I love my garden, filled with trees that provide welcome filtered shade along with flowering shrubs. While my garden gives me joy, it does take maintenance to keep it healthy and looking its best.
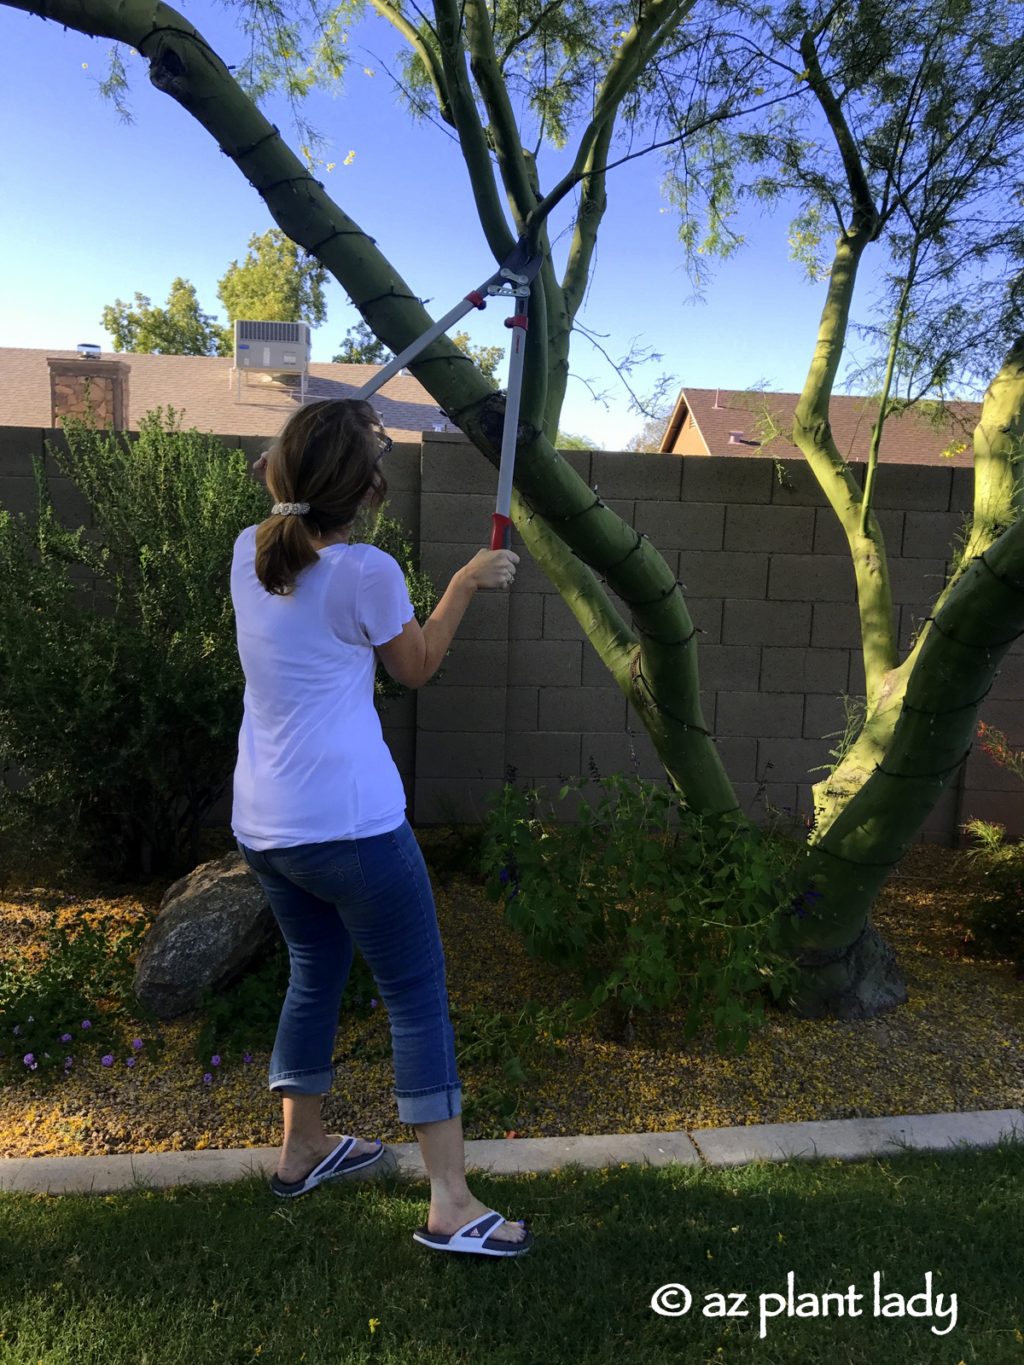
The primary maintenance chore I have is pruning, which I enjoy doing.
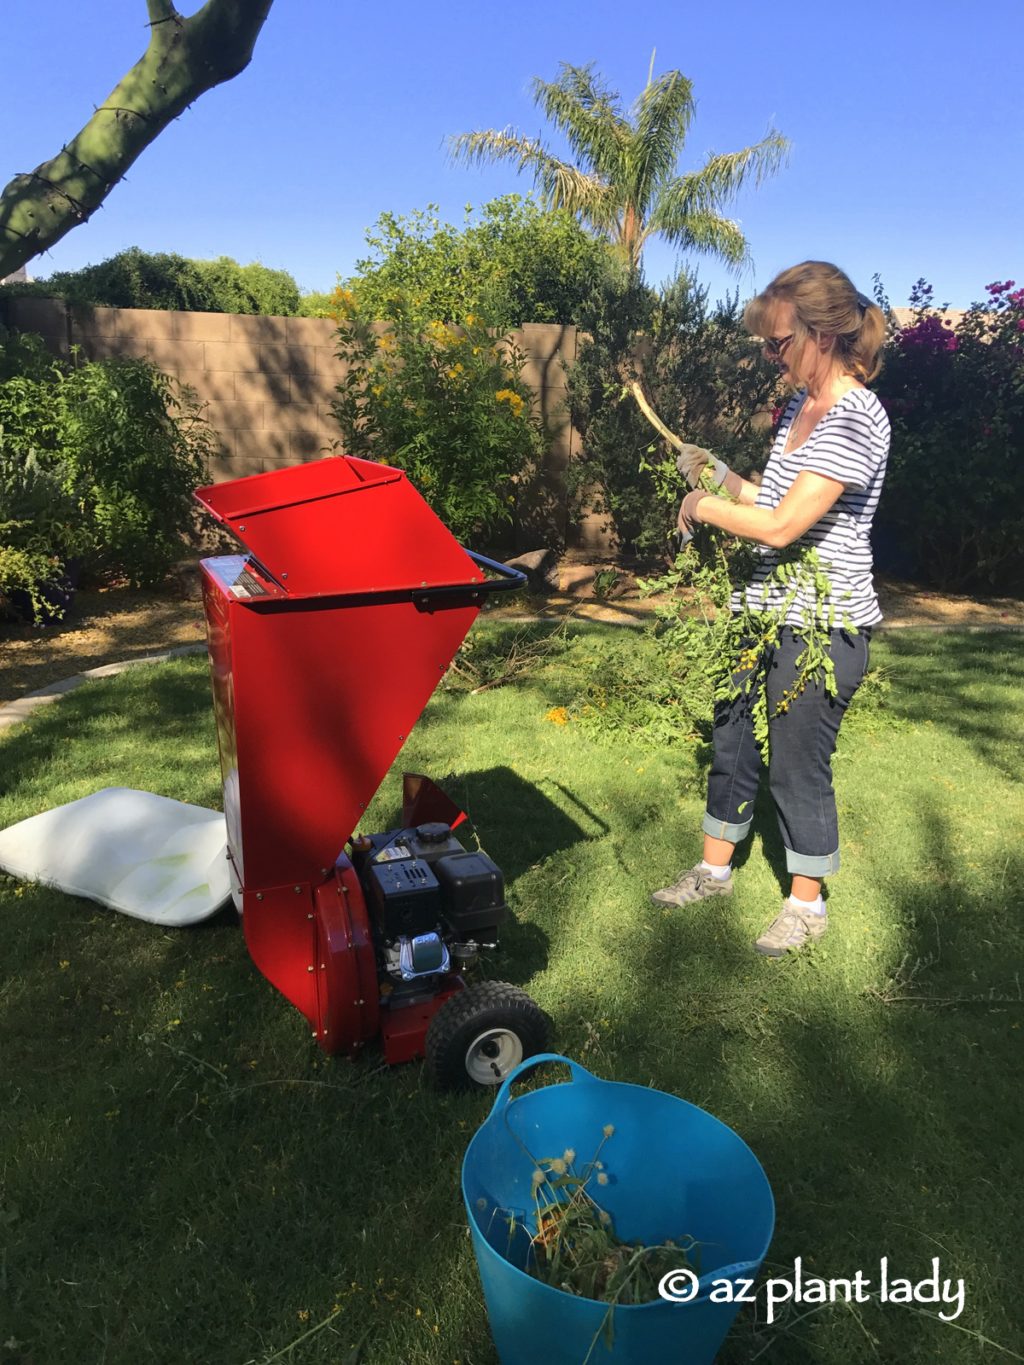
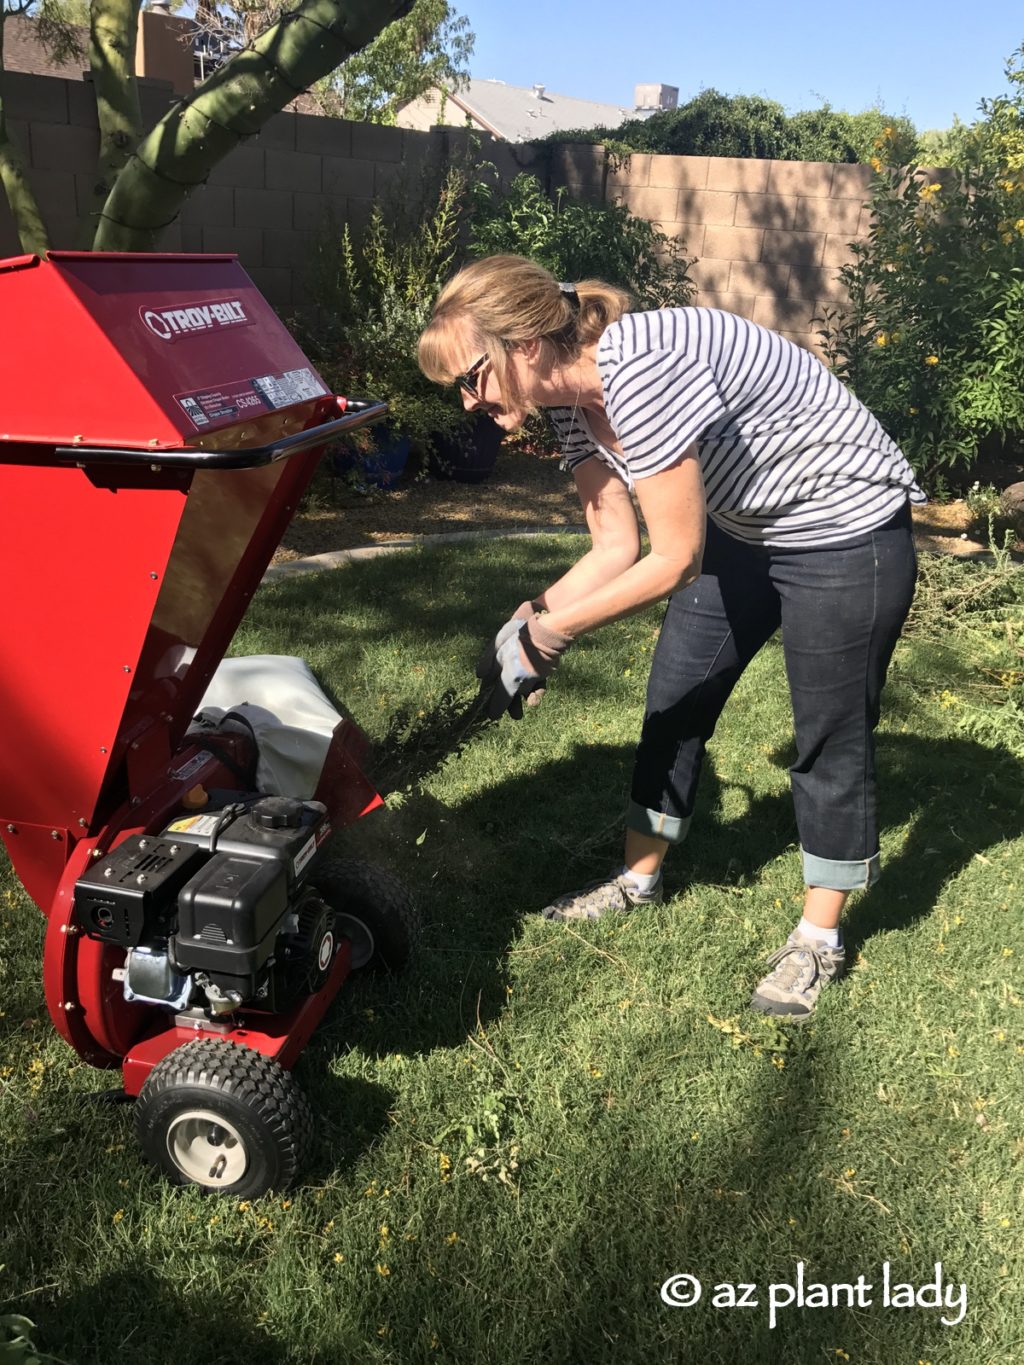
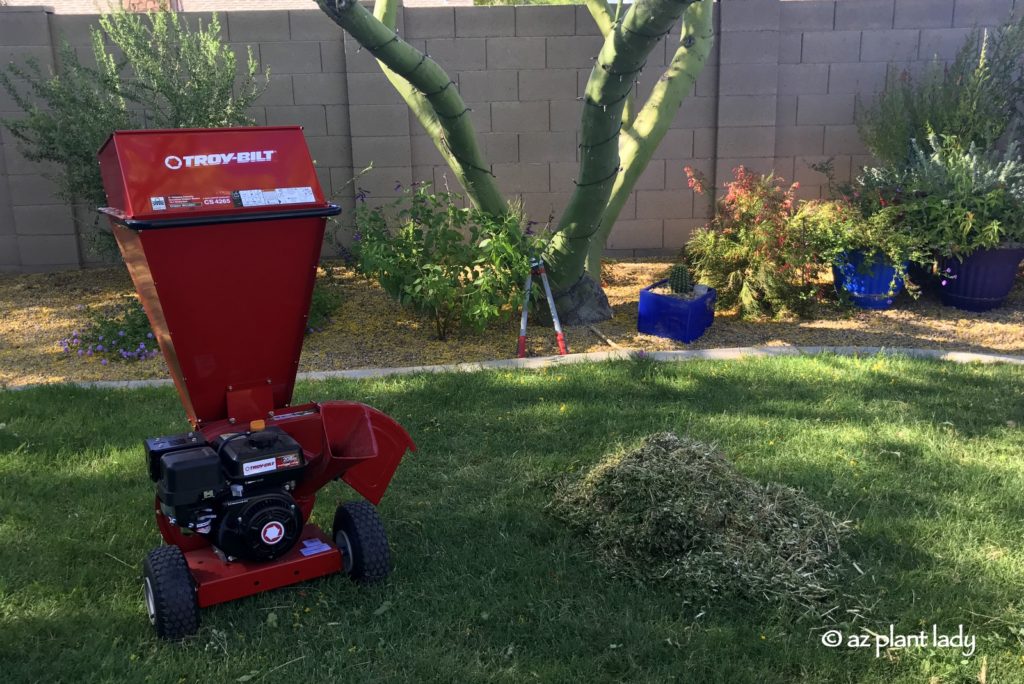
What I don’t like is cleaning up the clippings, and I often ask my kids to drag them to the trash can or the curb for bulk pickup. However, that was then, and I have a new tool to help me with dealing with the aftermath of pruning. My new Troy-Bilt Chipper Shredder will take the stems and small branches and shred them into mulch.
*As a brand ambassador, I was provided the CS4295 Chipper Shredder free of charge, for my honest review.
The chipper shredder has two areas where you can insert plant material. The top part is called the ‘hopper’ and is where stems and branches that are less than the width of the pencil are added, which are pulverized into mulch that is expelled into a white bag attached off to the side.
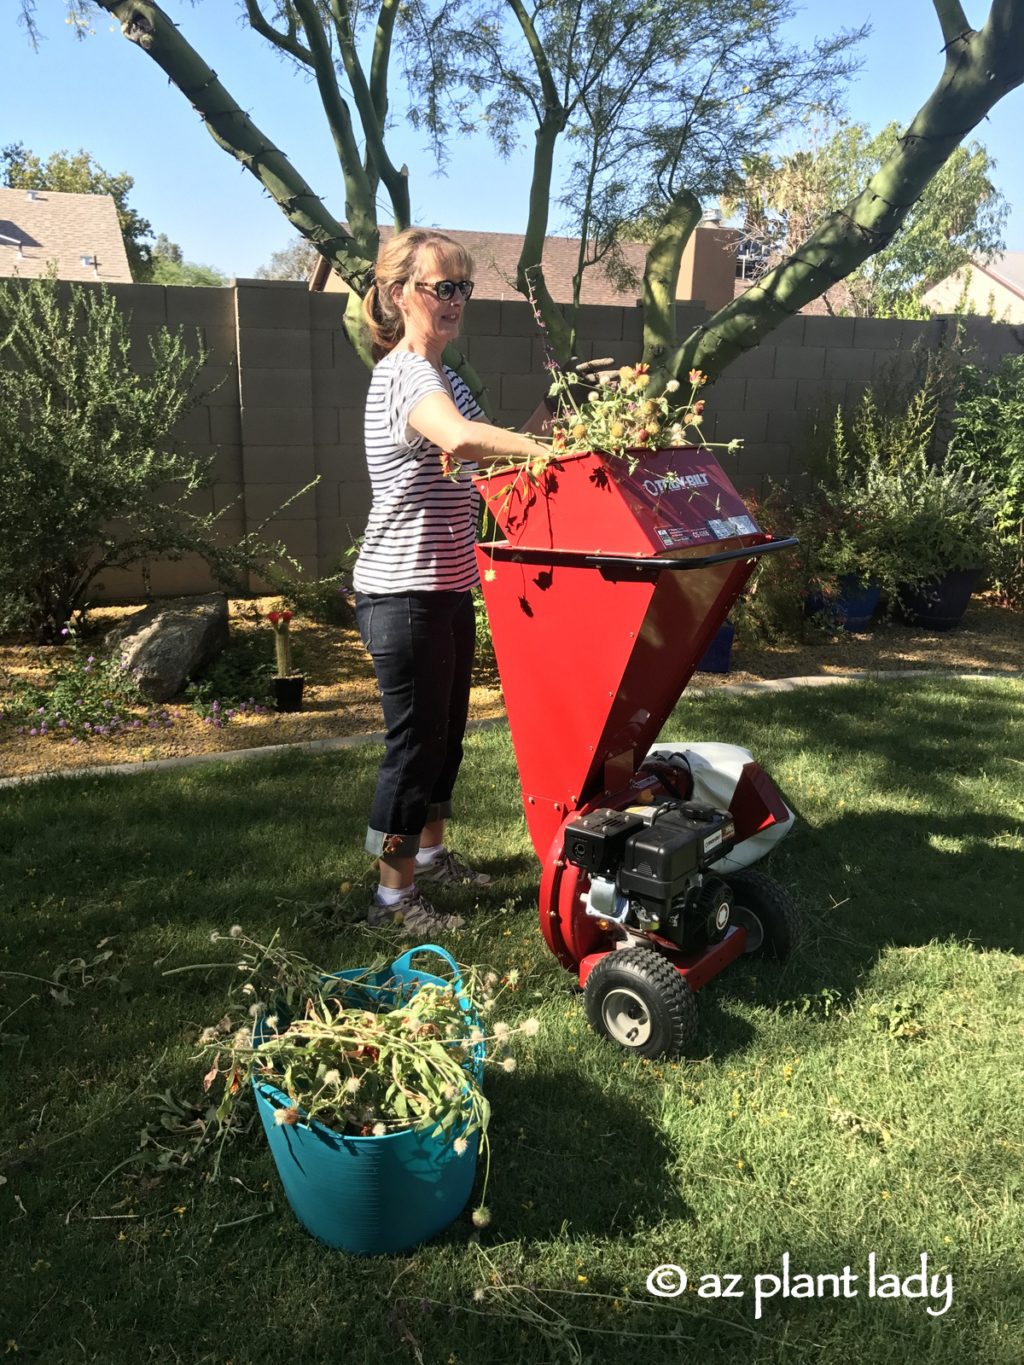
Branches under 2-inches in diameter are fed through the ‘chipper chute’ and are expelled into the collection bag. It was fun to use and I was pleased with how quickly my pile of branches was decreasing in size.
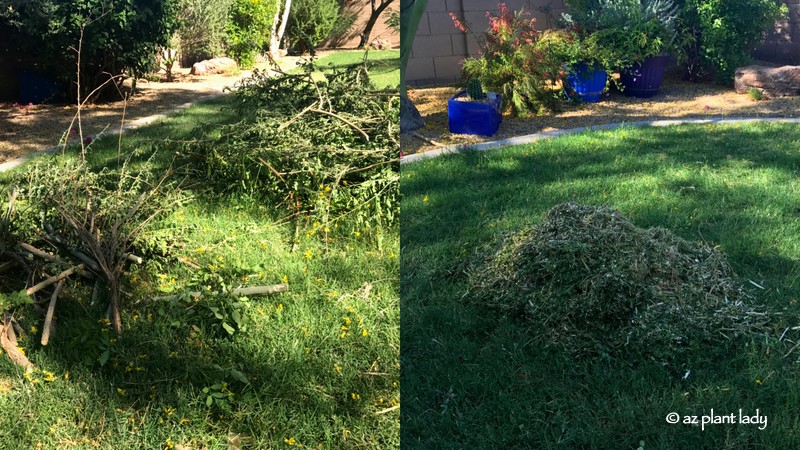
In the end, my two large piles were reduced to a much smaller pile of shredded leaves and stems. Instead of throwing out piles of plant clippings, I now have great material for my compost pile. It is also suitable to use as mulch for putting around my plants. However, you’ll want to age the mulch for 3 – 6 months before applying or it can use up the nitrogen that plants need while it breaks down.
This photo says it all. My Troy-Bilt Chipper Shredder took two piles of branches, that would have filled up most of my trash can, and reduced them to a small pile of mulch suitable for my garden.
*Disclosure: As a Troy-Bilt brand ambassador, the chipper shredder was provided to me at no cost by TroyBilt to review for my honest opinion.
https://www.azplantlady.com/wp-content/uploads/2017/06/TroyBilt_Chipper_Shredder_Product_Review_azplantlady-003.jpg16001200arizonaplantlady@gmail.comhttp://www.azplantlady.com/wp-content/uploads/2018/10/favicon.pngarizonaplantlady@gmail.com2017-06-19 05:22:042022-10-02 04:09:29From Branches to Mulch: Troy-Bilt Chipper Shredder
One of the things that I enjoy about living in the Southwest is the ability to garden throughout the year. Well, that may be a slight exaggeration – I don’t especially like gardening in July or August. During those months, I simply like to view my garden out the window from the air-conditioned comfort of my home. But, you’ll often see me outside spending January in the vegetable garden through the winter months.
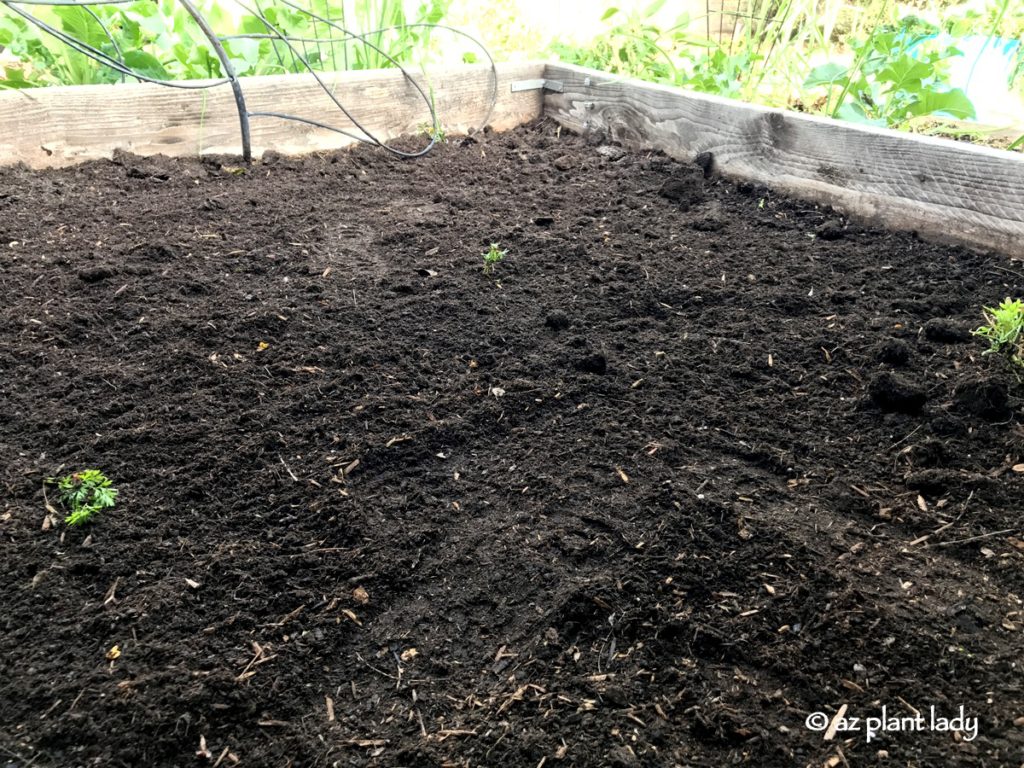
So far, this year’s cool-season garden hasn’t been very impressive. In fact, it was quite disappointing. Our drip irrigation system wasn’t watering this particular vegetable bed well because the tiny holes had become clogged from mineral deposits left behind by our notorious hard water. As a result, a handful of romaine lettuce transplants survived, but none of the seeds that I planted in early October germinated except for the radishes and a couple of carrots.
To make it worse, when I discovered the problem last fall, I was so busy trying to keep up with my landscape consulting that I didn’t fix the irrigation troubles. Spring and fall for horticulturists is much like tax season for accountants, and little else gets done.
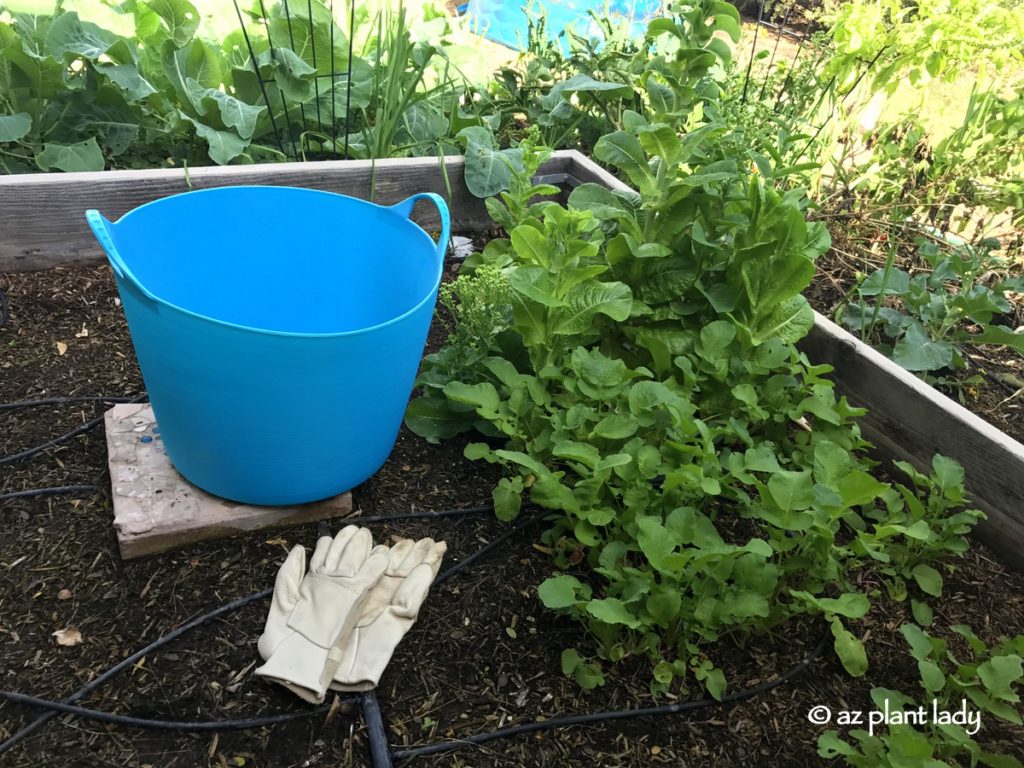
Well, I felt bad looking out at my sad little vegetable bed, so I cleared my calendar to give it a little TLC earlier this week. First on the list was to pull out the lettuce plants, which had bolted and were ready to be taken out. I was able to get a few radishes, much to the delight of my youngest daughter who loves them.
Before planting, I added a 4-inch layer of compost to help refresh the soil. There wasn’t any need to mix it in with the existing soil – in fact, it’s better if you don’t do that.
Like many people, I find working out in the garden therapeutic and the stresses of day to day life simply melt away. What made this day even better was that my husband came out to help me. At this point, I should mention that he isn’t one of those men who loves to work out in the garden. Oh, he does a great job at it, but he doesn’t like it – at all. Poor guy, he had no idea that the woman he married 30 years ago would turn out to be a plant lady who lives, eats, and breathes all things related to the garden.
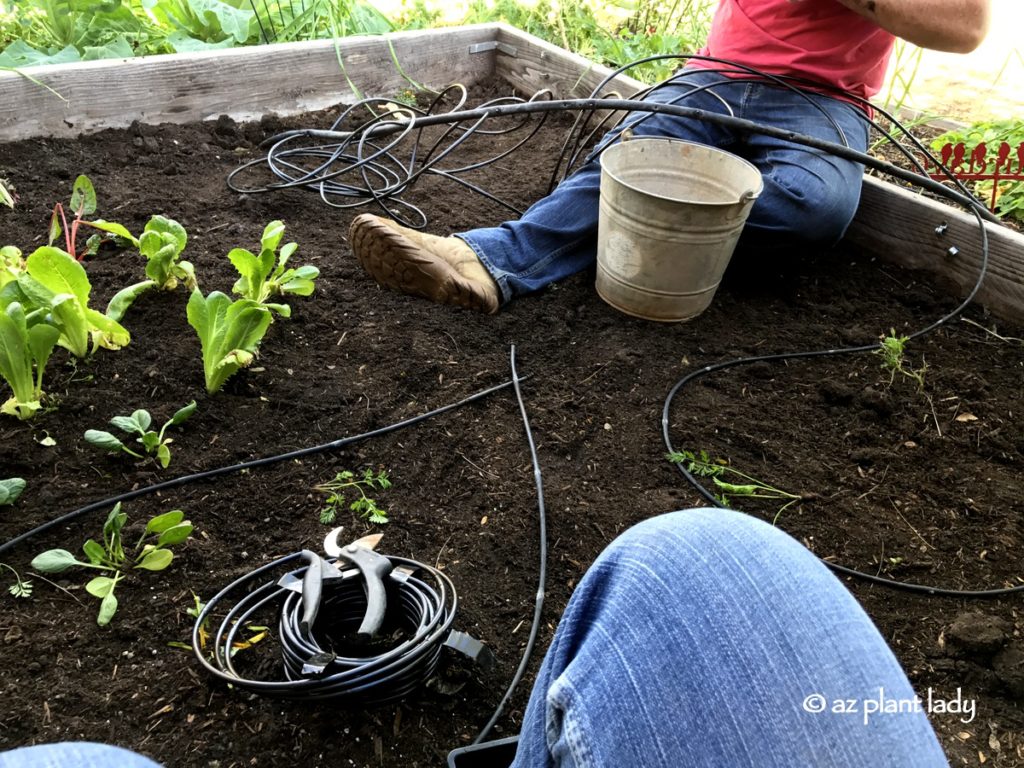
My darling husband took an entire morning out of his busy schedule to help me in the garden, fixing the drip irrigation system in my garden. Forget flowers, if spending a morning out in your wife’s vegetable garden fixing irrigation doesn’t shout “I love you,” I don’t know what does.
The drip irrigation system in my vegetable garden is made up of a main poly drip line that runs up the center of the garden. Micro-tubing, with small holes along the length, are then looped along the length of the main drip line. We pulled out the old micro-tubing and replaced it.
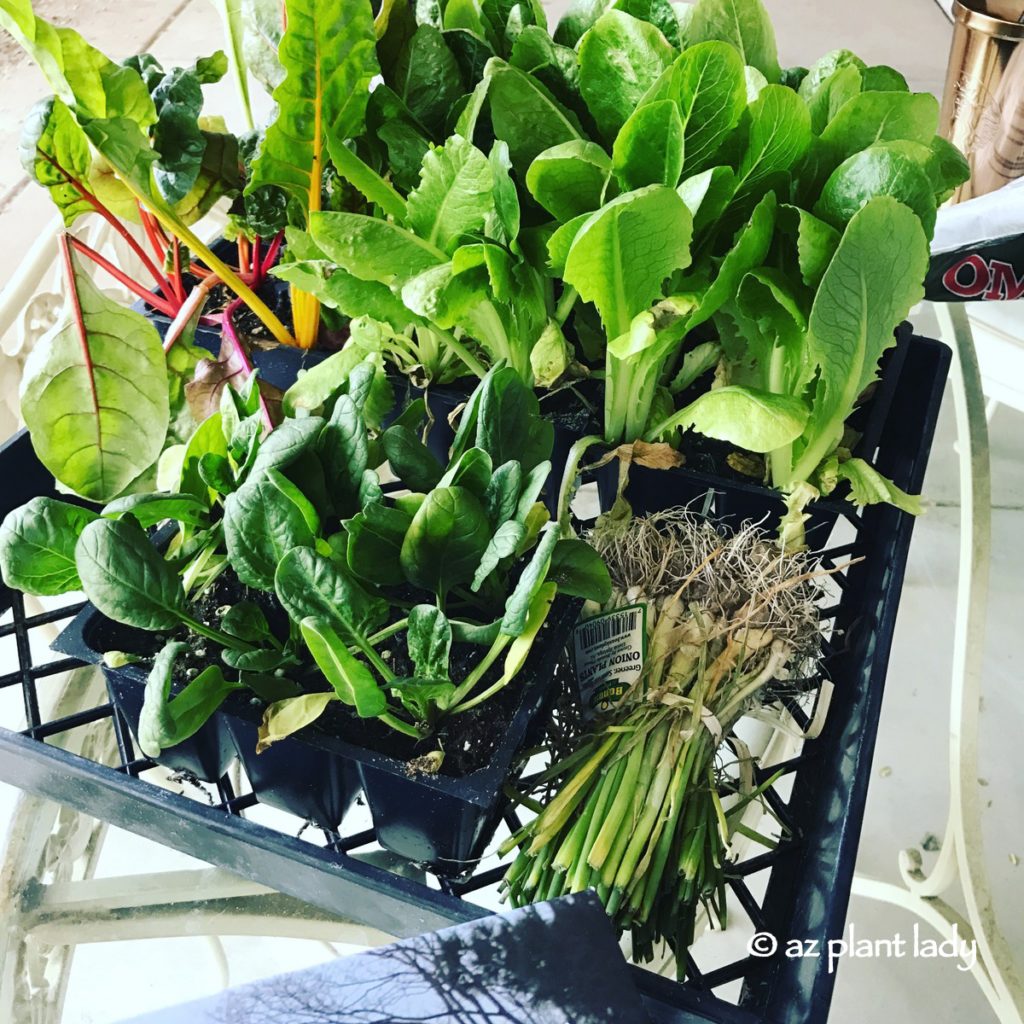
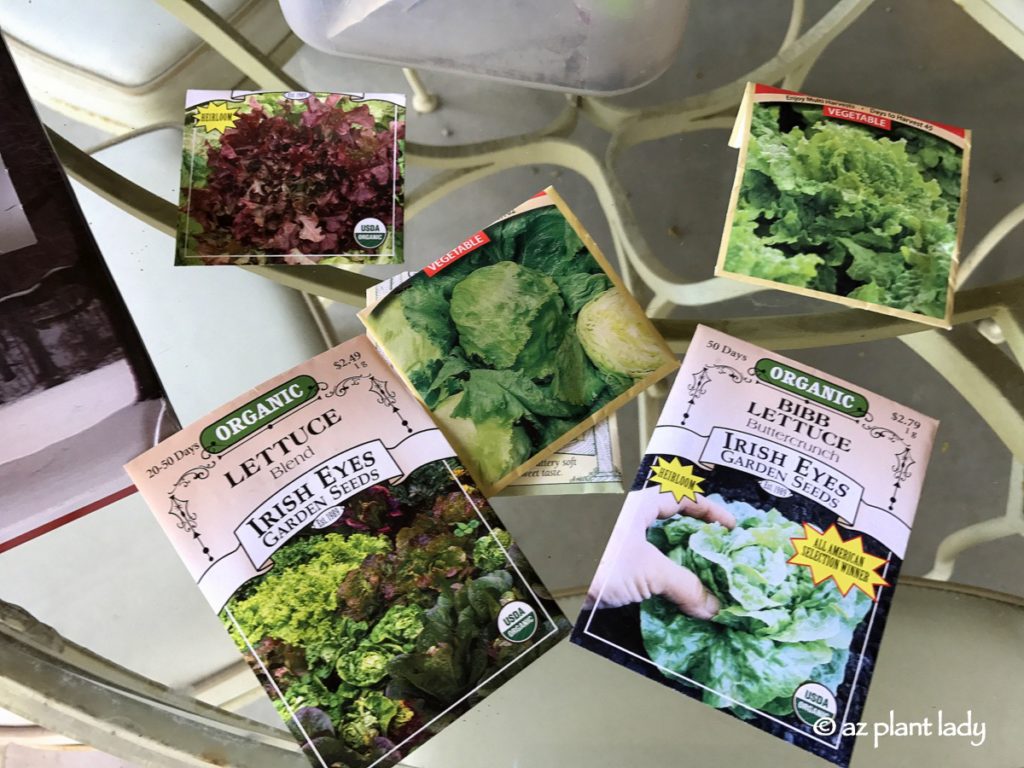
Once the irrigation repair was finished, it was time to add plants. Luckily, there is still plenty of time to plant cool-season favorites. To get a head start, I bought romaine lettuce, Swiss chard, and spinach transplants. The rest I would grow from seed. Irish Eyes Garden Seeds is one of my favorite seed companies.
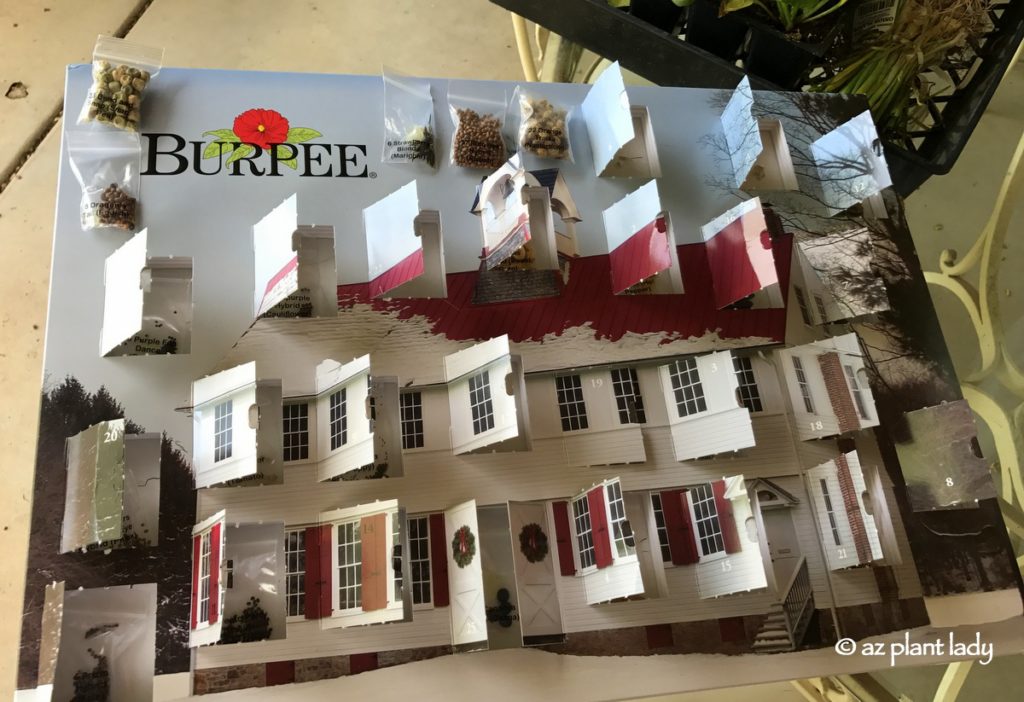
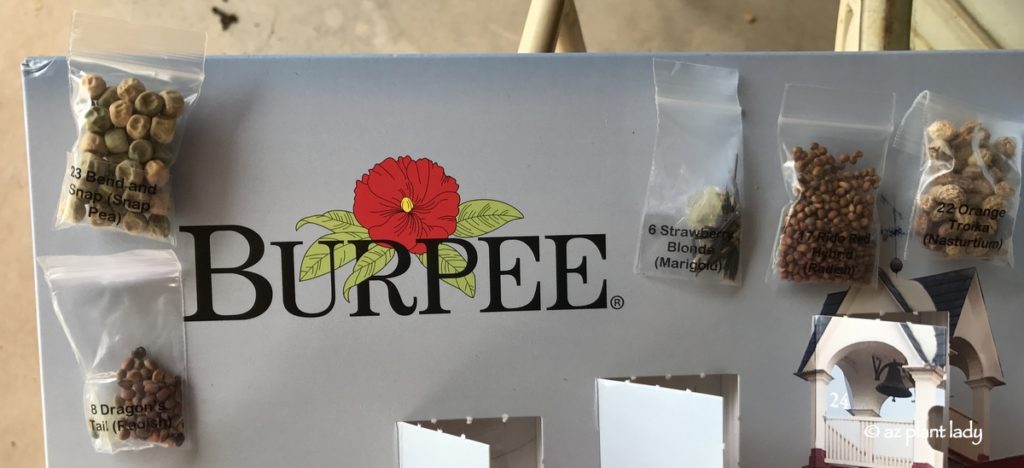
Another seed company who I have used over the years is Burpee. I remember perusing my dad’s Burpee seed catalog when I was a child and planning on which ones I would order for the little plot of land that he gave me in the back garden.
I still order seeds from Burpee and was pleasantly surprised to receive a gift from them this Christmas – an advent calendar where each door opened up to a seed packet filled with one of their new 2017 plant introductions. What an ingenious marketing tool! Every morning, I felt like a kid again waiting to see what new seeds I would find behind the door.
I selected ‘Dragon Tail’ radish, where you eat its purple seed pods and NOT the roots. It is a version of an Asian heirloom radish and has a more delicate flavor than regular radishes. I am very excited to see what this one does in my garden. ‘Rido Red’ radish and ‘Bend and Snap’ snap peas also found a spot in the garden.
Marigolds and nasturtiums are always present alongside cool-season vegetables as they attract beneficial pollinators, discourage harmful insect pests, and just make the garden look pretty. Imagine my delight when I saw new varieties of my favorite flowers in the advent calendar. ‘Strawberry Blonde’ marigolds and ‘Orange Troika’ nasturtiums will add welcome beauty to my vegetable bed. There were other seeds in the calendar that I plan on using including ‘Bend and Snap’ snap peas. I plan on giving some of my seeds to my mother for her garden. Burpee has a list of their new 2017 introductions, which you can access here. I’d love to hear if you grow any of them.
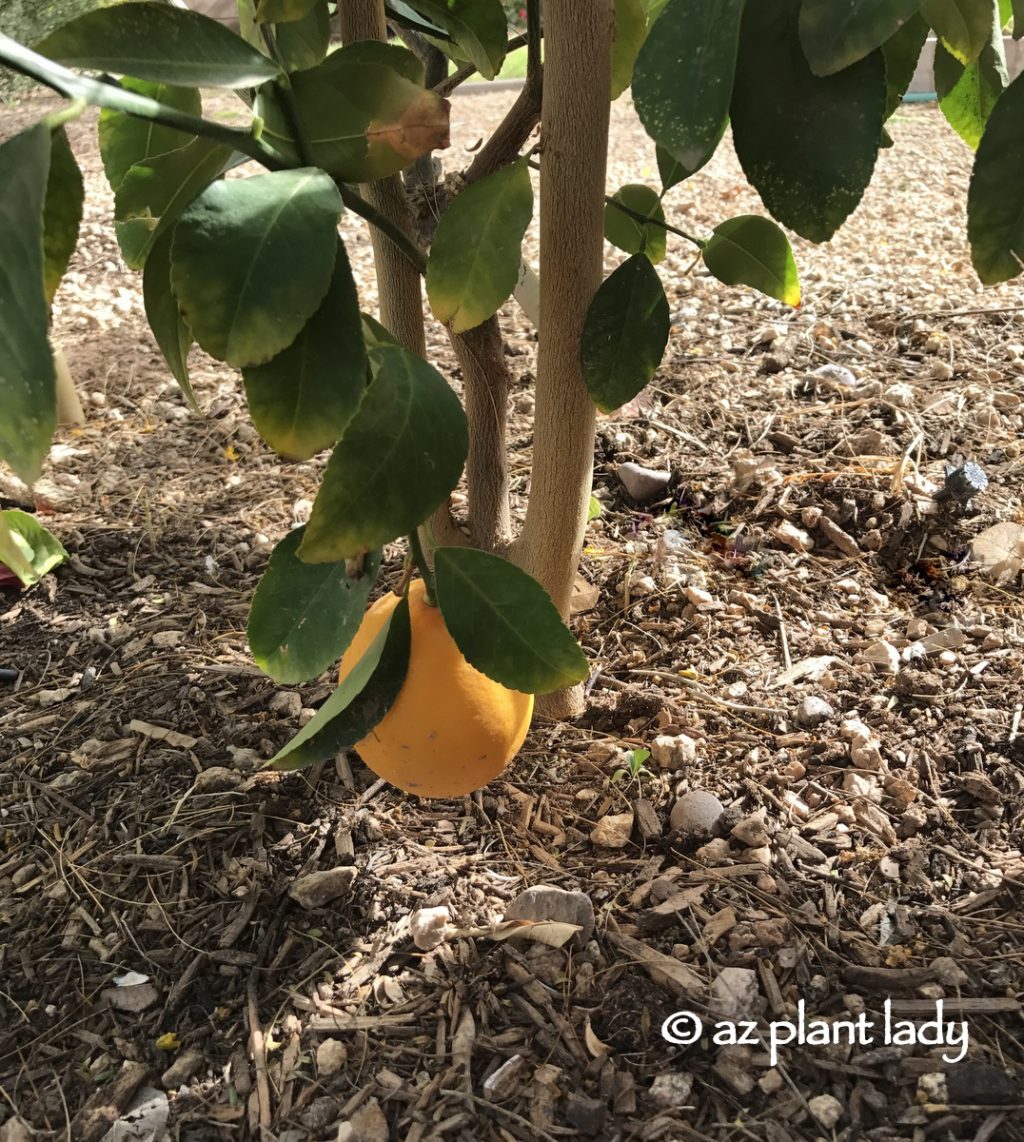
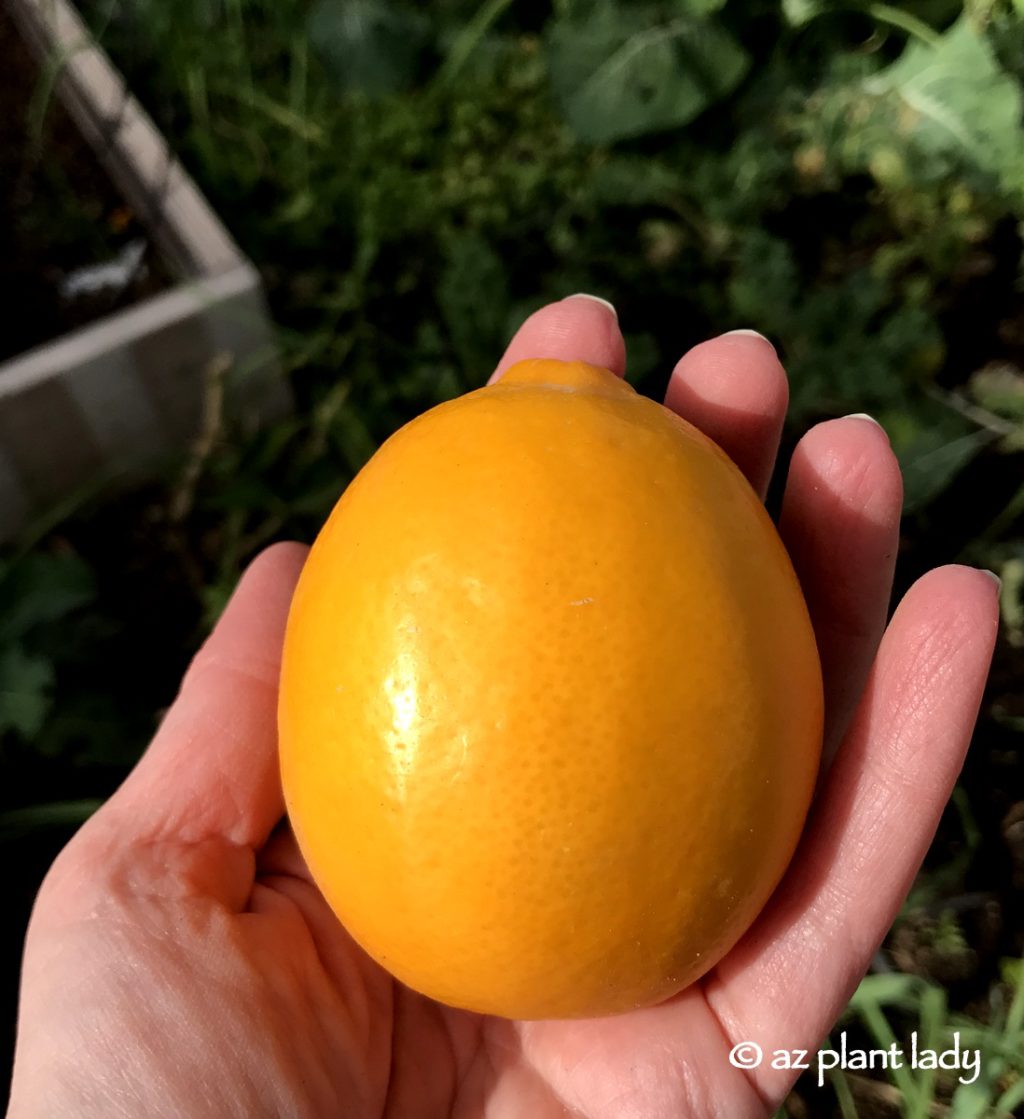
Next to the vegetable garden is my young ‘Meyer’ lemon tree. We planted it two years ago, and this is its first ever fruit. Young citrus trees can take a year or two, after planting, before it produces fruit and I look forward to years of delicious fruit from mine.
Meyer lemons aren’t true lemons. They are a cross between a regular lemon and mandarin orange, and this gives them a sweeter flavor and a deep yellow skin. The story behind Meyer lemons includes overseas exploration, threatened extinction, and Martha Stewart.
Well, that is what is happening in the January vegetable garden. What is growing in your winter garden?
https://www.azplantlady.com/wp-content/uploads/2017/01/cool_season_vegetable_transplants_Arizona.jpg12001200arizonaplantlady@gmail.comhttp://www.azplantlady.com/wp-content/uploads/2018/10/favicon.pngarizonaplantlady@gmail.com2017-01-14 15:02:162022-10-09 00:45:10January in the Vegetable Garden
https://www.azplantlady.com/wp-content/uploads/2015/04/ManganeseDeficiency5-1.jpg7681024arizonaplantlady@gmail.comhttp://www.azplantlady.com/wp-content/uploads/2018/10/favicon.pngarizonaplantlady@gmail.com2015-04-30 21:23:002022-10-26 03:49:22Reading The Leaves: Diagnosing Common Plant Ailments
It’s hard to believe that we have made it through another summer.
Oh, I realize that we have a few more weeks of 100+ degree weather, but whenever there is month that ends with the letters “ber” it just feels cooler to me.
I am gearing up for my favorite season in the garden. In my last post, I talked about the reasons why fall is the best time to add new plants to the Southwest landscape.
Today, I’d like to share with you three tips to help you make the most of your fall planting.
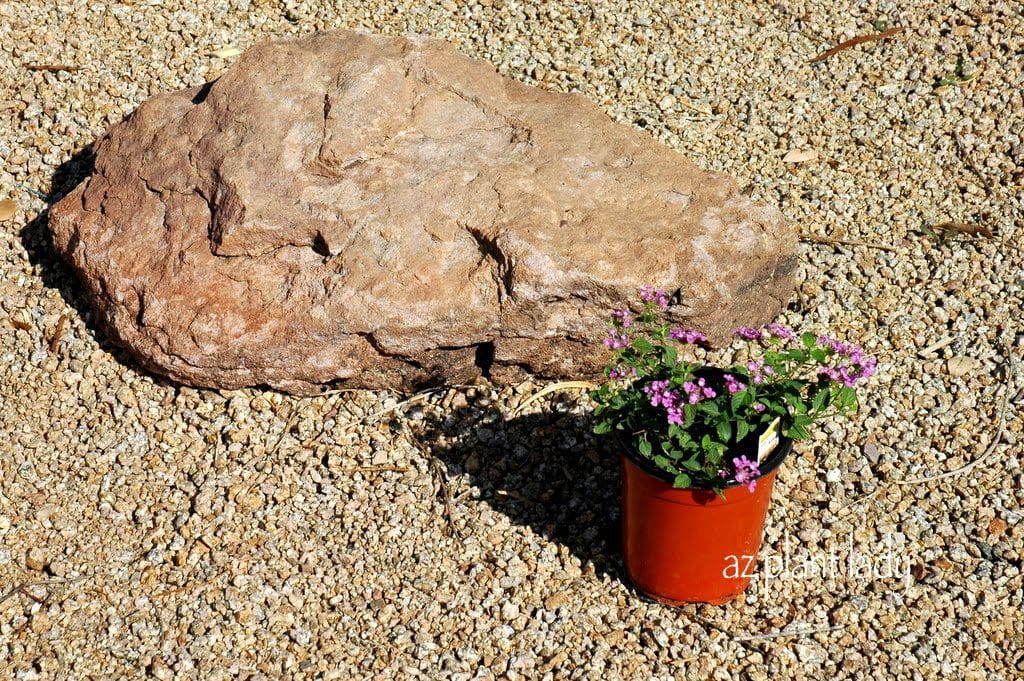
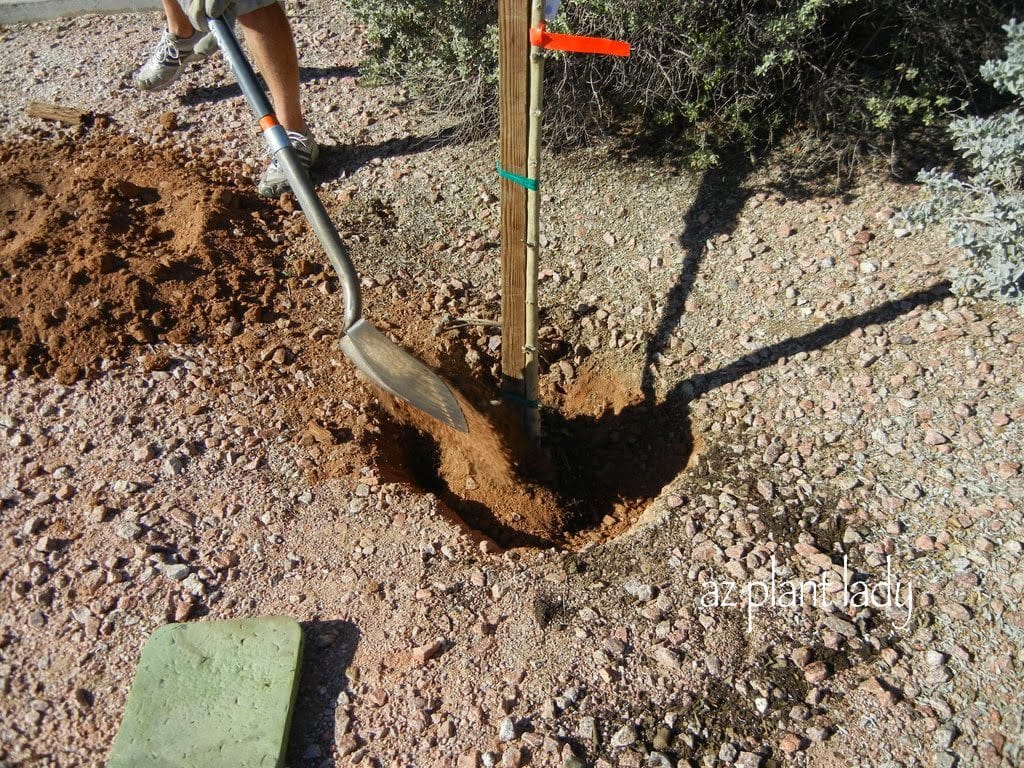
Photo: This planting hole is too small.
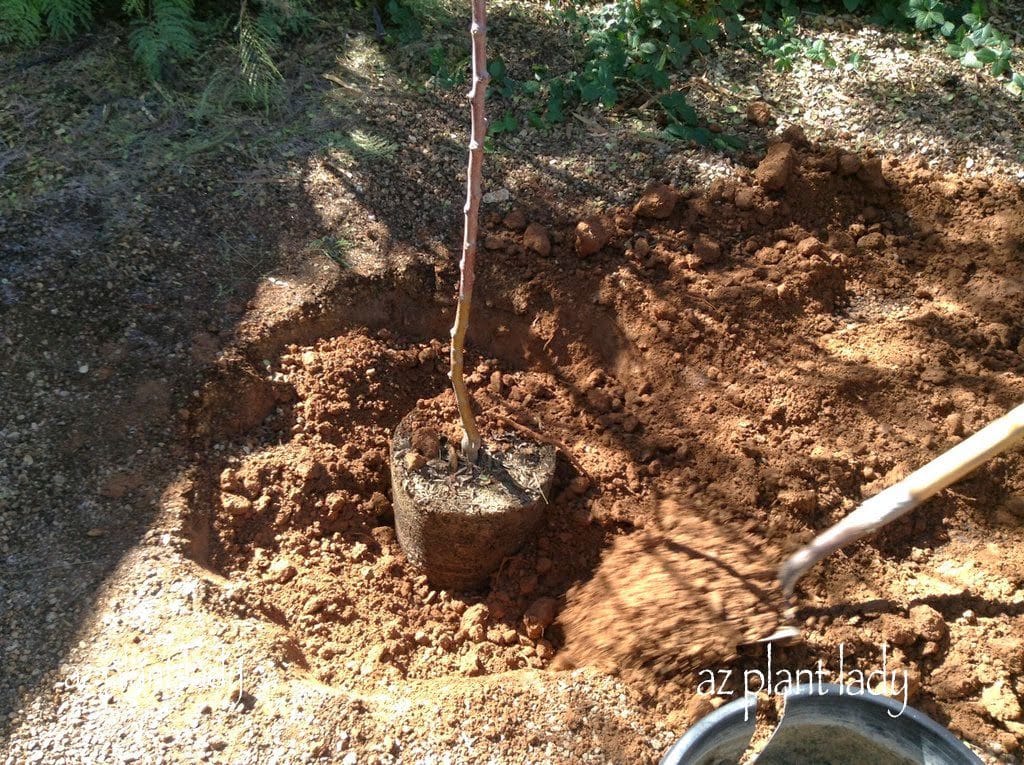
It all comes down to the hole. It’s hard to believe that often what determines a plant’s initial success is the size of the hole it is planted in.
If you are digging holes like the one above – then you may be in trouble. That hole is too narrow.
The ideal hole should be 3X as wide as the root ball.
Why?
Well, most of a plant’s roots grow outward into the soil. When they are placed in a hole like the one above, the recently loosened soil makes it much easier for roots to grow into, which helps the plant to establish much sooner.
*It’s important to note that the depth of the hole should be the same depth as the root ball or even a few inches shallower. This helps prevent problems from the dirt settling, which can leave your new plant sitting rather low in the soil where problems with becoming waterlogged can happen.
The big question – whether to add soil amendments or not?
When you go to your local nursery to buy new plants, you may be encouraged to buy soil amendments such as compost, potting soil or even manure.
The question is, do you really need it? Often you don’t.
I have planted thousands of plants throughout my career as a horticulturist and most of them without adding anything to the soil. The plants were healthy and did very well without any extra additions to the soil.
Here a few guidelines to follow to help you decide whether or not to add any amendments to the soil before planting.
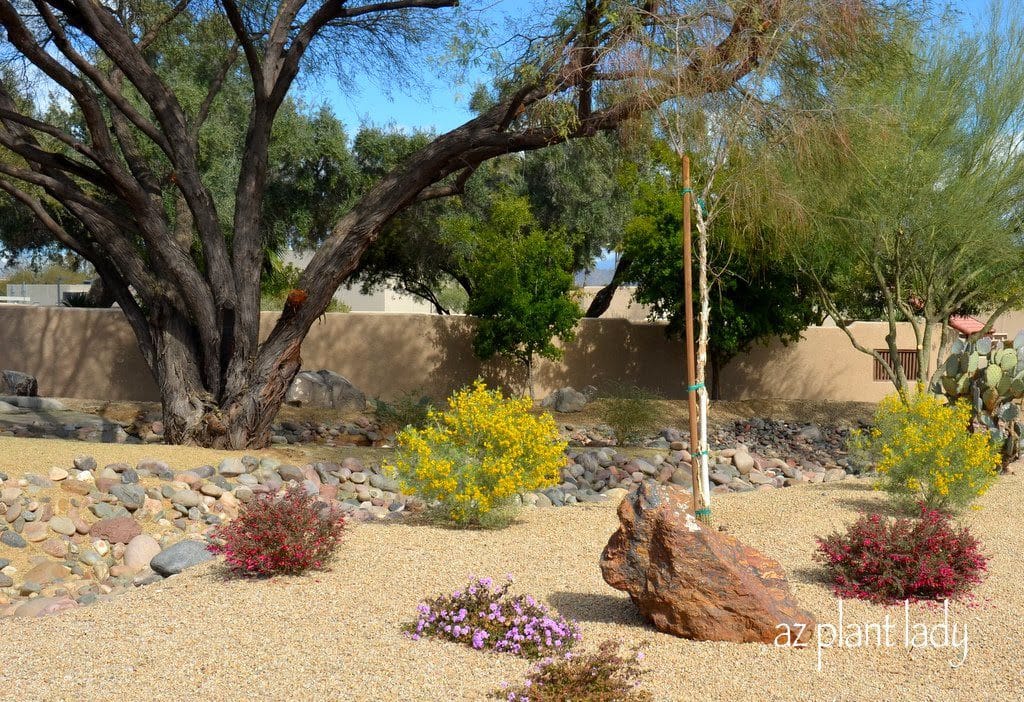
– If your soil is well-drained AND your new plants are native to any of the desert regions of the United States, than the answer is “no”.
Native plants are adapted to growing in the nutrient poor soils of the desert and do best when nothing is added to the soil. In fact, if the soil is too fertile – you’ll often see green growth, but flowering will be decreased.
Photo: Valentine (Eremophila maculata), Feathery Cassia (Senna artemisoides) and Purple Trailing Lantana (Lantana montevidensis) planted without needing any soil amendments.
The same can be said of some non-native plants – particularly those from Australia such as Eremophila and Senna species.
So, are some times when adding soil amendments is a good idea?
Absolutely!
– If you have heavy clay soil or very sandy soils, than adding compost to the planting hole can help. Mixing compost in with clay soils help them to drain better. This is important because most plants that grow in the Southwest do best in well-drained soil.
Conversely, sandy soils have a hard time holding onto enough water, so compost helps those soils to hold onto more water. Add 1 part compost to 1 part native soil and mix together before planting.
– Amend the soil when planting non-native plants that do not originate from arid climates.
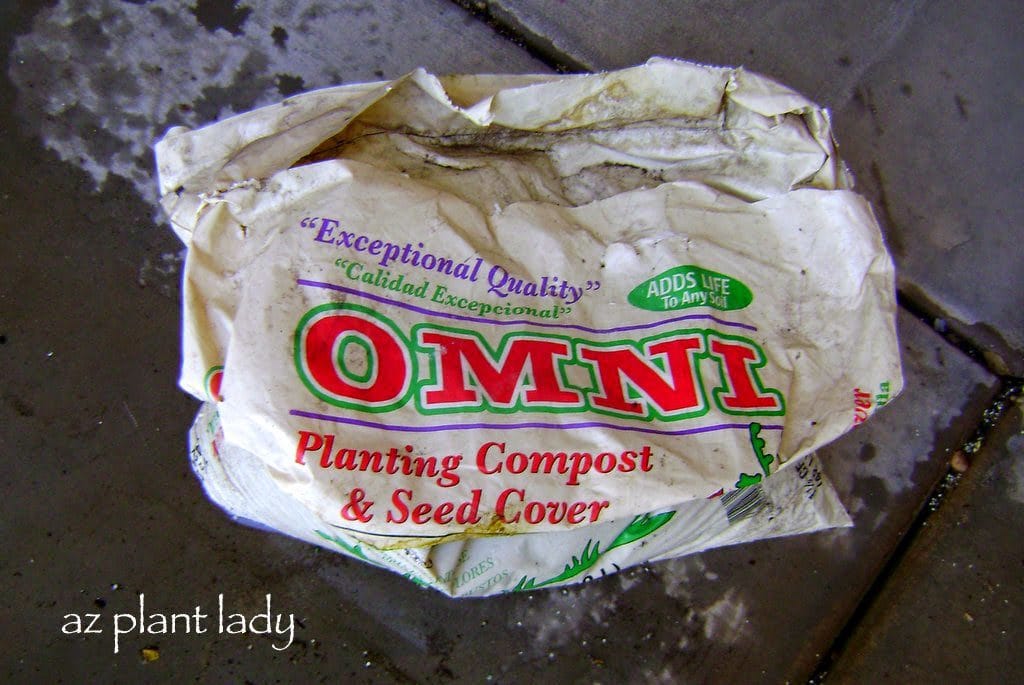
Plants like day lilies, iris, roses, etc. require fertile soil to grow their best. Amending the soil with compost, manure and other amendments will improve the soil texture, add small levels of nutrients and add beneficial microorganisms which will benefit your plants.
Plants such as these will need regular applications of fertilizer to do their best.
Personally, I like to grow what I like to call ‘fuss-free’ plants where I don’t have to add fertilizer with the exception of my roses.
Skip the fertilizer for newly planted plants. This tip is NOT always popular with some nurseries who often encourage the application of fertilizer at the time of planting.
So, let’s talk about when to add fertilizer.
– Most native plants will not need fertilizer ever. In fact, many can make their own fertilizer.
– For plants that do need fertilizer such as hibiscus, iris, roses, etc. – wait until you see new growth occurring before adding fertilizer.
The reason for this is that when you first add a new plant, it needs to concentrate on growing new roots in order to support future top growth (stems, branches and leaves). If you add fertilizer at the time of planting, you are forcing the plant to focus on the top growth before it has the roots to support it.
So, a general rule is to wait until you see new top growth before adding fertilizer.
– The rule for fruit trees is slightly different. It is recommended to wait until 1 year after planting before fertilizing.
Again, you may hear differently from your nursery who in addition to wanting you to be happy with your purchase, also has their bottom line (profits) in mind.
I am not including all nurseries or nursery professionals into this one group. However, I have visited nurseries where customers are told that they need to fertilize all their plants. Many of my clients are thrilled when I tell them to throw out their fertilizer because their native plants don’t need it.
*I remember a story from one of my horticulture professors who talked about standing in line behind a customer at the store with a cart filled with native, desert plants and another cart with ‘special’ fertilizers that they were encouraged to buy.
My professor loudly commented to her husband, standing next to her, that “Numerous studies have shown that fertilizer is a waste of money when used for native plants.”
So, are you ready to add some new plants to your landscape? Before you head out to the nursery, I invite you to come back for my next post, when I’ll share with you some tips on how to select healthy plants AND I will reveal to you what my favorite plant nursery is!
************************
I apologize for the relative lack of recent posts. Life has been very busy with the kids back in school, increased landscape consults and getting ready to go visit my daughter, Rachele, who is expecting. We will find in a few days whether we will be welcoming a boy or girl!
I have two biological children – both girls and my oldest daughter, Brittney, has a daughter. So, we will see if Rachele will break the pink trend in our family.
My son Kai (who is adopted from China) and has four sisters and a niece is really hoping for a boy 😉
https://www.azplantlady.com/wp-content/uploads/2014/09/fallplantingsouthwestgarden-1.jpg6811024arizonaplantlady@gmail.comhttp://www.azplantlady.com/wp-content/uploads/2018/10/favicon.pngarizonaplantlady@gmail.com2014-09-03 17:41:002022-11-04 03:37:033 Tips for Fall Planting Success
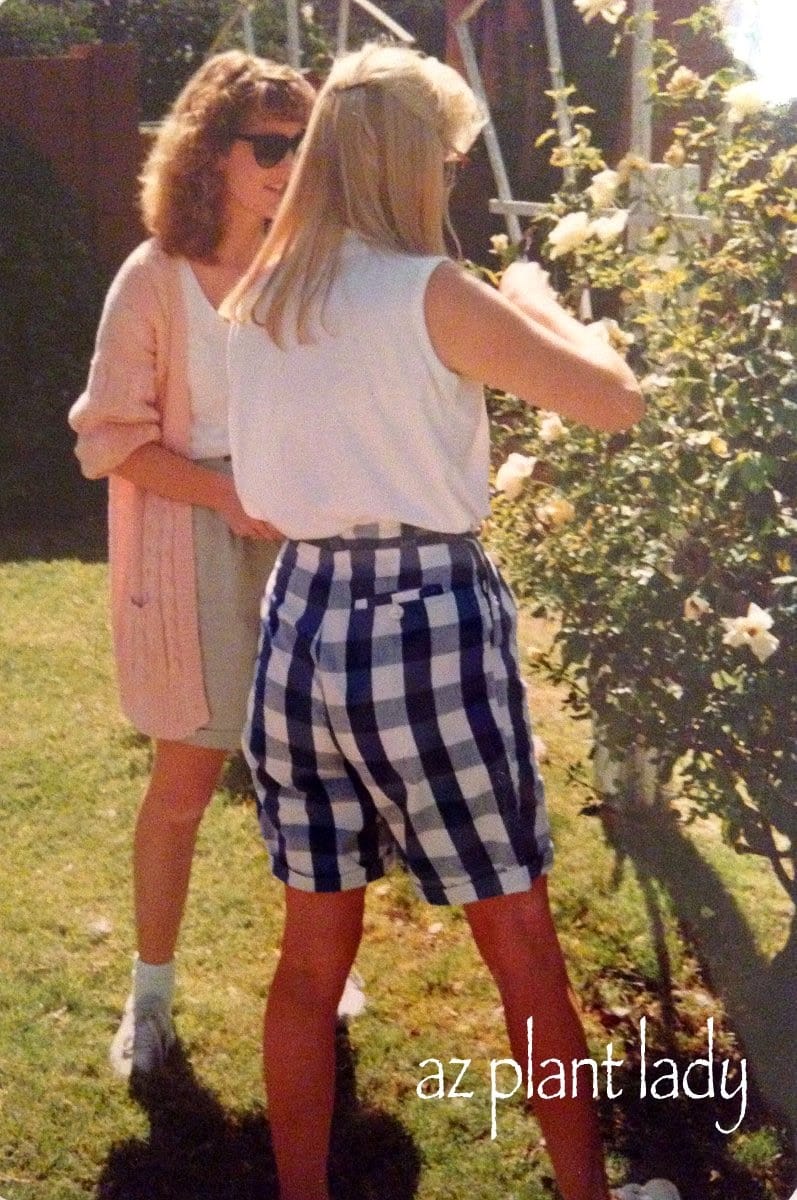
Old rose bush that came with our first house. *You can tell by the hair and clothes that this was the 90’s.
Do you love roses? I do….
At first, I made a lot of mistakes because at the time, there wasn’t a lot of information on how to grow roses in the desert.
However, I did learn from my mistakes and found knowledgeable people who steered me in the right direction. Soon, I had 40 rose bushes growing in my garden in our first house. I lovingly tended them and was rewarded with gorgeous blooms.
Years later, I don’t have quite as many roses in my current garden, but I love growing them just as much as I did years ago.
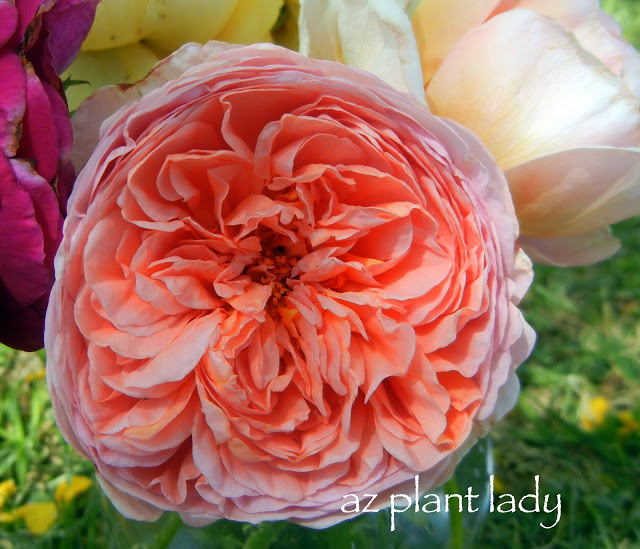
Photo: Abraham Darby
Because we grow roses for their beautiful blooms, I learned some tips from rose-growing experts on how to maximize blooms and the health of my rose bushes.
So, I’m going to share them with you.
*Basic rose care consists of fertilizing your roses in spring, using a fertilizer specially formulated for roses. You can do this and have a lovely rose bush. However, if you want the biggest and most floriferous rose bushes in your neighborhood, you’ll want to follow these tips.
1. In spring, grab your broom (yes, I said a broom) and make six holes around each rose bush (about 1 ft. from the base). Each hole should be 6 – 8 inches deep.
2. For this next step, you will need 6 cups of compost, 3 cups of composted steer (or chicken or horse) manure, 1/2 cup of Epsom salts, the recommended amount of your favorite rose fertilizer and two handfuls of alfalfa pellets per rose bush.
So how do these ingredients help your roses?
– The compost improves your soil by adding fertility, increasing its ability to hold the right amount of water and feeds microorganisms in the soil.
– Using manure adds a natural source of nitrogen that is slowly released into the soil. Make sure the manure is composted (aged) before using, or it can ‘burn’ your roses.
– Head to your nearest feed store and pick up some alfalfa pellets. When alfalfa breaks down in the soil, it releases an alcohol (triacontanol) that roses love. They respond to it by growing more branches (basal breaks) from the bud union AND increases the number of roses and their size.
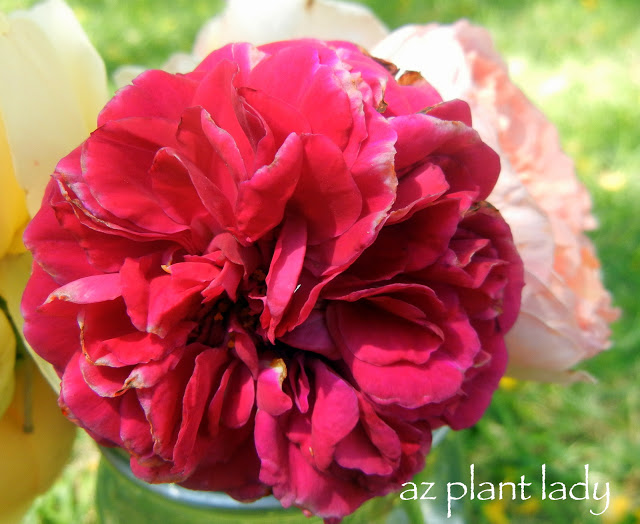
Photo:Falstaff
3. Mix all the ingredients together and then pour the mixture into each of the holes. Work any extra mixture into the top inch of soil around your roses. By adding the mixture into the holes, you are putting them right where the roots are.
4. Water deeply to 18 inches.
That’s it! Follow these tips, and your roses will soon be the envy of all your neighbors.
But, I’m not finished yet….
If you want to do even more….then follow this next step:
5. Add liquid fertilizer to your roses monthly during the growing season.
**In hot, dry desert climates – your roses will slow down their growth during the heat of summer because it is hard for them to focus on growth when it is hot. Apply liquid fertilizer at 1/2 strength once a month beginning in May and lasting through August. In September begin your regular fertilizer schedule for beautiful, fall roses.
Isn’t it true that most projects take longer then you plan on?
Still, I always approach projects with optimism that I will be able to finish in just a couple of days.
Of course, things just seem to come up with the kids and work. I get really busy this time of year when people’s gardens are starting to grow again.
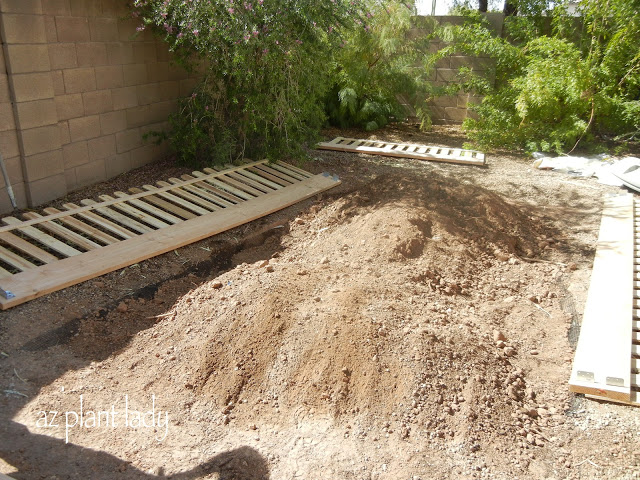
But finally, our new vegetable garden is finished!
Here are the last few steps…
New Vegetable Garden
We added compost and manure to the existing soil (1/4 compost, 1/4 manure and 1/2 native soil) and mixed them together. I finished it off by adding bone and blood meal, which are natural sources of phosphorus and nitrogen that will release slowly over time.
You can simply add a mixture of compost and manure to your raised bed and no native soil if you desire. This is easier, but I feel that working the soil down to a depth of 8 inches, helps with the growth of root vegetables.
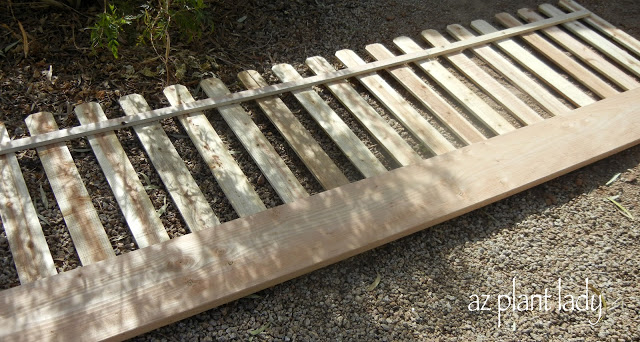
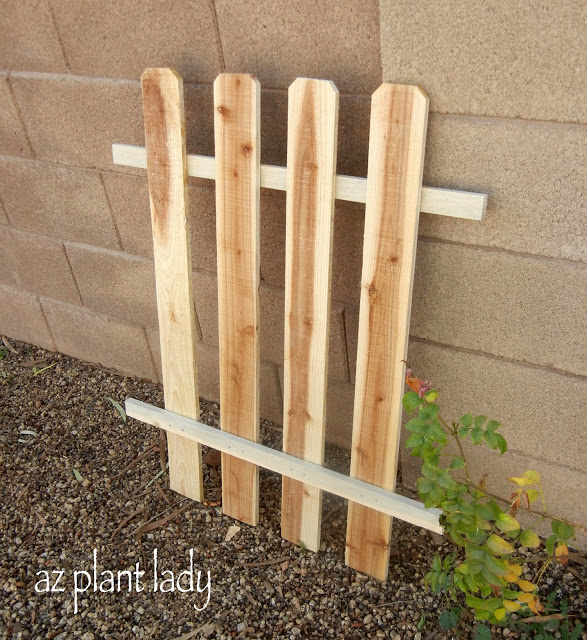
My husband built fences for the raised bed because we have dogs and they don’t always stay out of the garden. That and they love carrots.
We bought 6′ fence planks and then cut them in half. A 3 ft. high fence is enough to keep them out. The fence planks were attached at the top using a narrow strip of wood.
The base for the garden is made from a 2″ wide, 10″ high and this piece was 12 ft long. We used pine wood for our garden. Pine won’t last forever, but it will last for a few years and is relatively inexpensive. Of course, you can use cedar, which will last a very long time, but it can be rather expensive.
**There is some controversy regarding using pressure treated wood for vegetable gardens because of the chemicals used in the process and whether or not they ‘leach’ into the soil.
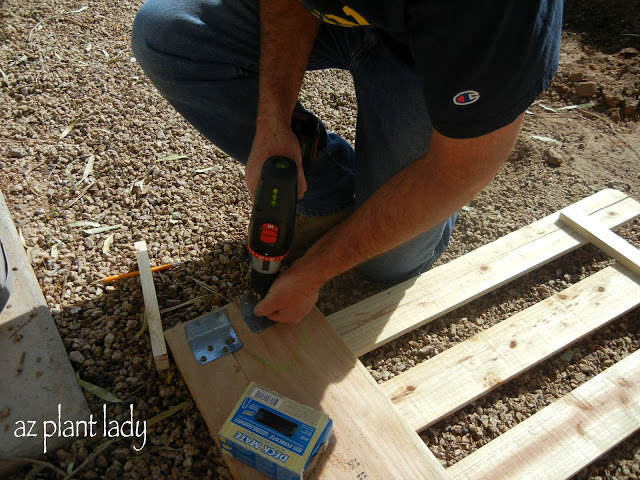
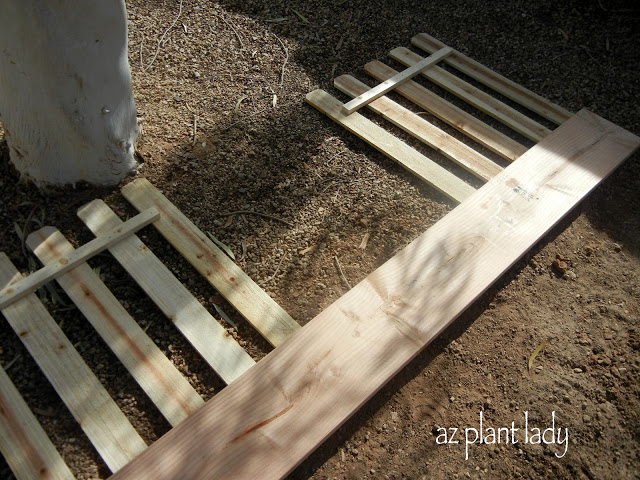
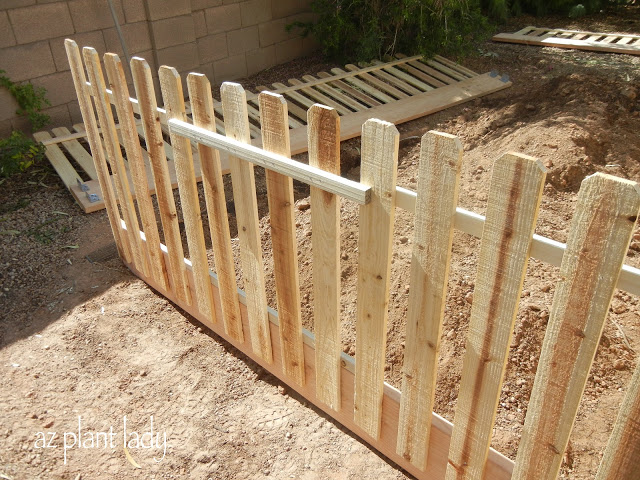
My husband built a removable gate into the garden without using any hinges or latches.
As you can see, this removable gate has a narrow strip of wood on the inside and the other strip is on the top of the other side.
The gate slides down into the opening with the bottom strip of wood, resting on the raised bed on the inside and the outer wooden strip on the top fits on the outside.
You can see how the gate fits, above.
We all had fun putting the sides up…it took three of us – two to hold the sides up while my husband attached the brackets.
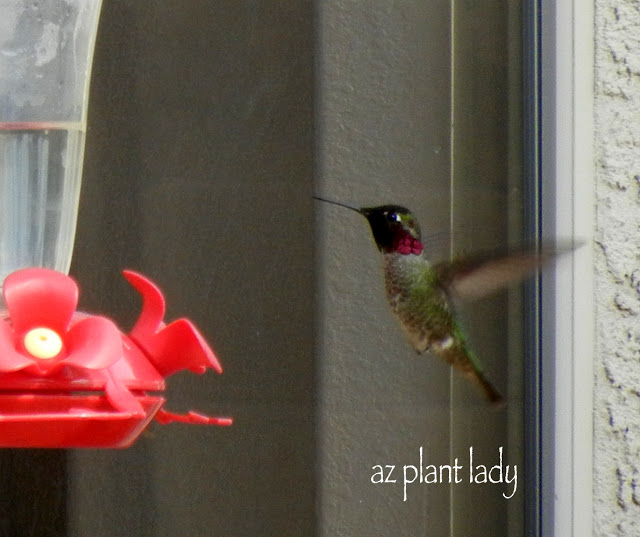
The entire time we were putting up the sides, we were visited by a curious and hungry Anna’s hummingbird. He would stop by every 5 minutes or so.
I planted sweet corn, bush beans and cucumbers in my new garden in addition to marigolds, nasturtium and bachelor’s button, which will attract pollinators and help keep harmful insects away.
I promise to show photos as soon as my seedlings come up 🙂
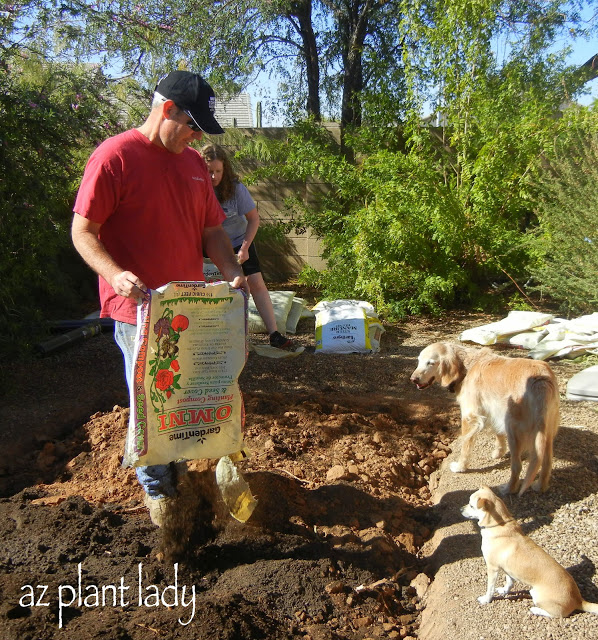
I’ve got a large pile of dirt outside my kitchen window.
But, we are making progress on our new vegetable garden. Today, we amended the existing soil with equal amounts of compost and aged steer manure. Then added bone and blood meal, which are natural sources of phosphorus and nitrogen.
Here are pictures of what we did today. (Not super exciting, but we are getting there).
(If you’re looking for some new tools for gardening click here).
Four of my favorite things….my husband, daughter, dogs Missy & Tobey and compost!
Sprinkling bone meal (Beware of dogs digging afterward – they love the smell of bone and blood meal).
Everyone joins into to mix the compost, manure, bone and blood meal with the existing soil.
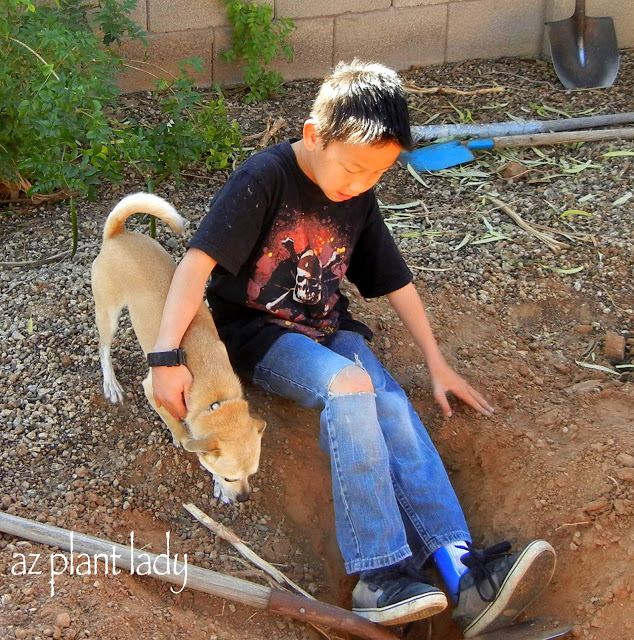
Isn’t it interesting how fresh dirt attracts both dogs and little boys?
ur next step is to put up the sides and fence. Then we will rake the soil smooth and get the irrigation ready.
I can’t wait to plant seeds!
*************************************
I must admit that I didn’t do much of the work today in the vegetable garden. I was busy preparing dinner for Sunday night, which is my daughter Ruthie’s 14th birthday party. I made my special ‘Baked Spaghetti’ with onions, garlic, tomato sauce, sausage, green peppers, herbs and of course – spaghetti.
I had to make 3 batches to feed everyone. Our extended family is coming over along with Ruthie’s friend.
I kept the kitchen window open so that I could watch their progress while I was cooking. I don’t keep a screen on my kitchen window since I have a hummingbird feeder in front of the window and I like to take pictures without the screen in the way.
I did get a visit today from a female Anna’s hummingbird. She was 3 feet away from me while I stood at the kitchen sink. I am so thankful that she didn’t fly in the house.
I made an Angel Food Heath Bar dessert for the first time. I got it out of an Amish cook book that I saw when we visited Amish country in Indiana last year. It has angel food cake, caramel, whip cream and heath bar in it. The kids had fun watching me make homemade caramel. I had fun tasting it 😉
In my last post, I undoubtedly left you hanging, wondering how the second part of our project ended (just kidding).
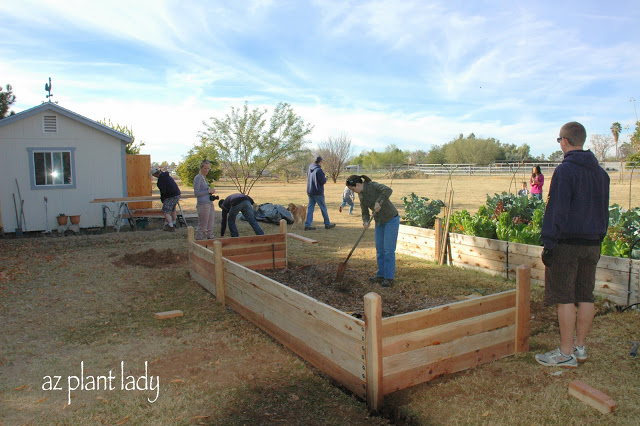
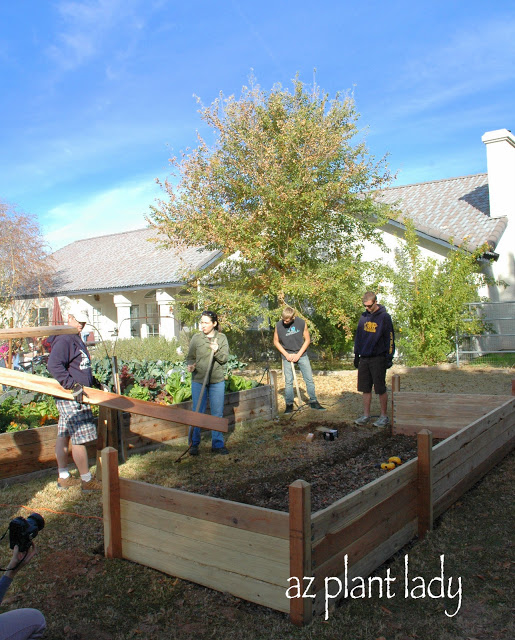
What project is that? Well, my siblings and I along with our families surprised my mother for her 70th birthday by building her a raised vegetable garden to go along with her existing one.
I posted the first part of our project, which ended up with a lot of muddy shoes as we dug out the grass. You can catch up on the first part here.
Now we all gathered again the next Saturday and were excited to finish the project.
Birthday Gift
We worked on building up the remaining sides. It helped that my brother-in-law had a portable table saw, (if you don’t have one you can always have the store do it for you).
My 1-year old nephew Danny, (one of my brother’s twin boys), is just fascinated about how things work and he was wondering how much older he would have to be to use his dad’s cordless drill 😉
Birthday Gift
Almost finished with the sides!
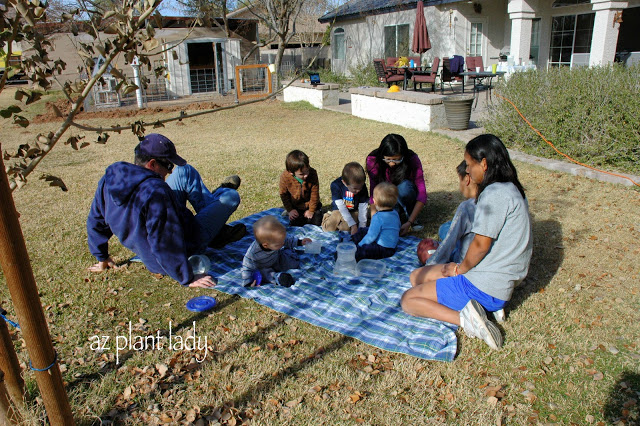
My mother put out a blanket for the twins to play on and then the other grandkids came to play with them too.
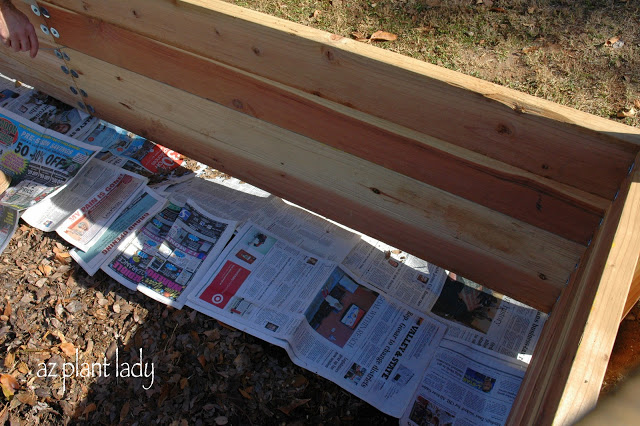
Once we got all the sides up, we lined the bottom with newspaper, which helps to supress weeds and will break down.
My sister takes the twins, Danny and Dean for a walk around the backyard.
Here I am with my two sisters.
Okay, enough with all the family photos, let’s get back to finishing the garden.
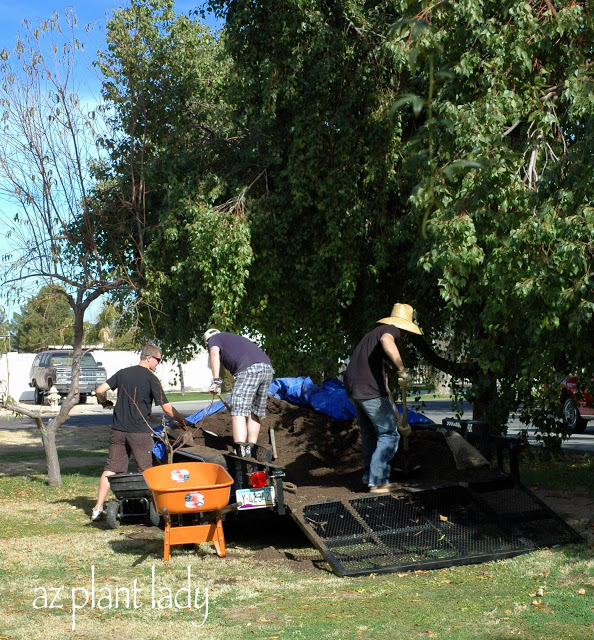
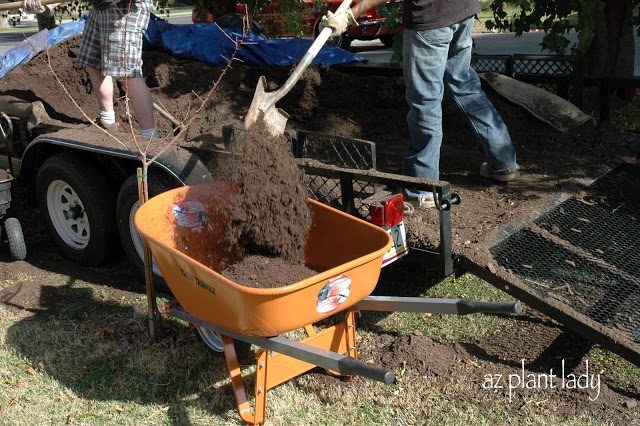
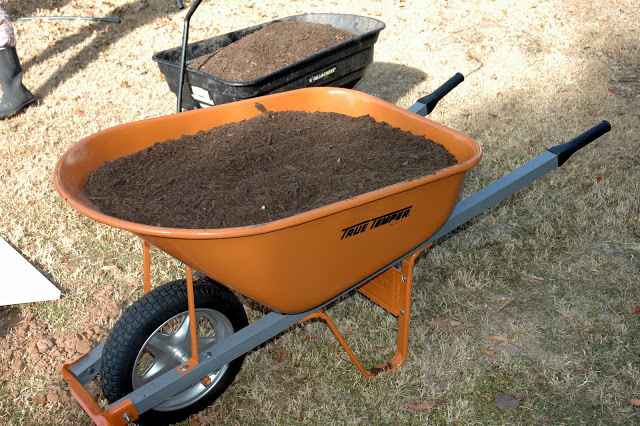
I don’t think that there is anything quite as wonderful to a gardener then a trailer full of compost, do you?
Here is an action shot…
One of the clients that I write for wants gardening ‘action’ shots, so I try to get them whenever I can.
I love the fragrance of compost or as I like to call it “black gold”.
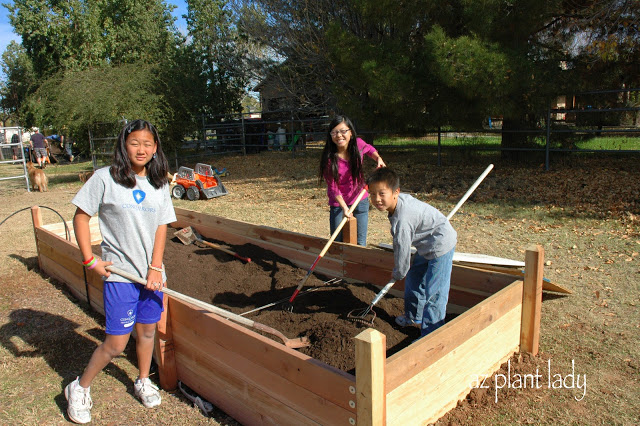
My niece Sofie (left), and my kids Ruthie and Kai had fun spreading the compost inside. They kept getting higher and higher up as the garden filled up with compost.
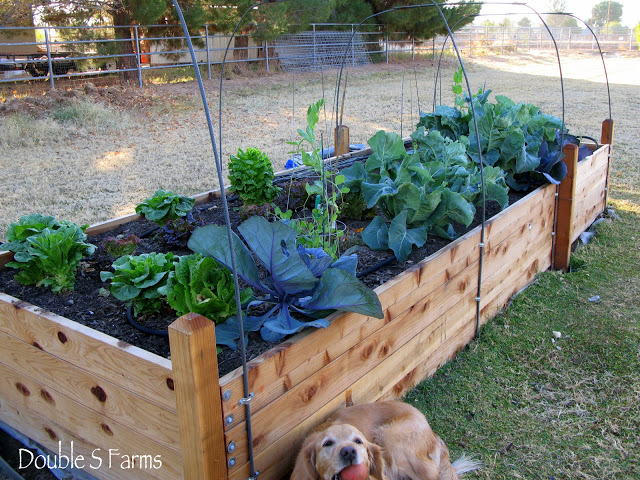
We finished the project by connecting the garden to drip irrigation and also put up support for the shade structure.
Some of you have asked me how we did this and you can see how it was done with the first vegetable garden…
The supports are made out of rebar. Two pieces form each support and they were bent by hand and fastened in the middle using wire. The support is used for shade cloth in summer, frost cloth in winter and bird netting all year to keep the chickens out of the garden.
****************************
My mother was so excited about her new garden and she fed us all a fabulous lunch that day.
Later, we celebrated her 70th birthday with two cakes….
A few of her grandsons were more then happy to help her blow out her candles 🙂
https://www.azplantlady.com/wp-content/uploads/2012/01/DSC_0141.jpg426640arizonaplantlady@gmail.comhttp://www.azplantlady.com/wp-content/uploads/2018/10/favicon.pngarizonaplantlady@gmail.com2012-01-23 19:21:002021-02-10 05:05:37The Gift of a Vegetable Garden: Part 2
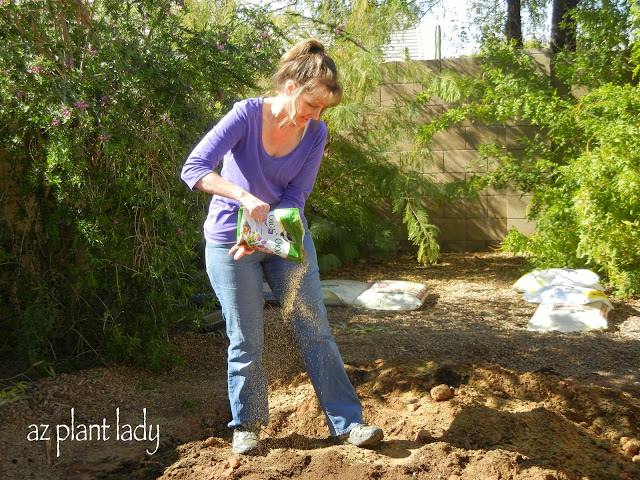
Have you been faced with the dilemma of what to give someone special for their birthday? Well, the stakes are even higher when it is a ‘milestone’ birthday. My siblings and I were faced with this very dilemma in deciding what to give our mother, (Pastor Farmer) of Double S Farms, for her 70th birthday.
After some deliberation, we decided upon building her a vegetable garden.
Now for those of you who are familiar with my blog, you may recall that my mother already has a nice vegetable garden….
Perfect Birthday Gift
But, for those of you who enjoy vegetable gardening; don’t you sometimes wish that you had more space to grow vegetables?
We knew that our mother did, even though she never mentioned it. So, we got to work planning on what we needed to build a new one.
My brother-in-law, built the first garden by himself…
For the new garden, my brother-in-law and I planned on what we would need and where the new garden should be placed.
Actually, my part was easy. I just figured out where to locate the garden and how many cubic yards of compost we would need.
Well, the date was set when we would all congregate at Double S Farms and start building the new vegetable garden.
My mother had NO idea we were coming or what we were going to do.
Early on a Saturday morning we showed up with shovels, rakes, picks, drills and wheelbarrows.
My mother wasn’t there when we all arrived. She was at the local farmer’s market – at this point, she was still clueless that anything was going on.
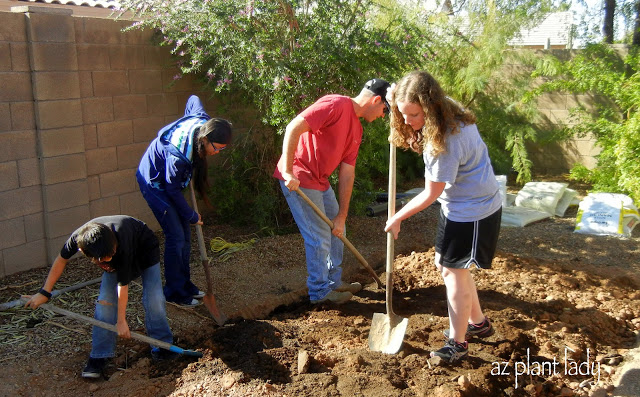
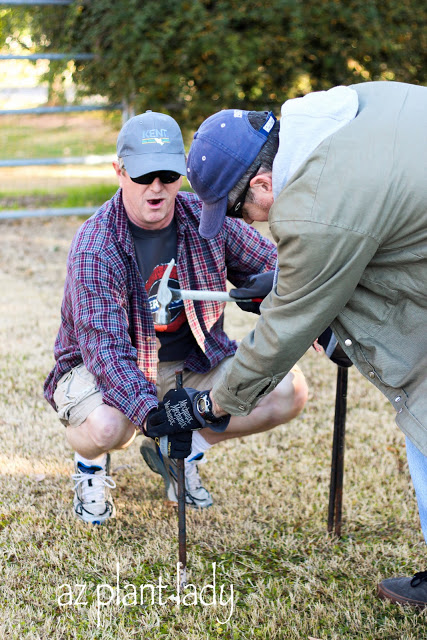
First, my other brother-in-law and my brother hammered in stakes so that we knew where to remove the grass.
Perfect Birthday Gift
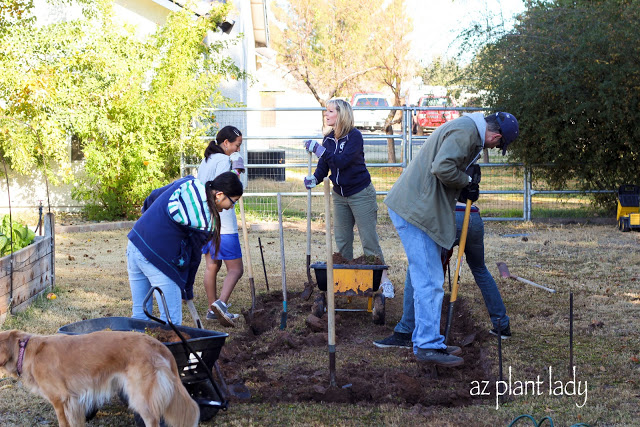
Then came the fun part (just kidding). Digging out the grass. Actually, it wasn’t too bad because the grass had been soaked two days before so that it was easier to dig out.
There were a couple of rocks that we used a pick to get out.
It has been years since I have used a pickax, as you can probably tell from how I’m holding it.
Soon, we had the grass removed and a muddy area left behind, which was absolutely irresistible to my 5-year old nephew, Finley.
At this point, my mother returned home from the farmer’s market and was surprised to see all of our cars parked out in front of her house.
She was quite shocked when she came into the backyard and saw us working on her birthday present. She was so happy. She then got busy making us food, including the cinnamon chip bread that she had just bought at the farmer’s market.
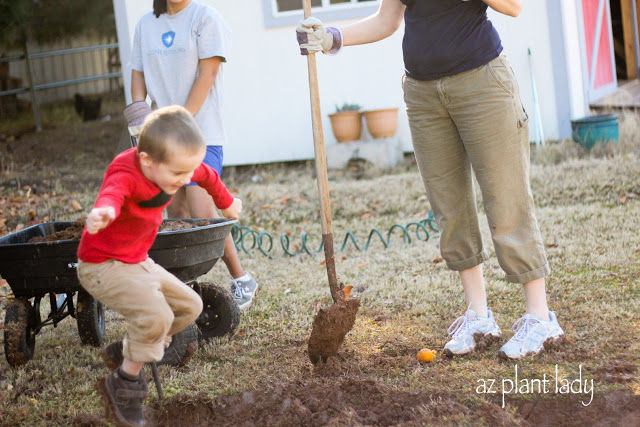
After a break for lunch (pizza), we began to add some loads of composted leaves and soon, it was time to start putting up the sides.
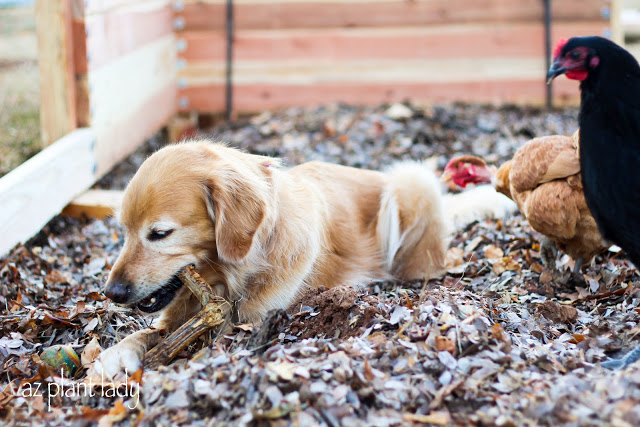
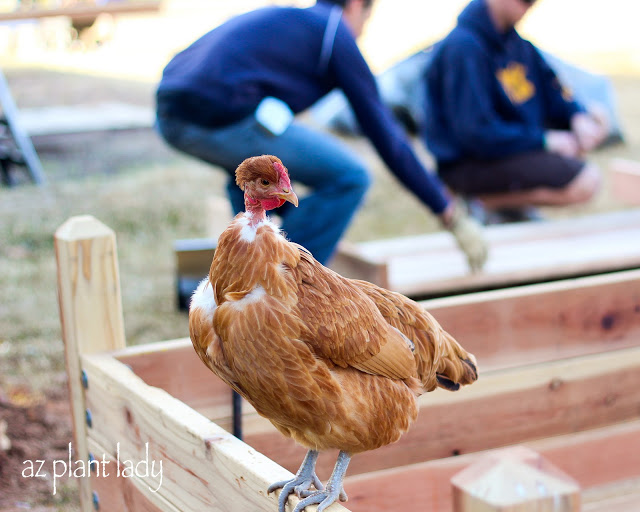
Sodapop and the chickens took time to come over and see what we were doing.
This is Francie, and this is how she is supposed to look – she is a ‘naked neck’ chicken.
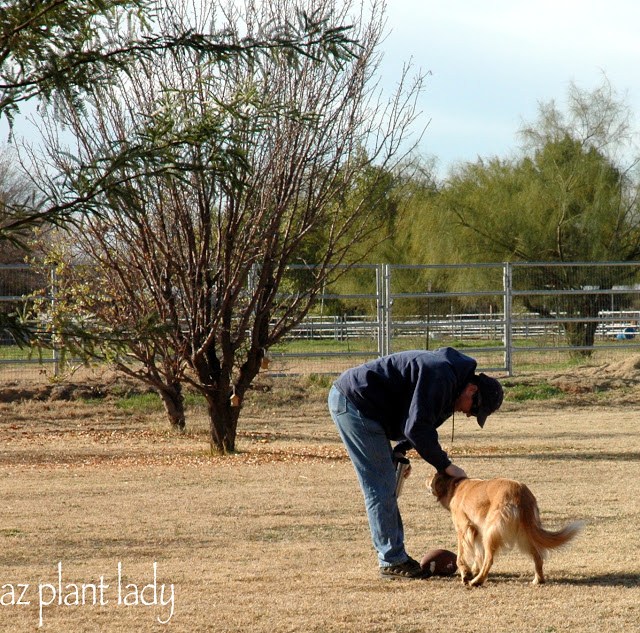
From time to time, we would take small breaks to play with Sodapop, who would drop her ball at your feet and wait hopefully for someone to throw it.
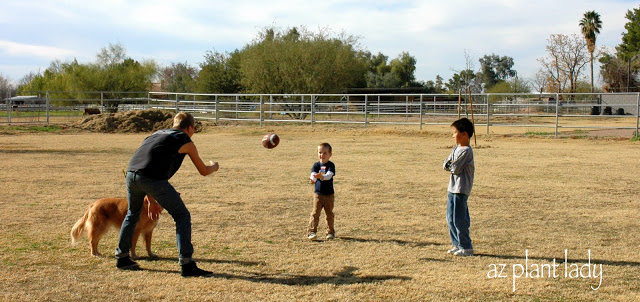
Of course, there was also time for the cousins to play catch too.
At this point, we had to quit for the day because it was almost dinner time. We all decided to come back the next Saturday to finish the project.
I went home and while my husband cleaned our mud-crusted boots, I put a load of very dirty clothes into the washing machine. Please come back for Part Two and see the end result of our labors 🙂
https://www.azplantlady.com/wp-content/uploads/2012/01/IMG_8015-1.jpg480640arizonaplantlady@gmail.comhttp://www.azplantlady.com/wp-content/uploads/2018/10/favicon.pngarizonaplantlady@gmail.com2012-01-21 19:55:002021-02-10 05:14:15The Perfect Birthday Gift – A New Vegetable Garden
But, I must admit that my love for Mondays is rather new. I didn’t always enjoy sitting in traffic, headed for my office in downtown Phoenix, where I worked as a landscape designer. (I did enjoy my beautiful office that overlooked the city from the 14th floor).
Fast forward to 5 years later, and I find Mondays refreshing. For one, the kids are back in school after a hectic weekend, trying to get their projects finished on time. I also love that Monday is a fresh start. I rarely have time to garden on the weekends, so Mondays is a wonderful time to step outside and see what is flowering, smell the subtle fragrance of my desert trees and most importantly – see what has developed in my vegetable garden.
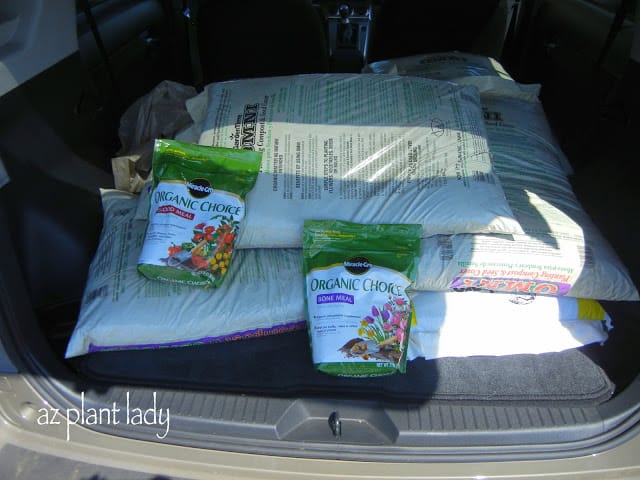
Two weeks ago, I planted my fall vegetable garden – on a Monday. It all started with a visit to our local Home Depot, where I picked up bagged compost, aged steer manure, bone meal and blood meal.
Earlier, we had ripped out what was left of our summer vegetable garden, leaving only our basil and oregano plants behind. Since I had removed the shade cloth from the garden, I put in two plastic chairs to protect the basil and oregano from the sun.
We added a 3 inch layer of compost and 3 inches of aged steer manure. Then I sprinkled both blood and bone meal on top. We then lightly raked the layers together and then waited a week before planting our vegetable seeds.
Fall vegetable garden
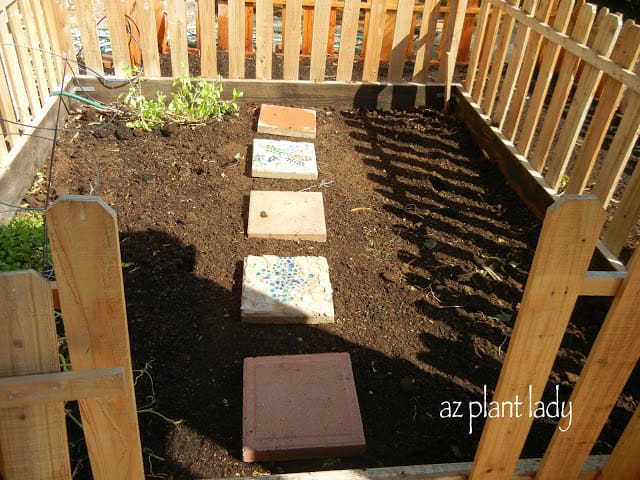
We placed stepping stones through the middle so that we will have easy access to our vegetables.
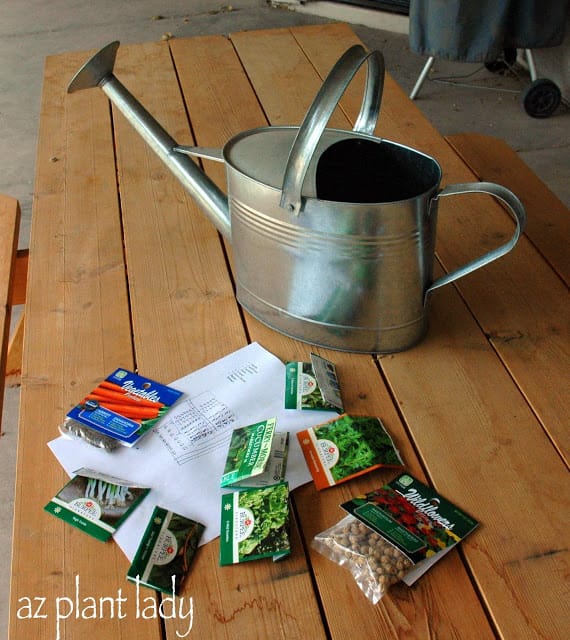
I buy my seeds from different sources. I have Burpee, some from Botanical Interesta, but I usually buy mine at the local Big Box store.
We decided to plant cucumbers, carrots, green onions, spinach, leaf lettuce and cauliflower.
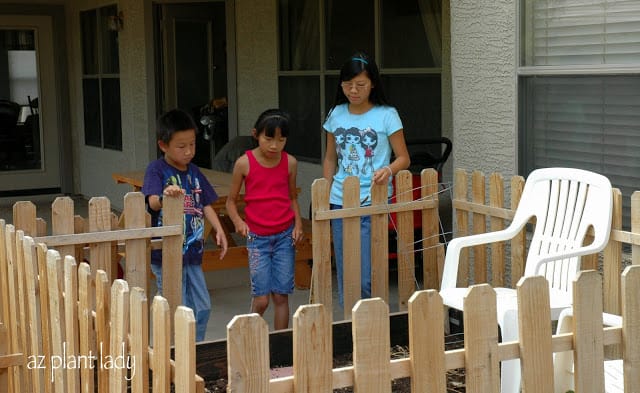
I let each of the kids pick out what kind of seed they wanted to plant.
Decisions, decisions….
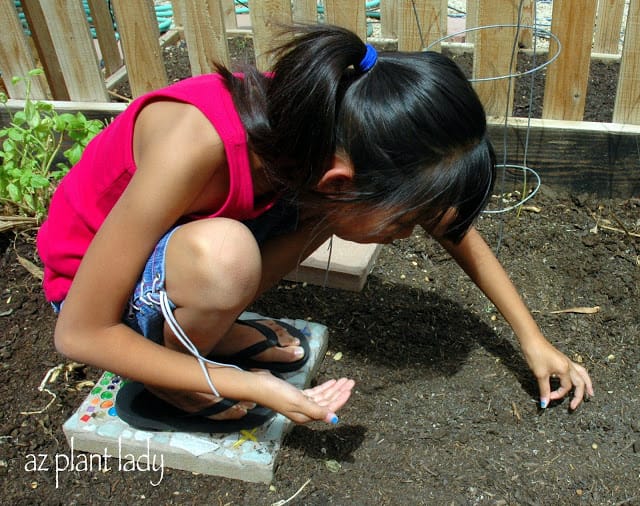
Planting Vegetable Seed
Gracie loves carrots, so that is what she picked to plant.
My son, Kai, planted the green onions and my daughter, Ruthie, planted the lettuce.
I finished up planting the rest of the seeds, using my top secret vegetable garden tool.
I will share my special tool with you soon 🙂
Fall vegetable garden
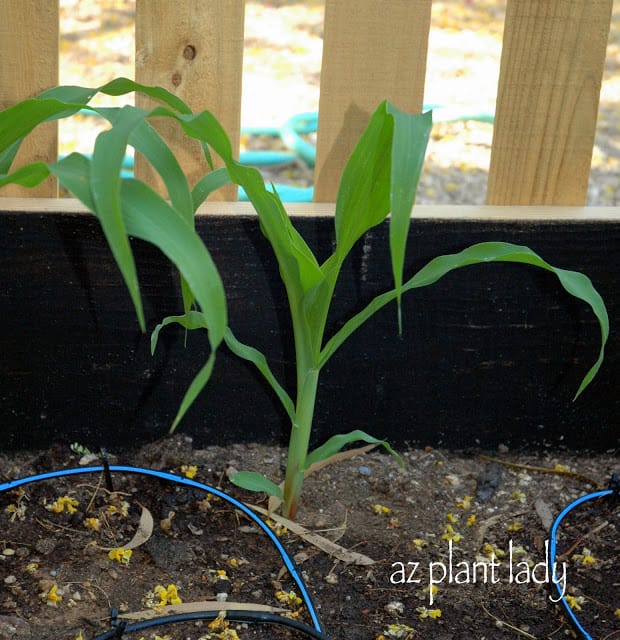
I had planted the sweet corn a few weeks ago, since they need to be in the ground by the end of August for best results.
So, do you know what you will be doing today?
I will be stepping out in to my vegetable garden, seeing what seedlings have started to sprout.
Stay tuned for how to plant garlic and learn about my ‘secret’ gardening tool.
********************
I hope you all had a great weekend and are off to a good start for the week.
**THERE ARE 2 DAYS LEFT TO ENTER YOUR MONTHLY GARDEN BOUQUET FOR THE MONTH OF SEPTEMBER.**
Please email me a photo of your bouquet, or leave me a link to your blog post with you bouquet in the comments section of this post. I will then feature your bouquet and a link back to your blog.
I hope you decide to take the time to send me your bouquet. I do enjoy seeing the beautiful flowers from your garden 🙂
https://www.azplantlady.com/wp-content/uploads/2011/09/2132.jpg480640arizonaplantlady@gmail.comhttp://www.azplantlady.com/wp-content/uploads/2018/10/favicon.pngarizonaplantlady@gmail.com2011-09-19 12:37:002021-02-12 10:36:01Mondays in the Garden – Planting Vegetable Seed
We use cookies on our website to give you the most relevant experience by remembering your preferences and repeat visits. By clicking “Accept All”, you consent to the use of ALL the cookies. However, you may visit "Cookie Settings" to provide a controlled consent.
This website uses cookies to improve your experience while you navigate through the website. Out of these, the cookies that are categorized as necessary are stored on your browser as they are essential for the working of basic functionalities of the website. We also use third-party cookies that help us analyze and understand how you use this website. These cookies will be stored in your browser only with your consent. You also have the option to opt-out of these cookies. But opting out of some of these cookies may affect your browsing experience.
Necessary cookies are absolutely essential for the website to function properly. These cookies ensure basic functionalities and security features of the website, anonymously.
Cookie
Duration
Description
cookielawinfo-checkbox-analytics
11 months
This cookie is set by GDPR Cookie Consent plugin. The cookie is used to store the user consent for the cookies in the category "Analytics".
cookielawinfo-checkbox-functional
11 months
The cookie is set by GDPR cookie consent to record the user consent for the cookies in the category "Functional".
cookielawinfo-checkbox-necessary
11 months
This cookie is set by GDPR Cookie Consent plugin. The cookies is used to store the user consent for the cookies in the category "Necessary".
cookielawinfo-checkbox-others
11 months
This cookie is set by GDPR Cookie Consent plugin. The cookie is used to store the user consent for the cookies in the category "Other.
cookielawinfo-checkbox-performance
11 months
This cookie is set by GDPR Cookie Consent plugin. The cookie is used to store the user consent for the cookies in the category "Performance".
viewed_cookie_policy
11 months
The cookie is set by the GDPR Cookie Consent plugin and is used to store whether or not user has consented to the use of cookies. It does not store any personal data.
Functional cookies help to perform certain functionalities like sharing the content of the website on social media platforms, collect feedbacks, and other third-party features.
Performance cookies are used to understand and analyze the key performance indexes of the website which helps in delivering a better user experience for the visitors.
Analytical cookies are used to understand how visitors interact with the website. These cookies help provide information on metrics the number of visitors, bounce rate, traffic source, etc.
Advertisement cookies are used to provide visitors with relevant ads and marketing campaigns. These cookies track visitors across websites and collect information to provide customized ads.