Tag Archive for: southwest gardening

large bougainvillea in front of a southwest home

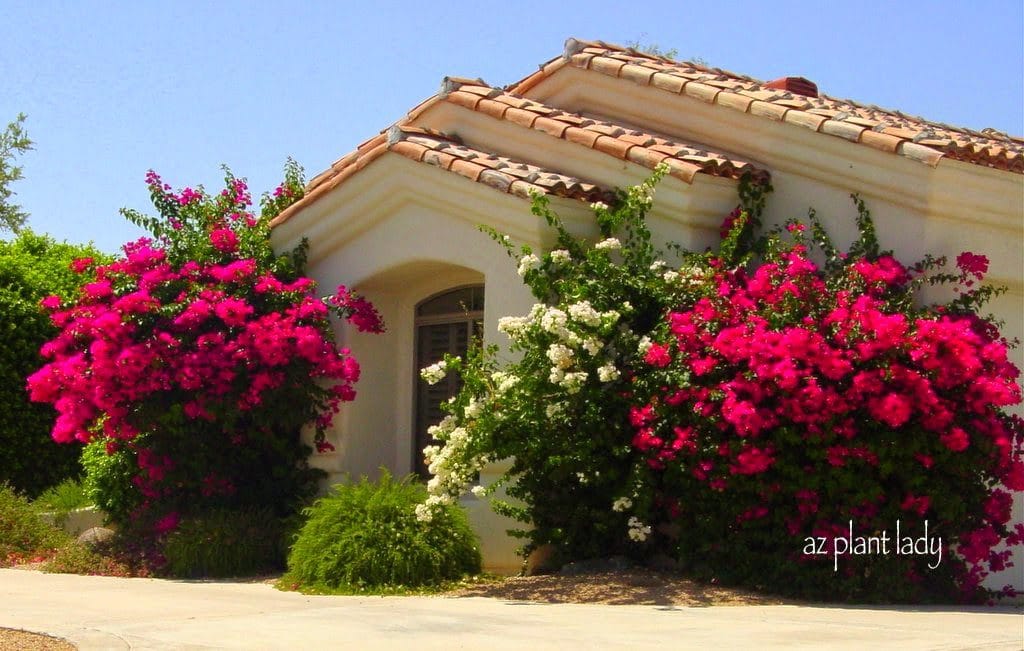
Do you love the beauty of bougainvillea? Many of us will agree that bougainvillea is beautiful, but many homeowners hesitate to grow them for a variety of reasons. The most common that I hear is that they get too big and as a result, too messy.

Embracing Bougainvillea: Maximizing Beauty while Minimizing Hassle in Containers

While both statements are certainly true, wouldn’t it be nice to enjoy the captivating and vibrant beauty of bougainvillea in a more controlled manner? One can find great satisfaction in discovering how to strategically grow bougainvillea, harnessing its enchanting colors and delicate blooms while mitigating the challenges associated with its exuberant growth and occasional unruliness.

Grow Bougainvillea in Pot or container

Thriving in Harsh Desert Summers: Consider Growing Bougainvillea

Let’s face it; summers in the desert can be brutal and bougainvillea are one of the lush green, flowering shrubs that thrive in intense heat and sun. So, why not consider adding one in a high-profile area where you can enjoy their beauty throughout the warm season?

Link to desert southwest Fuss-Free Plant Guide
Grab my FREE guide for Fuss-Free Plants that thrive in a hot, dry climate!

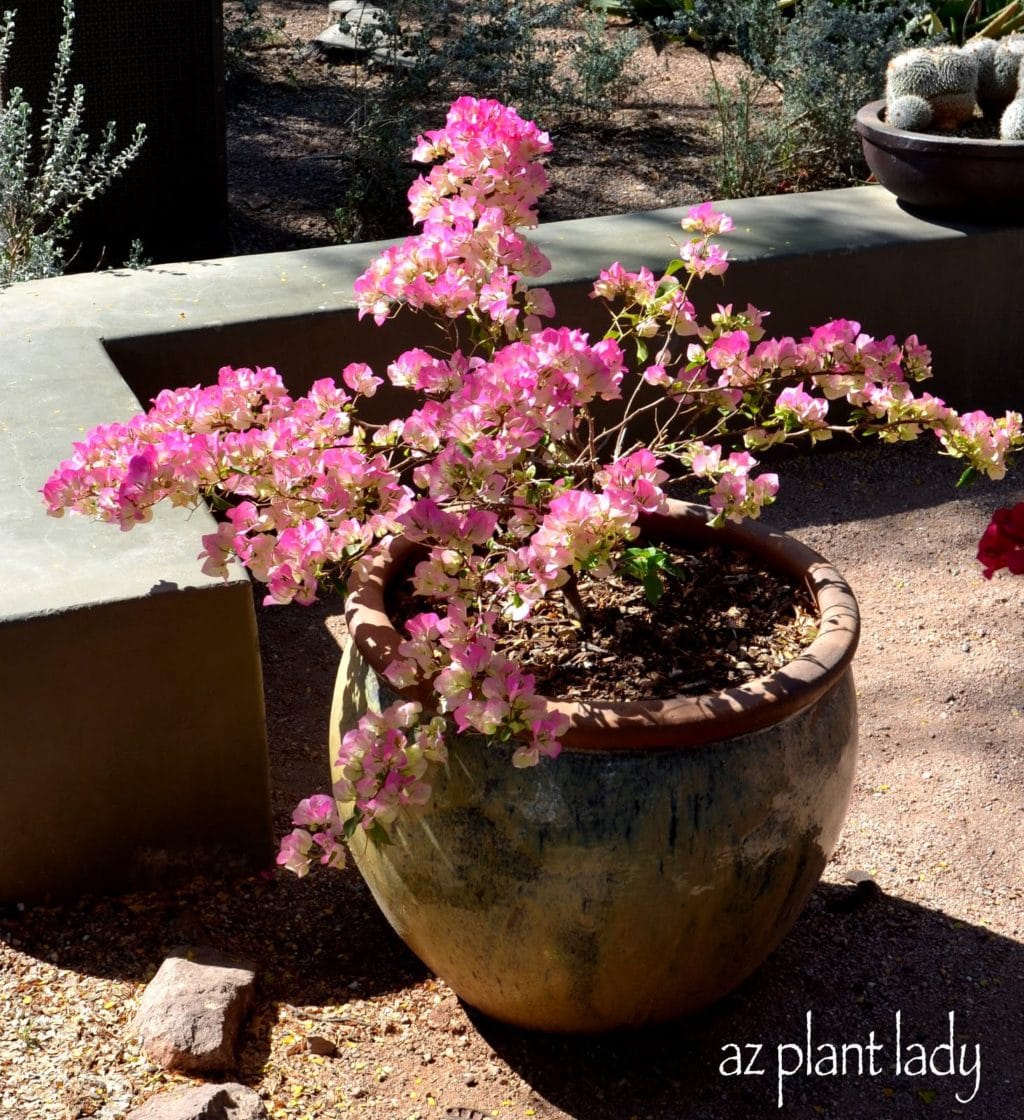
The Advantage of Potted Bougainvillea: Small Size, Less Mess

Growing bougainvillea in pots limits their overall size, and with smaller shrubs, there is less mess. It also makes it easier to protect them from frost damage in winter by moving the container to a sheltered location, such as underneath a patio or covering them with a sheet.

pale pink bougainvillea in container

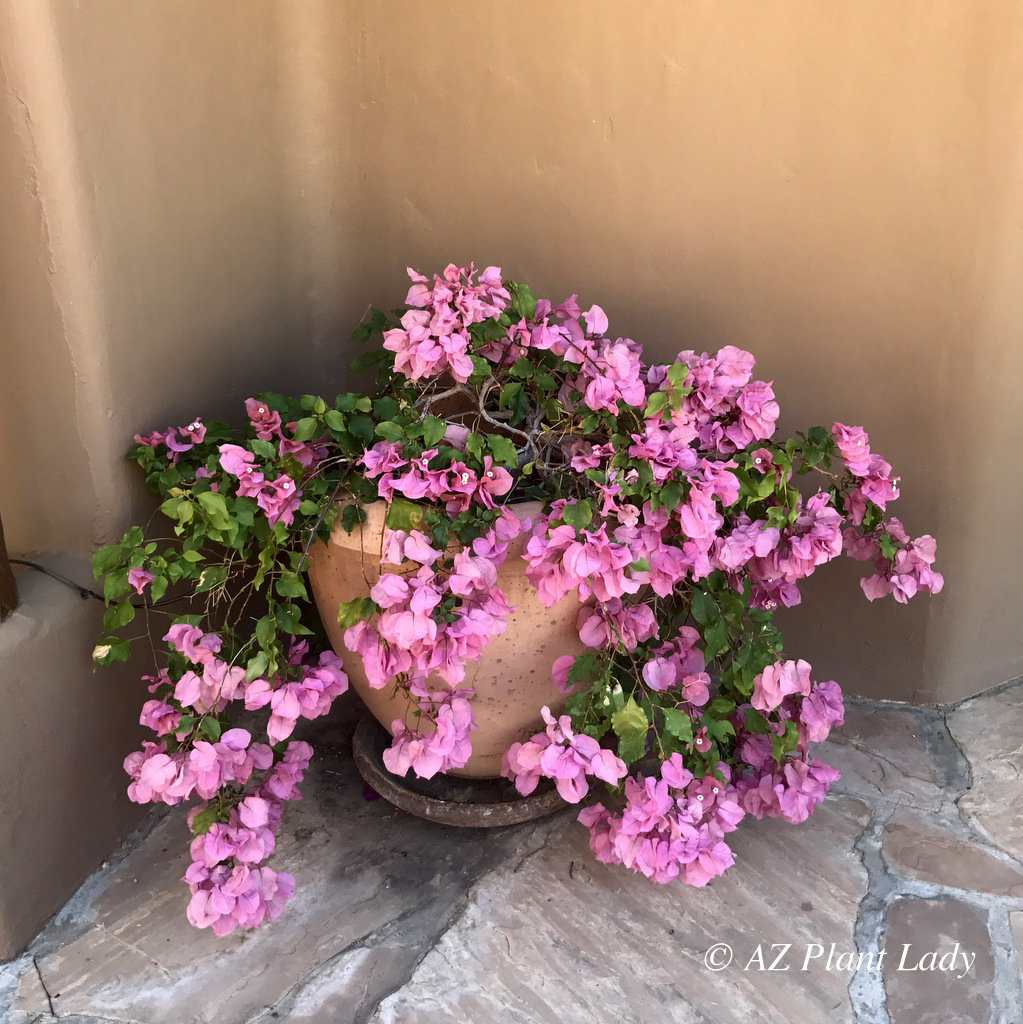
Mastering Bougainvillea Growth: Container Planting Insights

Bougainvillea make excellent container plants. In fact, many gardeners who live in cold climates, only grow them in pots and move them indoors in winter. I met a gardener in Austin, Texas who treats bougainvillea like an annual plant, planting a new one every year to replace the old one lost to winter cold. Thankfully, we don’t need to do add a new one every year.

Bold pink flowery plant in container

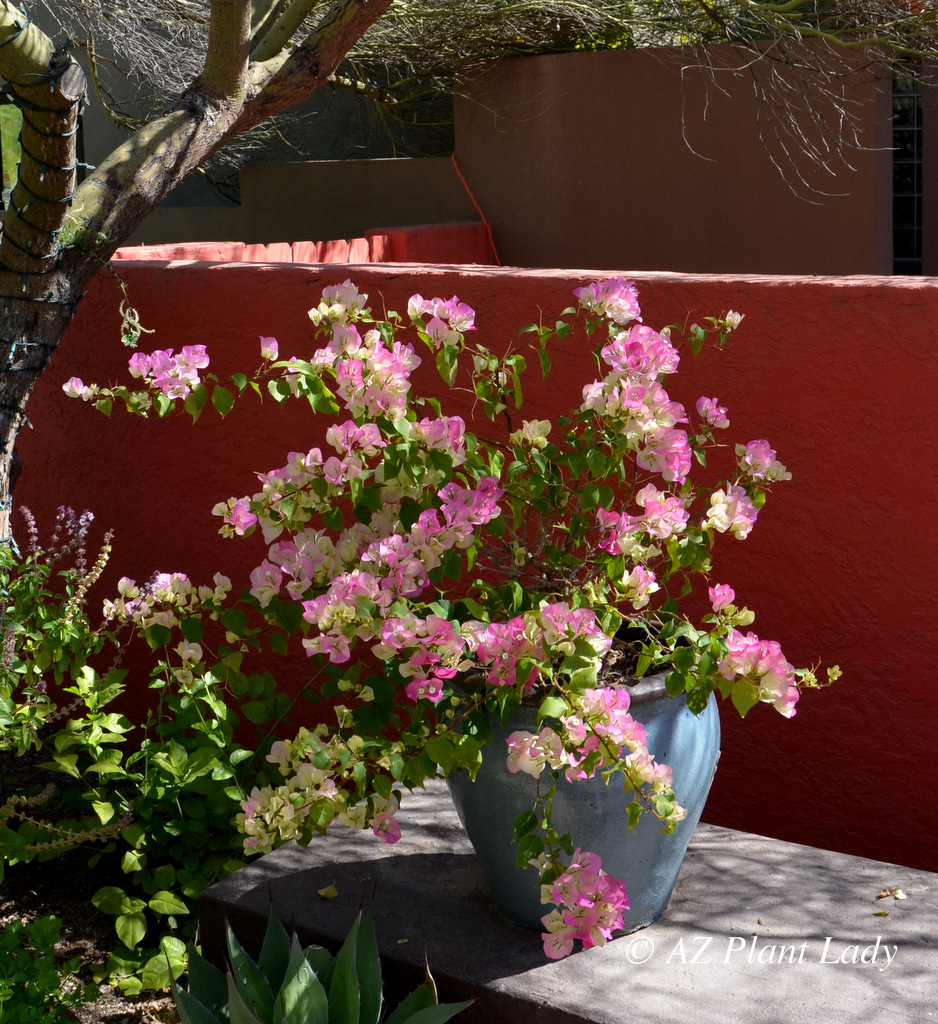
Simple Steps to Cultivating Bougainvillea in Pots

Growing bougainvillea in pots is easy to do. Select a location in full sun where it will promote the most bloom. Bougainvillea are one of the few flowering plants that can handle west-facing exposures. 

pale pink and white bougainvillea flowers in blue pot

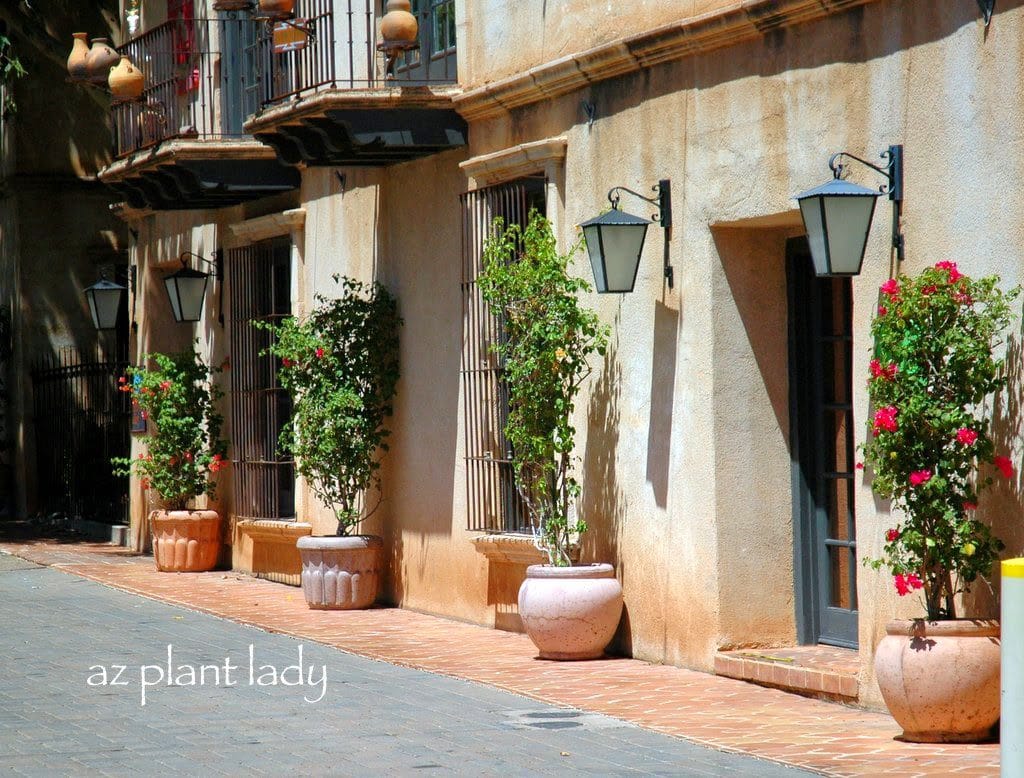
Nurturing and Feeding Your Potted Bougainvillea for Optimal Growth

Provide support for them to grow upward if desired. You can also grow bougainvillea as more of a compact shrub form if you wish.

Water deeply and allow the top 2 inches to dry out before watering again. Bougainvillea does best when the soil is allowed to dry out between watering.

bougainvillea in containers along a hot wall

Apply a slow-release fertilizer in spring, after the danger of frost is passed. You’ll want to reapply fertilizer every three months until September.

Winter Care and Final Thoughts: Flourish with Potted Bougainvillea

Growing bougainvillea in pots keeps them small enough to make it feasible to cover them when freezing temperatures occur. So, if you like container gardening, consider growing bougainvillea in a pot for great success.

Creative Container Gardening Tips

Portable Drip Irrigation With a Recycled Milk Jug

Do you have plants that need extra water this summer? I have the portable drip irrigation solution for you!

Many of us have a few plants that aren’t connected to an irrigation system. Some people don’t have an irrigation system and use a hose to water plants, which is time-consuming and inefficient.

Portable Drip Irrigation is an Alternative to Traditional Irrigation

While you can certainly haul out your hose and water each of your thirsty plants, it is not the best way. The main problem is the hose puts out water quickly and the soil can’t absorb it fast enough. As a result, much of the water runs off and doesn’t benefit the plant as much as it should.

So, if the time-consuming task of watering plants by hand isn’t your cup of tea, I’m here for you. You can make life easier by creating your own portable drip irrigation system with a recycled milk jug.

3 Steps to Create a Simple Recycled Drip Irrigation System

This solution is very easy and will have you digging through your recycle bin collecting your used milk jugs.

To get started, you will need an empty plastic milk jug and a nail.

1. Make the Holes:

Heat the nail using a lighter or stove burner. Then use the nail to pierce 3 – 4 small holes in the bottom of the milk jug.

Pouring water in a jug for portable drip irrigation

2. Fill the Jug with Water:

Fill the milk jug up with water, put the cap on and carry it upside down to the plant. Turn it right side up and set it down to the plant that needs irrigation. *You can also set the empty milk jug(s) next to your plants, bring the hose to them and fill with water that way.

Portable Drip Irrigation at the bottom of a  Recycled Milk Jug

3. Portable Drip Irrigation Water Pressure

Slightly loosen the cap, which will allow the water to drip out of the holes at the bottom – this allows the water to penetrate the soil slowly, instead of running off.

Once the water has drained out of the bottom of the jug, pick up your milk jug and move it to the next plant. After you are done, bring the empty jugs inside and store until the next time you need them.

Special Note: If you live in a windy area and worry the milk jug will blow away, weigh them down with an inch of small rocks in the bottom of the jug – the rocks won’t interfere with the water dripping out.

Milk jug next to an agave plant

I usually recommend this method of irrigating cacti monthly in summer.

This portable drip irrigation system is a great aid for those who live in areas that are suffering from drought or where an irrigation system may not exist.

**A semi-permanent variation of this method is to create holes along the sides instead of on the bottom. Then bury the entire jug next to the plant, leaving just the top exposed. To water plants, remove the milk cap and fill with water and replace the cap.

I hope you find this DIY garden project helpful. Please feel free to share it with your friends by clicking the “Share” button below. 

How To Grow Tomatoes in the Desert

pruning apple trees

Yesterday, I spent the morning on the family farm pruning apple trees.

It was a nice break from a very busy week of landscape consulting and I was looking forward to spending time with my mother, who resides on Double S Farms with my youngest sister and her family.

pruning apple trees

The sun was rising up in the sky and the day promised warm temperatures in the upper 70’s with our unseasonably warm winter.

Now at this point, you may be noticing that the trees were already in flower and that we were getting to pruning them a bit late in the season.  Ideally fruit trees are pruned just before the buds begin to open.

But, even though we were pruning them late, it won’t make a huge difference and will improve the size and quality of our apple crop.  

pruning apple trees

 You’ll notice that the apple trees are located behind a wire fence. Well, there is a good reason for that…

Sodapop and Johnny

And their names are Sodapop and Johnny.

Soda is the daughter of our dog Missy, who passed away last year at the age of 13.

Johnny is a 3-legged doberman rescue dog who is so friendly and exuberant.

You see, the dogs love to eat the apples from the trees. Especially Soda who does her best to reach them up high.

You can read about Soda’s previous exploits here.

The problem is that the seeds of apples contain small amounts of cyanide and if dogs consume too many, they can have problems. So the fence is up, much to the dismay of Soda and Johnny.

Pruning trees

Pruning trees is one of my favorite things to do and although as a certified arborist, I talk to my clients a lot about trees, I don’t prune their trees. Instead I give them advice on how to prune them their selves or refer them to a certified arborist company who does it for them. So, my tree pruning is primarily focused on my own and my family’s.

Armed with a pair of loppers, hand pruners and a pruning saw, I took a moment before beginning to smell the sweet fragrance of the apple blossoms.  

Pruning trees

In the midst of our pruning, my granddaughter, Lily, showed up.  She proved to be a good helper and moved the small branches into a pile.

We focused on cleaning out the interior branches, which are hard to get pick apples from.  In addition, we also pruned off some of the taller branches so that come apple-picking time, we could more easily reach them. Once we finished, we had pruned away a quarter of the tree, which will allow it to focus its resources on growing the remaining flowers, which will turn into apples.

For info on how we have pruned fruit trees in the past, click here.

Pruning trees

My mother took a few of the cut branches and brought them inside and put them in a vase where they will offer beauty and fragrance indoors for a few days.

delicious vegetables

Now it was time to turn our attention to the vegetable gardens. My mother has two large, raised beds where she grows a variety of delicious vegetables.

Lily wanted to feed the chickens some lettuce from the garden.

Double S Farms

The resident chickens of Double S Farms, love lettuce.

cabbage

Next, great-grandma needed Lily’s help to pick a cabbage from the garden. It was huge!  I only wish that I liked cabbage.

I asked my mother how she uses it and she told me that she uses it in soups, but blends it ahead of time so no one knows that it is in there.

chickens

Lily wondered if the chickens would like cabbage and it turned out that they liked it better than the lettuce.

smelling their fragrance.

Before leaving the gardens, Lily had to pick a flower.  Like many little girls, she loves flowers and carries them around smelling their fragrance.

The white petunias belong to Finley, my nephew, who gets a small plot in the vegetable gardens to plant what he likes.

pruning tree

As we got ready to leave, I noticed a beautiful, little bouquet made up of petunias on the kitchen table. Who knew that petunias could make such a sweet bouquet?

Visits to the family farm are always refreshing and it was great to enjoy a morning out in the sunshine gardening.

When you visit a nursery, do you wonder which plants are drought tolerant as opposed to those who will wilt if not given enough water?

There are a few different traits that many drought-tolerant plants share.  For example, did you know that small leaves and gray foliage can be signs that a plant may be drought-tolerant?  

I recently shared several traits to look for when shopping for drought-tolerant plants for Houzz.com

I hope this article will help you to create a beautiful, drought-tolerant garden!

How to Spot a Drought-Tolerant Plant

Drought Tolerant Garden

Earlier this week, I mentioned I was being interviewed about drought tolerant gardening for several radio stations throughout the country.    

This morning, I am doing a live interview for the public radio station, KERA in Dallas, Texas.  I will be taking viewer questions throughout the program.   *You can listen to it here, if you like.   

I must admit to being a little nervous, but am mostly excited to talk about a subject that I am passionate about and have a lot of experience with having lived in California and now Arizona.

Drought Tolerant Garden

In my last post I talked to you about 10 steps toward a drought tolerant garden.  

As I promised, it is time to decide what to plant in your water wise garden.  

Today, let’s talk about one of my favorite group of plants – perennials.   

The perennials I am sharing with you can grow in a variety of climates throughout the United States and I will note their USDA planting zones.  

*For best results, the following guidelines should be followed when planting these or any drought tolerant plants:  

– Plant in well-drained soil.

-Amend the existing soil with compost at a ration of 1:1.

– The planting hole should be 3X as wide as the root ball to allow the roots to grow outward more easily and the plant to establish more quickly.

White Gaura (Gaura lindheimeri)

Photo: White Gaura (Gaura lindheimeri)

White gaura has a central place in my drought tolerant landscape.  I have three growing underneath my front window where I can enjoy their delicate, butterfly-shaped flowers that appear in spring and fall where I live in the low desert.  

In cooler locations, it blooms spring through summer. This white-flowering native grows approximately 2 ft. tall and wide.  

Hardy to zone 7 – 10, plant gaura in well-drained soil.

Penstemon species

Photo: Penstemon species

The arrival of spring is heralded by the flowering spikes of penstemon.  There are many different species of native penstemon and all have a place in a drought tolerant garden.   

Hummingbirds will flock to your garden to enjoy the nectar from its blooms.  The base rosette of penstemons are approximately 1 foot high and 1 – 2 feet wide when not in flower.  

The species you choose depends on your region and their cold hardiness ranges from zone 4 – 10.  Plant in full sun to filtered shade in well drained soil.

Blackfoot Daisy (Melampodium leucanthum)

Photo: Blackfoot Daisy (Melampodium leucanthum)

If you like white daisies, than this is a drought tolerant perennial that deserves a place in your garden.  

Blackfoot daisies are a native, mounding plant that grow 12 inches tall and 18 inches wide.  Don’t let their straggly appearance fool you when you see them at the nursery – once they are planted and have a chance to grow roots, they will fill in and look great.  

I like to plant blackfoot daisies next to boulders where their soft texture provides beautiful contrast.  

Plant in full sun, well-drained soil.  Hardy to zone 5 – 10.

Angelita Daisy / Perky Sue (Tetraneuris acaulis - formerly Hymenoxys)

Angelita Daisy / Perky Sue (Tetraneuris acaulis – formerly Hymenoxys)

Here is one of my all time favorite perennials.  I use it often in my designs and landscapes that I have managed in the past.  

Angelita daisies are native to the United States, which add a welcome spot of color to the garden.  Don’t let their delicate appearance fool you – they are very tough.  

Plant them in groups of 3 or 5 for best effect in areas with full, (even reflected) sun to filtered shade.  Gardeners in zones 5 – 10, can grow this pretty little perennial that reaches 1 foot high and tall.  

In zone 8 gardens, it is evergreen and will flower throughout the year.  For those who live in zones 5 – 7, it can die back to the ground, but will quickly grow back in spring and provide yellow blooms throughout the summer into early fall.  

In zones 4 and below, angelita daisy is often grown as an annual.

Tufted Evening Primrose (Oenothera caespitosa)

Photo: Tufted Evening Primrose (Oenothera caespitosa)

The flowers of tufted evening primrose open at night where their white blooms illuminate the garden.  

As flowers fade, they turn pink.   Plant this native alongside boulders or at the base of spiky plants such as sotol (desert spoon) where you can show off the contrast in textures.  

Plant in full sun to filtered shade in well-drained soil for best results.  Hardy to zones 8 – 10.

amianita (Chrysactinia mexicana)

Photo: Damianita (Chrysactinia mexicana)

It’s hard to find a native plant that can compete with the golden yellow blooms of damianita.    

This shrubby perennial grows 1 foot high and 2 feet wide.  Masses of yellow flowers appear in spring and fall covering the bright green needle-like foliage.  

Hardy to zones 7 – 10, damianita needs full sun and well-drained soil.  Prune back to 6 inches in spring after flowering has finished to keep it compact and reduce woody growth.

Trailing Lantana (Lantana montevidensis)

Photo: Trailing Lantana (Lantana montevidensis)

While not a native, trailing lantana is a plant that is well adapted to arid climates and is a popular choice for drought tolerant gardens.  It also is a butterfly magnet.

*Lantana can be invasive in warm, humid climates but in arid regions, this is not a problem.  

Trailing lantana grows up to 1 foot high and 3 feet wide.  Plant in full sun or filtered shade.    

Although lantana is not cold hardy (it grows in zones 8 – 10), it is often grown as an annual in colder climates.  Flowers appear quickly after the danger of frost has passed that last until the first frost in fall / winter.  Shear back to 6 inches in spring once the freezing temperatures have ended.  

Any of these beautiful perennials will add beauty to your drought tolerant garden.  

A few years ago, while visiting my sister in the Palm Springs area in California, we visited the Living Desert Museum.  This is a combination botanical garden and zoo.

Blue Bells

We had a great time exploring along with our kids and I enjoyed taking pictures of the different plants that I saw.

Leucophyllum (Texas Sage).

While walking through the gardens, I noticed a small shrub, which at first glance, I assumed was a small species of Leucophyllum (Texas Sage).

blue bells

I took a quick photo and then walked on.

Fast forward 2 years later, where I found myself learning about a newer plant on the market that thrives in desert heat, is drought-tolerant, flowers all year and needs little to no pruning.

Now any plant that looks great but isn’t fussy in desert gardens is one that I definitely need to get to know better.

I found out that this particular shrub was supposed to look a lot like a gray Texas sage.  That was when I remembered taking the photo, above.

I was thrilled to find out that I had been introduced to this plant earlier, but hadn’t known it.

There is so much that I can say about Blue Bells (Eremophila hygrophana ‘ Blue Bells ‘) and I have written an article about this beautiful, yet tough shrub, which you can read in my latest Houzz plant profile…  


Kitchen designs, bathroom designs, and more ∨

Hire residential landscape architects to help with all aspects of landscape design, from selecting or designing outdoor patio furniture, to siting a detached garage or deck.
A home remodeler or residential architect will see the potential in the architecture and building design of your home.

I strongly encourage you to be a trendsetter in your neighborhood by planting this lovely shrub in your garden!

Mexican Fence Post

A Tale of New Beginnings: The Mexican Fence Post Cactus and Rachele’s Journey

This is a story about new beginnings – one for a new cactus and another beginning for my second-oldest daughter, Rachele.

Believe me when I say that both stories are connected in a way.

The Connection Between a Mexican Fence Post Cactus and a Daughter’s Departure

This cactus, above, is a Mexican Fence Post (Pachycereus marinatus), which has been happily growing in my front garden.

What may not be initially obvious is that 11 years ago, I started this cactus from a 2 ft. piece of one (called a ‘cutting’) given to me by a client from their large Mexican Fence Post cactus.

Well, exactly 1 year ago, I repeated the favor for our neighbors.

Mexican Fence Post

Sharing the Beauty: Providing a Piece of the Mexican Fence Post Cactus to Neighbors

Look carefully at the photo above and compare it with the first one. Can you see where we cut off a piece of the cactus?

Our neighbors had recently re-landscaped their front yard and wanted a cactus like ours. Of course, they knew that they would have to start out with a much smaller one – but they were unprepared for how expensive it would be to buy one at the nursery.

Our cactus had been growing so well, we decided to offer them a piece (cutting) off of our Mexican Fence Post. So, my husband, daughter and I gathered together to take a cutting from our cactus.

Here is how we did it…  

Mexican Fence Post

How to Properly Take a Cutting from a Cactus

We selected a good-sized length of cactus and while I held onto it, my husband took a pruning saw and started sawing it off at the bottom.

Multiple layers of newspaper and gloves are helpful to use to grab onto cacti with short thorns. For cacti with longer thorns, you can use carpet remnants. When you cut out a piece of cactus, it will be much heavier then you are expecting – so be prepared.

Mexican Fence Post

My husband and daughter wheeled the cactus cutting over to our neighbor’s house using our wheelbarrow.

Mexican Fence Post

Preparing the Cactus Cutting for Planting

We then placed the cutting in a dry, shady spot for 2 weeks in order to allow the cut site to ‘callus’ over, which would protect the cacti from rotting when it is replanted.

*Exactly 3 days after helping us with the cactus cutting, my daughter, Rachele, left for the Navy and basic training.  It was a sad goodbye for us, but a new beginning for her.

After 2 weeks had passed, the new cactus was planted in its new location with a wooden stake for support.

No water was applied for the first month after planting, in order to make sure that the entire cut end had callused over.

One month after planting, the cactus was watered deeply, monthly, until November.

my second-oldest daughter, Rachele

*Whenever I looked at the newly-planted cactus, thoughts of my daughter and how she was doing in her new Navy life always crossed my mind.

new cutting

One year later, the new cutting is doing so well and has even grown two new sections.

You can see the parent cactus in the background.

Now, I may not be located as closely to my daughter as these two cacti, but like the new cactus, she is growing and doing so well in her new career with the Navy.  We are so proud of her!

You can read more about Rachele’s adventures, here.

How to Propagate Cactus Via Cuttings


Propagating cactus via cuttings can be done with many species of cacti. Here are a few guidelines to follow for success:

1. Propagate cactus during the warm season, when the threat of frost is over.

2. Make the cut at the joint where the segment attaches to the parent plant. For prickly pear cacti, you can cut a segment that consists of 1 – 3 pads.

3. Place the new cutting in a dry, shady spot for 2 weeks to allow the cut site to ‘callus’, which protects the cacti from rot when it is replanted.

4. Plant your new cactus in full sun with well-drained soil.

5. Don’t water for a month after planting.  Then water deeply, monthly until fall.

6. Provide temporary shade for the first summer. You can do this by placing a plastic patio chair over the top or using shade cloth.

Soon, you will begin to see new growth on your cactus.