Tag Archive for: Landscape Consultation

Yesterday, I showed you a photo of a citrus tree that I came upon during a landscape consultation.  

landscape consultation

I mentioned that there was more then one problem affecting this tree.  There are actually two large problems and one small problem.

Problem #1: Look at the area near the trunk.  Notice a little green shoot coming up from a small citrus root?

This innocent-looking little sucker can cause a lot of problems if allowed to grow.  The reason for this is that citrus trees are grafted onto a vigorous rootstock.

Basically, the top of a citrus tree and the roots come from different plants.  Citrus trees we enjoy in our landscape don’t have a particularly strong root system.  So, they are grafted onto a thorny, citrus tree that has vigorous roots and sour fruit.

landscape consultation

Occasionally, small suckers from the thorny, citrus tree start to grow up from the roots or the base of the trunk below the bud union.  The bud union is a bulge around the lower part of the tree, about a foot above the ground.  Any suckers that originate from below the bud union should be removed, because if allowed to grow – the thorny citrus tree will grow and take over.

Now, back to our original picture for our second problem…

landscape consultation

Problem #2: Look closely at the soil and you can see signs of shallow irrigation. How can you tell? Look at the small citrus roots criss crossing out from the tree.  In a properly watered citrus tree, you shouldn’t see the roots at all.

This indicates that when the tree is irrigated, that the water is not turned on long enough to penetrate to the recommended 3 ft. depth.

When I pointed this out to the homeowner, she indicated that if the water is turned for too long, that it runs out from the basin.

There are two solutions for this problem.

 Elevate the sides of the basin to at least 6 inches high and allow to fill with water.  Next, check to see how deeply you have watered by taking a long, narrow stick or piece of rebar and push it into the wet soil.  It should go down fairly easily to the point where the water permeates.  Pull it back out and you will get a good idea of how much more or less water you will need.

– If after trying the first solution and you still haven’t hit the recommended 3 ft. depth, then try this trick – water in the morning, filling up the basin.  Allow the water to sink and fill the basin again later in the day.  This should help you achieve the right depth.

The smaller problem is really nothing to be overly concerned about…

Orange Dog Caterpillar

If you look closely, some of the leaves have ragged edges and holes.  The damage is caused by the Orange Dog Caterpillar.  This caterpillar appears in the summer months and resemble ‘bird poop’ which makes them hard to spot.  

These caterpillars will turn into the beautiful Giant Swallowtail butterfly.  Mature citrus trees can usually handle the damage from the caterpillars, so in most cases, the best thing to do is nothing.

For additional resources for raising citrus in the Valley of the Sun and other areas throughout the Southwest, check out this helpful link.

Do you have citrus trees in your landscape?  Which kinds?  

I like the word ‘deluge’.  I think that it accurately describes what happened at our house a couple of weeks ago.

So, why am I just now writing about it?

Well, I must admit that I am keeping my head above water, so to speak 😉  I am still recovering my strength after suffering from the flu (I have been needing a nap everyday).

I have also been busy with consults now that the weather is cooling again and people actually want to go out in their gardens.

Okay, so back to our ‘deluge’.

We get periods of torrential rain during our summer monsoon season.  But, what happened on this Friday morning was quite impressive.

torrential rain during our summer monsoon season

torrential rain during our summer monsoon season

The Lantana in the front entry were absolutely drenched.

Homes don’t have gutters where I live, so the rain drips from the eaves.

torrential rain during our summer monsoon season

Our new flagstone pathway channeled the water into the street.

torrential rain during our summer monsoon season

Our newly re-landscaped front garden enjoyed the rainfall.  I was happy to see how the rain also pooled around our new Desert Museum Palo Verde tree, watering it deeply.

I wish I could say that our back garden weathered the ‘deluge’ as well as the front garden.

But, we definitely need to work on channeling the water away from the patio….

A Deluge of Water...

Thankfully, my 20-year old daughter, Rachele, and my teenage nephew were on hand to scoop the excess water with buckets out onto the grass.

(The water got too close to the back doors for comfort).

We will be making a shallow channel along the front of the patio and toward the side gardens, where the excess water will drain out to the front.

********************

I have had the pleasure of meeting a few readers of my blog when I came to do a landscape consult for them.

I enjoy meeting you in person and seeing your gardens for myself.

Have a great week everyone! 

Wet Weather and Two Races…

Are you the type of person that notices what is wrong more then what is right?

Although I would describe myself as having an outlook as a “glass half-full” and tend to observe the positive – it doesn’t carry over when I look at landscapes.

I think that it is because I am supposed to find problems and help people avoid or fix them.

A few weeks ago, I shared my first “Landscape No-No” post, which showcased a common mistake people make with drip emitter placement and trees.

My hope is that by sharing some “Landscape No-No’s” that I will be able to help you avoid making the same mistakes in your garden.

This time, I am showing you a picture from a landscape consult that I did a few years ago.

This featured “Landscape No-No”  is from a consult I did years ago.  The homeowner was very excited to show me his newly landscaped front yard.

However, I did find a few problems, including this one along the pathway to his entry…

Torch Glow Bougainvillea

Torch Glow Bougainvillea

Can you tell what is wrong?

Hint: The plant in the middle is a ‘Torch Glow’ Bougainvillea.

I would love to hear your thoughts about what the problem is in the area above.

Please come back for a visit next time, when I will explain why this is a “Landscape No-No” and show you another photo of another problem with this newly landscaped garden.

**************************

I hope you all have a great start to your week!

I have been looking forward to writing this next installment because I am passionate about garden design.  I had planned to post this yesterday, but, as sometimes happens, ‘life’ interrupted.  

Yesterday, we received a call from the school principal (never a good thing).  In fact, I would love to hear from someone who has ever received a call from their school principal and gotten good news 😉  Okay, back to my story…..our son Kai had hurt his leg on the playground.  The school nurse was with him and they were calling the paramedics.  We rushed out to the playground at the school and got there when the fire department paramedics did.  

For those of you who have followed my blog for a while, you may be familiar with Kai and his many surgeries on his hip, legs and feet.  If you like, you can read more about them here.  Well, Kai had hurt his shin and was in a lot of pain.  After the many surgeries that he has been through, he is a pretty tough kid.  The paramedics splinted his leg and offered to call the ambulance.  But, my husband said that we could easily take him to the hospital.

The doctors checked him out thoroughly and took x-rays.  Thankfully, they could not see any break.  The only thing that saved his leg from being broken, was the steel plate that Kai has on his shin bone from a previous surgery.  He does have a contusion on his bone and so far, cannot walk.  So, Kai is home as we speak, watching one of his favorite Star Wars movies.  We are consulting with his orthopedist tomorrow.

You may be wondering how he hurt his leg.  Well, when I asked him how he hurt it, he told me that he was chasing girls and ran into the bottom of the curly slide with his leg.  So, I do hope he learned his lesson and stops chasing girls 😉

Well, thank you for letting me share our latest ‘life interrupted’ incident.  So, now back to our latest installment of “Curing the Garden Blahs”.  I am really having fun with this series of posts because it is so easy to make your garden more interesting.

Today, let’s discuss where to place plants.  No matter where you live…..in the desert like me or in Alaska like my friend Christine, these are basic design ideas that are applicable to almost every garden.

I like to think of trees and plants as a wonderful way to ‘window dress’ your home and increase interest.  For example, are there any homes in your neighborhood where the front garden looks better then the others?  It really isn’t hard to achieve this for yourself and you don’t have to spend lots of time on your hands and knees gardening to achieve it.

 garden design

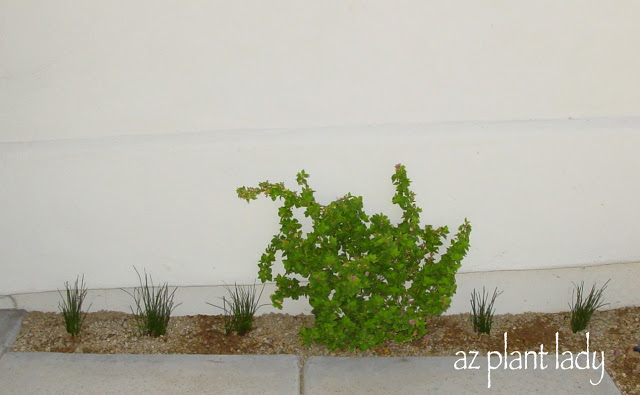
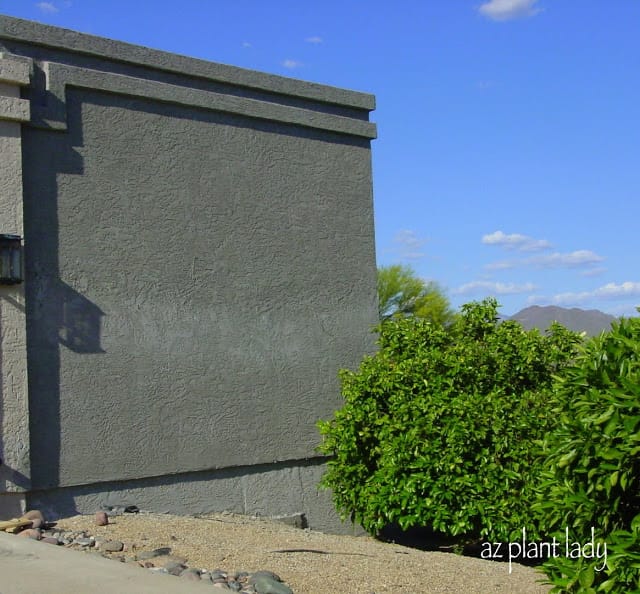
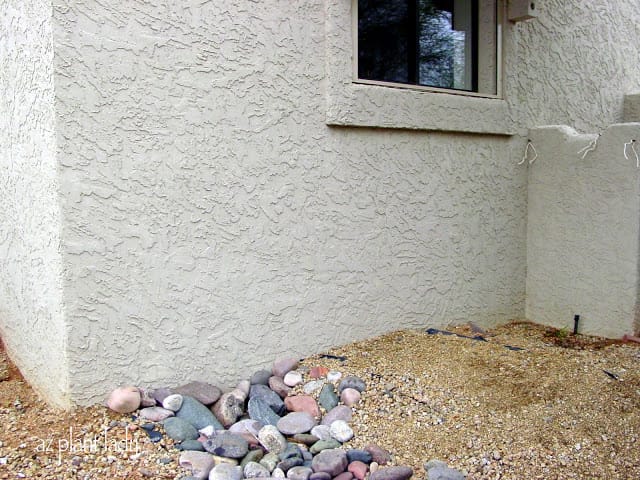
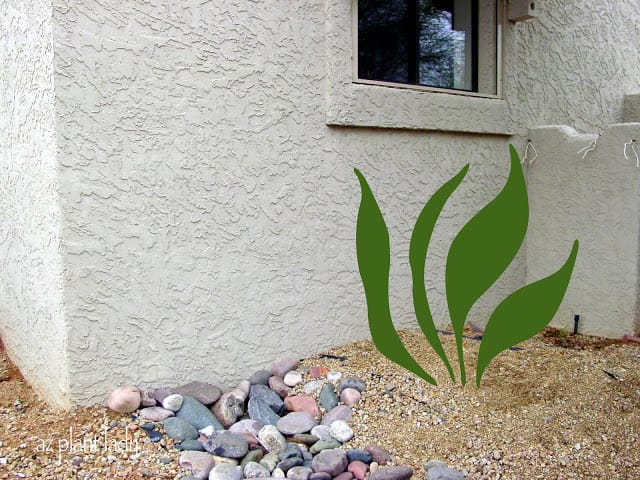
This bare wall beside the garage sticks out because it is so barren.  Many people tend to ignore this part of their house.  

 garden design

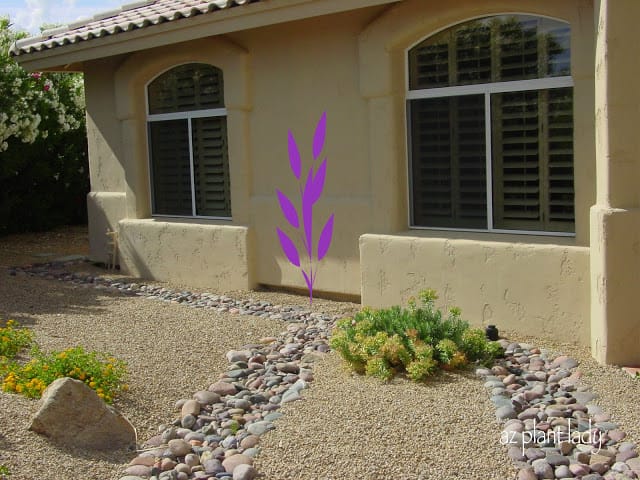
Like my ‘virtual’ plant?  Seriously, by placing a tall shrub or vine in this area, you immediately dress up your home and create interest.  If you add a plant that has unusually colored foliage or pretty flowers, that is even better.

 garden design

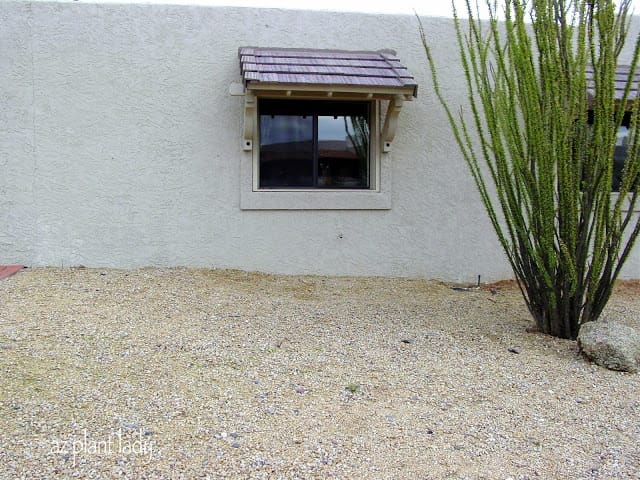
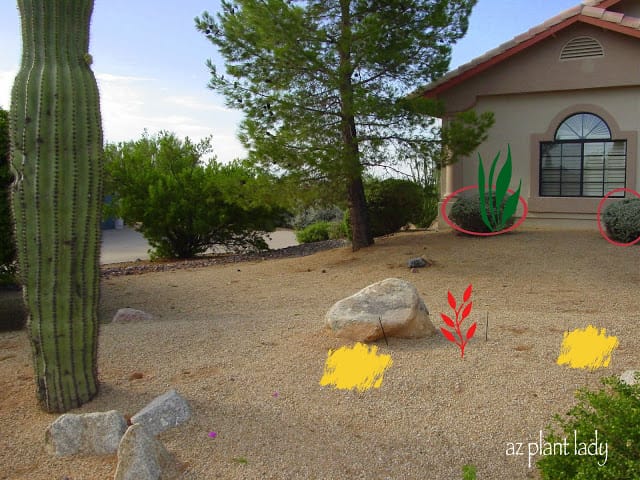
Here is another example of a bare wall next to a window.  This is actually the side of a house that is visible to the street.  While the Ocotillo is very nice, there is still something missing.

 garden design

Similar to the side of the garage door, add a tall shrub or vine and then add shrubs underneath the window.  **When planting shrubs, I always use shrubs that flower at least for part of the year to increase interest.

 garden design

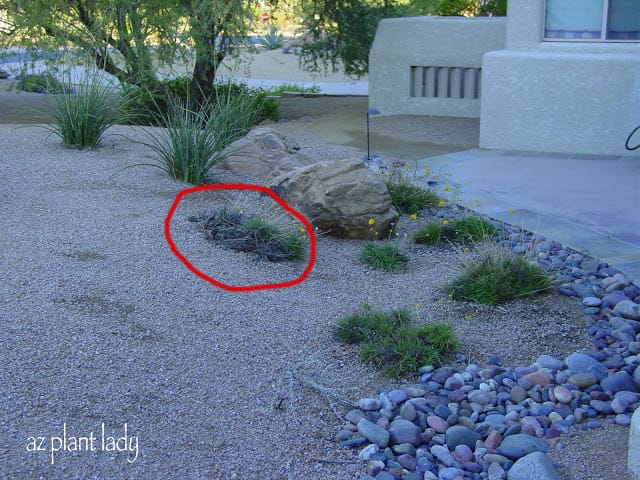
Here is a landscape that has lost some plants due to age or neglect and were never replaced.  You can see the empty drip irrigation emitter sticking up.  This is one of the main reasons for dull and drab landscapes…..homeowners do not replace plants.  This may be news to some of you, but plants do not live forever – you do need to replace them from time to time 🙂

 garden design

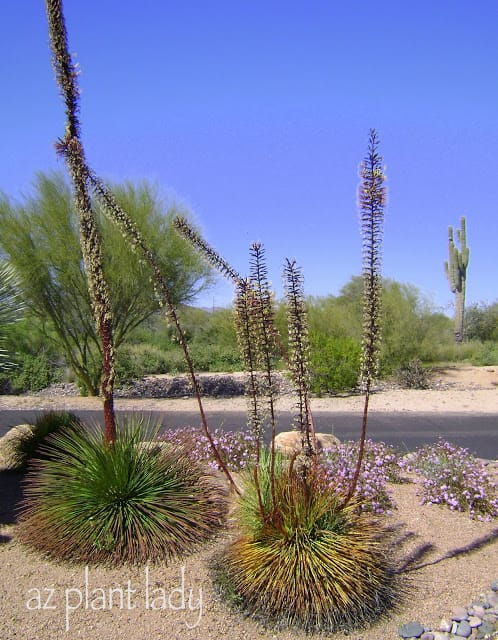
By adding two more Red Yucca (Hesperaloe parviflora) to match the existing one and adding three flowering groundcovers around the boulder, you immediately transform this ‘blah’ landscape.

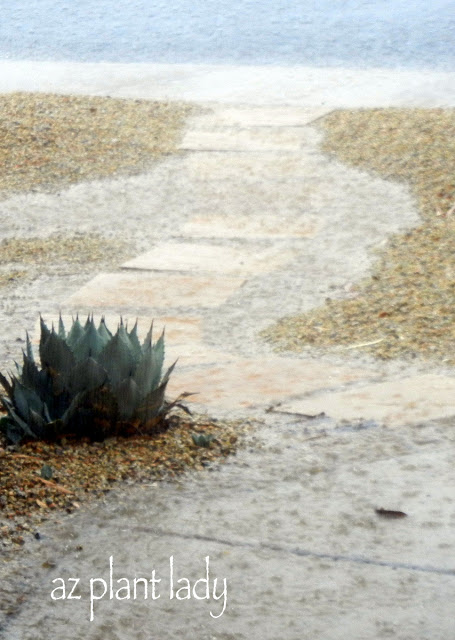
*Boulders are meant to have plants growing next to them.  The contrasting texture of the boulder and plants are visually appealing…..so if you have an empty boulder – plant something next to it.  Do not plant something that will grow too large and overwhelm the boulder, but rather a groundcover or small succulent, such as a smaller Agave.

Low walls are also a good place to plant as well.  The shadows from the plants reflected onto the wall attract the eye.  Use plants that will not overgrow the low wall.

 garden design

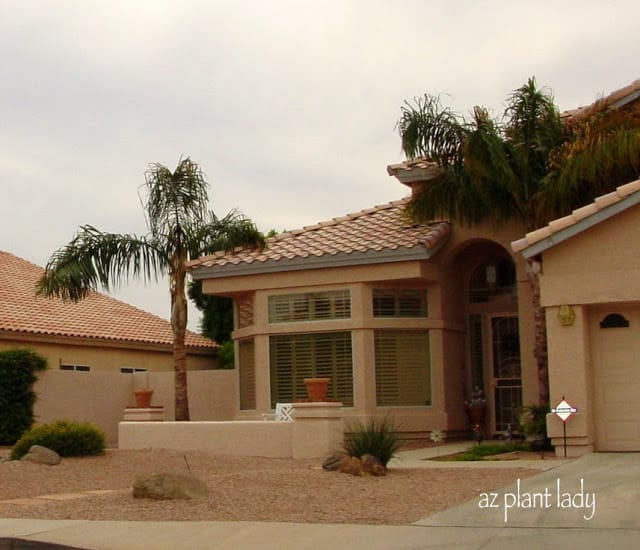
One of the most common bare areas that I see is in the entry way.  When you visualize your front garden, you want the eye to be attracted towards the front door, which is the focal point of your home.  Plants, placed in the right place can guide the eye to the front door. 

 garden design

A little texture from spiky plants and color from flowering plants can do a lot to focus attention on your entry.  Plants in containers are also a great way to achieve the same thing.

 garden design

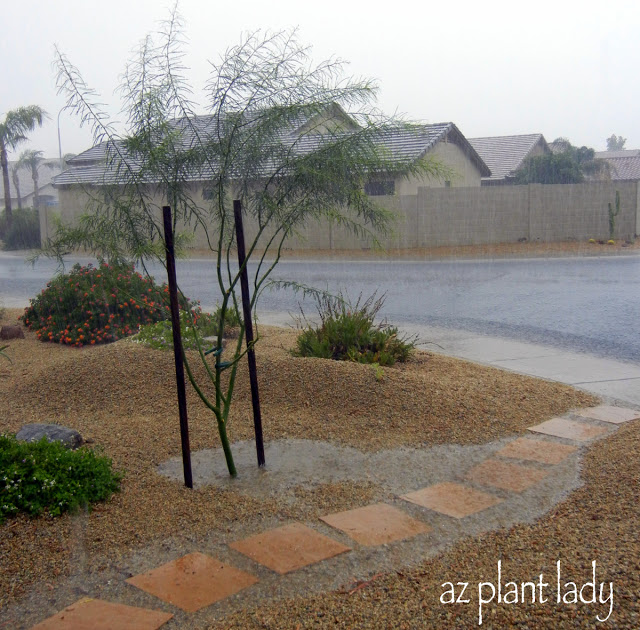
Now this photo had good things and bad things in it.  I do love the design….boulders, flowering perennials and spiky Red Yucca look great together.  They are placed by the driveway, which is also a good place to place plants.  However, about half of the Angelita Daisies should be replaced.

 garden design

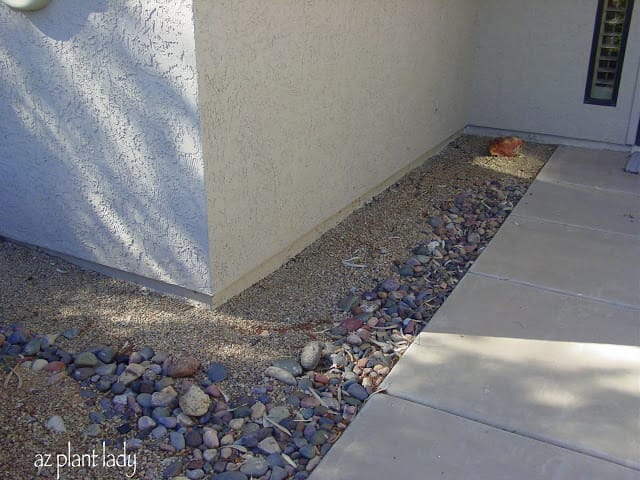
One word describes this area….boring.  This empty corner is created by the low wall hiding the air-conditioning unit.  Empty corners just cry out for some help.

 garden design

A single shrub would fill this area nicely.  It is easy to ‘hide’ your air-conditioner, even if it is not concealed behind a low wall.  Simply add some shrubs about 3 ft away from the unit itself to help hide it.  **This also works great for pool equipment that does not have a wall surrounding it.

Where to Place Plants

Many landscapes started out from a good design, but again, plants were not replaced as they died.  Look around your neighborhood and see how many empty drip-emitters you can see.

The two shrubs flanking the window are also old and woody.  The window is quite decorative and meant to be a focal point, so I do not recommend planting shrubs beneath it.

Where to Place Plants

Add tall growing shrubs or vines on either side of the window after removing the two old shrubs.

Add two additional Gold Lantana to match the one in the foreground and add a taller accent plant by the boulder.

Where to Place Plants

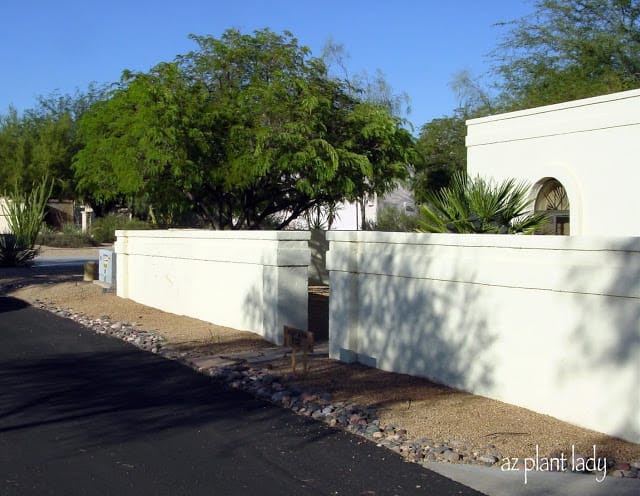
The interior garden behind this wall is beautiful and lovingly cared for.  But you would never know that by looking at the bare front area.

Where to Place Plants

I recommend that the client add spiky accent plants with small, colorful shrubs.  

Where to Place Plants

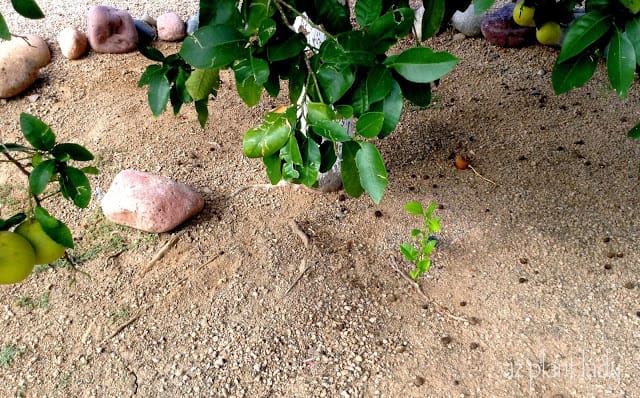
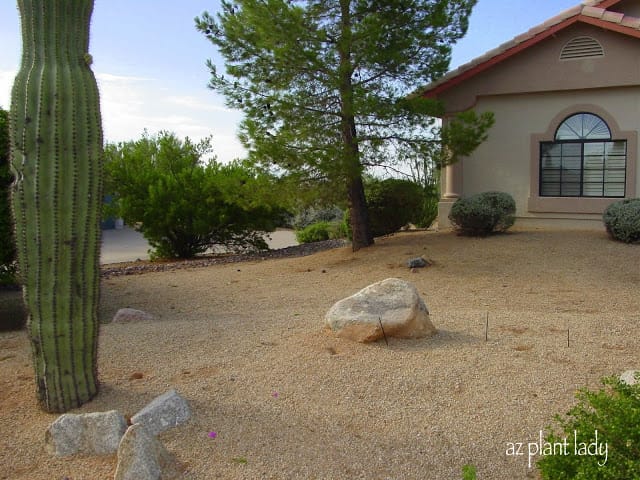
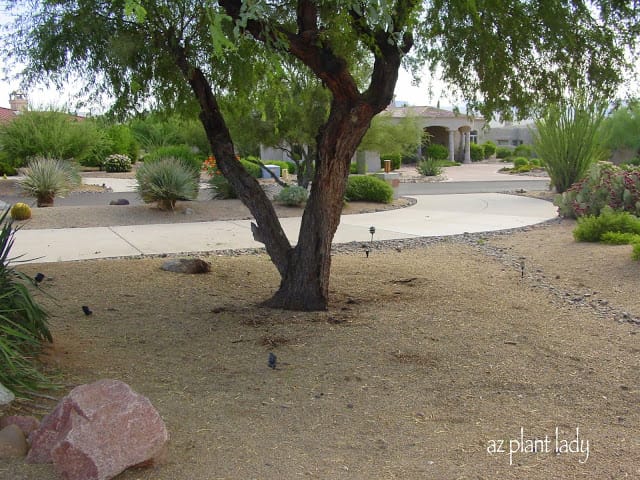
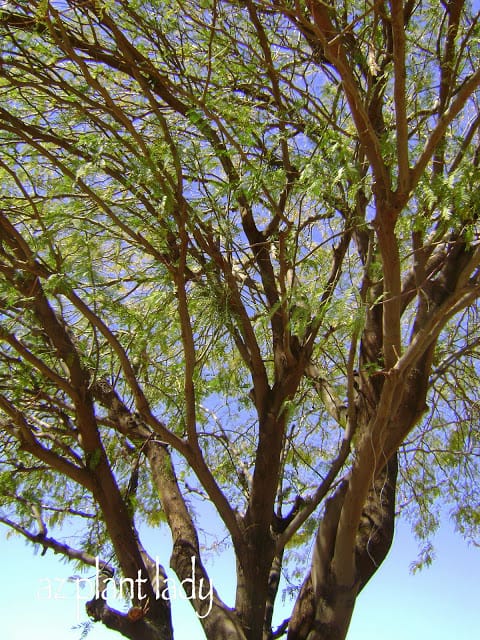
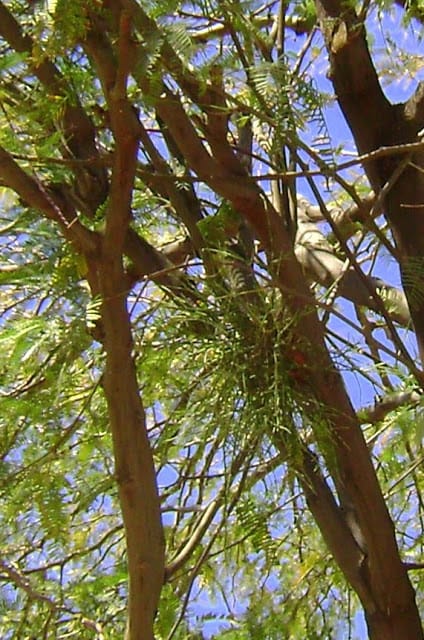
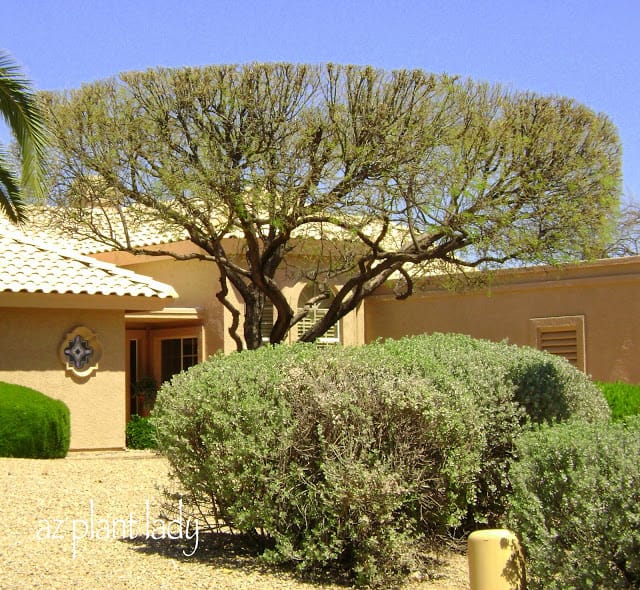
As trees begin to grow larger and shady areas begin to expand, plants that were growing beneath can sometimes fail to thrive in their new shady situation.  So, homeowners pull them out and think that they are doomed to have this large bare area beneath their trees.

Where to Place Plants

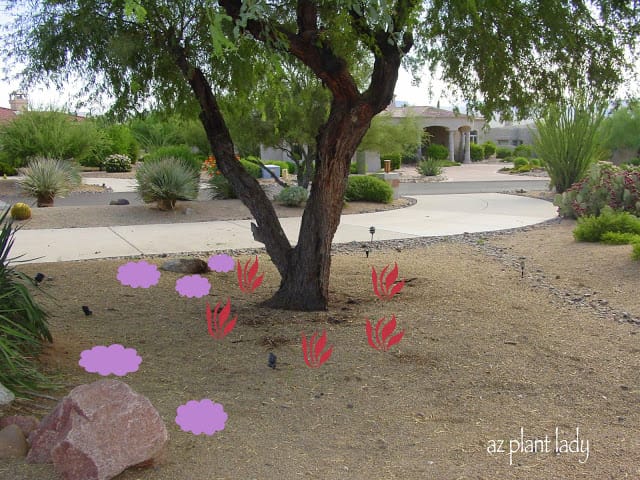
Many arid-adapted trees such as this Mesquite, produce a filtered shade and many plants thrive in this type of light.  Planting around the tree, at least 3 – 4 ft away from the trunk looks wonderful.  I also added flowering groundcovers around the boulders for additional color and interest.

Where to Place Plants

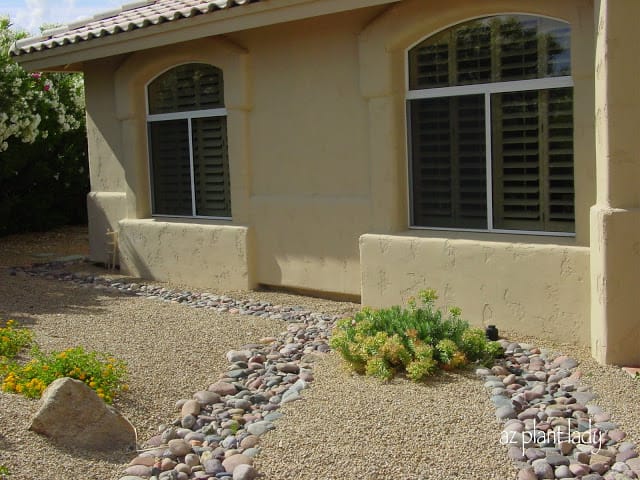
Again, these windows are meant to be a focal point and not to have shrubs planted underneath that would grow tall and cover the bottom half.  

Where to Place Plants

By placing a tall shrub between the windows, you actually draw attention to the architectural detail of the windows. 

SOME ADDITIONAL GUIDELINES FOR PLANT PLACEMENT:

Plant in groups of 3 or 5 or more using odd numbers, which is more pleasing to the eye then when using even numbers.

*I’m not sure why that is, but it is true.

Know what the mature size of the plant will be and allow plenty of room for it to grow to it’s full size.

Try to avoid planting trees in front of windows….try to place the tree to the side of the window so that as it grows, it frames the window and your view.  Otherwise, when you look out of your window, all you see is a tree trunk in the center of your vision.  The same thing applies when you are looking at your house from the outside….a tree placed in the center of your view to the window, disrupts the architectural line of your house, since windows are meant to be a focal point.

Replace plants when they die.

Concentrate on adding plants in the following areas….

The entry

Each corner next to the driveway

Beside the garage door

Bare walls

Along pathways

Besides boulders

You do not have to have plants growing everywhere in your garden, but by concentrating on a few areas, you will enjoy a beautiful garden that makes your house look even better.  Don’t underestimate the power of curb appeal.

Our next subject will cover what types of plants to choose.  We will discuss what colors go well together, what are accent plants and why you should include them in your garden, plant size and more.

I hope you will join me 🙂

Each time I go on a landscape consult, it is an adventure.  I never know what to expect. Will there be serious problems with any of the trees and plants?  Or will my help be needed to re-design the landscape, adjust the irrigation schedule or help people learn how to maintain their plants?  Well, life is full of surprises. 

Of course, every time I go on a consult, I always bring my camera.  I am always looking for examples of beautiful plants and problems to photograph.  I then share many of them with you.

Yesterday, was a gorgeous spring day.  The high was 78 degrees and I actually had two consults scheduled, within two miles of each other.  My first client had just bought a new home and wanted help identifying her plants and how to take care of them.  She also had inherited some sick citrus trees and needed help in how to help them.

First the good things that I saw….

white flower

I was greeted by the front entry by this spectacular white flower.  Argentine Giant (Trichocereus candicans), is a cactus that is highly desired.  It produces flowers a few times during spring and summer months.  This particular cactus was absolutely covered in these large blossoms.

identifying plants

Nearby the Argentine Giant, was the smaller Claret Cup Cactus (Echinocereus triglochidiatus) awash in bright orange blooms.

identifying plants

An unusually shaped flowering Twin Flower Agave (Agave geminiflora) caught my eye.  Normally, they produce a single flowering stalk like the one on the left.  However, the one on the right had seven smaller stalks.  I love seeing examples of plants that are doing something out of the ordinary 🙂

Now for the bad….

identifying plants

This is one of the four sickly citrus trees that I was asked to see.  The diagnosis was relatively easy.  Lack of water and nutrient deficiency.  Both problems will be solved by enlarging the basin underneath the tree so that it extends out to where the branches end.  As the tree grows, so must the basin since a trees roots extend outwards where the branches extend.  A new watering schedule and making sure that the water penetrates to 3 ft. in depth should do much to help these trees.

Nutrient deficiencies are corrected by fertilizing citrus trees three times a year – in Feb/Mar, May and September, using either a synthetic or organic fertilizer specially formulated for citrus which contains not only nitrogen, but also micronutrients that are often deficient in our soils.  

More information on citrus care, irrigation and fertilization can be found here.

identifying plants

As I walked the landscape with the homeowner, we started looking at the trees that she had inherited with her new home.  I quickly noticed something very bad.  The previous homeowners had never removed the stake and cables from their tree when it was young.  

The tree ended up growing around the wire and there is no way to remove it now without seriously damaging the tree.  Usually, when wires are left on the tree, they gradually cut off the nutrients to the tree as the “veins” of the tree are located directly underneath the bark.  This usually results in the death of the tree.  However, this Mesquite tree appears to have survived and regrown it’s vascular (veins) system around the wire.  The tree is 11 years old and is the exception in terms of surviving this type of treatment.  

identifying plants

**If your trees are staked, PLEASE make sure to check your wires/cables to make sure that this does not happen to you.  Trees are not to be staked forever, only the first 1 – 2 years after planting.

identifying plants

Now the next bad thing I observed was not immediately obvious, but as I began to focus my gaze upwards to evaluate the trees, I saw a few clumps of mistletoe (Phoradendron californicum) growing in the tree.  Now, this is not the same kind of leafy mistletoe that is often seen at Christmas.  But it is a parasite that will, over time, cause a decline in the tree and stress the tree.  This makes the tree more susceptible to disease, insect infestations and other stresses. 

As an arborist, I have taken part in discussions regarding whether or not you should leave mistletoe in trees.  Mistletoe is part of the natural desert and can be seen growing in trees in the wild. Mistletoe itself will not kill a tree, but does stress the tree and leaves it vulnerable to disease, insects and environmental stresses that will kill the tree eventually.  

 In managed landscape areas I have always had mistletoe removed.  In my opinion, trees do not need any additional stress and the trees are part of a larger landscape design and aesthetics are important.  

I also recommend that homeowners also remove the mistletoe from their trees.  Not only will it help their tree, but will help keep the mistletoe from spreading to their neighbor’s trees.  Mistletoe is spread when birds eat the berries it produces and then they ‘poop’ them out on another tree’s branch and the seed germinates and starts to infect the branch it landed on.

identifying plants

Small clumps of mistletoe are not always obvious, but once you know what to look for, you will easily be able to spot it.  I recommend looking at your tree in the winter, when there are fewer leaves to hide the mistletoe.

There are two ways to remove mistletoe.  To completely get rid of it, you need to cut the branch that it occurs on at least 12″ below where the mistletoe begins.  In most cases, this will completely get rid of the mistletoe.  This works best with smaller branches.  However, if you have a very large branch that is infected, it may not be feasible to remove the branch.  In this case, you can prune the mistletoe off – just take your gloved hand and brush them off of the branch.  It is really that easy.  Doing this will not get rid of the mistletoe, but help to control it.  You will have to continue to do this periodically to keep the mistletoe from becoming larger and spreading.

identifying plants

Now on to my second client of the day.  Overall, is landscape was in good shape.  His citrus trees were healthy as were the rest of his plants.  But, the majority of his concerns were in regards to his irrigation system.  His mature Palo Brea tree (Parkinsonia praecox), pictured above, still had the irrigation emitters positioned by the trunk of the tree.  The same place that they had been place 8 years ago.  The problem is, the roots have now moved.

I explained to him that as a tree grows, so do the roots.  They grow outwards, toward the edge of where the branches extend.  And so as the tree grows, the emitters need to be moved and places around the tree where the branches end.  For this tree, three 2 (gph) emitters evenly spaced around the tree will work just fine.

Well, I had a very fulfilling day working with some very nice people.  I just love help people learn how to care for their trees and plants and spend time outdoors and admiring the beauty in people’s gardens.

As I was leaving, I saw something very ugly….

 Mesquite tree

This homeowner had ‘topped’ his Mesquite tree.  Now, I am not sure why they had this done.  I could tell that from looking at the branches, that it was not the first time it had been ‘topped’.

Now any arborist will tell you that ‘topping’ is bad and there are a number of reasons why.  I will address it further in another post, but will leave you with these few reasons NOT to top your trees:

-It causes the tree to grow more quickly to replace the leaves lost, therefore increasing the amount of pruning needed.

-The new branches will not be firmly attached and will be more likely to break.

-Topping stresses the tree, making it susceptible to disease, insects and environmental stresses.

-If those reasons are not enough, then maybe this one will be….IT IS UGLY.

*For more information on the damage ‘topping’ trees does, you can visit The International Society of Arboriculture.

Thank you for hanging in there with me…I realize this was a long post, but there was so much to ‘talk’ about from my visits yesterday.  I hope you enjoyed the beauty of the flowers and that maybe I have helped people avoid some of the problems that I have highlighted.

“Scary” Pruning Practices and the Unfortunate Results