A Tale of New Beginnings: The Mexican Fence Post Cactus and Rachele’s Journey
This is a story about new beginnings – one for a new cactus and another beginning for my second-oldest daughter, Rachele.
Believe me when I say that both stories are connected in a way.
The Connection Between a Mexican Fence Post Cactus and a Daughter’s Departure
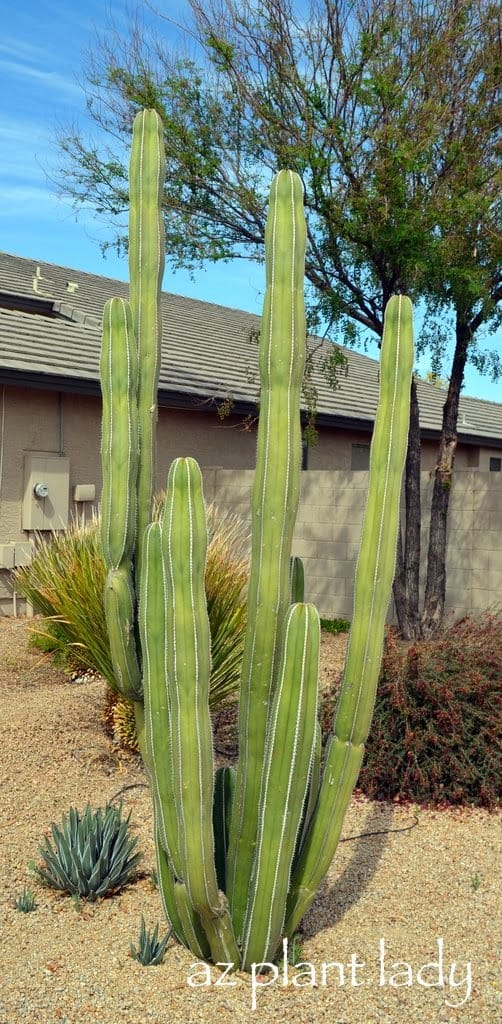
This cactus, above, is a Mexican Fence Post (Pachycereus marinatus), which has been happily growing in my front garden.
What may not be initially obvious is that 11 years ago, I started this cactus from a 2 ft. piece of one (called a ‘cutting’) given to me by a client from their large Mexican Fence Post cactus.
Well, exactly 1 year ago, I repeated the favor for our neighbors.
Sharing the Beauty: Providing a Piece of the Mexican Fence Post Cactus to Neighbors
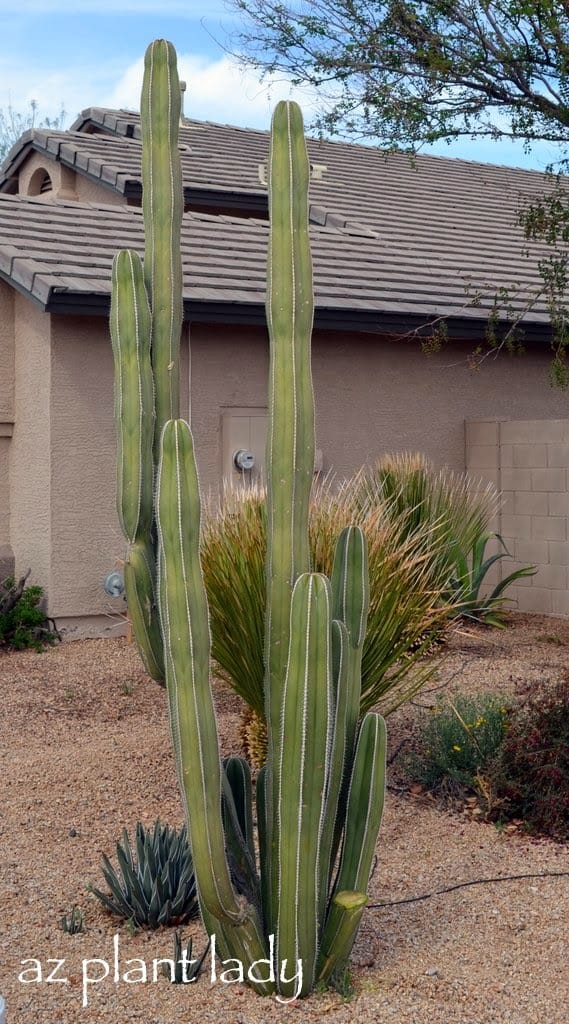
Look carefully at the photo above and compare it with the first one. Can you see where we cut off a piece of the cactus?
Our neighbors had recently re-landscaped their front yard and wanted a cactus like ours. Of course, they knew that they would have to start out with a much smaller one – but they were unprepared for how expensive it would be to buy one at the nursery.
Our cactus had been growing so well, we decided to offer them a piece (cutting) off of our Mexican Fence Post. So, my husband, daughter and I gathered together to take a cutting from our cactus.
Here is how we did it…
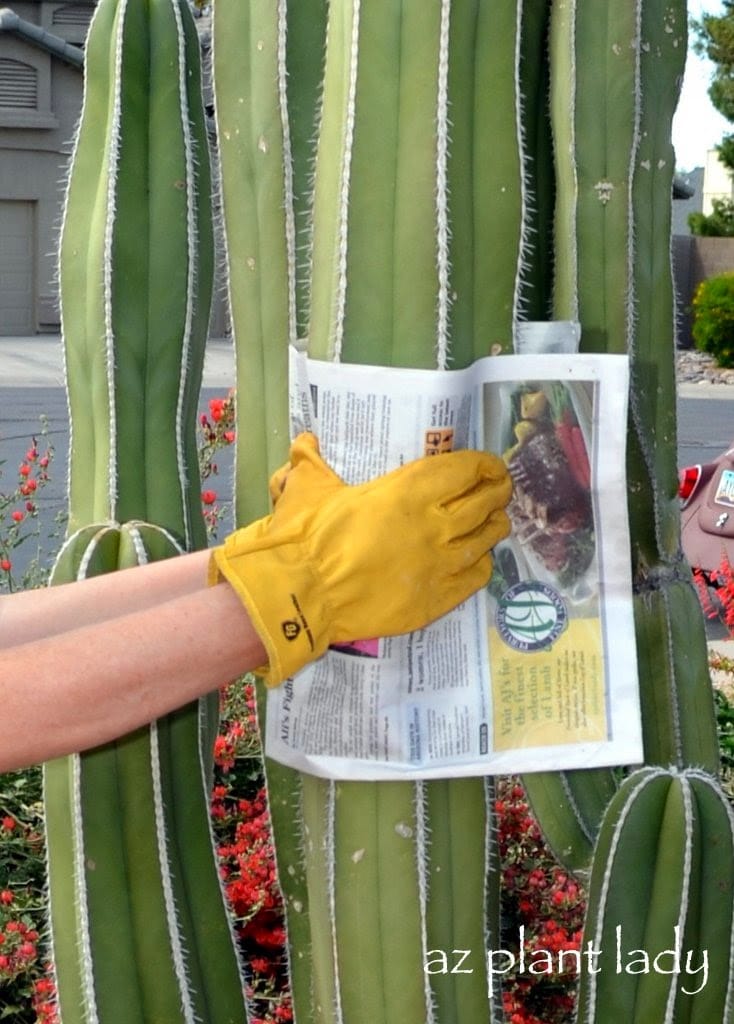
How to Properly Take a Cutting from a Cactus
We selected a good-sized length of cactus and while I held onto it, my husband took a pruning saw and started sawing it off at the bottom.
Multiple layers of newspaper and gloves are helpful to use to grab onto cacti with short thorns. For cacti with longer thorns, you can use carpet remnants. When you cut out a piece of cactus, it will be much heavier then you are expecting – so be prepared.
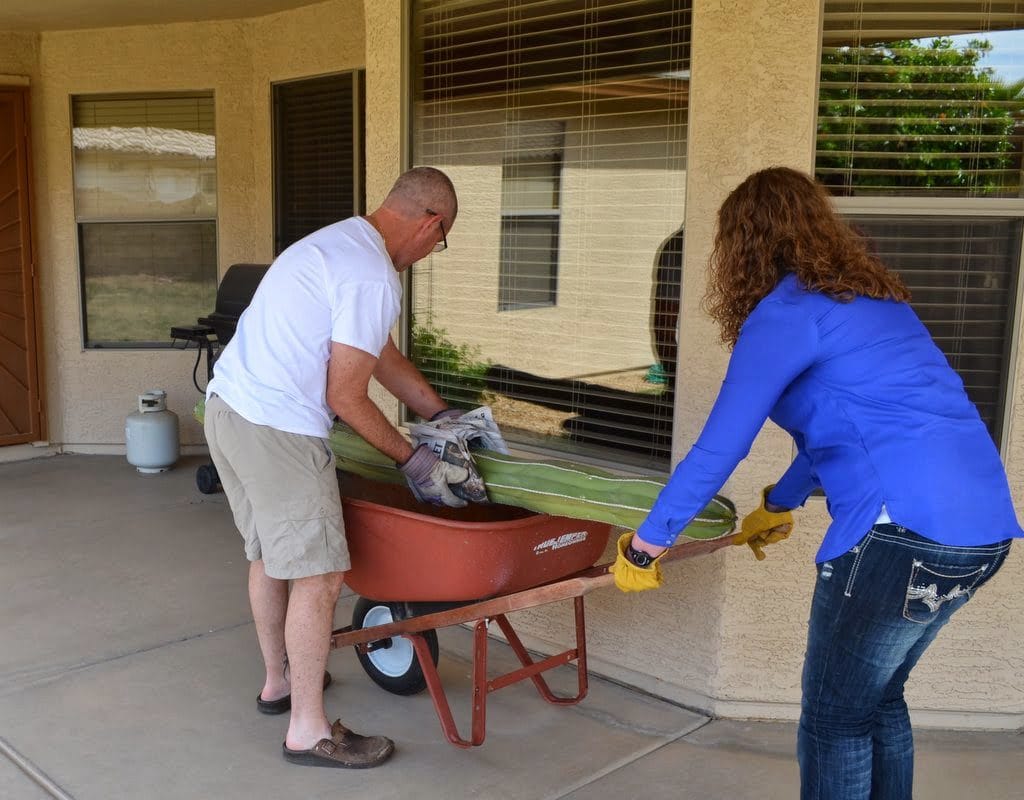
My husband and daughter wheeled the cactus cutting over to our neighbor’s house using our wheelbarrow.
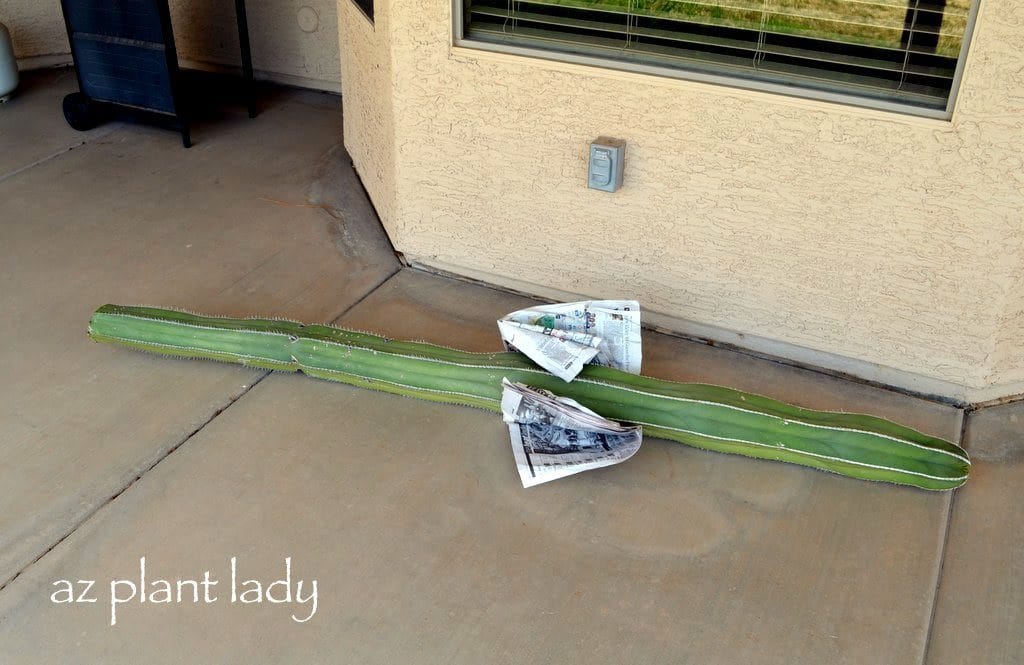
Preparing the Cactus Cutting for Planting
We then placed the cutting in a dry, shady spot for 2 weeks in order to allow the cut site to ‘callus’ over, which would protect the cacti from rotting when it is replanted.
*Exactly 3 days after helping us with the cactus cutting, my daughter, Rachele, left for the Navy and basic training. It was a sad goodbye for us, but a new beginning for her.
After 2 weeks had passed, the new cactus was planted in its new location with a wooden stake for support.
No water was applied for the first month after planting, in order to make sure that the entire cut end had callused over.
One month after planting, the cactus was watered deeply, monthly, until November.

*Whenever I looked at the newly-planted cactus, thoughts of my daughter and how she was doing in her new Navy life always crossed my mind.
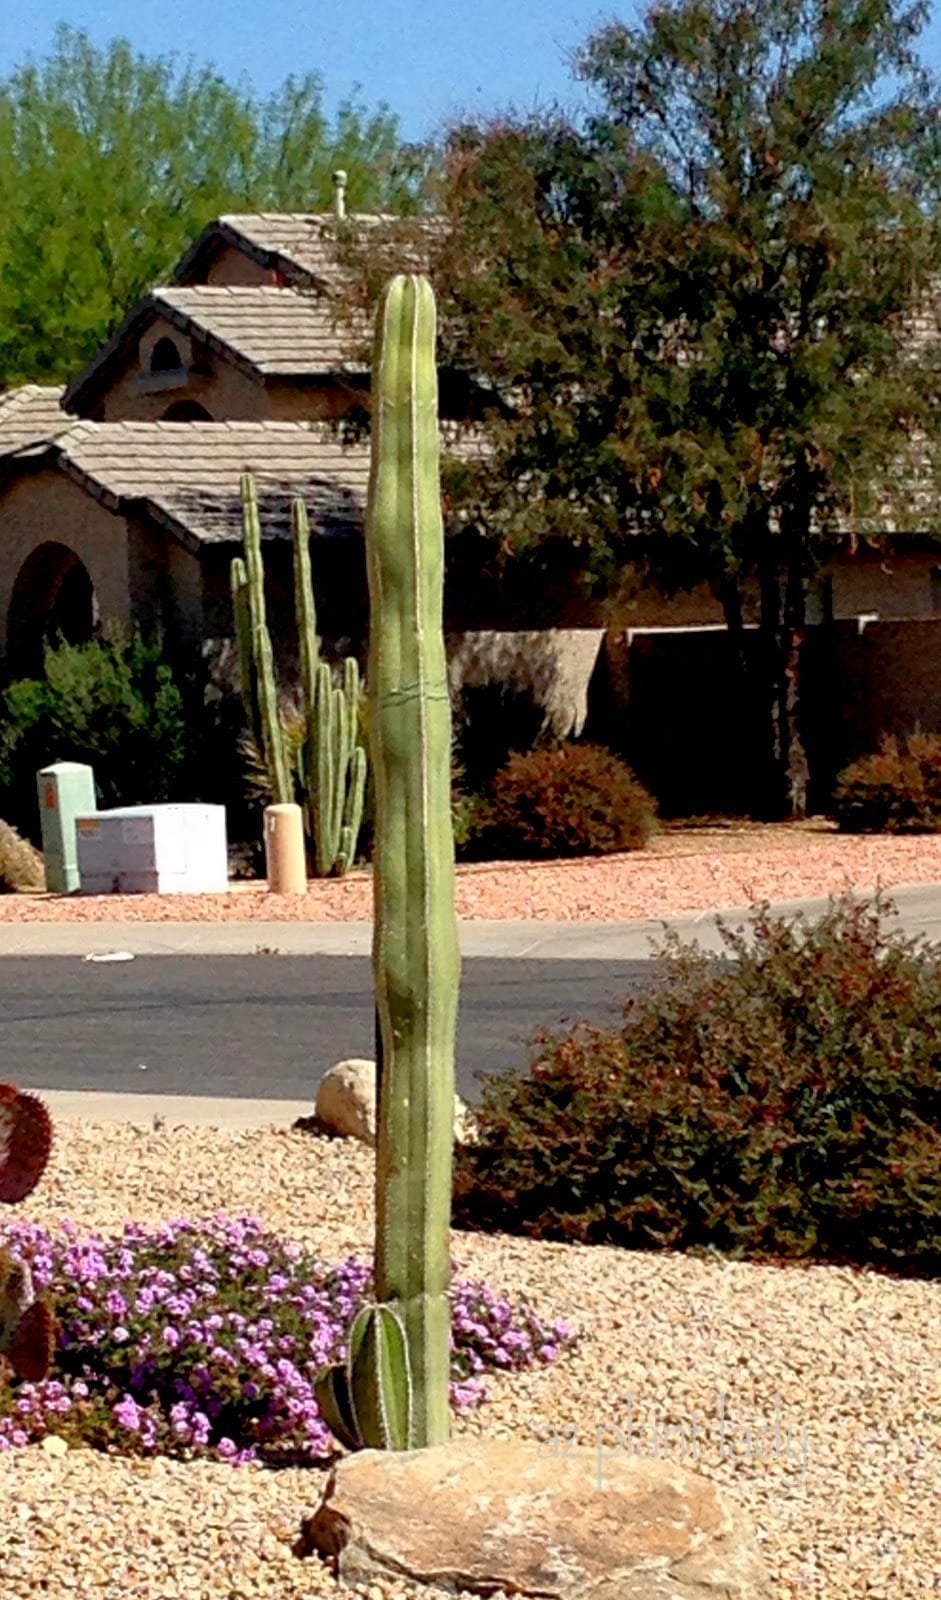
One year later, the new cutting is doing so well and has even grown two new sections.
You can see the parent cactus in the background.
Now, I may not be located as closely to my daughter as these two cacti, but like the new cactus, she is growing and doing so well in her new career with the Navy. We are so proud of her!
You can read more about Rachele’s adventures, here.
How to Propagate Cactus Via Cuttings
Propagating cactus via cuttings can be done with many species of cacti. Here are a few guidelines to follow for success:
1. Propagate cactus during the warm season, when the threat of frost is over.
2. Make the cut at the joint where the segment attaches to the parent plant. For prickly pear cacti, you can cut a segment that consists of 1 – 3 pads.
3. Place the new cutting in a dry, shady spot for 2 weeks to allow the cut site to ‘callus’, which protects the cacti from rot when it is replanted.
4. Plant your new cactus in full sun with well-drained soil.
5. Don’t water for a month after planting. Then water deeply, monthly until fall.
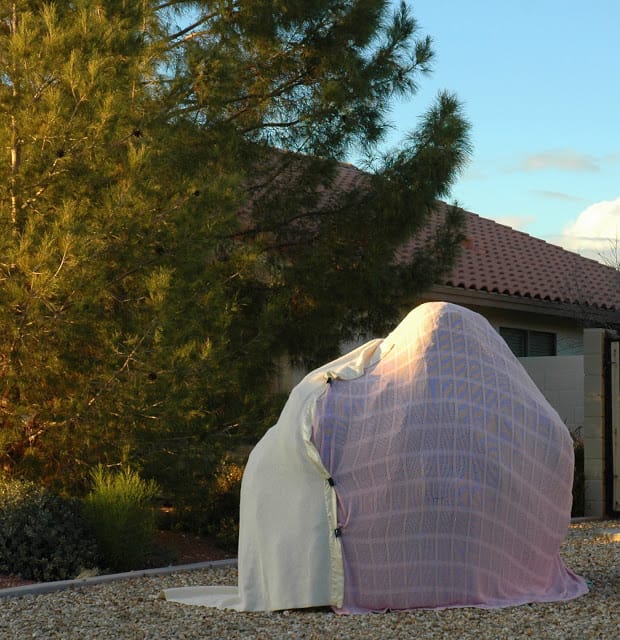
6. Provide temporary shade for the first summer. You can do this by placing a plastic patio chair over the top or using shade cloth.
Soon, you will begin to see new growth on your cactus.