This past week, I have been sharing with you my latest landscape project that is located next to a golf course.

I shared with you the tree and shrubs that I had chosen and not it’s time to show you what perennials and succulents that will be going in.

*All the following perennials are drought tolerant and require full sun with well-drained soil.

Perennials and Succulents

Perennials and Succulents

Damianita(Chrysactinia mexicana) is a fabulous flowering ground cover.

It thrives in locations with hot, reflected heat and handles cold temperatures (down to 0 degrees F) just as well.

In spring and again in fall, masses of bright yellow flowers cover this low-growing perennial.  When not in bloom, it has dark green needle-like foliage.

Newly planted landscape with Purple Trailing Lantana, Parry's Penstemon, Desert Spoon, Palo Blanco trees and Damianita

Newly planted landscape with Purple Trailing Lantana, Parry’s Penstemon, Desert Spoon, Palo Blanco trees and Damianita.

I have used Damianita in other landscapes that I have designed in the past (shown above), with great results.

*The trick to keeping Damianita looking great is to shear it back in late spring.

Perennials and Succulents

Perennials and Succulents

Firecracker Penstemon(Penstemon eatoni) is my favorite flowering perennial.  The one pictured above, is in my own garden.

I am often asked about this brilliantly colored plant in spring when it is in bloom.

One of the reasons that I love this Penstemon is that is begins flowering in winter, in zone 9b and continues on into spring.  In cooler zones, it begins flowering in spring and lasts into summer.  It handles cold temperatures easily and is hardy to zone 5.

Hummingbirds find the flowers irresistible.  To prolong bloom, prune off the flowering stalks once the flowers begin to fade and you will be rewarded with another flush of bloom.

Perennials and Succulents

Perennials and Succulents

Angelita Daisies(Tetraneuris acaulis formerly, Hymenoxys acaulis) are what you could call one of my ‘signature’ plants, because I use them often, like the landscape I designed, above.

I find them invaluable in the landscape because they flower off and on throughout the year, with the heaviest bloom occurring in spring.

Perennials and Succulents

They easily handle full sun and reflected heat and look great in pots.  I like to plant them next to boulders in groups of 3 or 5 for best effect.   Cold temperatures are no problem either because they are hardy to zone 5.

Maintenance is easy – simply shear the flowers every 8 weeks or so.

Now, so far I have shown you the trees, shrubs and perennials planned for this area.  But, I want to add succulent plants, which are also used as accent plants.  These types of plants add texture to the landscape because their unique shapes contrast well with the softer, more rounded shapes of the shrubs and perennials.

Perennials and Succulents

Weber’s Agave(Agave weberi) is a large agave that can grow 5 to 6 ft. high and up to 8 ft. wide.

In large landscape areas, I don’t want to use small succulents because it will be hard to see them unless you mass a lot of them together.  My budget won’t allow for that with this project.

I love how this large agave can stand up on its own.  I like to plant flowering ground covers underneath them.

Plant in full sun or light shade.  Weber’s Agave is hardy to zone 7.  *Agave need supplemental water in our climate to look their best.  I recommend watering twice a month in summer and once a month in spring and fall.  

Purple Prickly Pear

You can’t get much more unique in shape and coloring then Purple Prickly Pear(Opuntia santa-rita).

I love the gray pads with shades of purple.

The purple color deepens in cold temperatures or in times of drought.  

Purple Prickly Pear

In spring, yellow flowers cover this beautiful cactus.

Hardy to zone 8, plant in full sun and well-drained soil.

**If you notice white cottony masses on your prickly pear, simply spray it off with a hose.  They are caused by an insect.

Okay, are you ready for my last plant selection for this new project?

Red Yucca(Hesperaloe parviflora)

It is hard to find a succulent that works harder then Red Yucca(Hesperaloe parviflora).  Despite their common name, they aren’t a yucca.

The lower, succulent leaves resemble ornamental grasses.  In spring coral-colored flowers are borne above the grass-like foliage.

Perennials and Succulents

Hardy to zone 7, Red Yucca thrives in full sun.  While drought-tolerant, they do best with supplemental water.

Maintenance is easy – just remove the flowering stalks as they begin to fade.

*There is a common mistake that landscapers often make with this succulent plant.  To make sure this doesn’t happen to you, check out my previous post, “Do This NOT That”.

The last element for my newest project isn’t a plant at all, but it adds height and texture to the landscape without requiring any water or pruning…

Boulders

Boulders!

I will use boulders interspersed throughout this flat area to add height.  The boulders will have either a succulent and/or flowering perennials planted next to them.

Well, I must say that I am excited to get started on this project.  We will wait until this fall for the planting.

I’ll be sure to take you all along as it progresses.

***************************

7 days until my daughter, Rachele, comes home from the Navy!!!  

If someone asked you what your favorite food was, what would you tell them?

My daughter, Gracie, would answer by saying “anything chocolate”.

My husband would say “pizza”.

But my favorite food is a warm slice of sourdough bread with melted butter.  My idea of heaven is being surrounded with loaves of French bread and plenty of Irish butter without the carbs or calories 😉

Because I like to make things using produce from my garden, I decided to try making herb butter using the herbs that I grew and dried earlier this summer.

heavy whipping cream

Just for fun, I decided to make my own butter using some leftover heavy whipping cream (did you know that if you beat heavy whipping cream long enough that you will get butter)?

When we were kids, my mom would teach us how to make butter this way using her antique butter churn.  It was a lot of work, but it was fun.

Most of the time, I just use regular butter to make herb butter.

making your own herb butter

I beat the whip cream until it became thick and continued until it looked like this…

making your own herb butter

Your butter will start to solidify with a little buttermilk liquid left.

making your own herb butter

Drain the buttermilk and you are left with butter!  You can salt it to your taste at this point.

1. You will need a 1/2 cup of softened butter. (Store bought works just as well as butter you made yourself).

2. Add a 1/2 teaspoon of your favorite herb.  Dried basil, chives, dill, oregano, rosemary, sage or thyme work well for herb butter.  You can also use a 1/2 teaspoon of poultry or Italian seasoning instead if you like.

3. I also added 2 cloves of minced garlic, also from my garden, to the herb butter.

4. Mix it all together using a rubber spatula.

making your own herb butter

5. Place your butter mixture onto wax paper and begin to form it into a roll by folding over the wax paper and using your hands to mold the herb butter.

making your own herb butter

6. Twist the ends of the wax paper and place your herb butter into a plastic freezer bag.

preserve

7. Freeze until 2 hours before using.  You don’t have to use it all at once.  Simply cut off a few sections at a time.

You can freeze herb butter up to 6 months.

So, get started now and preserve the taste of your summer herbs by making your own herb butter.

Make some for yourself and give some away to friends.

I must say, that I was going to take a picture of my herb butter melting over a hot slice of sourdough bread.

But, I ate it before I remembered to take the picture…

**You can use your own herbs that you have dried or you can use herbs from the grocery store.

To learn how to dry herbs, check out my earlier post – “How to Grow and Dry Your Own Herbs”

What herb(s) would you add to herb butter?

For those of you who have read my blog for a while, you have probably heard me talk about the epidemic of over-pruning. But, that doesn’t mean that you should never prune. The other day, I was driving down a street in our neighborhood when I saw one of my favorite perennials, Angelita Daisies.

The problem was, that they didn’t look very attractive…

Angelita Daisies

They looked like tufts of green grass with dead sticks.

This is what Angelita Daisies should look like…

Angelita Daisies

So, what went wrong with my neighbor’s Angelitas?

They didn’t remove the dead flowers.

Dead-heading doesn’t have to be done to them all the time, but once every 4 – 8 weeks will make a huge difference in their appearance.

In general, dead-heading spent flowers stimulates the plant to produce more flowers.  The reason for this is that the goal of flowers is to produce seed.  So, if dead flowers are allowed to remain on your plants, they figure that they have done their job and will stop flowering.

Of course, if you want to collect seeds from some of your favorite plants, then allow the flowers to dry and then collect the seeds (this doesn’t work that well with hybrids).

But, if you want colorful flowers – then take a couple of minutes a month and clip off the dead flowers.

Would you like to know why Angelita Daisies are one of my favorite perennials?  Check out my post about this wonderful plant…

“A Bright, Sunny, Lesser-Known Plant”

fresh herbs

I love growing herbs in my garden and one of the reasons is that they thrive in our hot, dry summers with minimal fuss.

I must admit that I sometimes forget to make use of my fresh herbs, or sometimes I have more than I need. Some frost-tender herbs like basil don’t grow in winter in my garden – so either I have too much in the summer and almost none at all in winter.

Well, no more! Did you know that you could freeze your fresh herbs so you could use them during the winter months?

I tried this with my chives earlier this summer and it was so easy to do.

Here is how to do it:

Choose your favorite herb…

Chopping herbs

 Wash them.

chopped herbs

Chop them into the desired size.

chopped herbs

I just love chives.

chopped herbs

Place your chopped herbs into an ice cube tray, filling up each one about 3/4 of the way full.

Freezing herbs

Fill up with water, taking care to allow a little room for expansion since water expands when it freezes.

Put in your freezer for a few hours.  

herb cubes

Freezing herbs

Once frozen, pop out your ‘herb cubes’ and put them in a freezer container or plastic container and store in your freezer.

herb cubes

Freezing herbs

Now, whenever you need fresh herbs when you cook, add a few ice cubes to your favorite sauce.  

**You can also freeze herbs into ice cubes using olive oil instead of water, if desired.

Another great way to preserve herbs is to dry them.I talked about how to do this in an earlier post –  “How to Grow and Dry Herbs”

Last month as I was leaving from a landscape consultation, I took some time to drive by a few of the landscapes in the neighborhood.  

I immediately noticed that quite a few people had Olive trees growing in their front yards.

Olive tree

Olive tree

There was a large difference in how some of the homeowners pruned their Olive trees…

Olive tree

Believe it or not, both of the trees pictured above are the same type of Olive tree.

Some people like to formally prune their Olive trees while others like theirs to grow naturally.

Which one would you prefer?

Olive tree

OR

Olive tree

I know which look I prefer and it is much healthier for the tree and much less maintenance.

How about you?

Which style of pruning do you like – formal or natural?

apple harvest

Last week, I shared with you our latest apple harvest.

My kitchen was filled with bags and bags of delicious, crisp, apples from my mother’s apple trees.

(I don’t have any apples from my trees yet because they are too young).

admit that I didn’t get to my apples right away.  So, they sat in my kitchen.  My granddaughter, Lily, had other ideas for the apples.

A Lapful of Apples and Caramel Apple Jam

She would pick out a couple of apples from the bags.

Lily

Lily then brought them over to me.

apples

And, proceeded to put them in my lap.

apples

By the time she was done, I got the message she was trying to tell me….

It was time to start making some treats with my apples.

Caramel Apple Jam

In the past, I would make homemade applesauce.  Once you have tasted homemade, the store-bought just doesn’t cut it.

This year, I was inspired to make something new.

Caramel Apple Jam

How does Caramel Apple Jam sound?

I found this wonderful magazine at the checkout lane (after I had glanced over the tabloids to get my weekly update on celebrity happenings 😉 

preserving fruits and vegetables

The magazine is a Better Homes & Gardens special publication devoted to preserving fruits and vegetables (I have seen it at Walmart and Barnes & Noble).  It is filled with jams, jellies, sauces and so much more.  I dog-eared half the magazine with recipes that I want to try.

Well, I decided the Caramel Apple Jam would be my first recipe to try.

chopping fruit

The hardest part of making fruit jams is peeling and chopping fruit.  So, I finally got smart and asked my 15-year old daughter to help me.  

Chopping apples

Chopping apples went so much more quickly with two people.

Like applesauce, we cooked the apples and then put them through a fruit mill, which removed the peels and ‘mushed’ up the apples to the consistency of applesauce.

caramel

At the same time the apples were cooking, I made the caramel from white sugar.

A Lapful of Apples and Caramel Apple Jam

Then combined the two, put it in jars and processed them with my boiling water canner.

Caramel Apple Jam

The Caramel Apple Jam tasted so good that I made two more batches that are now sitting in my pantry.  It tastes great on toast or served warm over vanilla ice cream.  My husband likes eating it plain out of the jar 😉

Caramel Apple Jam

With my leftover apples, I sliced them up and added flour, sugar, cinnamon and lemon and froze them.  I’ll use them later for apple pies, this fall.

How about you?

What are enjoying eating from your garden this summer?

my sister's chicken

I don’t think that my sister’s chicken has ever seen a caterpillar that large before.

Do you think she will eat it?  Or will the caterpillar emerge victorious?

I’ll let you know at the end of this post…

Those of you who have ever grown tomatoes probably recognize this green, horned caterpillar.

tomato hornworm

If you are not familiar with this green menace, let me introduce you to the ‘tomato hornworm’.

As their name suggests, they love to eat tomatoes and the leaves on their plants.

What you may not know is that also like to eat potato, pepper and eggplants as well.

Tomato hornworms

What is even worse, is that they can be a little hard to find.  With their green color, they blend in well with the tomato plants.  Tomato hornworms also tend to hide underneath the leaves.

At this point you may be wondering if you have these pesky caterpillars on your tomato plants.  How can you tell?

Well, some telltale signs include holes eaten from the leaves and tomatoes.  You may also see little green pellets (caterpillar poop) on the leaves.

The only way to know for certain is to go looking for them.

tomatoes

So what do you do if you find out your tomatoes are infested with these caterpillars and how did they get there in the first place?

Well, tomato hornworms grow up into moths who in turn, lay eggs on the underside of tomato leaves.  The eggs hatch in about a week and the newly emerged caterpillars start eating non-stop for 4 – 6 weeks.

As if that weren’t enough bad news, as the caterpillars grow larger, they eat more.  After about a month on gorging themselves, they drop into the soil where they form a cocoon and transform into a moth who will start the cycle again by laying eggs.

How can you do to get rid of them?

Well, there are a few ways to get rid of them and even help to prevent them in the future.

Tomato hornworm

Tomato hornworm

– The easiest way to get rid of a current infestation of tomato hornworms is to simply pick them off and dunk them into soapy water, which kills them.

– If pulling off large, green caterpillars isn’t your thing, then you can spray them with a product that contains Bt (Bacillus thuringiensis), which infects the stomach of the hornworm, killing it.  Bt is safe for animals and plants.

– There are some wasps that will act as parasites to the caterpillars and lay their eggs directly onto them.  The eggs hatch and the larvae eat the caterpillar.

Now, I don’t know about you, but I’d rather not have to deal with tomato hornworms at all.  So, I am all about prevention.

– In the fall, till the soil around your tomato plants.  This will unearth any cocoons that are attempting to overwinter in the soil, which kills them.  Do this again in spring, before planting new tomato plants.  This is usually 90% effective in getting rid of tomato hornworm cocoons before the moth emerges.

Okay, so back to the chicken, caterpillar face-off…

My sister's chicken Francie is a 'naked-neck' chicken and yes, she is supposed to look that way

My sister’s chicken Francie is a ‘naked-neck’ chicken and yes, she is supposed to look that way 😉

It turns out that the chickens were a little put off by the large size of the caterpillars.  So, they wouldn’t touch them.

That is until… the caterpillars were cut up into smaller pieces.  Then the chickens couldn’t eat them fast enough. (I know, kind of gross, isn’t it?)

**I want to thank my sister, Grace, for her fabulous pictures.  You can find out more about her photography, here.

You may remember that earlier this year, I was excited to try my hand at growing container corn.

I learned about container corn when I was reading through Burpee’s catalog.  They had a hybrid corn called, ‘On Deck’, which was specially bred to grow in containers.  Each stalk was said to produce 2 – 3 ears.  

Well, I like to try new things in the garden and then tell you all about them.  So, I ordered the seeds and got ready.  You can read about how I prepared in my earlier blog post “An Old Whiskey Barrel and Corn Seeds”.

Container Corn

I hand-watered my seeds and was delighted when they quickly sprouted.

I planted a few nasturtiums in the front because I like to grow flowers with my vegetables.

Container Corn

The corn grew quickly, but I started to see a problem…

The corn on the outside was not growing as quickly as those in the middle.  I suspect that maybe that was because the corn in the middle received more water and/or had more room to grow their roots.

The reason it is a problem is because in order to have a good corn crop with ears full of kernels, they need to be adequately pollinated.  This is achieved by having multiple rows of corn.

In this case, I had plenty of corn stalks for pollinating.  The problem was that the outer corn weren’t maturing as quickly as those in the middle.  

Container Corn

As a result, the inner corn stalks started sprouting corn before the outer stalks and there was not enough pollen available.

I did get 3 tiny ears of corn among the center stalks – not worth eating at all.

I was going to pick the ears of corn so that I could show you how small they were.  But…  

Container Corn

The birds got to my container corn first.

I have grown corn in my vegetable gardens every year and have never had a problem with birds eating it.

But, they evidently loved my container corn.

**I watered my container corn diligently, taking care not to over water.  They were planted in good-quality planting mix and given slow-release fertilizer.

While I did like how they looked growing in my whiskey barrel, I am not impressed with their uneven growth and lack of corn.

Needless to say, I won’t be growing container corn anytime soon.  I am planning on planting strawberries in it this next spring though 🙂

I hope you enjoyed the grand tour of my edible garden that I created in my side yard.

Today, I would like to show what is happening in my original vegetable garden…

my edible garden

As you can see, there is a lot growing in this area.

Among the vegetables is a giant sunflower, pots filled with ornamental plants AND vegetables and hollyhocks that have finished flowering can be seen alongside the garden.

Off to the right side, you can see my container corn.

And yes, those are plastic patio chairs inside my vegetable garden.  (I’ll explain why later.)

vegetable garden

This edible garden is actually made up of three parts.  My original vegetable garden was a fenced in square space.  Like many gardeners who like to grow their own food, I realized that I needed more space – so we added on an extension a couple of years ago…

vegetable garden

The third part of my edible garden consists of vegetables growing in containers along with ornamental plants…

my edible garden

I currently have zucchini growing in the closest pot along with a jalapeño plant, parsley and sweet potato vines.

The middle pot is filled with a Thai pepper plant, chives, cucumber, celosia and kangaroo paw.

The third (and my most favorite container) has a bell pepper plant, cinnamon basil, green & purple sweet potato vines, dianthus and angelita daisy growing inside.

my edible garden

The outer vegetable garden is filled with sunflowers and bush beans.

Our family loves to eat ‘string beans’.  They are easy to grow and to freeze for later.

vegetable garden

Here is something that you may not know about growing beans.  “They make their own nitrogen, so you don’t need to add any nitrogen fertilizer.”

In fact, if fertilize them with a fertilizer that contains nitrogen – it can cause them to grow beautiful leaves, but not beans.  That is because there needs to be a balance between the other major nutrients – phosphorus and potassium.

If you do apply a fertilizer, make sure that contains a low amount of nitrogen.

vegetable garden

I have lots of cucumbers growing in the original vegetable garden along with a couple of pumpkin plants.

As a child, I grew up calling cucumbers ‘gurkens’, which is what they are called in German.  I spent some time when I was young, in Germany, visiting my grandparents while my grandfather was working over there.

I love cucumbers and we eat them 3 or 4 times a week.

cucumber plants

It can be a little hard to spot ripe cucumbers.  Most of my cucumber plants are growing up onto the trellis, but sometimes you can find cucumbers growing on the ground.  You need to move the leaves aside to see them.

I like to eat cucumbers with salad, using my grandmother’s top secret’ salad dressing recipe.

I only wish that I could grow cucumbers and leaf lettuce at the same time….  

vegetable garden

Okay, back to the patio chairs sitting in my garden.

Why on earth would I place chairs in my garden?

Well, they are an easy way to provide shade for vegetables that quickly wilt in the full sun.

And so, that is what is going on in my edible gardens this summer.

**I am excited to share with you a gardening video that I made for Troybilt as a part of my involvement with the ‘Saturday 6″.

I’ll debut it for you on Monday 🙂

It may be awfully hot outside, but my garden is awash in brightly colored flowers from my single bougainvillea, Arizona yellow bells and ‘Rio Bravo’ sage, which shrug off the summer heat.

Summer Edible Garden

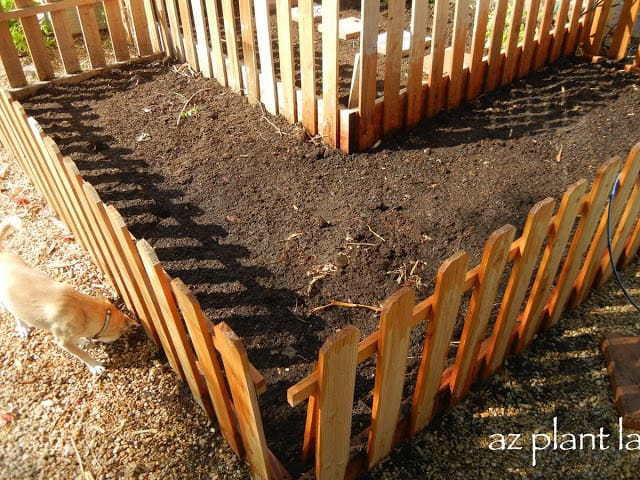
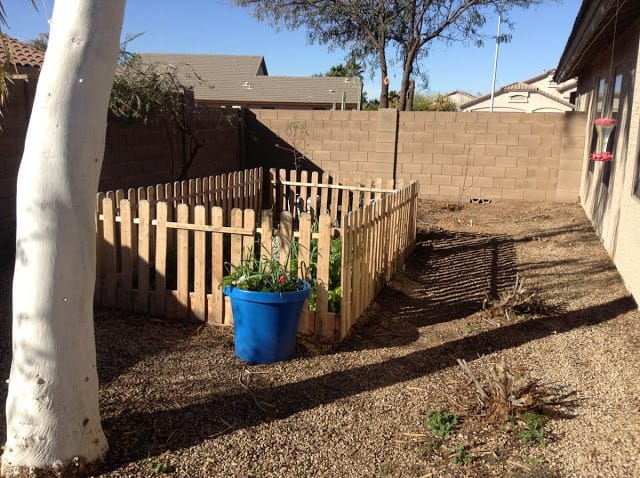
Last year, we decided to create an edible garden along the side of our house.

This was a large underused area that we look out at from our kitchen, family room and bedrooms.

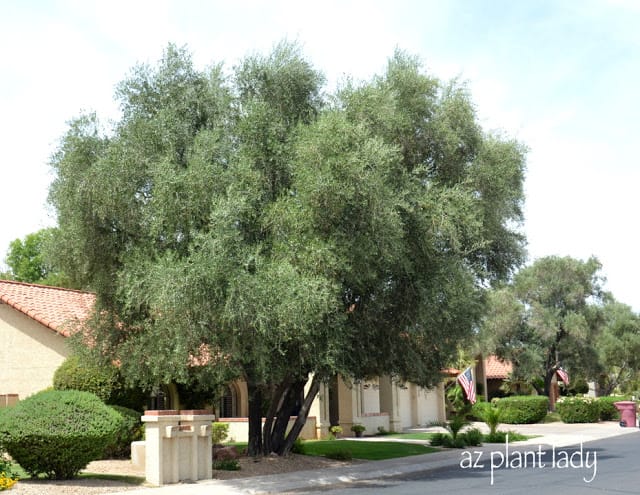
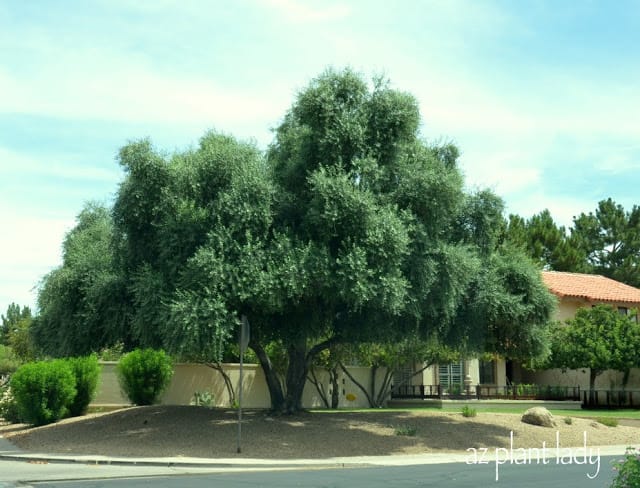
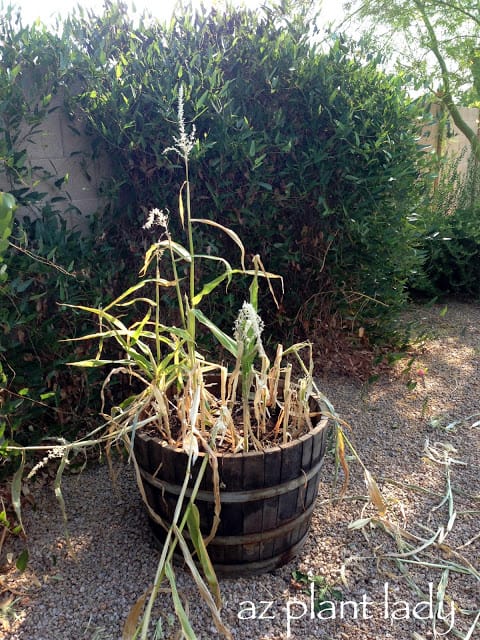
To get it ready for planting, we had our ghost gum eucalyptus tree removed.  It was a beautiful tree, but was quickly outgrowing this area with its overhanging limbs.

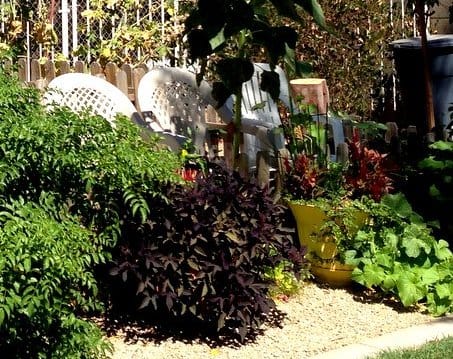
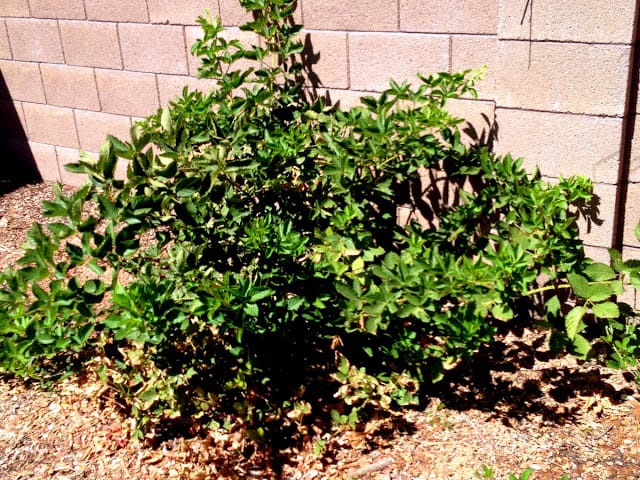
The next step involved pulling out some of the flowering shrubs along the back wall and along the side of the house.  We kept the flowering shrubs along the side wall, because they add beauty and help to break up the bare expanse of the wall.

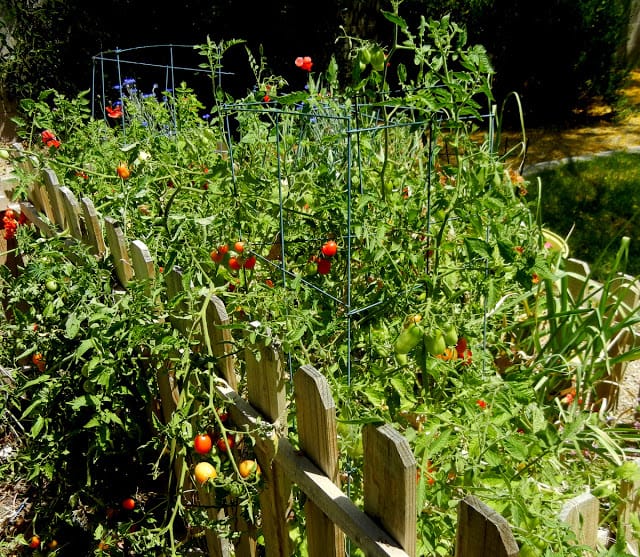
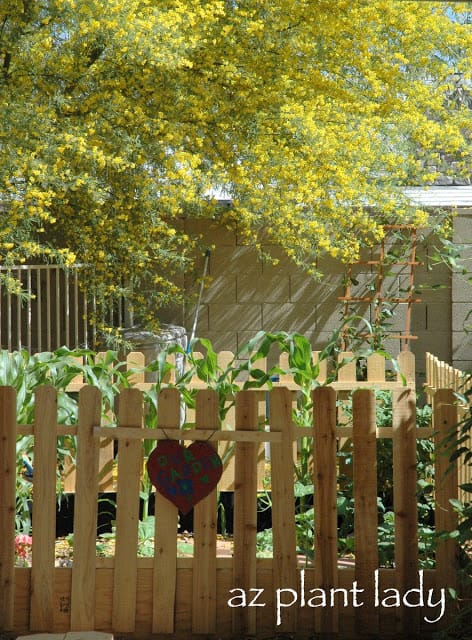
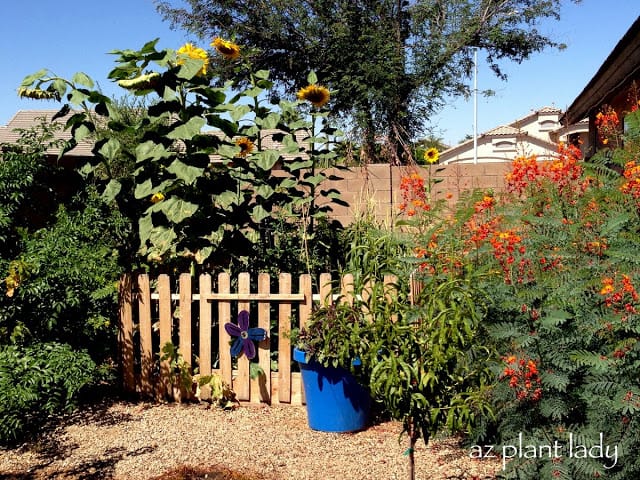
This is what the side garden looks like today…

Summer Edible Garden

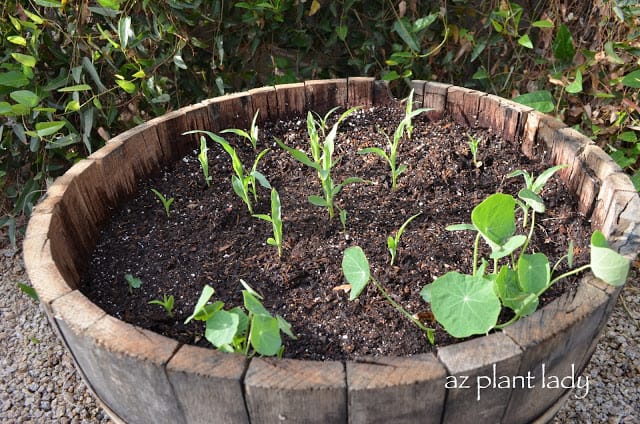
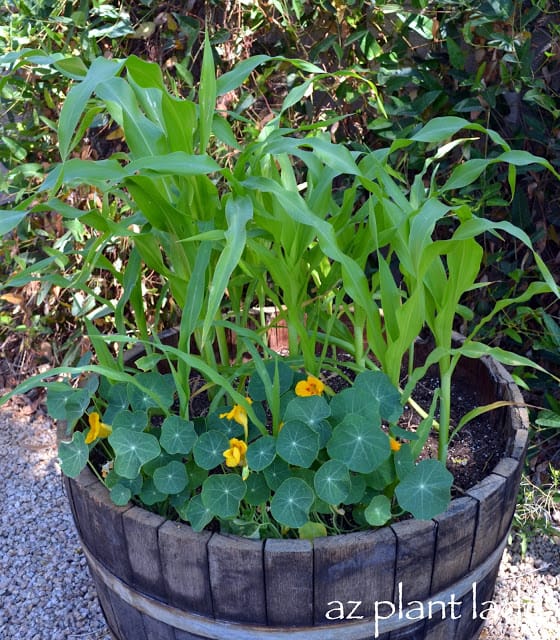
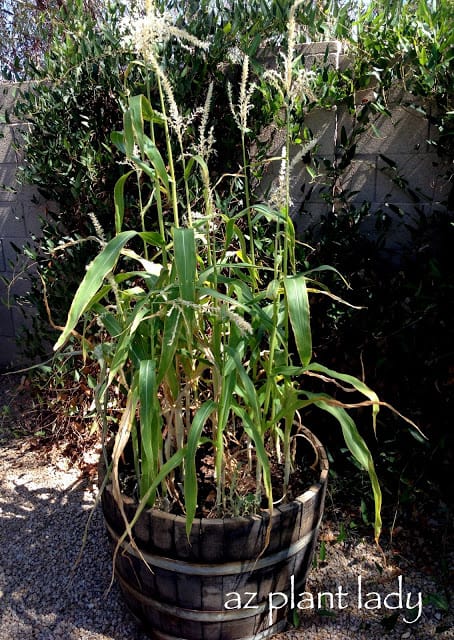
The centerpiece of the edible garden is the vegetable garden.  Right now, it is filled with corn, zucchini, tomatoes, cucumbers and sunflowers.

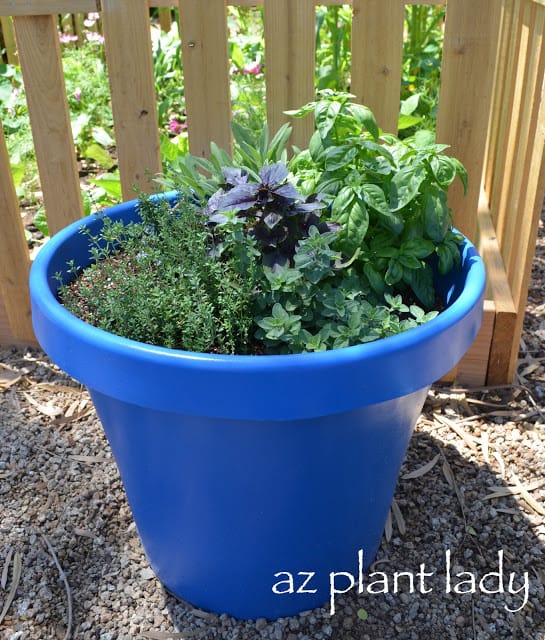
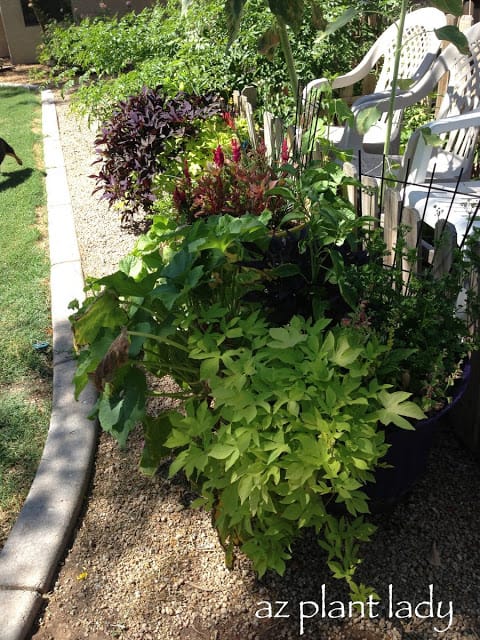
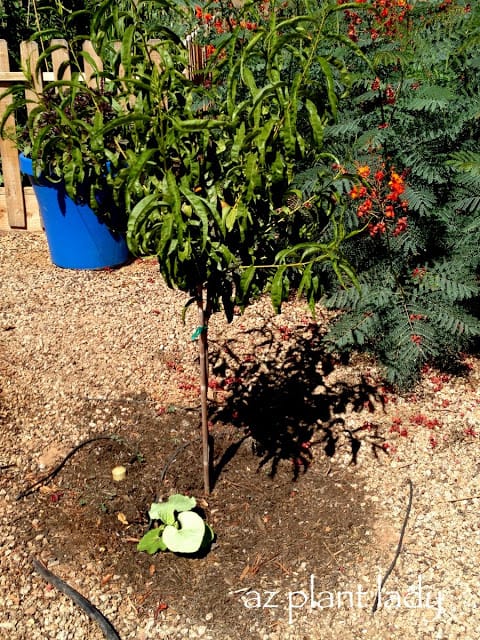
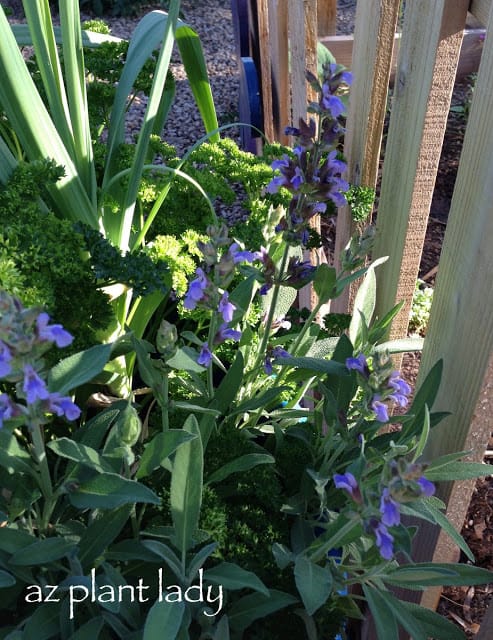
In front, is my colorful container filled with a variety of herbs including basil, parsley, sage and thyme.  I bought an inexpensive plastic container and spray painted it a bright blue.  The container is connected to the drip system of the vegetable garden.

Arizona sweet orange tree

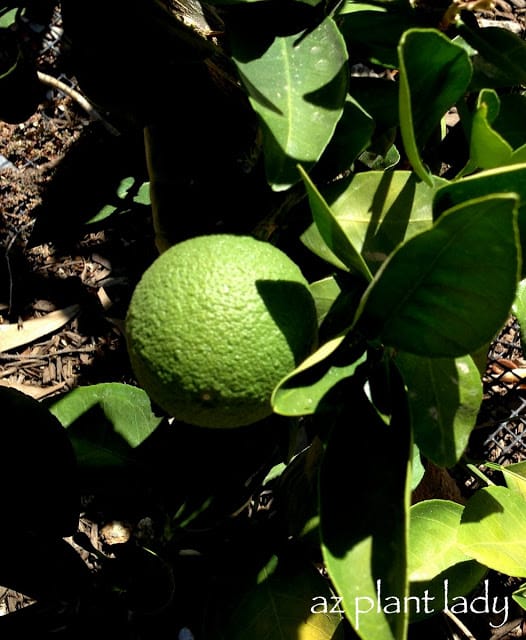
In the foreground (not pictured) is our new Arizona sweet orange tree.  We planted it last year and are excited to have three oranges growing on it.

You may be thinking that three oranges is not much to be excited about, but the first couple of years after a citrus tree is planted – you are lucky to get any fruit at all.

Newly planted citrus trees shouldn’t be fertilized during the first year, because you want them to focus on root growth, not upper growth when there is not a substantial root system for them to rely on.  Since it has been a year since we have planted it, we will fertilize this year.  

new peach tree

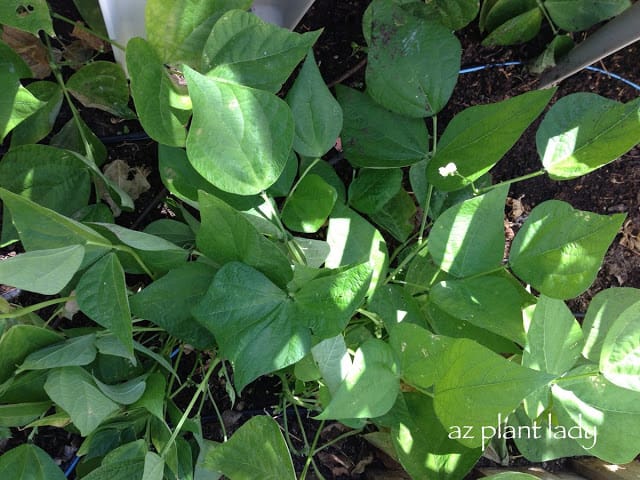
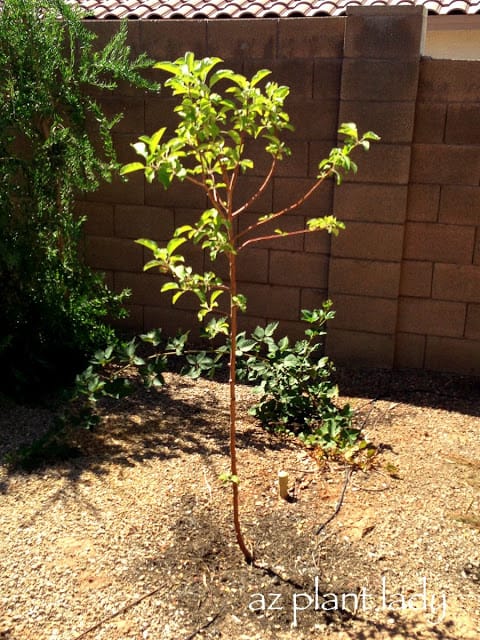
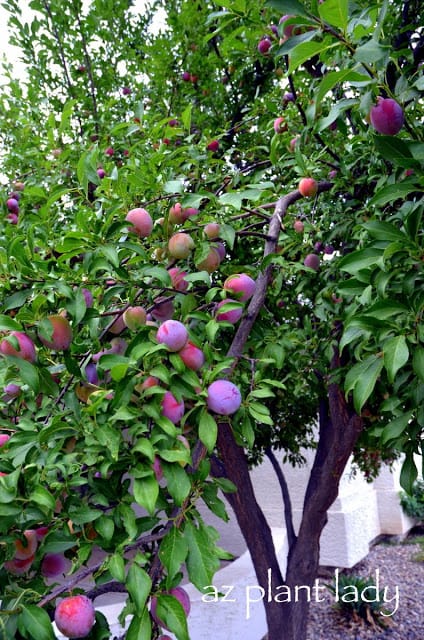
In front of the vegetable garden are a pair of new peach trees.

I love peaches and have enjoyed the fruit from my mother’s peach trees for years.  I finally decided that I wanted to grow my own.

We got 18 peaches this year, which is a lot considering that we planted them in January.

Notice the green plant at the base of the peach tree?  It is a gourd plant that will quickly grow and cover the ground.  This will serve as a ‘living mulch’ and help to prevent weeds and shade the roots of my peach trees.

sunflower

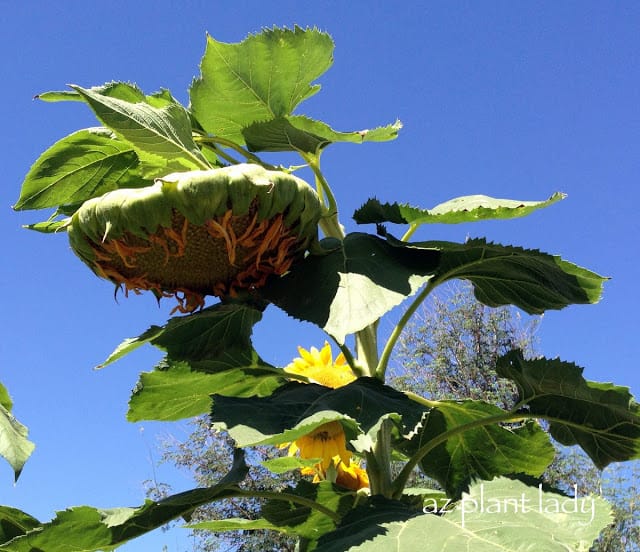
Inside the vegetable garden, sunflower seeds are beginning to form.  It is so fun to see the birds hanging upside down trying to get to the seeds.

You can allow the birds to eat the seeds or if you want to save them for yourself, simply tie a paper bag around the flower to keep the birds away.

I’ll probably save some flowers for ourselves and let the birds enjoy the seeds of a couple of unprotected sunflowers.

zucchini plant

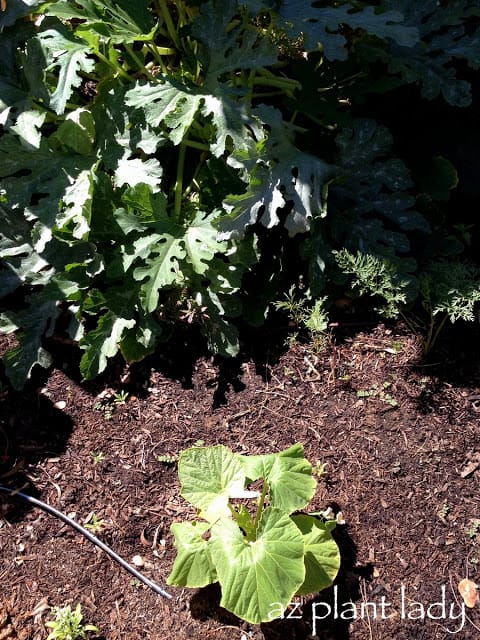
A large zucchini plant is growing in the background and as anyone who has grown zucchini will tell you, it is prolific.

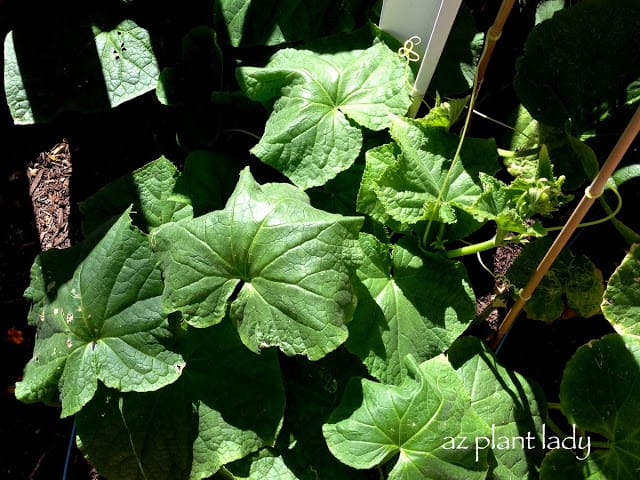
The slightly wilting plant in the foreground is a pumpkin plant.  If you want a pumpkin for fall, then June is when you want to plant them.

It is normal for the leaves to wilt slightly during the heat of the day.  They will return to normal later in the day.

zucchini plant

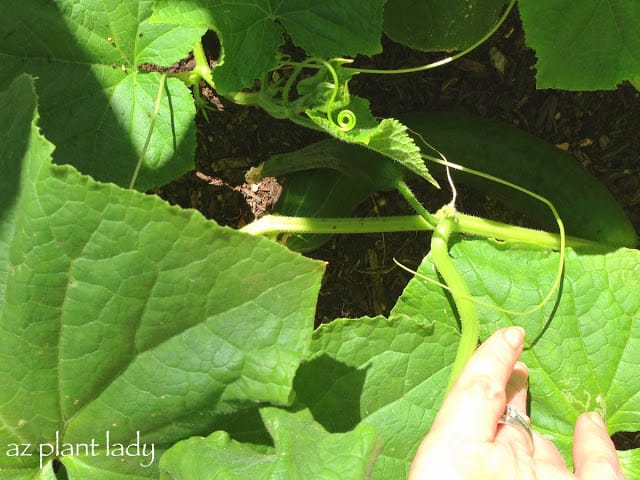
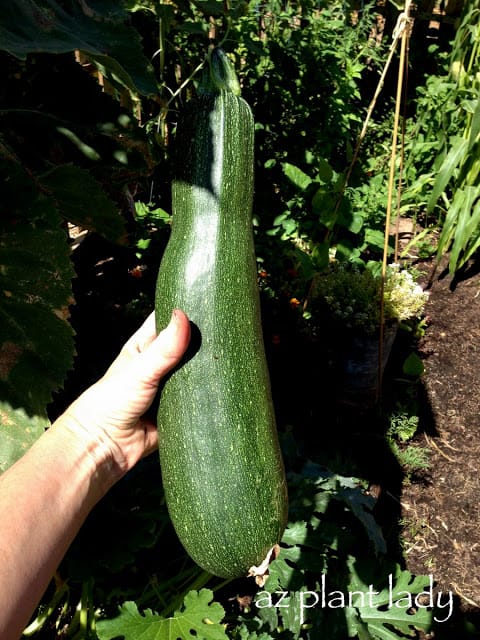
Zucchini can hide underneath the large leaves of the zucchini plant.  I’m going to use this one to make my chocolate chip zucchini bread.  It’s delicious and your kids will never know there is zucchini in it 😉

I found the recipe on Pinterest and have already made it once.  My family keeps bugging me to make more.  Here is the link to the recipe, if you are interested – Chocolate Zucchini Bread

Summer Edible Garden

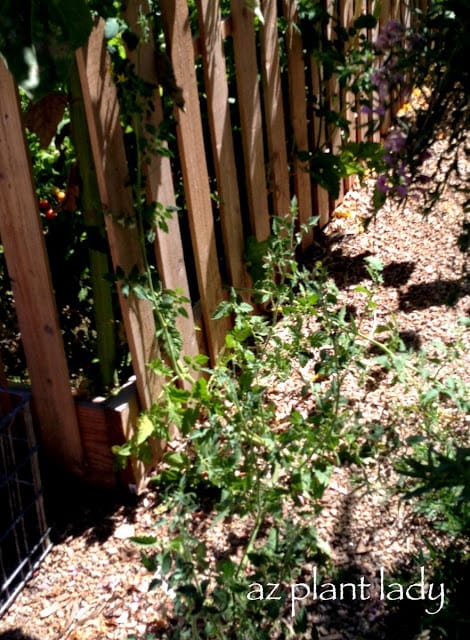
My tomatoes are flourishing in the natural shade provided by my sunflowers.

cherry tomato plants

One of my cherry tomato plants has even decided to expand a bit outside of the garden.

two apple trees

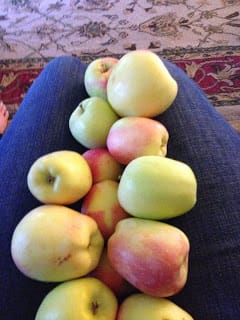
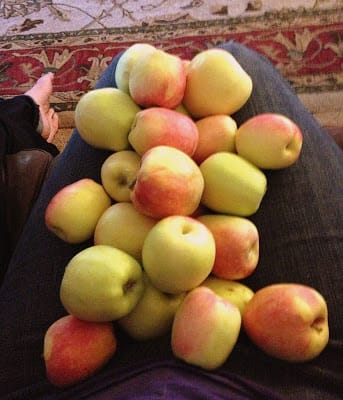
Behind the vegetable garden are my two apple trees, planted this January.  One is a Anna apple tree and the other is a Dorsett Golden. These apple trees do well in the desert and although they will produce apples if planted alone – they will produce more apples because they will cross pollinate each other.

It will take a few years for any apples to appear, but the blossoms in spring are just lovely.

Summer Edible Garden

Behind the apple trees are six blackberry bushes.  This year, we enjoyed the berries so much and are hoping for even more next year as they grow larger.

Blackberries won’t produce the first year after planting because the berries appear on 1-year odd canes.

Did you know that there are now thornless varieties of blackberries available?  I have one….I only wish that the other five were thornless 😉

Well, that is what I have growing in my side edible garden.

Tomorrow, I’ll share what is growing in my original vegetable garden.

What do you have growing in your garden right now?

A Summer Edible Garden: Part 2