Have you ever come upon an unexpected discovery?

I did.

Last week, my husband and I flew to Southern California for a visit with our second-oldest daughter, Rachele, who is stationed at a Navy base there.

The purpose of our trip was to be there when she got her 20-week ultrasound to see what sex her baby was (more about that later).

Southern California

Of course, a trip to California wasn’t complete without visiting some of the places I grew up in.  We decided to take a trip up north to the small beach town of Carpinteria, which has a fun and funky downtown area.  

Southern California

My family and I used to camp there every fall next to the beach and it was and still is one of my favorite places to visit.

Southern California

Every time we visit Carpinteria, we have to stop by our favorite cupcake place – CrushCakes.

Can you tell that my husband is excited about our new grand baby?

Vividly Vanilla

My favorite cupcake is Vividly Vanilla and I have it every time we visit.  I should branch out and try the other flavors, but I have never gotten past this one 😉

After we had eaten our cupcakes, we ventured out and past not one but two plant nurseries.  Talk about good fortune!

I am always on the lookout for new plants, unique gardening ideas as well as photographs to share with you and also in articles I write.

While I didn’t have my regular camera, I did have my phone and was eager to discover what the first nursery had to see.

Butterflies were flying from flower to flower and the nursery was awash in beautifully blooming plants.

Southern California

While walking through the nursery, my attention was caught by a lovely flowering perennials including Rudbeckia (black-eyed Susan) and Echinacea (purple coneflower).

Rudbeckia

Rudbeckia 

Echinacea purpurea

Echinacea purpurea  

For those of you familiar with both of these plants – what do you think a ‘baby’ from these two plants would look like?

Well, wonder no more.  Let me introduce a new perennial that is garnering a lot of attention – ‘Echibeckia’

Echibeckia

Echibeckia  

What do you think?

Aren’t they gorgeous?

perennial garden

As you can see, they have golden yellow petals with orange centers.  Once the flowers begin to age, the petals turn to a darker orange.

The flowers last 2 – 3 months and make great cut flowers.  Echibeckia is hardy to zones 6 and up and would make a great addition for any perennial garden.  

Echibeckia along with its parents

Echibeckia along with its parents. 

I have purple coneflower and black-eyed Susan growing in my desert vegetable garden where they enjoy the fertile soil and regular water.  I may need to try Echibeckia too!

I toured through the rest of the nursery and took lots of great photos and then stopped at the nursery next door, which was very unique.  I’ll share more of my nursery visits next time.

But, back to the real purpose of my visit to California.  

New Perennial Discovery and a Baby

We came to visit our daughter and to be there when she found out whether she was having a little boy or girl.

The ultrasound technician was showing us the baby’s heart, head and spine, which all looked great.  But, when he started to concentrate on the legs and arms – I was frankly, dying for him to get to the big question we all had – boy or girl???

New Perennial Discovery and a Baby

I was expecting him to build up to the announcement or at least say, “Do you want to know what it is?”  But no – there was no build-up to his announcement.  In the middle of talking about the arms and how much the baby was moving he casually said, “By the way it’s a boy.”

I was looking at my daughter at that moment and she was so happy to finally know what she was having.  None of us had a preference besides a healthy baby, but it is so nice to be able to know the sex.

After the ultrasound, we drove to the nearest Target store and I helped her with deciding what items to add to her baby registry.

It never ceases to amaze me how interesting things like bottles, cribs, high chairs, mobiles and strollers suddenly become once you are expecting.

Our grandson is due in January and we couldn’t be happier.  Now our granddaughter, will have a little cousin to play with 🙂

Fall planting

Fall planting

It’s hard to believe that we have made it through another summer.    

Oh, I realize that we have a few more weeks of 100+ degree weather, but whenever there is month that ends with the letters “ber” it just feels cooler to me.  

I am gearing up for my favorite season in the garden.  In my last post, I talked about the reasons why fall is the best time to add new plants to the Southwest landscape.    

Today, I’d like to share with you three tips to help you make the most of your fall planting.

This planting hole is too small

Photo: This planting hole is too small.

It all comes down to the hole.  It’s hard to believe that often what determines a plant’s initial success is the size of the hole it is planted in.  

If you are digging holes like the one above – then you may be in trouble.  That hole is too narrow.

Fall Planting

The ideal hole should be 3X as wide as the root ball.    

Why?  

Well, most of a plant’s roots grow outward into the soil.  When they are placed in a hole like the one above, the recently loosened soil makes it much easier for roots to grow into, which helps the plant to establish much sooner.  

*It’s important to note that the depth of the hole should be the same depth as the root ball or even a few inches shallower.  This helps prevent problems from the dirt settling, which can leave your new plant sitting rather low in the soil where problems with becoming waterlogged can happen.

Fall Planting

The big question – whether to add soil amendments or not?

When you go to your local nursery to buy new plants, you may be encouraged to buy soil amendments such as compost, potting soil or even manure.

The question is, do you really need it?  Often you don’t.    

I have planted thousands of plants throughout my career as a horticulturist and most of them without adding anything to the soil.  The plants were healthy and did very well without any extra additions to the soil.  

Here a few guidelines to follow to help you decide whether or not to add any amendments to the soil before planting.  

– If your soil is well-drained AND your new plants are native to any of the desert regions of the United States, than the answer is “no”.    

Native plants are adapted to growing in the nutrient poor soils of the desert and do best when nothing is added to the soil.  In fact, if the soil is too fertile – you’ll often see green growth, but flowering will be decreased.

Valentine (Eremophila maculata), Feathery Cassia (Senna artemisoides) and Purple Trailing Lantana (Lantana montevidensis) planted without needing any soil amendments

Photo: Valentine (Eremophila maculata), Feathery Cassia (Senna artemisoides) and Purple Trailing Lantana (Lantana montevidensis) planted without needing any soil amendments.

The same can be said of some non-native plants – particularly those from Australia such as Eremophila and Senna species.  

So, are some times when adding soil amendments is a good idea?  

Absolutely!  

– If you have heavy clay soil or very sandy soils, than adding compost to the planting hole can help.  Mixing compost in with clay soils help them to drain better.  This is important because most plants that grow in the Southwest do best in well-drained soil.  

Conversely, sandy soils have a hard time holding onto enough water, so compost helps those soils to hold onto more water.   Add 1 part compost to 1 part native soil and mix together before planting.

require fertile soil to grow their best.

– Amend the soil when planting non-native plants that do not originate from arid climates.  

Plants like day lilies, iris, roses, etc. require fertile soil to grow their best.  Amending the soil with compost, manure and other amendments will improve the soil texture, add small levels of nutrients and add beneficial microorganisms which will benefit your plants.    

Plants such as these will need regular applications of fertilizer to do their best.  

Personally, I like to grow what I like to call ‘fuss-free’ plants where I don’t have to add fertilizer with the exception of my roses.  

Fall Planting

Skip the fertilizer for newly planted plants.  This tip is NOT always popular with some nurseries who often encourage the application of fertilizer at the time of planting.  

So, let’s talk about when to add fertilizer.  

– Most native plants will not need fertilizer ever.  In fact, many can make their own fertilizer.  

– For plants that do need fertilizer such as hibiscus,  iris, roses, etc. – wait until you see new growth occurring before adding fertilizer.  

The reason for this is that when you first add a new plant, it needs to concentrate on growing new roots in order to support future top growth (stems, branches and leaves).  If you add fertilizer at the time of planting, you are forcing the plant to focus on the top growth before it has the roots to support it.

So, a general rule is to wait until you see new top growth before adding fertilizer.  

– The rule for fruit trees is slightly different.  It is recommended to wait until 1 year after planting before fertilizing.  

Again, you may hear differently from your nursery who in addition to wanting you to be happy with your purchase, also has their bottom line (profits) in mind.  

I am not including all nurseries or nursery professionals into this one group.  However, I have visited nurseries where customers are told that they need to fertilize all their plants.  Many of my clients are thrilled when I tell them to throw out their fertilizer because their native plants don’t need it.  

*I remember a story from one of my horticulture professors who talked about standing in line behind a customer at the store with a cart filled with native, desert plants and another cart with ‘special’ fertilizers that they were encouraged to buy.

My professor loudly commented to her husband, standing next to her, that “Numerous studies have shown that fertilizer is a waste of money when used for native plants.”    

So, are you ready to add some new plants to your landscape?   Before you head out to the nursery, I invite you to come back for my next post, when I’ll share with you some tips on how to select healthy plants AND I will reveal to you what my favorite plant nursery is!  

************************  

I apologize for the relative lack of recent posts.  Life has been very busy with the kids back in school, increased landscape consults and getting ready to go visit my daughter, Rachele, who is expecting.  We will find in a few days whether we will be welcoming a boy or girl!  

I have two biological children – both girls and my oldest daughter, Brittney, has a daughter.  So, we will see if Rachele will break the pink trend in our family.  

My son Kai (who is adopted from China) and has four sisters and a niece is really hoping for a boy 😉

Planting in fall

Planting in fall

Are you anxious for fall to arrive?  

I certainly am!    

Fall is my favorite season because of the holidays, cooler weather, and best of all – it is the best time of year to add new plants to the landscape.

Planting in fall

Now you may have thought that spring was the best time of year to start planting and while you certainly can plant then, I’ll tell you why fall is better…

Planting in fall allows enough time for plants to grow a good root system before the heat of the next summer arrives.  

Think about it – plants must have a good root system so that they can soak up enough water to handle the stress from intense heat and the dry conditions of summer.    

If a plant is planted just before or during the summer months, they are focused on just hanging on until temperatures cool off.  In many cases, they don’t make it.

fall planting

The only exception to fall planting is with frost-tender plants such as bougainvillea, lantana, and yellow bells.    

Because young plants are particularly susceptible to frost damage, or even death, it is best to wait until the danger of frost has passed to add these plants to your landscape.

Getting Ready for Fall Planting in the Southwest Garden

Over the next couple of posts, I’ll share with you some other helpful tips to help you with selecting plants, how to tell if they are healthy, the best way to dig a hole, and finally – I’ll reveal my favorite plant nursery!  

****************************  

On a personal note, I am going to be a grandma again 🙂  

My second-oldest daughter, Rachele, is having her first baby, and my husband and I are flying to California to be there when she gets her ultrasound and finds out if she is having a boy or girl!  

I can hardly wait…

New Perennial Discovery and a Baby

A few weeks ago, I was asked by one of my editors to come up with a list of the top 10 plants that every resident of the Southwest should consider adding to their Southwestern landscape.

I must admit that the task was a bit daunting at first – not because I couldn’t think of enough plants.  The problem was that my list was much larger.

How Easy is it to Find Native Southwestern Landscape Plants at a Local Nursery?  

Agave parryi in Southwestern landscape

I had to pare my list down and decided to focus on plants that would grow in zones 7 – 10, which cover much of the desert Southwest.  In addition, they had to be low-maintenance, native, beautiful and easy to grow.

After considering all of the criteria, I still had about 20 plants.  So, I added one other criteria of my own – how easy is it to find at your local nursery?  

At the end, I had 10 plants that I was very happy with – but I could have easily added a lot more 😉  

I hope you enjoy reading through this list of 10 essential plants for the desert Southwest.    

Flourishing Amidst Adversity: 10 Resilient Plants in the Southwestern Landscape

The desert Southwest is a region of extremes, with scorching summer heat and chilling winter temperatures that challenge even the most robust flora. Yet, in the face of such harsh conditions, these native plants not only survive but thrive. Equipped with remarkable adaptations, these tenacious species call the arid landscapes of the U.S. Southwest their home.

Enduring the relentless dry heat and enduring the freezing winter cold, they serve as a testament to nature’s resilience. Beyond their endurance, these plants play a vital role in the ecosystem, providing nectar for birds and bees, and shelter for native bird species. Every one of these drought-resistant plants contributes to the desert’s beauty.

Embracing the Sun: Essential Care Tips for Desert Native Plants

To cultivate a thriving desert garden, sunlight is key. Native desert plants require full sun, although some tolerate partial shade for a portion of the day. Optimal growth is achieved through deep, infrequent watering and well-drained soil.

Allow water to penetrate down to 1½ to 2 feet deep, ensuring the soil dries out before rewatering. For irrigation efficiency, drip systems are recommended. While new plants need more water until established, these desert natives rarely require additional fertilization.

yellow flowering damianita


1. Damianita (Chrysactinia mexicana): Thriving Delicacy of the Chihuahuan Desert

Delicate Flowers: The Charming Resilience of Damianita

Enduring the fiery extremes of the Chihuahuan desert, Damianita (Chrysactinia mexicana) emerges as a hardy and enchanting yellow ground cover (see above). Flourishing under full, reflected sun, this seemingly delicate plant showcases dark green, aromatic foliage, which undergoes a stunning transformation with the arrival of spring and fall.

Golden yellow flowers blanket the plant, adding a vibrant contrast to the arid landscape. Flourishing in well-drained soil, Damianita harmoniously complements the red flowers of firecracker penstemon and Valentine bush, as well as the purple blooms of desert ruellia.

Firecracker Penstemon


2. Firecracker Penstemon (Penstemon eatonii): Painting Winter with Vibrant Hues

A Symphony of Color: Firecracker Penstemon’s Winter Splendor

Ocotillo

In the midst of winter’s muted tones, the firecracker penstemon (Penstemon eatonii) ignites low-desert gardens with bursts of orange-red brilliance. Serving as a beacon of color during the colder months, this drought-tolerant perennial offers vital nectar for hummingbirds in winter scarcity.

Adaptable to cold winters and scorching summers, firecracker penstemon’s vibrant presence is enhanced when paired with complementary yellow-flowering perennials. Angelita daisy, damianita, and desert marigold join forces in a chromatic display, thriving under full sun or partial shade in well-drained soil.


3. Ocotillo (Fouquieria splendens): A Dance of Life in Arid Lands

Nature’s Hummingbird Feeder: Ocotillo is a Migrating Hummingbird’s Favorite

Stretching towards the desert sky, ocotillo (Fouquieria splendens) graces the Southwestern landscape with its elegant canes. Unique among shrubs, ocotillo’s canes burst forth with lush green leaves in response to rain showers and humidity, contrasting the arid surroundings (see photo right).

Vermilion-colored flowers crown the canes in spring, offering a lifeline to migrating hummingbirds. These vibrant blooms stand as a testament to ocotillo’s resilience and unwavering commitment to the desert ecosystem. A sun-soaked habitat is essential for this desert shrub’s growth.

Parry's agave 'truncata'


4. Parry’s Agave (Agave parryi): Desert Elegance in Every Form

Sculpted Beauty: Parry’s Agave’s Role in Desert Aesthetics

Adorning the arid landscapes of central Arizona and New Mexico, Parry’s agave (Agave parryi) stands as a quintessential element of Southwestern scenery. Ranging from majestic giants to diminutive varieties, agaves exhibit a wide array of forms.

Parry’s agave, with its medium stature and captivating leaf shapes and colors, thrives in a spectrum of environments. Its resilience to colder temperatures and ability to thrive in sun-soaked spaces make it a preferred choice for desert landscaping.

Texas Ranger Leucophyllum frutescens


5. Texas Ranger (Leucophyllum frutescens): The Majesty of Purple Blossoms

Nature’s Artist: Texas Ranger’s Purple Symphony

Residing in the heart of the Southwestern desert, the Texas Ranger (Leucophyllum frutescens) commands attention with its awe-inspiring purple blooms. Aptly known as the barometer bush, it responds to humidity and rainfall, painting the landscape with its vibrant hues in response.

Desert willow flowers

Even without its dramatic blossoms, the evergreen gray-green foliage of the Texas Ranger exudes an intrinsic charm. This resilient shrub’s ability to thrive under the unrelenting sun and reflected heat underscores its stature as a true desert gem.


6. Desert Willow (Chilopsis linearis): Nature’s Respite in Summer

Shade of Summer: Desert Willow’s Cooling Elegance

Amidst the scorching summer of the southwestern landscape, the desert willow (Chilopsis linearis) emerges as a refreshing oasis. This medium-sized deciduous tree enchants with its large, colorful blossoms that beckon hummingbirds from far and wide. (See the flowers in the image right)

Its vibrant pink and magenta flowers offer dappled shade to the plants below, providing relief from the desert’s intensity. Versatile and thornless, the desert willow thrives in smaller spaces, making it a charming addition to courtyards and patios.

Pink Muhly (Muhlenbergia capillaris)


7. Pink Muhly (Muhlenbergia capillaris): A Fall Color Explosion

Autumn’s Blush: Pink Muhly’s Dance of Color

The transition to fall heralds a breathtaking transformation as pink muhly (Muhlenbergia capillaris) takes the stage. Ornamental grasses provide texture and contrast in the landscape, and pink muhly stands out for its vibrant fall display.

As summer yields to autumn, the green foliage is adorned with plumes of pinkish-burgundy, casting a rosy enchantment over the surroundings. This ornamental grass thrives in the desert’s abundant sunlight and can be artfully clustered for a striking visual impact.

Red-Yucca-Hesperaloe-parvifolia


8. Red Yucca (Hesperaloe parviflora): Sun-Kissed Elegance

A Desert Gem: Red Yucca’s Sunlit Splendor

Thriving under the full, reflected sun of the desert, the red yucca (Hesperaloe parviflora) stands as a beacon of effortless beauty. Its succulent leaves bear a resemblance to ornamental grass, while spikes of coral-colored flowers grace the landscape in spring and early summer.

Adding a touch of elegance, the red yucca effortlessly weaves color and texture into the Southwestern tapestry, undeterred by the region’s demanding climate.

 Santa Rita Prickly Pear


9. Santa Rita Prickly Pear (Opuntia violaceae santa-rita): A Desert Icon

Nature’s Palette: Santa Rita Prickly Pear is a Must-Have for Shape and Design

The Southwestern landscape would be incomplete without the iconic presence of prickly pears. Among them, the Santa Rita prickly pear (Opuntia violaceae santa-rita) stands out with its captivating purple-tinged gray-blue pads.

Adapting its hue in response to drought and cold, it is a testament to nature’s artistry. Against this unique backdrop, yellow flowers burst forth in spring, amplifying the species’ beauty. Its distinctive appearance makes it a valuable choice for creating visual contrast in the garden.

Yellow Bells (Tecoma stans)


10. Yellow Bells (Tecoma stans): A Long-Lasting Serenade

Golden Harmonies: Yellow Bells’ Melodic Bloom

Elevating the desert landscape with a touch of the exotic, yellow bells (Tecoma stans) exude a tropical charm. Their large, trumpet-shaped flowers bring shades of yellow to the arid backdrop, evoking a sense of warmth.

In a captivating display, these flowers bloom from the end of winter until just before the first frost, a resounding chorus of color for an extended period. Serving as a vital nectar source, yellow bells enrich the desert ecosystem, inviting hummingbirds and bees to partake in its golden bounty.

Plant These Native Plants in the Southwestern Landscape

The desert Southwestern landscape may present challenges, but these ten top native plants have evolved to not only endure but flourish amidst adversity. With adaptations that defy the elements, these species contribute to the intricate web of life in the desert, adding splashes of color and life to the arid landscape.

By embracing these resilient beauties, gardeners can cultivate oases of natural wonder in even the most unforgiving of terrains.

Tour of Sustainable Southwestern Landscape: Part 1

Do you have vines in your garden? 

What type of trellis do you use for them?  Is it your basic (somewhat boring) wooden trellis?

What if you could make your own trellis that not only looks better but costs next to nothing?

*I have been sharing some of my favorite garden blog posts that I have written recently for Birds & Blooms magazine where I serve as the garden blogger – including this one about how to make your own ‘natural’ trellis.

Wooden trellis

Wooden trellis

I have seen quite a few trellises made from branches, but I thought this one that I saw while visiting the Green Bay Botanical Gardens in Wisconsin, was especially nice because you could see how it was made because the vine had not yet grown up on it.  

With all of the stormy weather, I’m sure you have your share of branches that have blown down from your tree that you can use.  I shared how to create your own trellis using branches in a recent post for Birds & Blooms…  

DIY Yard Project: How to Make a Trellis From Tree Branches    

You’ll not only save money by making your own, but I think that it looks nicer and is a more sustainable option.

DIY in the Garden: Floral Ice Cubes

Is your garden looking a bit lackluster and in need of more color than green?  While colorful flowering plants can help, it is hard to find a plant that will flower all year long.  

*Some of you may know that I am the garden blogger for Birds & Blooms magazine.  I have been going through some recent blog posts that I have written for them and thought that I would share some of my favorites with you.

Garden Without Plants

As part of a two-part series, I shared some creative ways to add color to the landscape without relying on plants alone.  This is especially helpful during the winter months when not many plants are in flower.  

Most of the photographs in these posts were taken during a recent trip to Southeastern Arizona including Bisbee, Tombstone, and Tucson.  

Backyard Garden Decor: Adding Color – Part 1

Backyard Garden Decor: Adding Color – Part 2  

I hope that you are inspired to use a few of these colorful ideas in your own landscape!

There are some plants in the landscape that are underused through not fault of their own.

This can be for a number of reasons, one of which, is that it isn’t stocked at local nurseries.  Customers often walk into their local nursery without any specific plant in mind and choose from what is in stock.

nursery container

Another reason is that many southwestern natives aren’t all that impressive looking in their nursery container, where their root growth is restricted.   However once they are planted and roots begin growing, they really take off and transform into a beautiful plant.

 little leaf cordia

One underused plant in the southwest garden is little leaf cordia (Cordia parvifolia).  

There are so many reasons to love this underused, native shrub…  

– it is evergreen in zones 8 and above

– thrives in areas with full, reflected sun

– is drought tolerant

– needs no fertilizer

– rarely needs to be pruned

– and perhaps most importantly, it has beautiful, white flowers!

 little leaf cordia

I recently wrote about little leaf cordia for Houzz.com and how to grow and use it in the landscape.  

My hope that this underused shrub will soon become a much-used shrub in the southwestern landscape.  

Great Design Plant: Little-Leaf Cordia Handles Desert Extremes

**Is there a plant that you think deserves a more prominent place in the southwestern landscape?  Please share it in the comments below!

Downsizing Is A Good Thing – But Not Always….

I am always on the lookout for new things to make from the garden.

Recently I learned how to make specially flavored salts using herbs from my garden.  ‘Herb salts’ have become a popular flavoring tool in the culinary community and they are very easy to make.

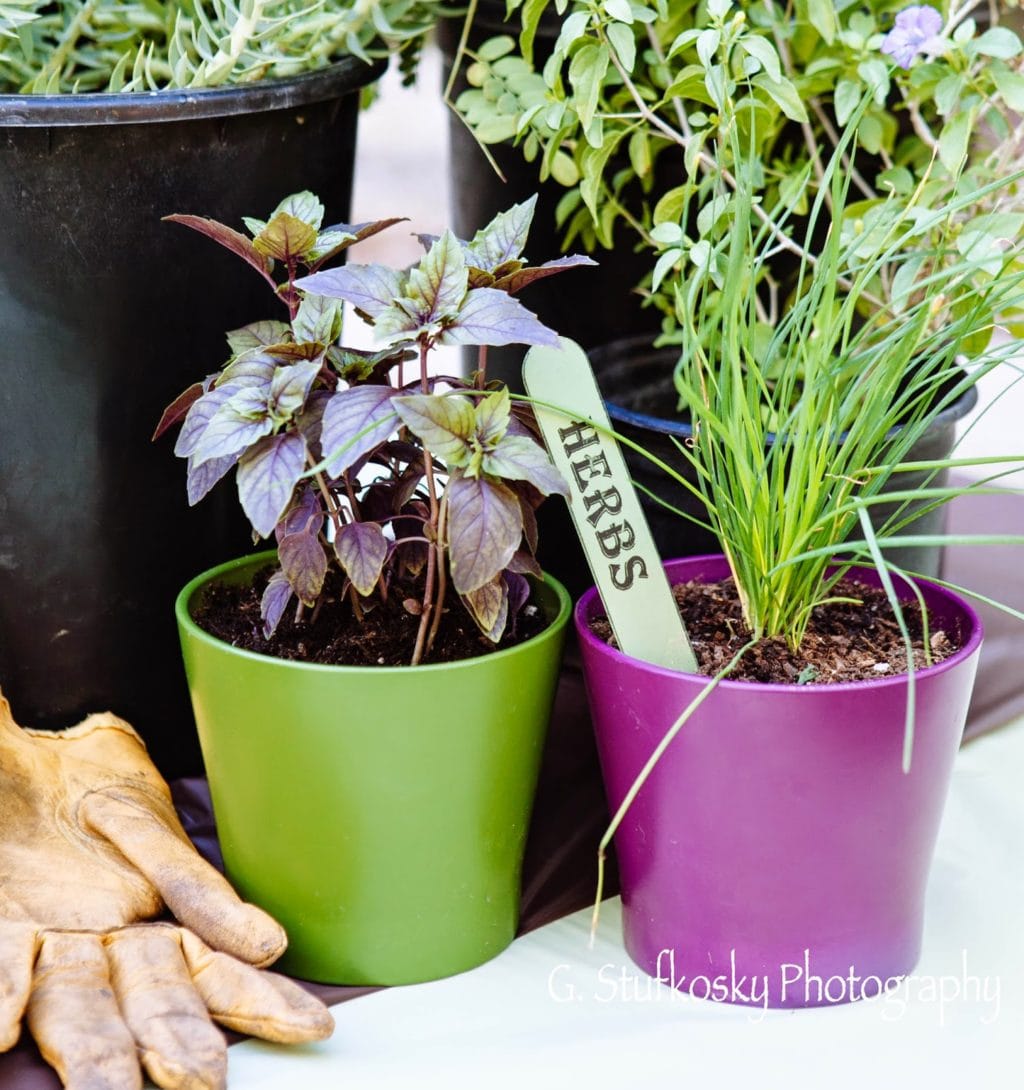
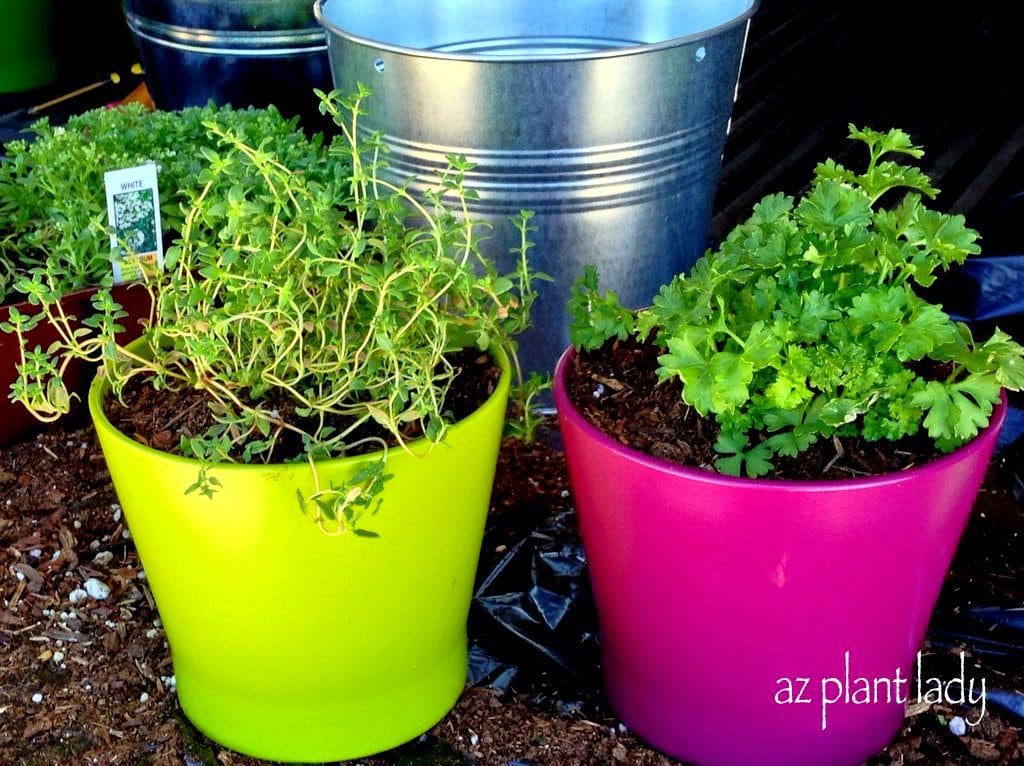
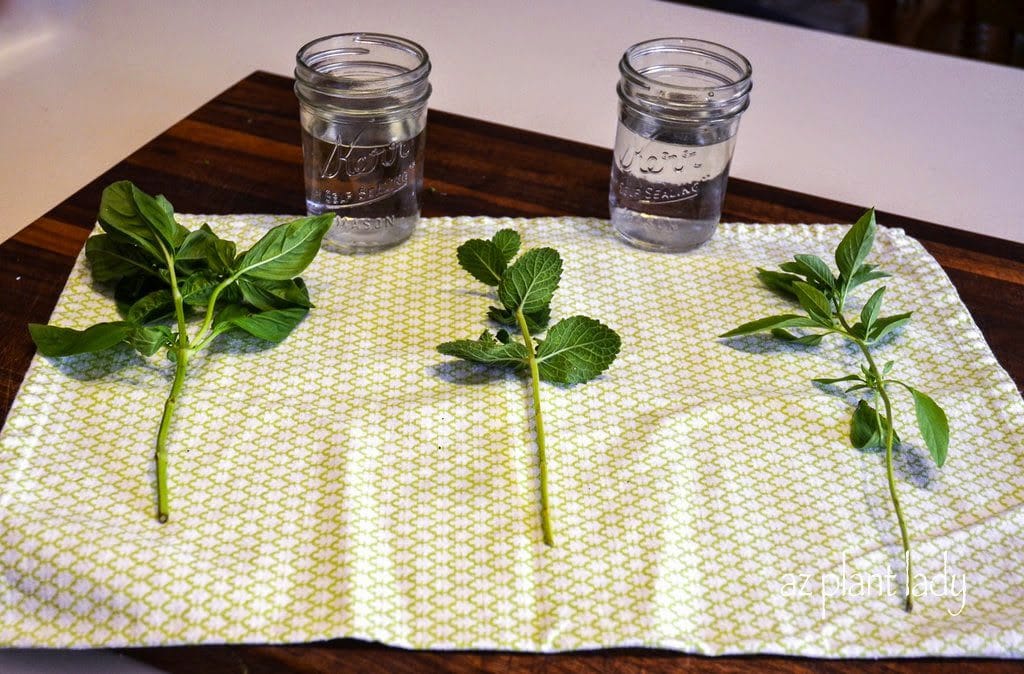
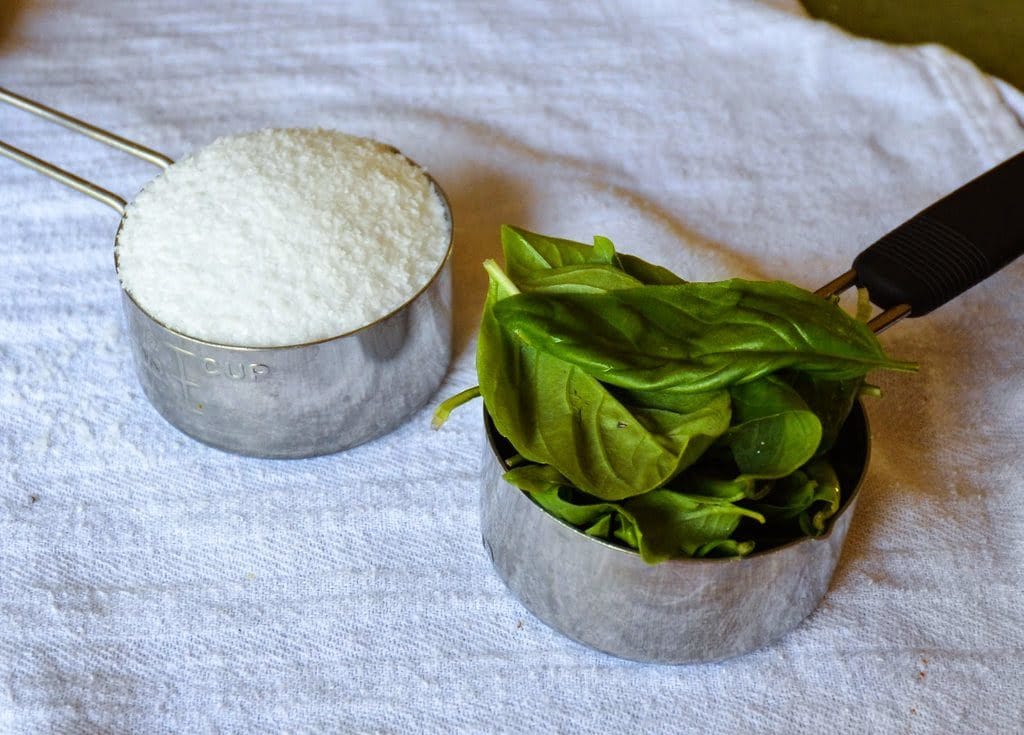
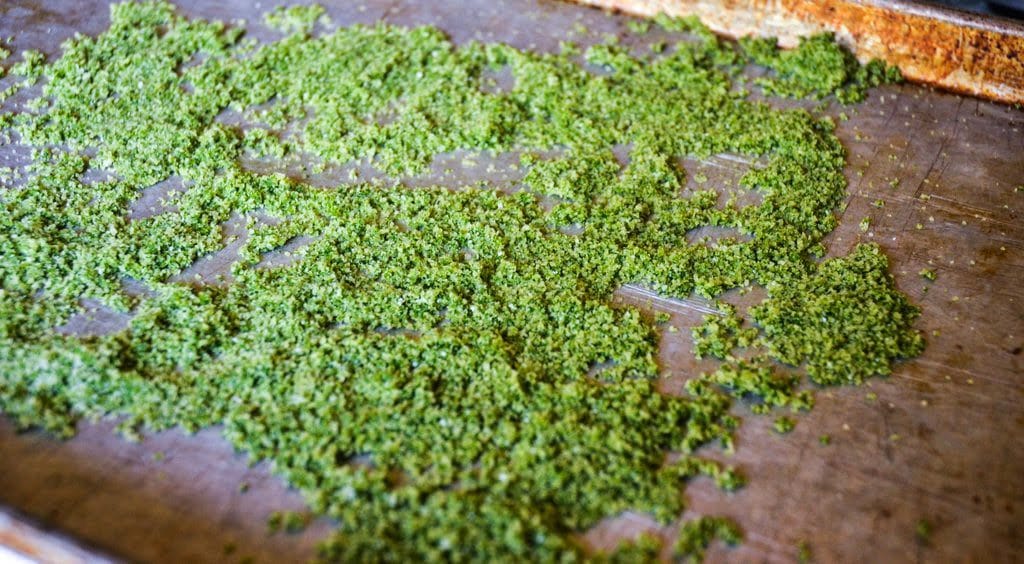
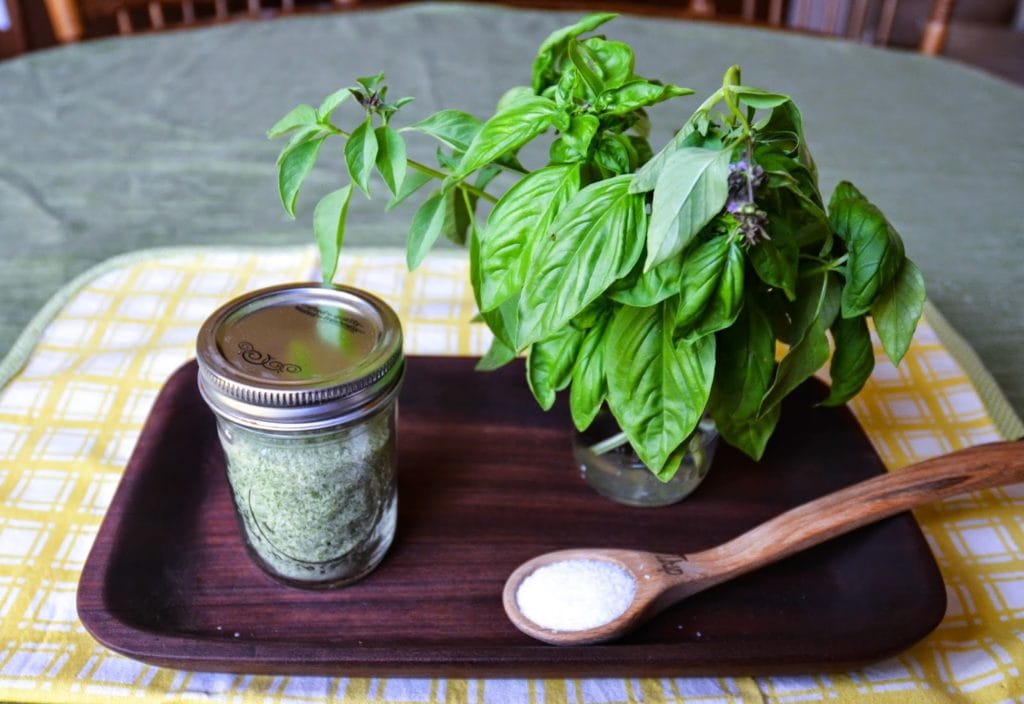
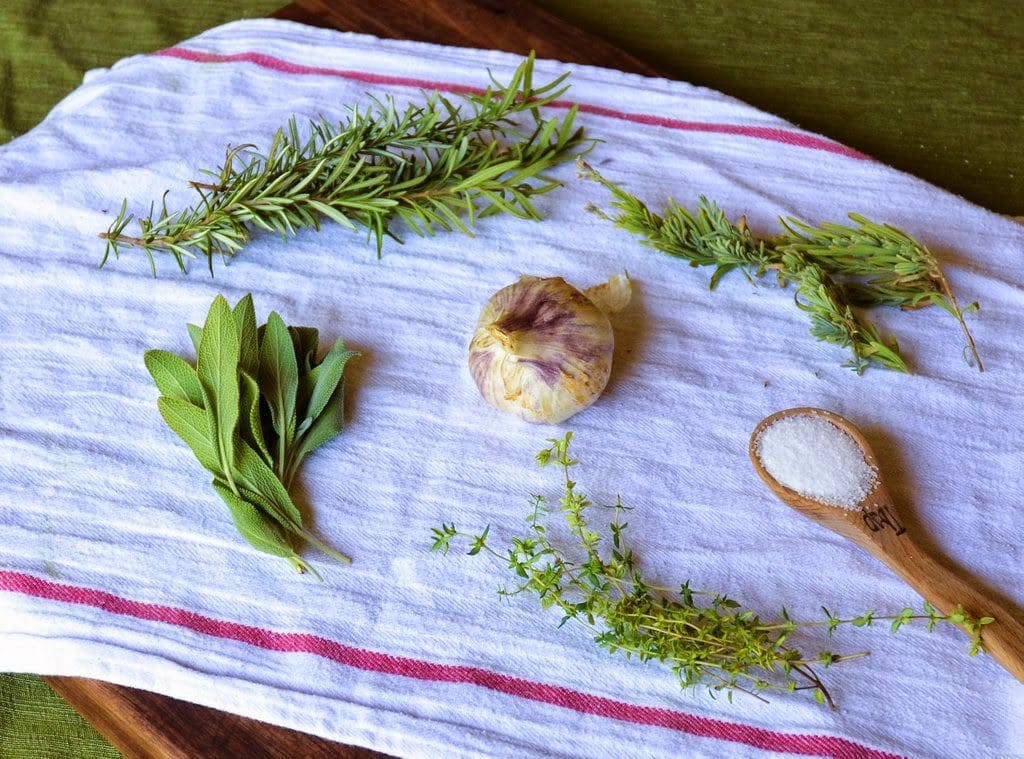
The process of making herb salts starts out looking like this…

making herb salts

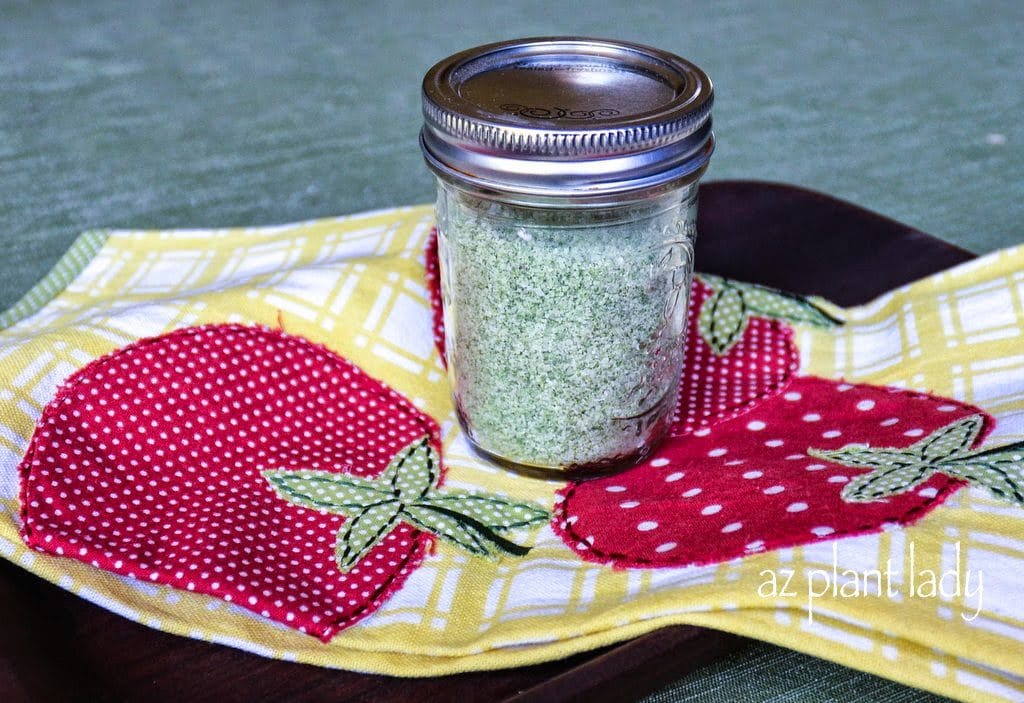
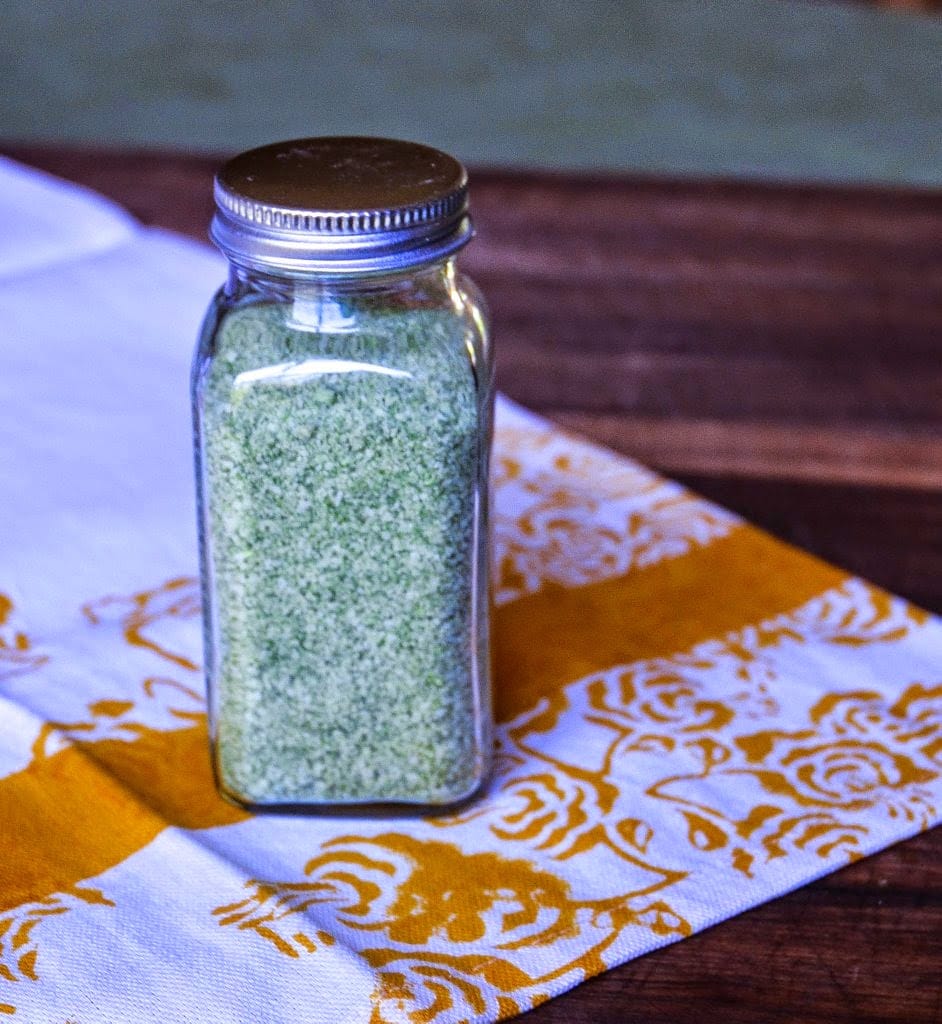
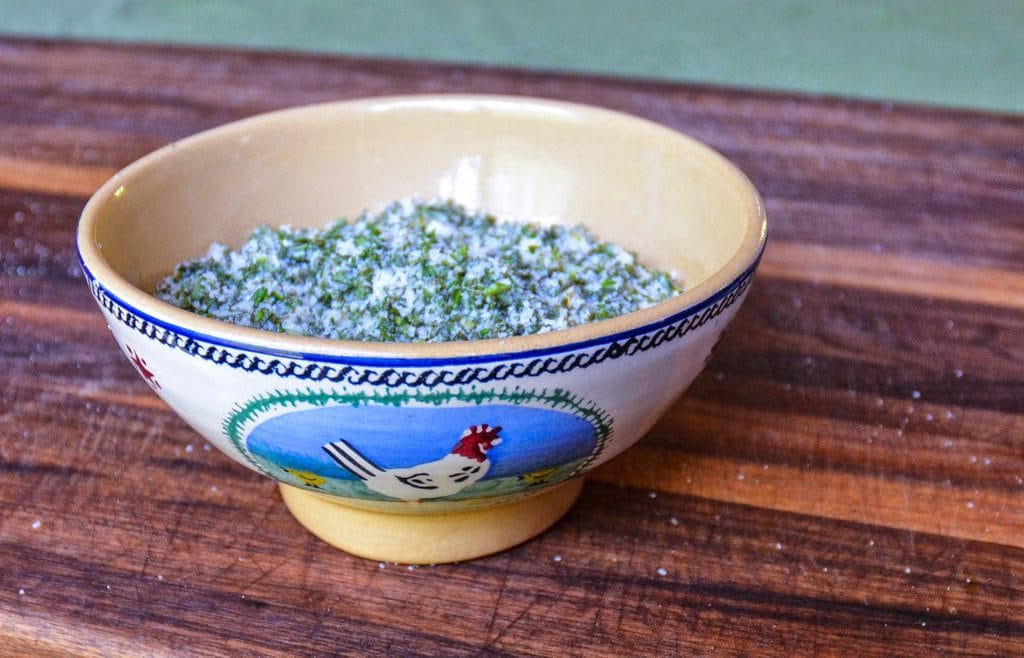
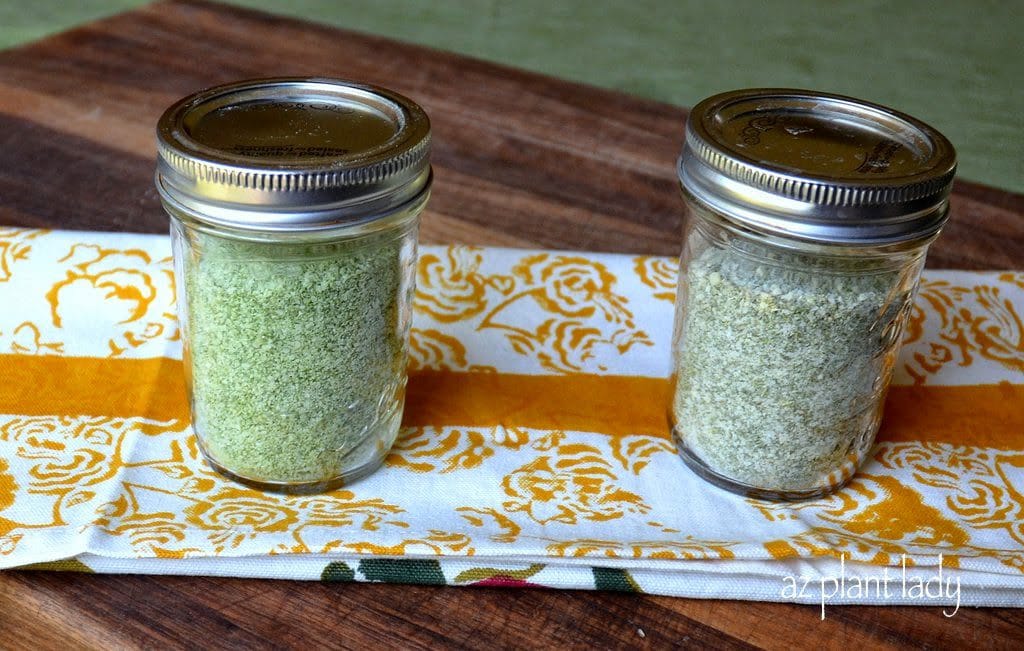
And ends up transformed into this…

making herb salts

Are you interested in making your own herb salts?   

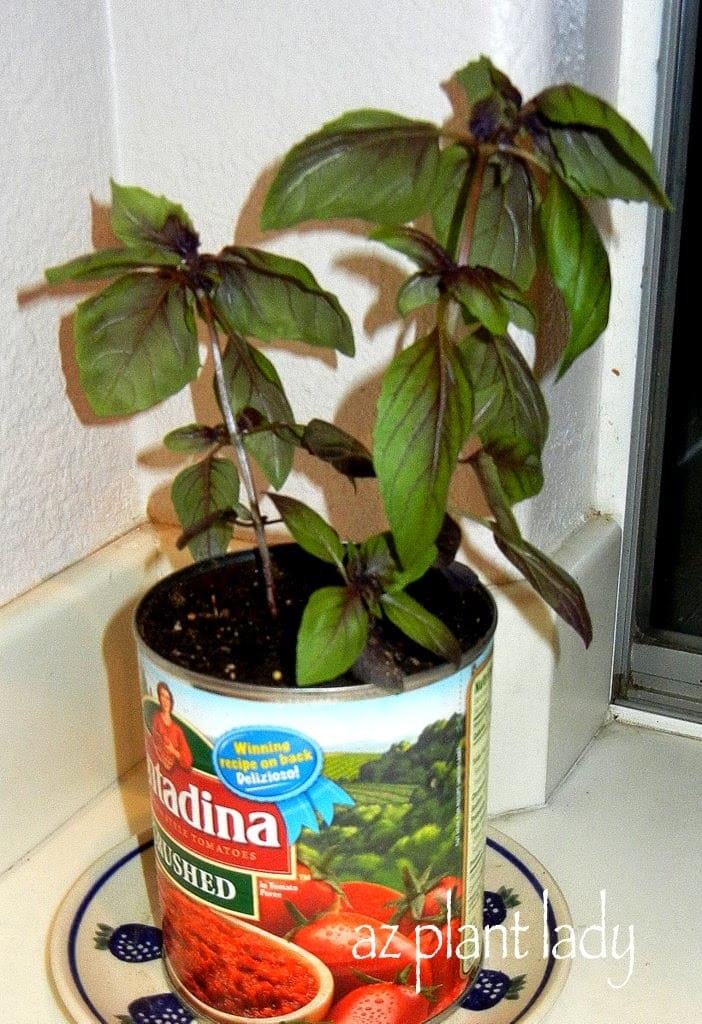
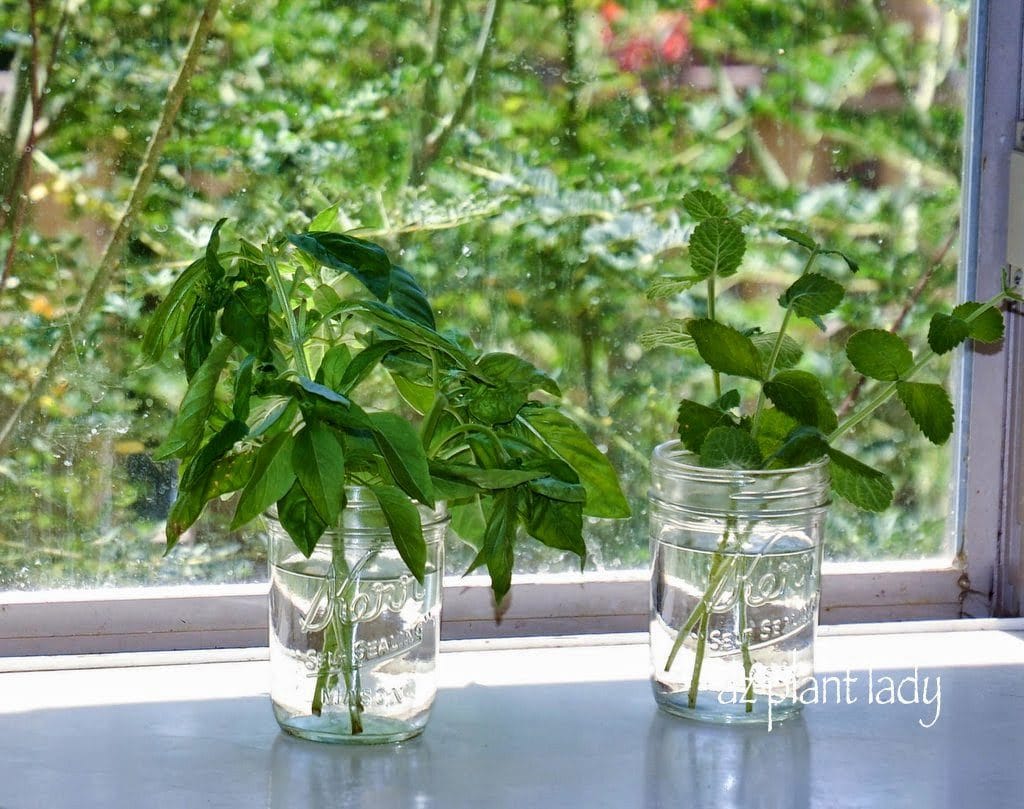
Summertime means that many of my herbs are actively growing and I sometimes run of ways to use all of the fragrant leaves of them.  

Herb or ‘gourmet’ salts are a great way to preserve herbs while adding a new twist to flavoring my favorite foods.
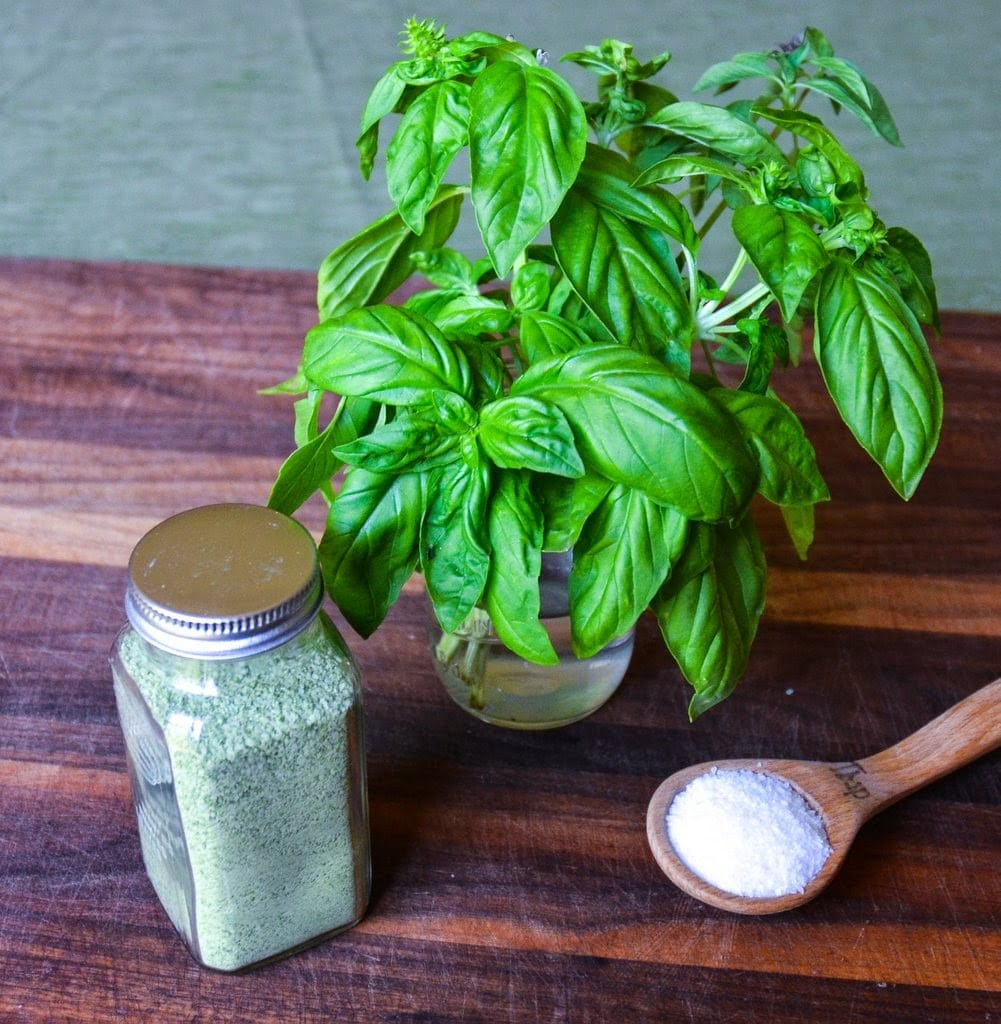
Basil Salt

Photo: Basil Salt

In my last post, I shared how to make basil salt using two ingredients – fresh basil leaves and kosher salt.  

Today, I’d love to show you how to make your own unique herb salt blend.

DIY Herb Salt Blends From the Garden

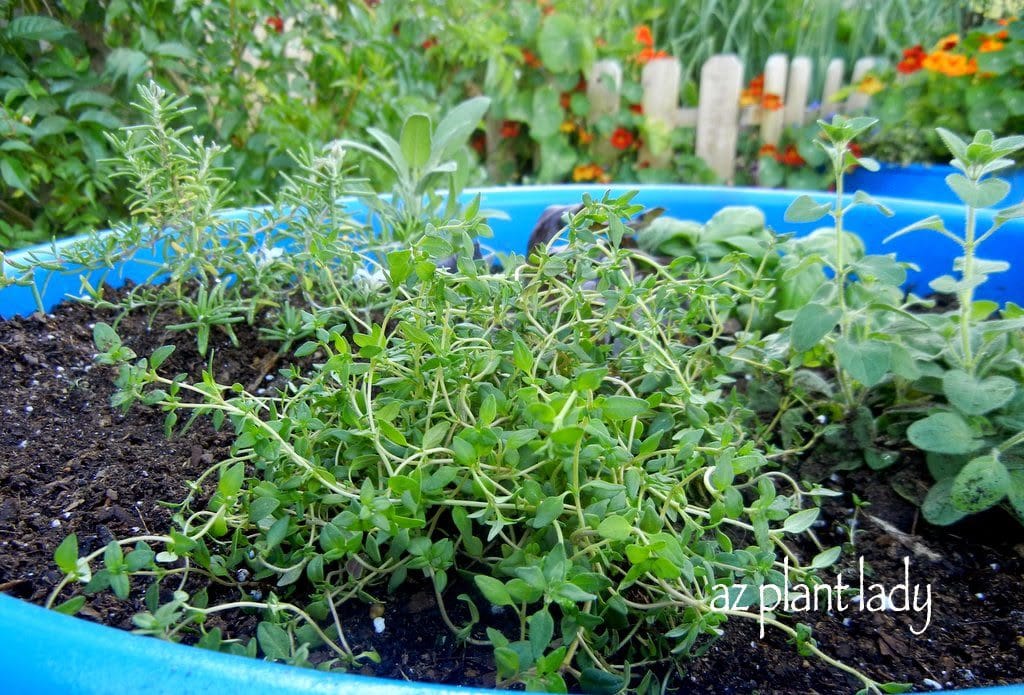
For my herb salt blend, I went out into the garden and looked for a variety of herbs that I love to cook with.  I found rosemary, sageand thyme. I then grabbed a head of garlic and kosher salt. I must admit that I was thrilled that I had all these herbs growing in my garden.  I grew the garlic too! 

For equipment, you should have a cutting board, a sharp knife for chopping, a baking sheet and a glass jar with a lid.  

You can make this recipe using a food processor, but it is optional.

DIY Herb Salt Blends From the Garden

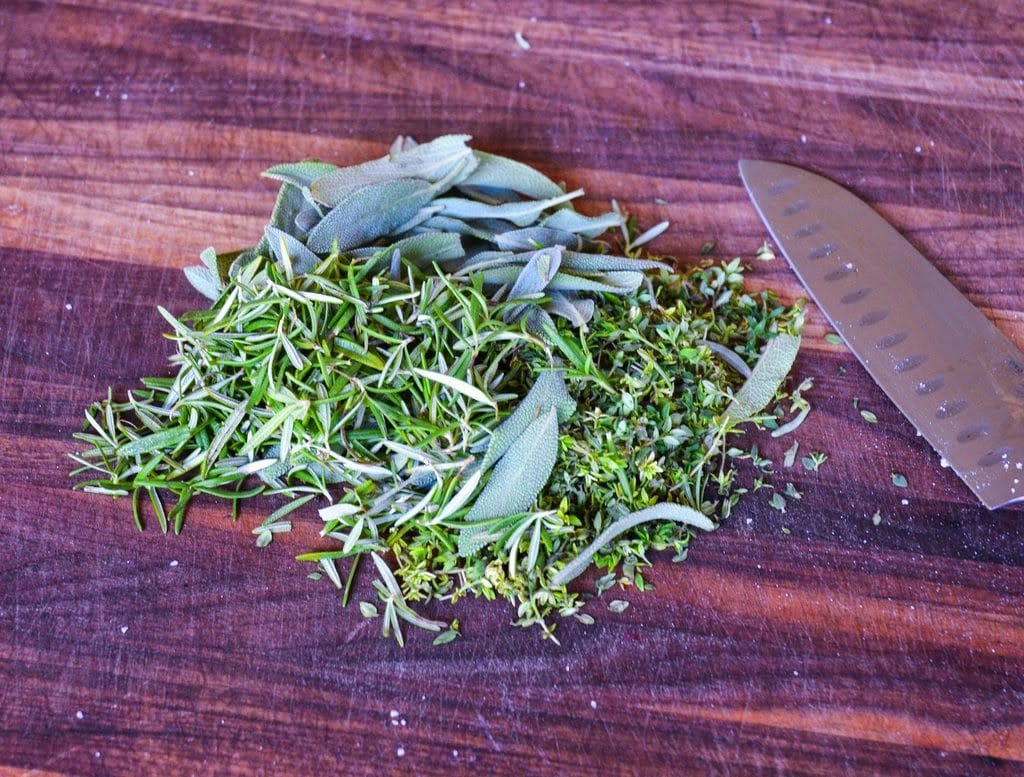
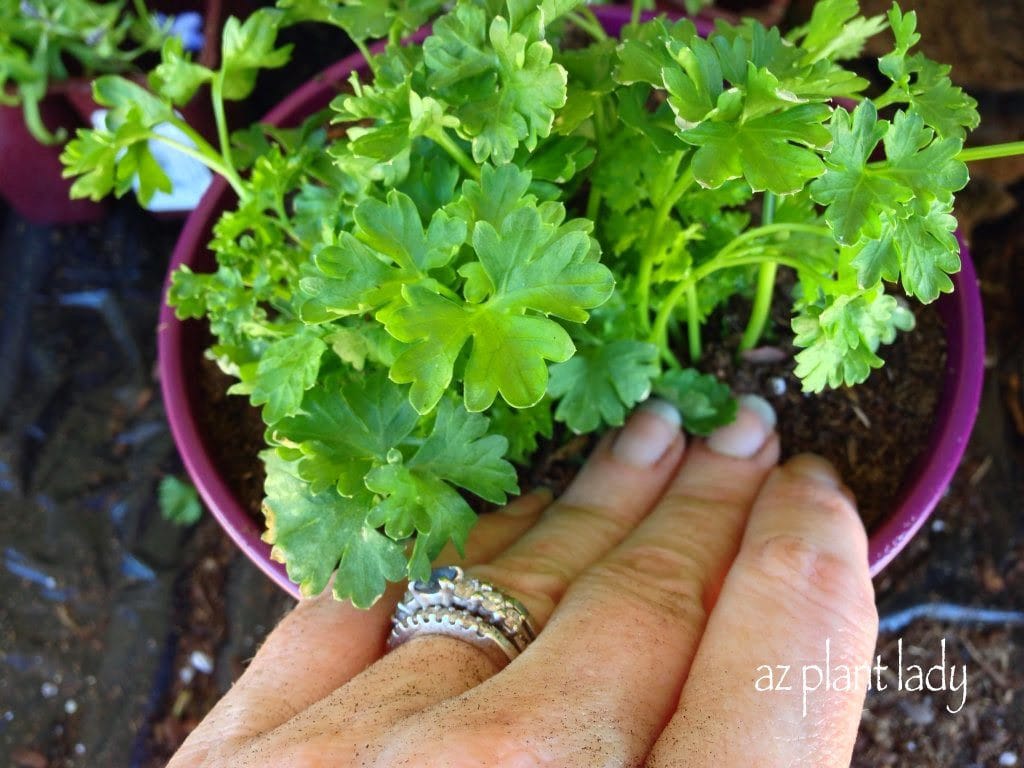
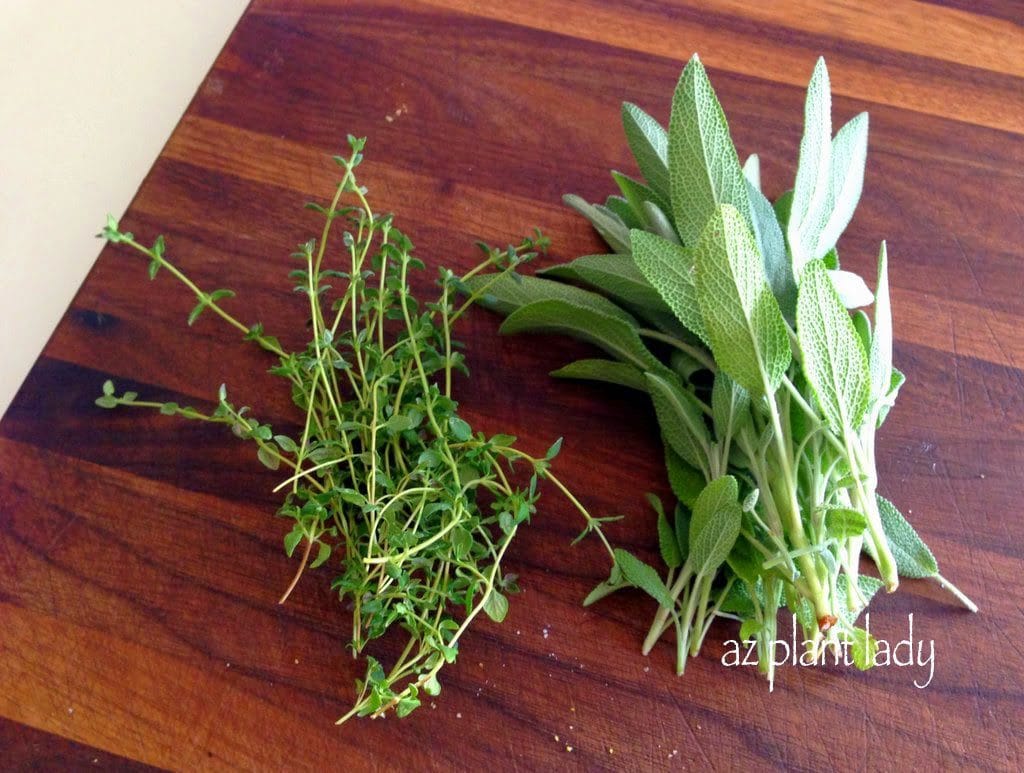
1. You will need 2/3 cup rosemary, 2/3 cup sage and 2/3 cup thyme leaves.  These are the amounts I used to get the flavor I liked, but you can play around with the ratio of each herb or choose different herbs to get the flavor you want.  

DIY Herb Salt Blends From the Garden

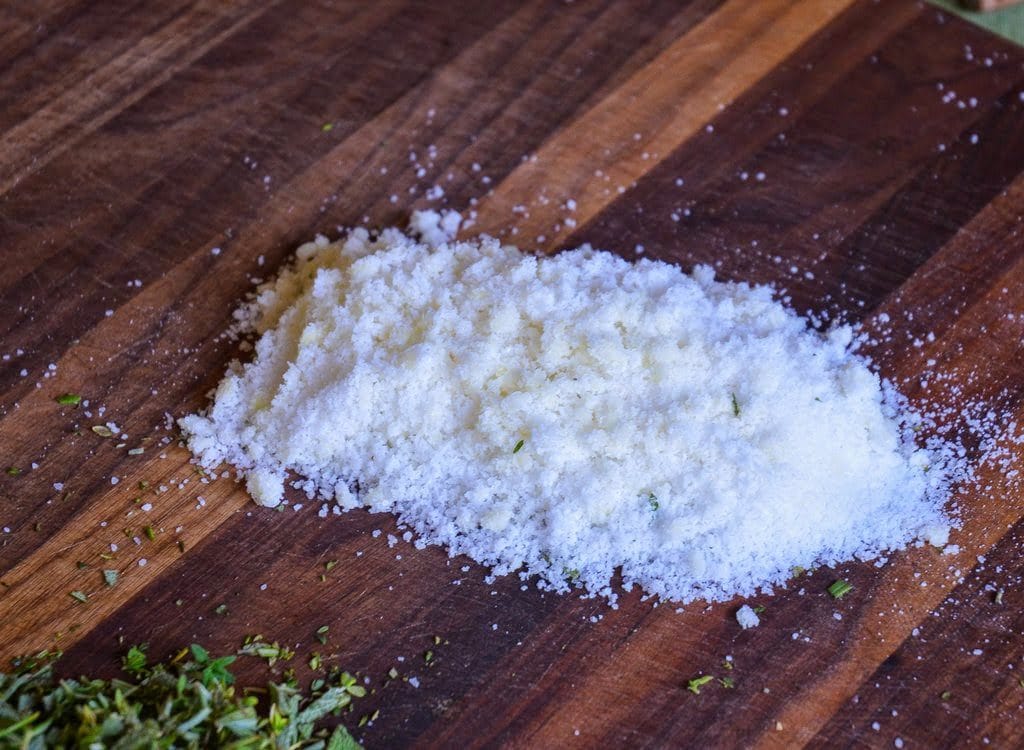
2. Place 1/2 cup kosher salt on your cutting board and add 5 peeled garlic cloves and chop them together.  The garlic should be finely minced at this point.

DIY Herb Salt Blends From the Garden

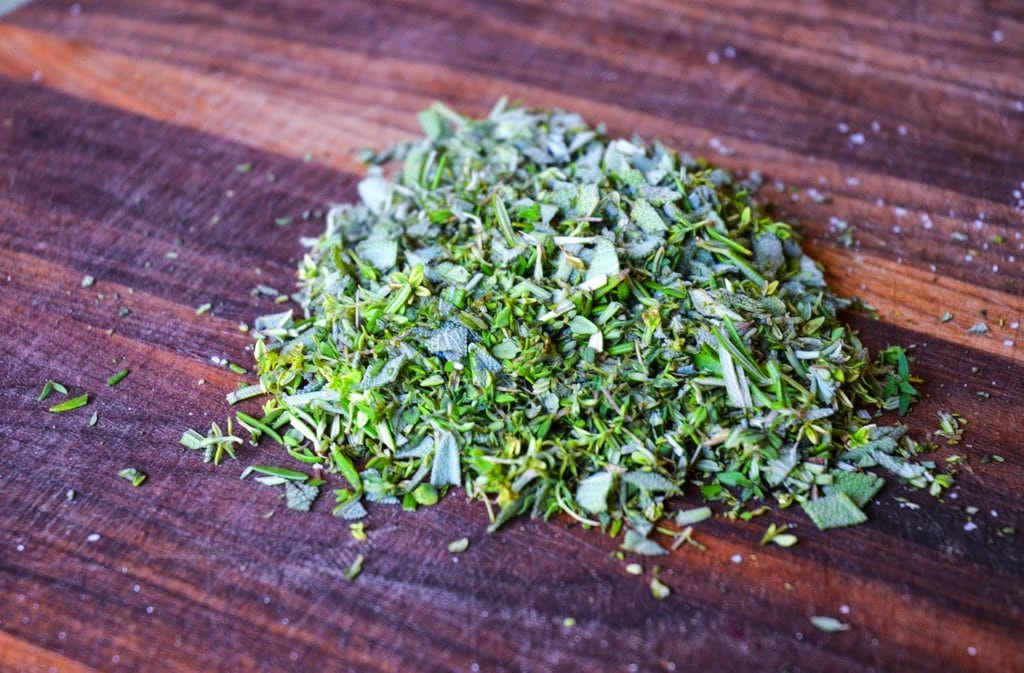
3. Chop all of the herbs together.

DIY Herb Salt Blends From the Garden

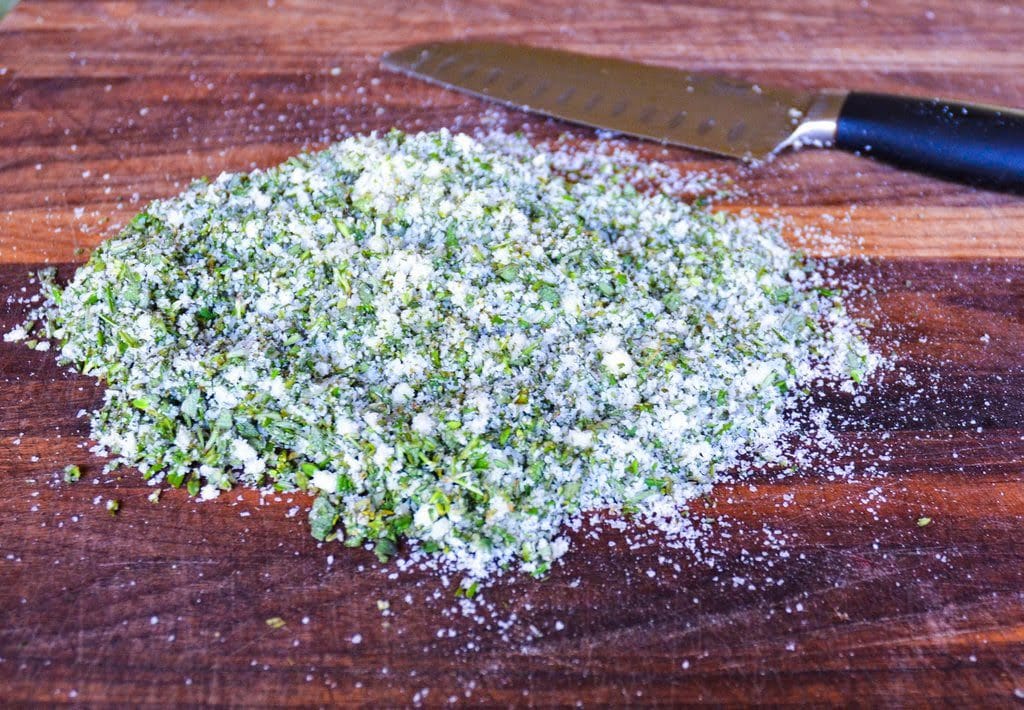
4. Combine the salt/garlic and the herbs together and continue chopping until finely chopped.

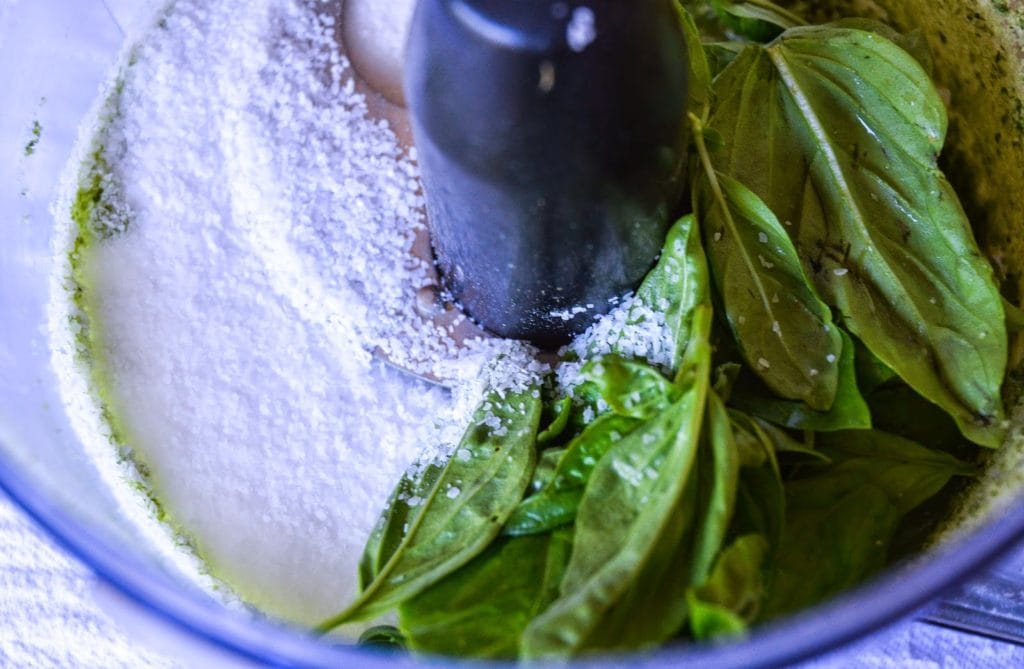
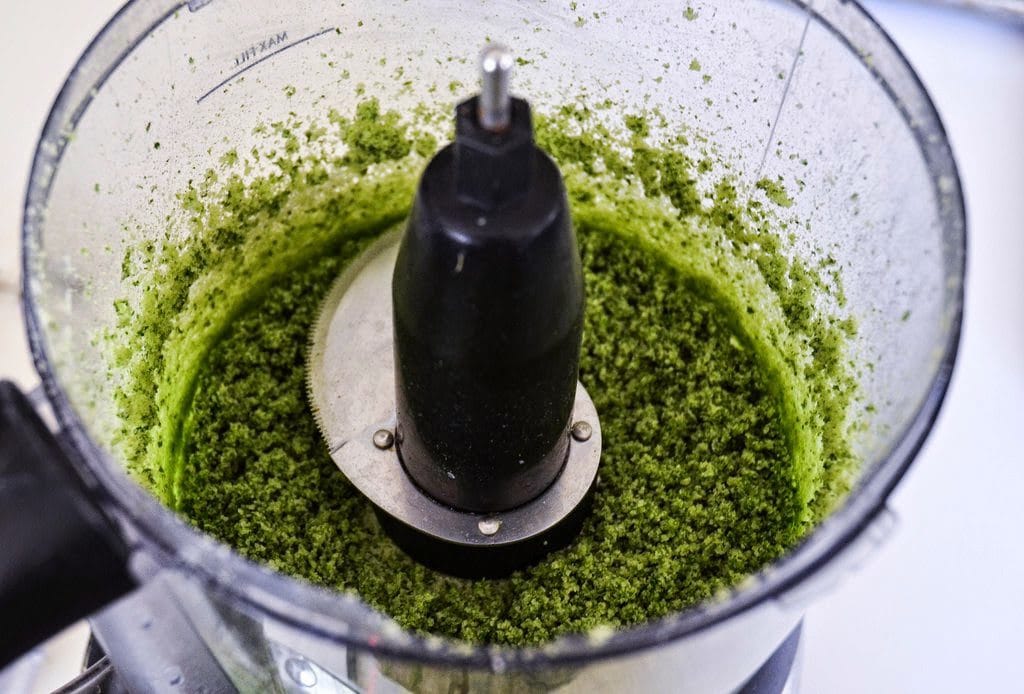
**You can use a food processor for steps 3 & 4 instead of chopping.  Simply put all ingredients in at once and pulse for 30 seconds. 

 herb salt

At this point you can use your herb salt to flavor a roast of beef, chicken or pork before cooking or to flavor roasted vegetables.  But, if you aren’t using the herb salt right away, continue on…  

DIY Herb Salt Blends From the Garden

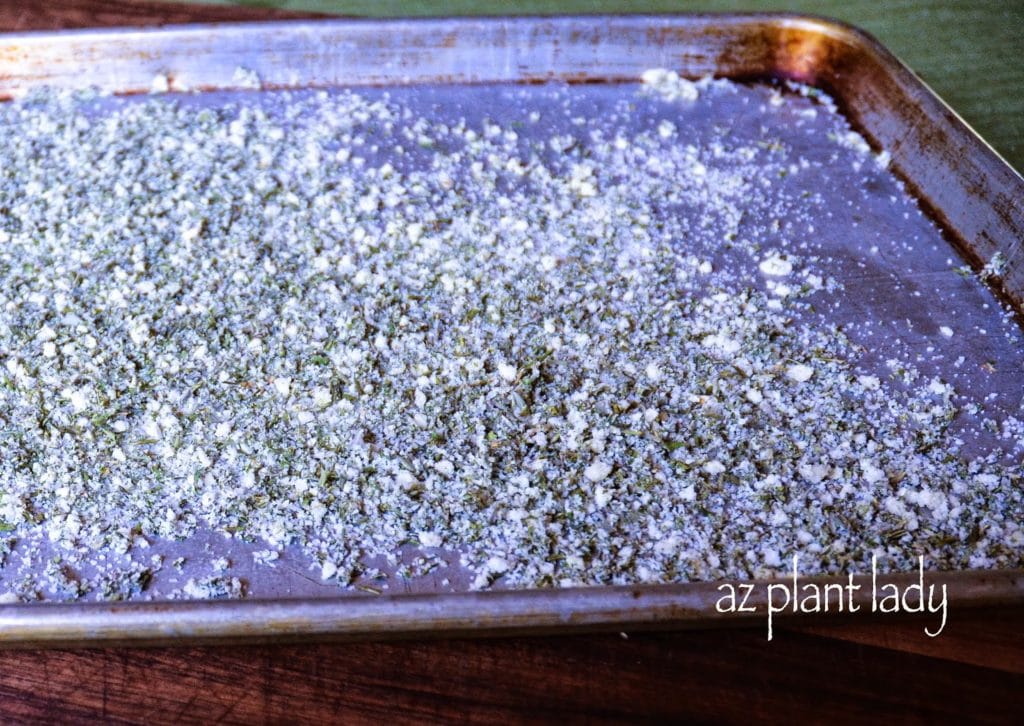
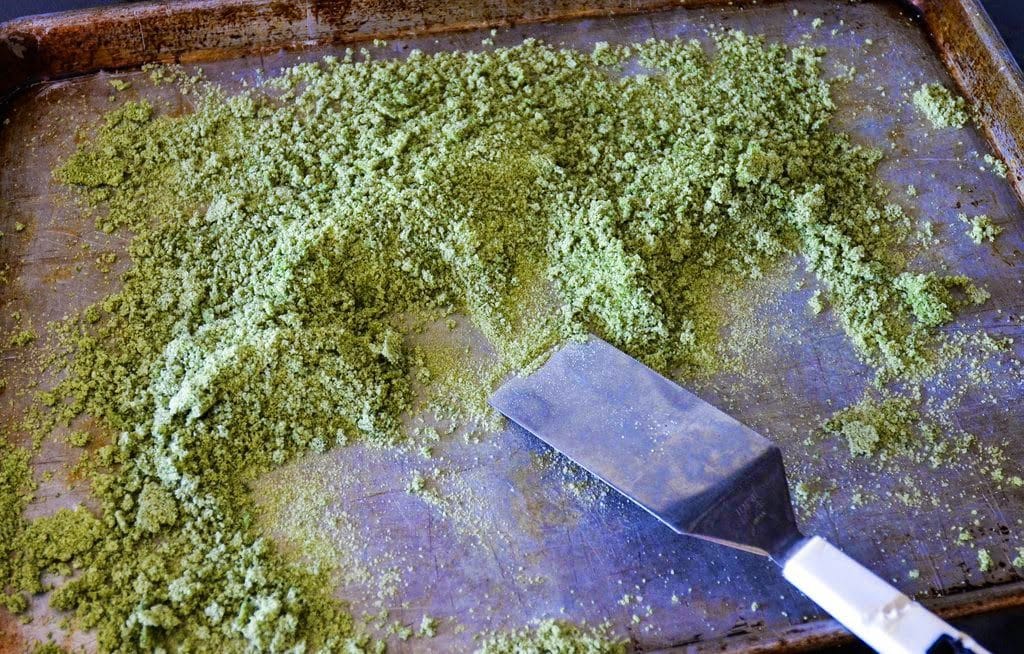
5. Put your herb salt mixture onto a baking sheet in a thin layer and bake in a 200 degree oven for 30 minutes.  This step dries out the herb mixture.  You can also allow it to air dry over a couple of days instead of putting it into the oven.

DIY Herb Salt Blends From the Garden

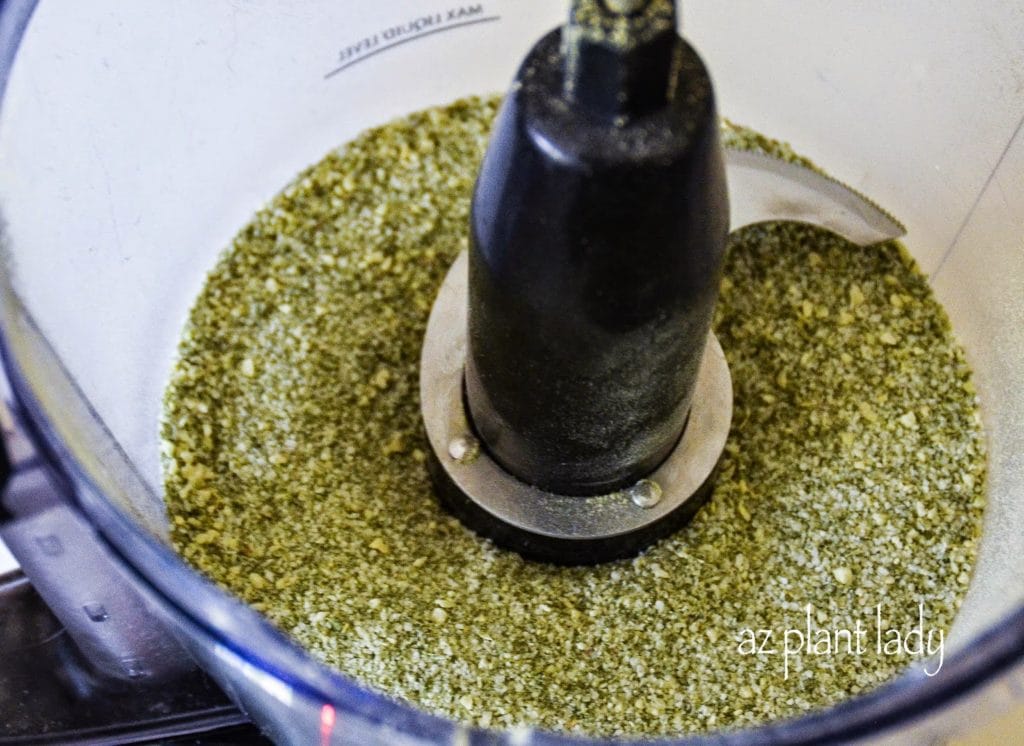
6. Place your dried mixture into a food processor and pulse for 30 seconds to get rid of any lumps.

If you don’t have a food processor, you can put the dried mixture into a Ziploc bag and roll it with a rolling pin until it is finely ground up.

Herb salts

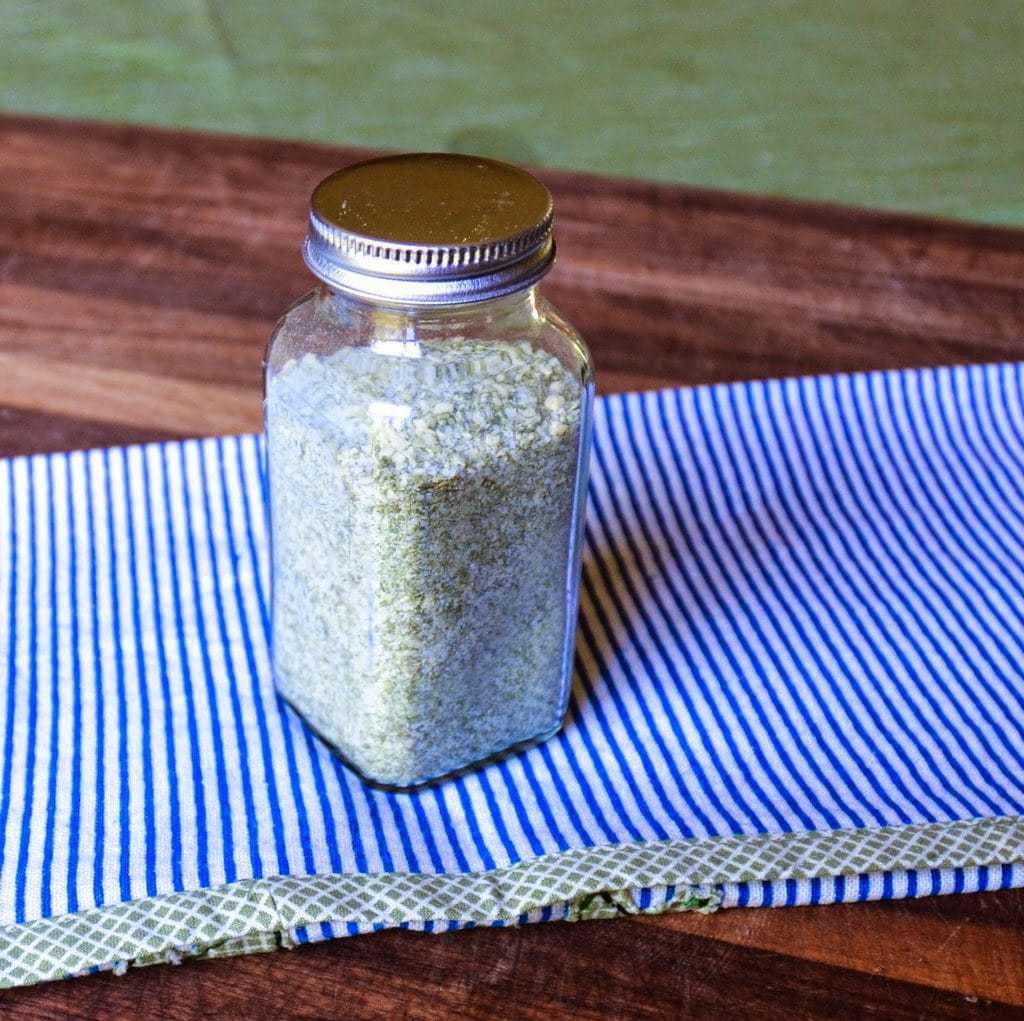
7. Put your herb salt into a glass jar with a tightly-fitted lid.  Store in a dark, dry place with your spices and dried herbs to preserve its flavor.

I will use my herb saltblend to flavor a pork loin, baked chicken or even a beef roast.  It would also taste great when sprinkled on roasted vegetables or put into soups, don’t you think? 

As you can imagine there are a number of different types of herb salts that you can make.  Here are a few different combinations that you might want to try:

Rosemary Sage Garlic Salt

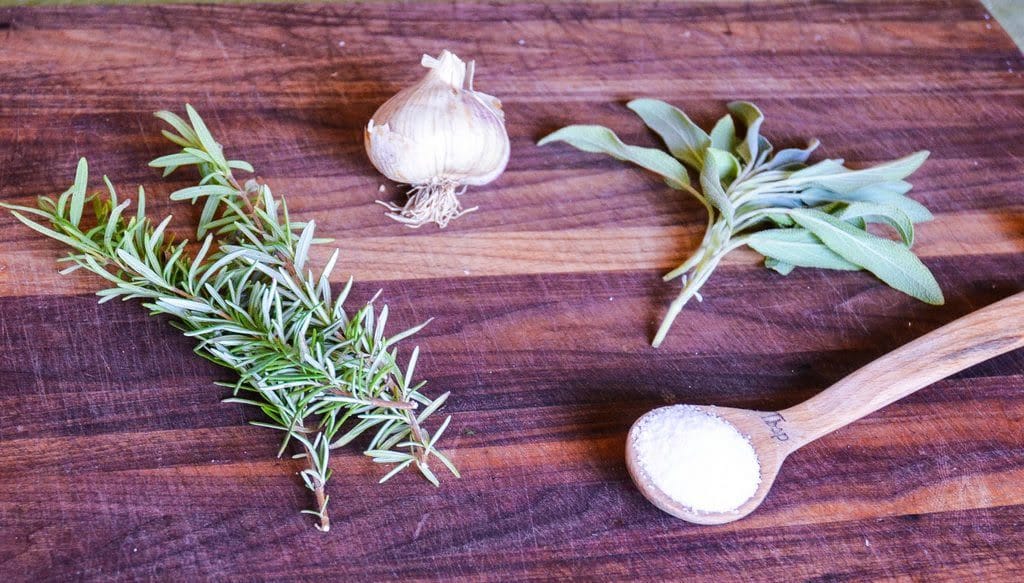
Photo: Rosemary Sage Garlic Salt

All of these herb salt blends can be made following the same steps as I have done for my herb salt blend – except where noted.

Rosemary Lemon Pepper Salt – 1/3 cup rosemary leaves, 2 tablespoons lemon zest, 1 teaspoon freshly ground black pepper and 1/2 cup kosher salt.
*(Increase cooking time to 1 hour)

Rosemary Sage and Garlic Salt – 1/2 cup of rosemary leaves, 1/2 cup sage, 5 peeled garlic cloves and 1/4 cup kosher salt.

Sage Thyme and Garlic Salt – 1/2 cup sage, 1/2 cup thyme, 5 peeled garlic cloves and 1/4 cup kosher salt.

If your garden is filled with herbs, this is a creative way to use them in the kitchen or give them as gifts.  Even if you don’t have a garden filled with herbs, you can find fresh herbs at your local grocery store or farmers market.

So, how about you? What would herb(s) would your ideal herb salt contain?

Do you like using fresh herbs when you cook?

I do.  But, I don’t like buying herbs from the store because they can be expensive and often aren’t very fresh looking.

Purple basil and chives

Photo: Purple basil and chives

I enjoy growing herbs outdoors in my garden, but I also grow herbs indoors on my kitchen windowsill.  

Whether you have a garden, a balcony or a windowsill, you can grow herbs inside.

own fresh herbs

Many people grow herbs indoors during the winter time, but you can grow them inside all year long.  

So, are you ready to grow your own fresh herbs? Let’s get started…  

1. Select a place to put your potted herbs that has a sunny window. – 
A window that faces south is best, but east facing will also work.  West facing windows may be too hot in if you live in the desert, but you can experiment with it.   Herbs need at least 4 – 5 hours of sun.

It’s important to note that herbs grown indoors won’t look as compact or lush as those grown outdoors, which is due to the fact that they don’t get as much sun indoors.  

2. Choose plastic or glazed containers with holes for drainage.

It’s best to avoid terra-cotta pots, which can dry out – especially during the winter when the air in our homes can be dry from heating. 

growing herbs indoors

growing herbs indoors

You can also use cans as recycled containers.  I have grown herbs in tomato cans as well as coffee cans.    

A row of cans with their labels removed, filled with herbs would add a real contemporary look to the kitchen, don’t you think?  

growing herbs

3. Use potting or planting mix.  
Avoid using potting soil, which is not formulated for containers and can become soggy.  

4. Select what herbs you want to grow.

There are many different herbs that will grow well indoors, which include basil, chives, lemon balm, mint, parsley, sage and thyme.   

You can buy herb transplants from your favorite nursery or sometimes at the grocery store.

growing herbs indoors

growing herbs indoors

Another way to grow certain herbs is to start them from cuttings.

I ran out to the garden to grab two types of basil and some apple mint to show you how to do this.  
Basil and mint are both easy to start from cuttings.

Remove the leaves from the bottom as shown, above.  Place the cuttings in a glass of water so that most of the stem is submerged in water, but take care that no leaves are in the water.

growing herbs indoors

growing herbs indoors

Place in a window with bright, indirect sun.  Change the water every other day and watch for roots to develop.  Once roots have grown 1/2 – 1 inch, transplant each cutting into a container filled with potting mix and your are done!

I told you it was easy.

growing herbs

5. Water your potted herbs when the top of the soil feels dry.

Herbs don’t like soggy soil, so it’s best to allow the top of the soil to dry out before watering deeply until the water runs out the bottom.    

An easy to tell when it’s time to water is to stick your finger into the soil till you reach your first knuckle – slightly less than an inch.  If it feels barely moist, then it is time to water again.  

6. Fertilize your herbs.

When plants are grown in pots, they need to be fertilized and herbs are no different.  You can apply organic fertilizer granules and work into the top inch of soil OR you can use an organic liquid fertilizer such as fish emulsion.    

Follow directions on the granular fertilizer package when applying and guidelines for frequency.  In general, liquid fertilizer can be applied every 2 weeks.

growing herbs

Soon you will have fresh herbs close at hand and ready to use in your favorite dishes.I recently made herbs salts from my herbs, which is fun and easy to do.  The flavor that they add to food is just delicious!

Click the links below to learn how to make:

Basil Salt

Herb Salt

For more information on how to grow herbs and how to preserve them, click on the following links:

Preserve Herbs By Freezing Them Into Ice Cubes

Preserve Herbs By Drying Them

I enjoy DIY projects – particularly when they involve things that I have grown in my garden.

It seems that a lot of the things that I make from the garden include herbs.  I have dried herbs, frozen them into ice cubes and have done homemade herb butter.

Using herbs from my garden when I cook always gives me a special satisfaction, and my food tastes great too!

Basil herb Salt

Photo: Basil herb Salt

Today, I am excited to share with you how to make basil herb salt.  If you haven’t heard of herb salts before, they are referred to as ‘gourmet salts,’ which are very popular in the foodie community.  

Herb salts are easy to make – especially if you have a food processor.  The salt helps to preserve the fresh flavor of your favorite herbs, and they add fabulous flavor to your favorite dishes.  

Gourmet salts also make great gifts.

Basil herb Salt

It is hard to find anyone who doesn’t love basil and the flavor it adds to so many different dishes.  I enjoy making Italian food and am often using basil.  Usually, I tear or chop some fresh basil leaves and add them as flavoring.  

Basil salt can be used in a variety of ways including sprinkling into your favorite tomato sauce, on top of a fresh-baked pizza, adding to bruschetta or simply sprinkling some on the top of fresh tomatoes.   Are you ready to get started?    

You will need fresh basil (either from your garden or the store) and kosher salt – pretty simple!  

Grab your food processor, a baking sheet and a glass jar with a lid.

kosher salt and basil leaves

1. You will need 1/2 cup each of kosher salt and basil leaves.  

basil and kosher salt

2. Add the basil and kosher salt to your food processor and pulse for 30 seconds.

Got Basil? Create Delicious Herb Salt

The finished mixture should look like this.

Got Basil? Create Delicious Herb Salt

3. Pour the mixture out onto a baking sheet in a thin layer.  The mixture will be somewhat moist.

Got Basil? Create Delicious Herb Salt

4. Bake for 20 minutes in a preheated 225-degree oven.  After the first 10 minutes, lightly mix the basil salt mixture and bake for another 10 minutes – this helps it to dry out completely.

basil salt mixture

5. Put the dried basil salt mixture back into the food processor and blend to remove any remaining lumps.  *Make sure that the food processor is dry beforehand.

basil salt into a glass container

6. Put your basil salt into a glass container with a tight-fitting lid.

That’s it – you are done!

I must admit that this is a pretty easy project and the food processor does most of the work.    

Keep your basil salt in a dark, cool space where you keep your other herbs/spices to help preserve its flavor.  Use it within a few months for the best flavor.  

*******************************  

This is one of the rare times that I didn’t have to spend any extra money on a DIY project – I had the basil growing in my garden, the kosher salt was in the pantry, and I used a mason jar that I had on hand.

Basil Salt

I made three batches of basil salt and will keep one for myself and start using it right away.  The rest I plan on giving away as gifts.    

Gifts from the garden and kitchen are personal and much appreciated by others.  Last year, I gave away homemade jam from my peach tree.  This year it will be basil salt.  

I can’t wait for my basil plant to grow more leaves so I can make more!

Herbes de Provence

Photo: ‘Herbes de Provence’ salt

**Basil salt is just the beginning of different types of herb salts you can make.  In my next post, I will show you how to make a customized herb salt blend as well as some ideas of other herb salts you can make.    

What would you use basil salt to flavor?