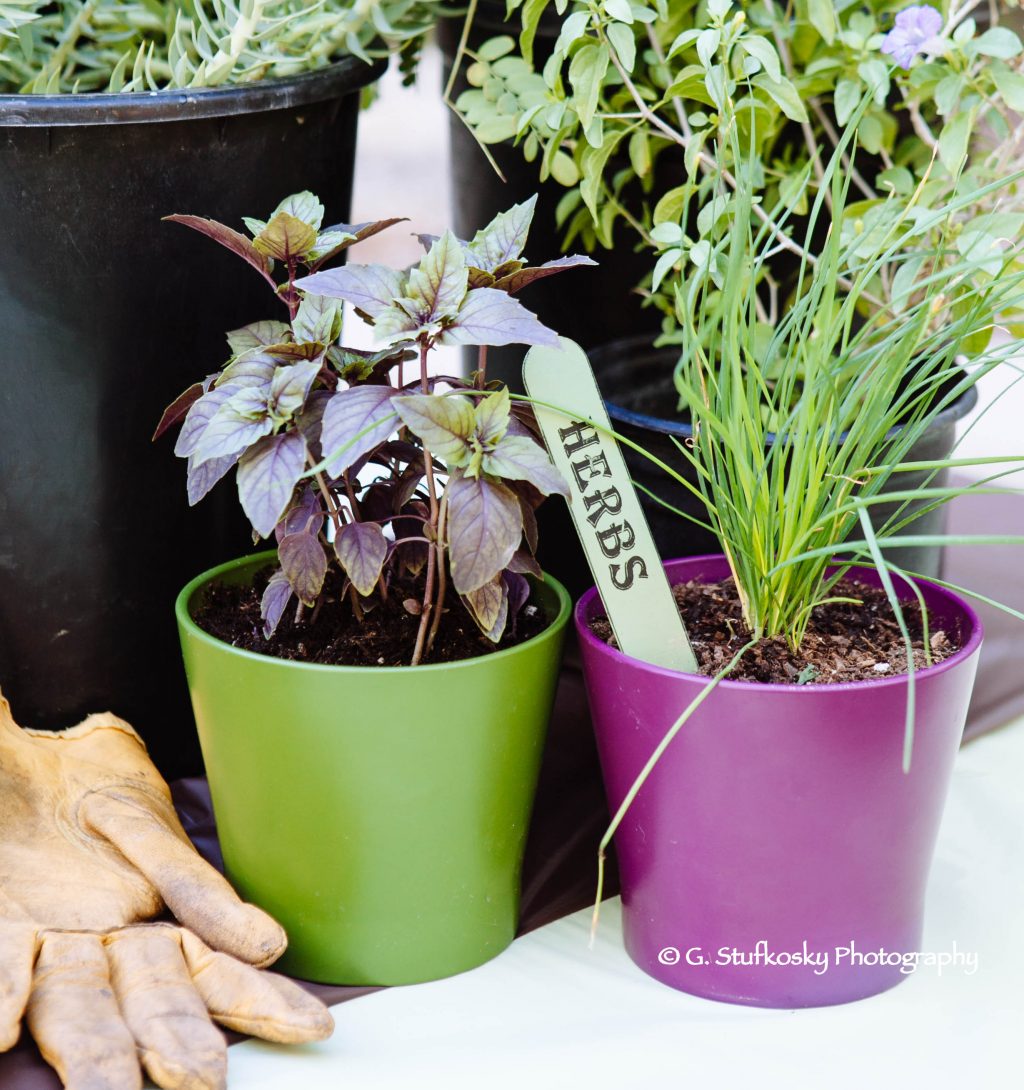
Herbs are easy to grow and thrive in arid climates and shrug off the heat. I’m the first to admit that I don’t like messing around with fussy plants and so herbs fit right in with my gardening style.
Toward the end of summer, my garden is overflowing with herbs – especially basil. I certainly have more than I can use right now, so I like to preserve my herbs in a variety of ways so that I can enjoy the fresh flavor of summer throughout the winter months.
preserving herbs
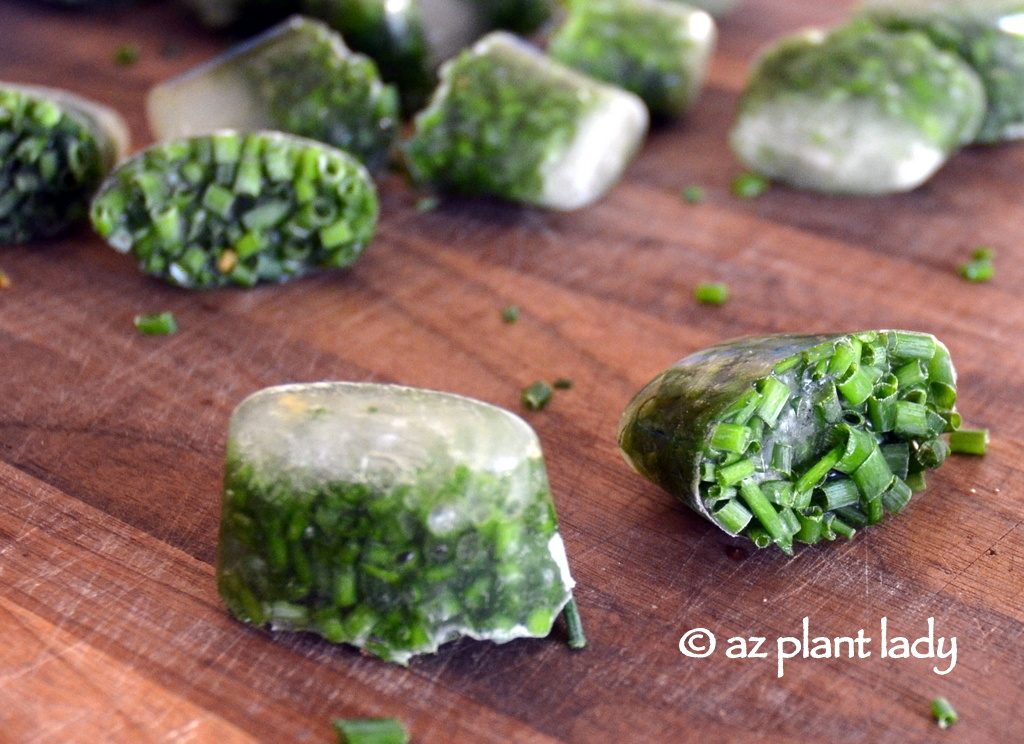
One of the easiest ways to store herbs is by freezing them using olive oil or water. You can see my post on how to freeze herbs here.
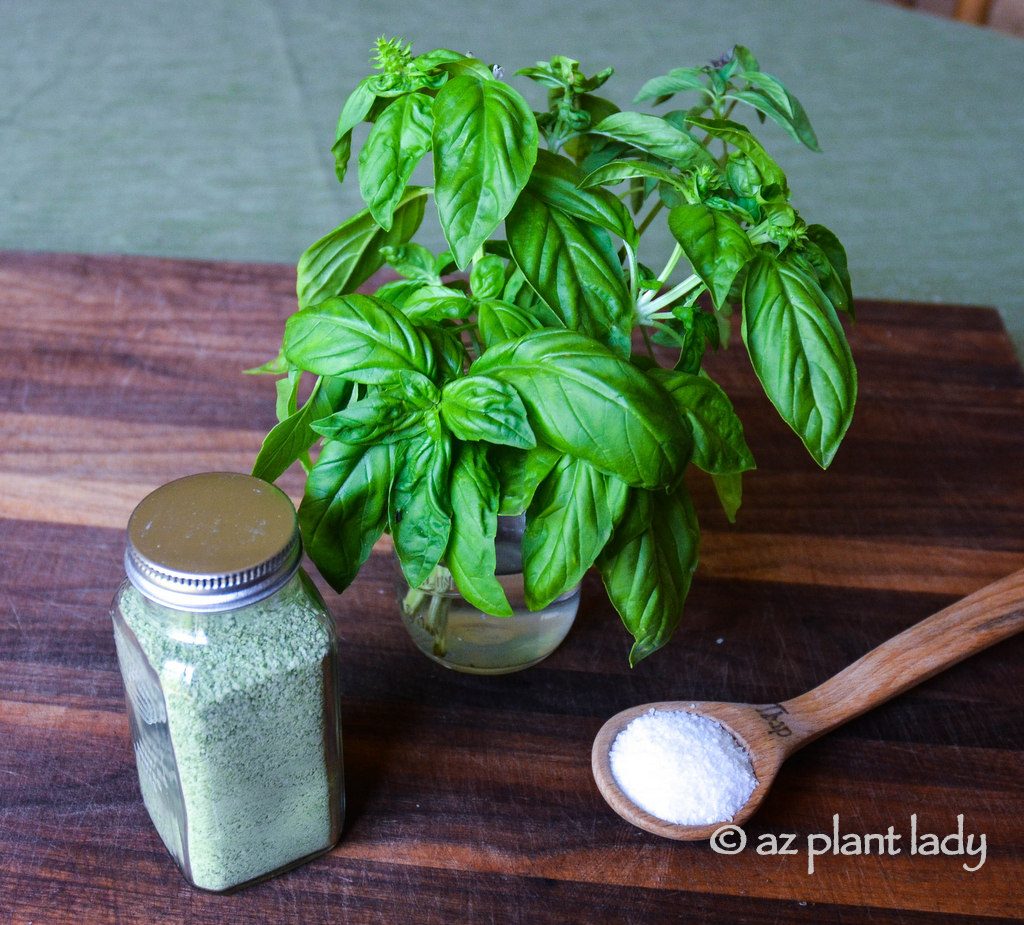
Herb salts are a newer way to keep the fresh flavor of herbs alive. The ingredients are simple, and they are a unique way to add a delicious taste to your favorite recipes. See how easy they are to make in this blog post.
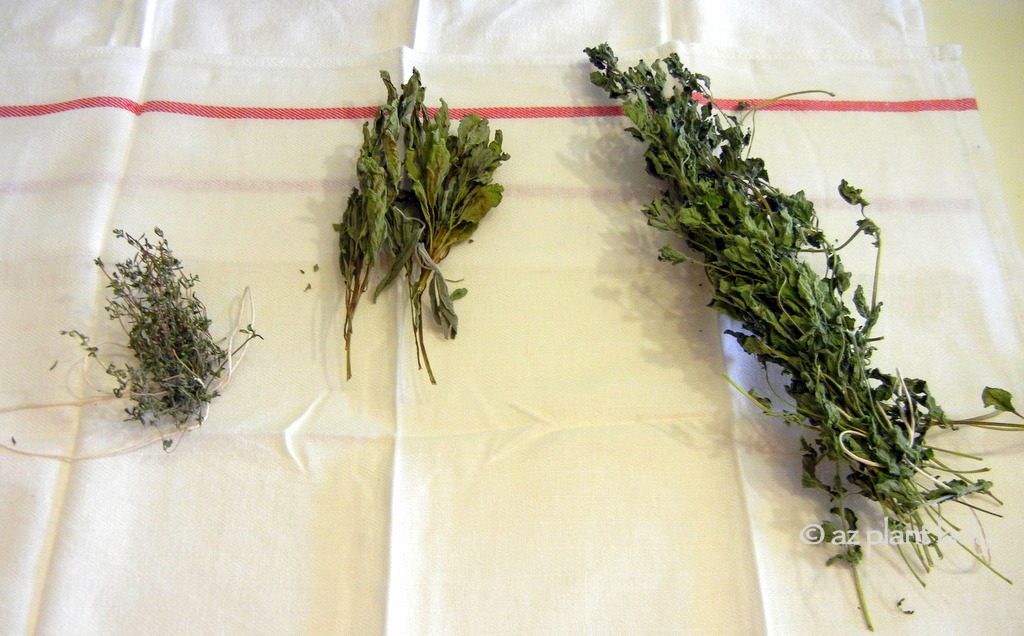
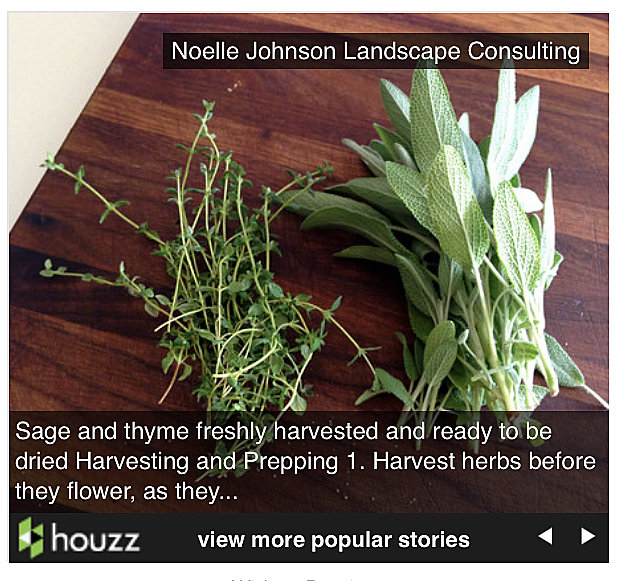
Finally, the most popular method for preserving herbs is to dry them. Some types of herbs are easier to dry than others, and there are different methods for drying herbs. I invite you to read my latest article for Houzz.com where it’s all you need to know about drying herbs. I hope you enjoy it!
Do you dry or freeze your herbs? Which herbs work best for you?
https://www.azplantlady.com/wp-content/uploads/2017/10/rosemary_sage_herbs.jpg7111024arizonaplantlady@gmail.comhttps://www.azplantlady.com/wp-content/uploads/2025/08/AZ-Plant-Lady-Logo-small.jpgarizonaplantlady@gmail.com2017-10-02 11:22:502022-10-02 01:14:493 Ways to Preserve the Flavors of Summer With Herbs
Have you ever looked back at your calendar and wondered at how you ever got everything done while still remaining somewhat sane?
I have…
Oh, I knew ahead of time that it would take a small miracle to get through the 30 days, starting with Halloween.
At this point, I’d like to apologize for the lack of blog posts, but in my defense, I was lucky to be able to remember to feed my kids (just kidding).
Seldom, have I looked forward to December as a time where I will be less busy, but in comparison to what I’ve done the past month, it should be a breeze.
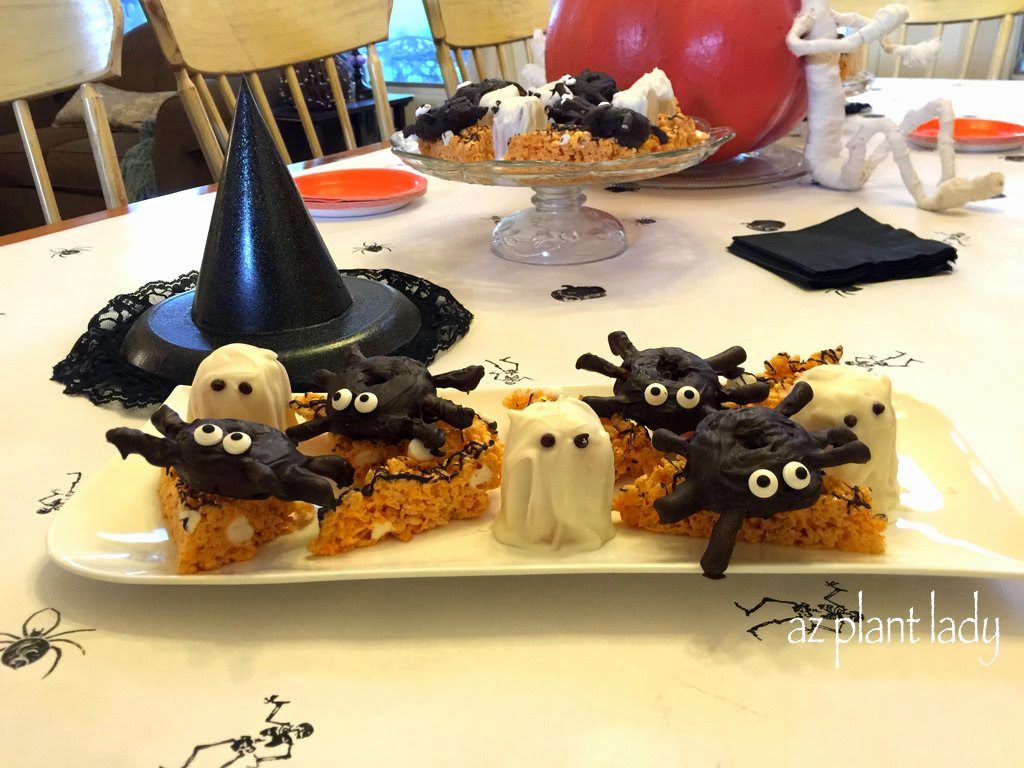
It all started with our annual Halloween celebration, which is held at our house.
I spent the day making ghosts (half a Twinkie dipped in white chocolate), black spiders (mini chocolate donuts with chocolate dipped pretzel legs) and candy corn rice krispy treats.
The entire family came over for dinner and trick-or-treating, including my granddaughter, Lily, who dressed up as Sleeping Beauty.
Two days later, we had an even larger group of people gather at our house for Lily’s birthday party – she turned 3!
Lily is seriously into princesses, so there was a lot of pink in the room.
I made her a princess cake, which went along with her favorite cake pops.
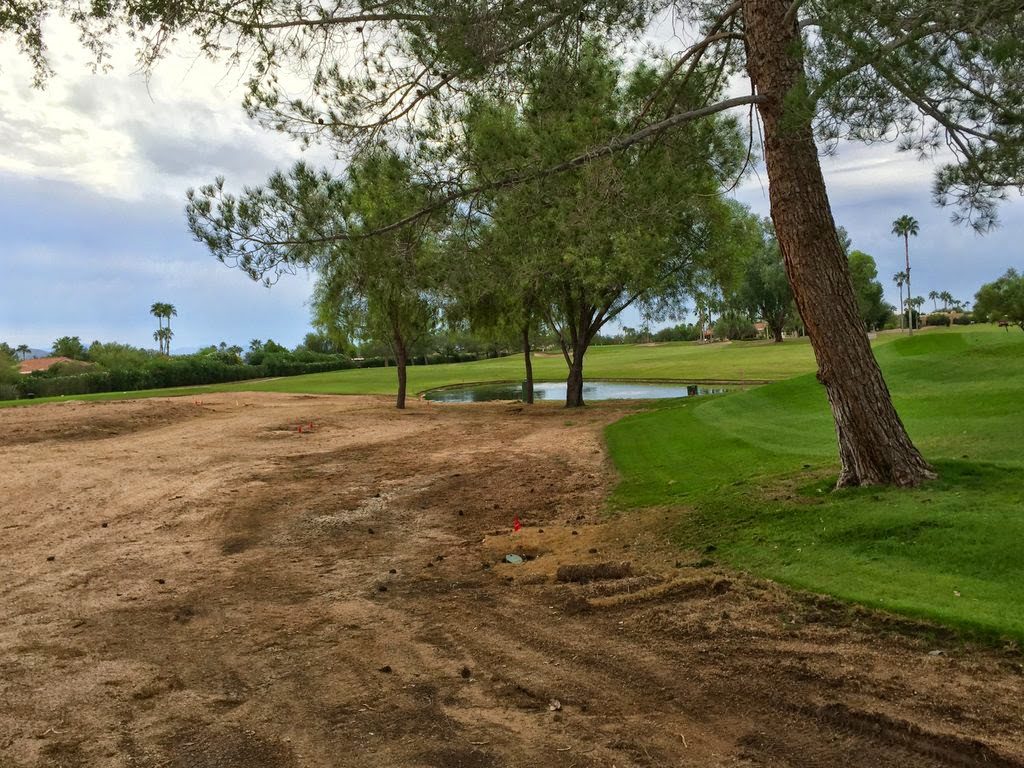
In the week that followed, I continued my work with a local golf course, where they are removing 30 acres of turf in favor of landscape areas filled with drought tolerant plants.
The areas of turf being removed are largely out of play in this parkland style golf course. Not all 30 acres are being removed all at once – instead, the grass is being taken out in smaller sections.
While a lot of my time was being spent at the golf course, I spent two days selling handmade items at a large holiday boutique.
Now, I’ve never sold anything at a boutique, but this past summer my mother, who is extremely talented, asked my sister and I to do it with her. I knew that it would be tough, since November is one of my busiest months since I spend most of my time outdoors consulting on landscapes. But, I really wanted to do it, so I used some of my down time this summer to make some things.
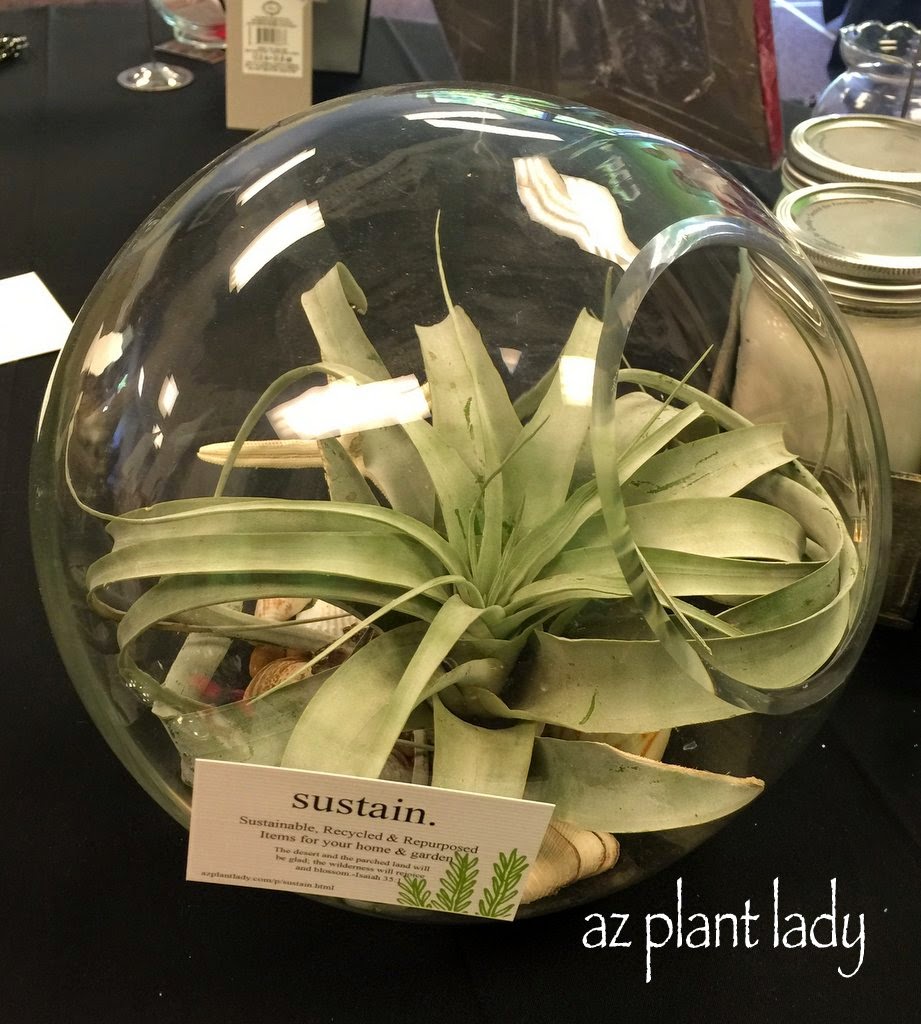
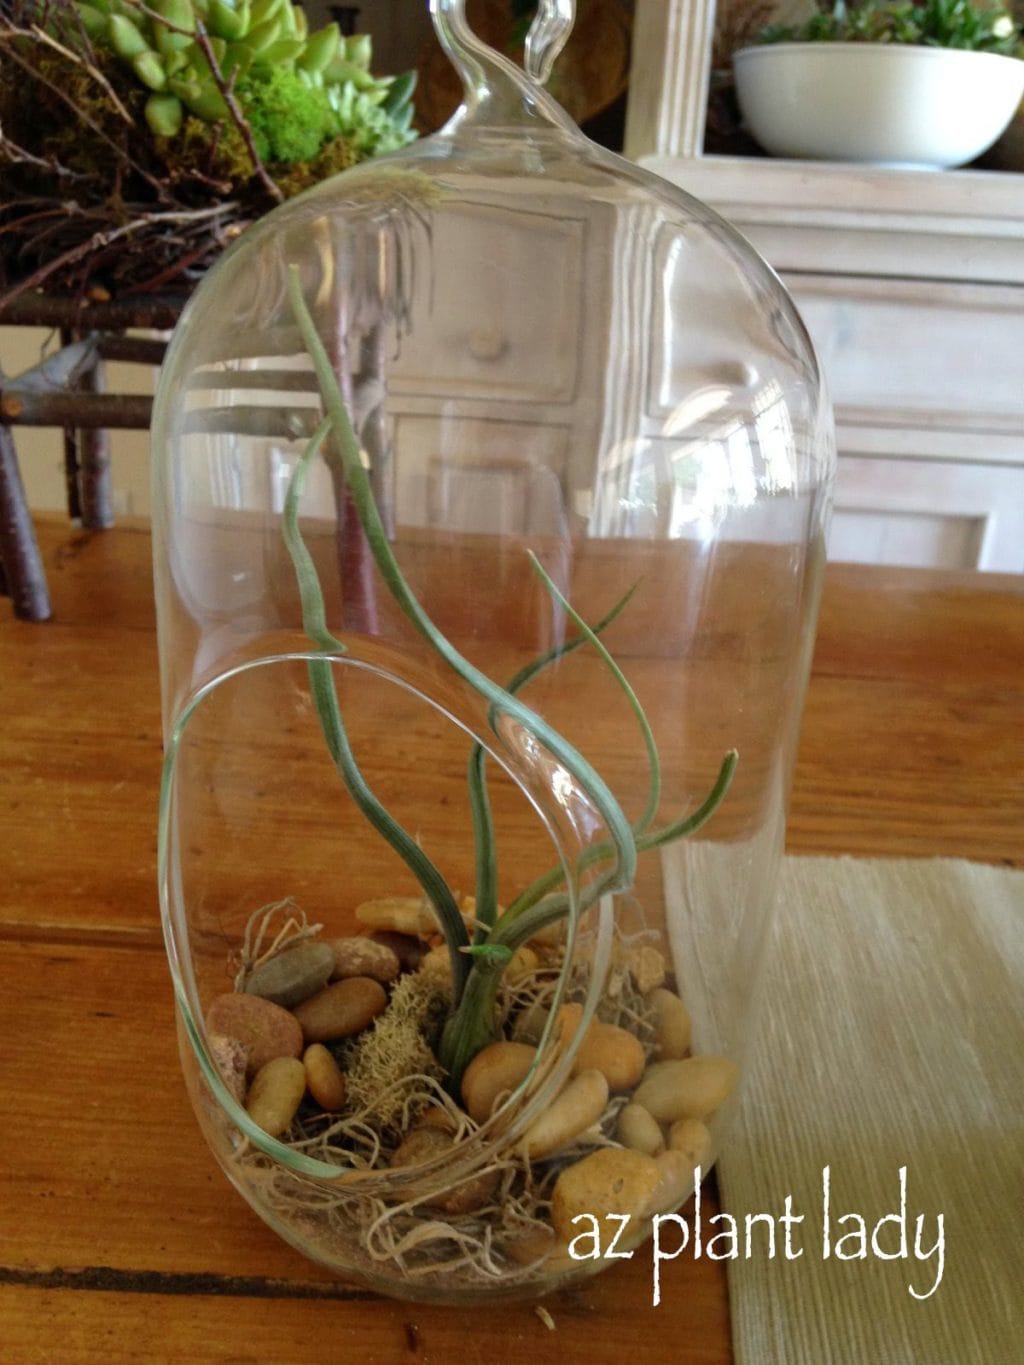
Xerigraphica air plant in a terrarium
The items we sold were made using sustainable, recycled and/or repurposed items.
Air plants in terrariums were a big hit.
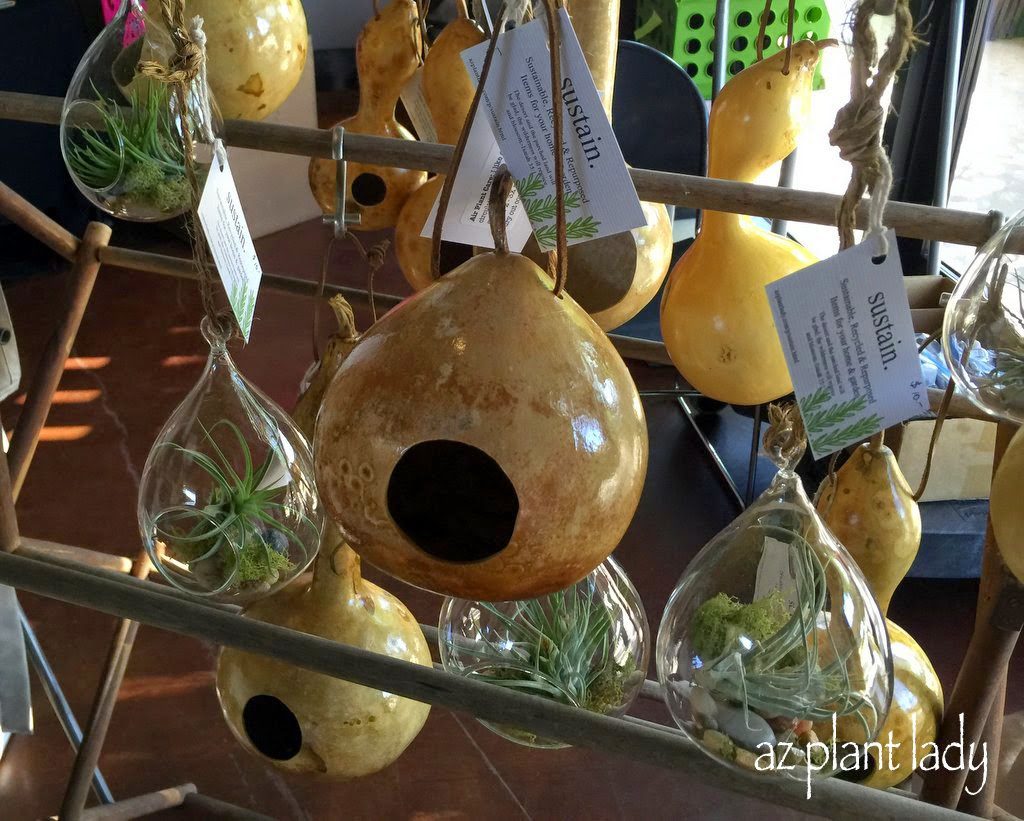
We also had hanging terrariums filled with air plants. I made bird houses from gourds, many of which we grew in our gardens.
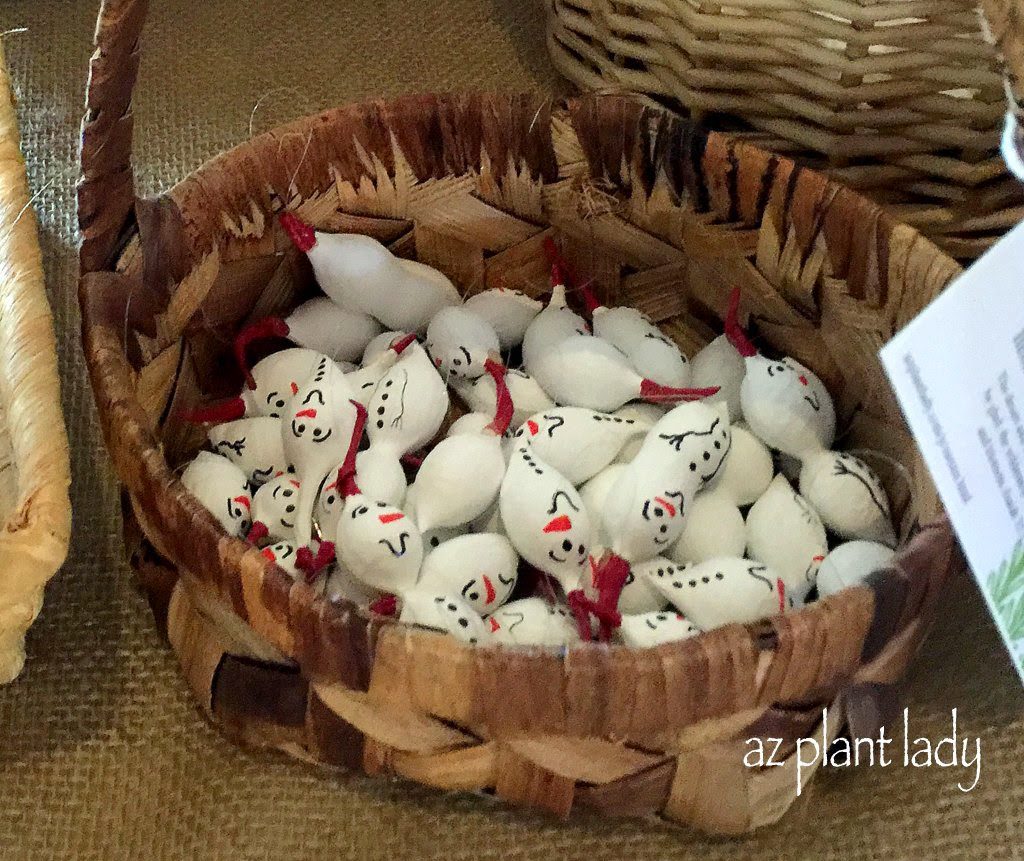
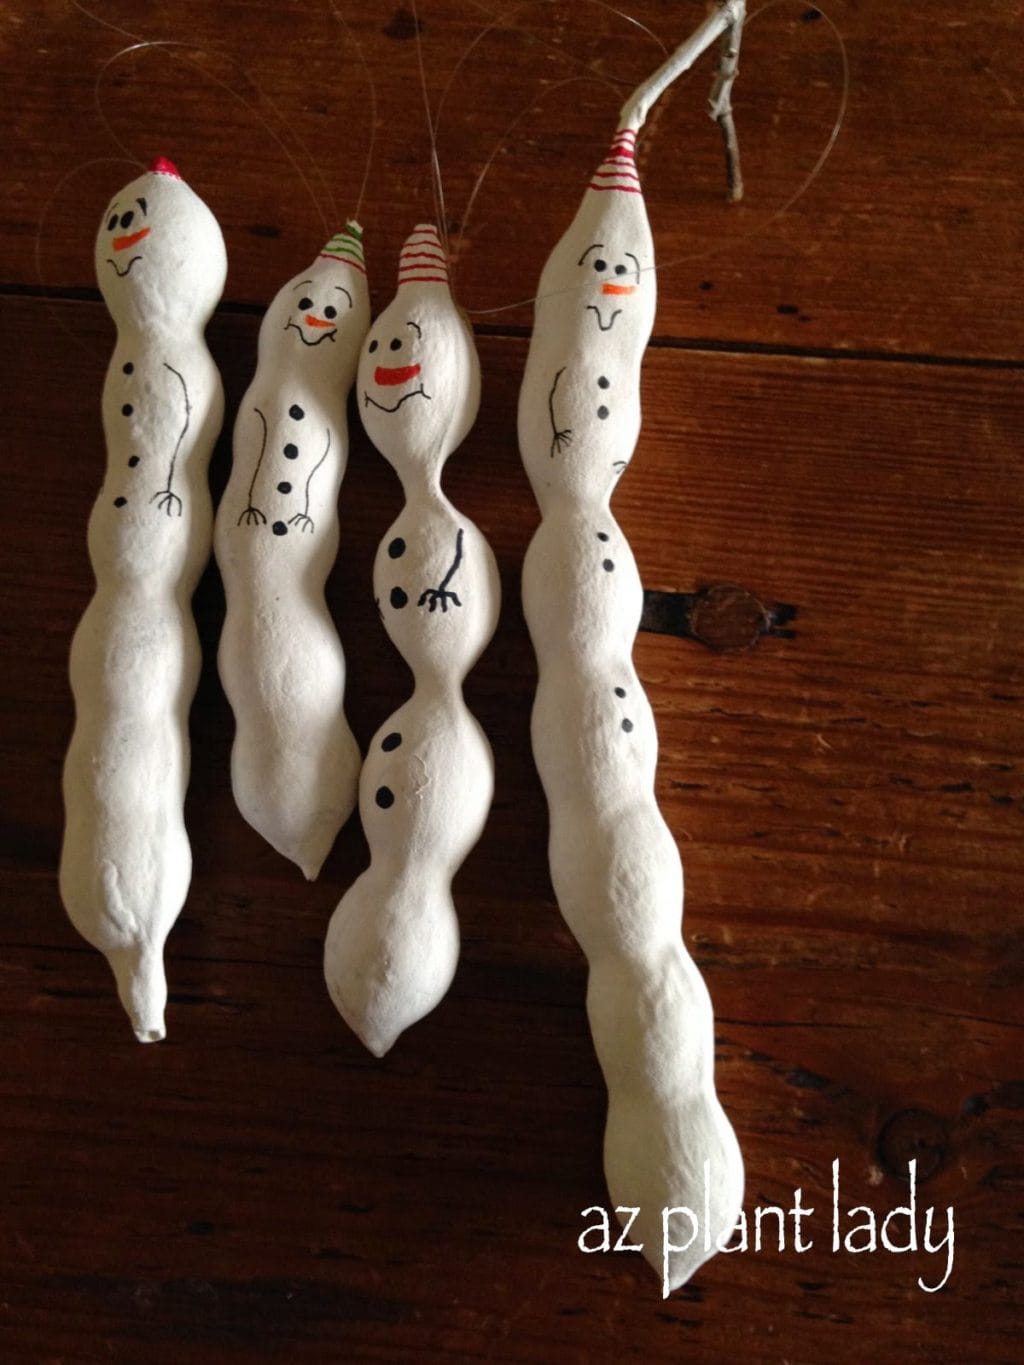
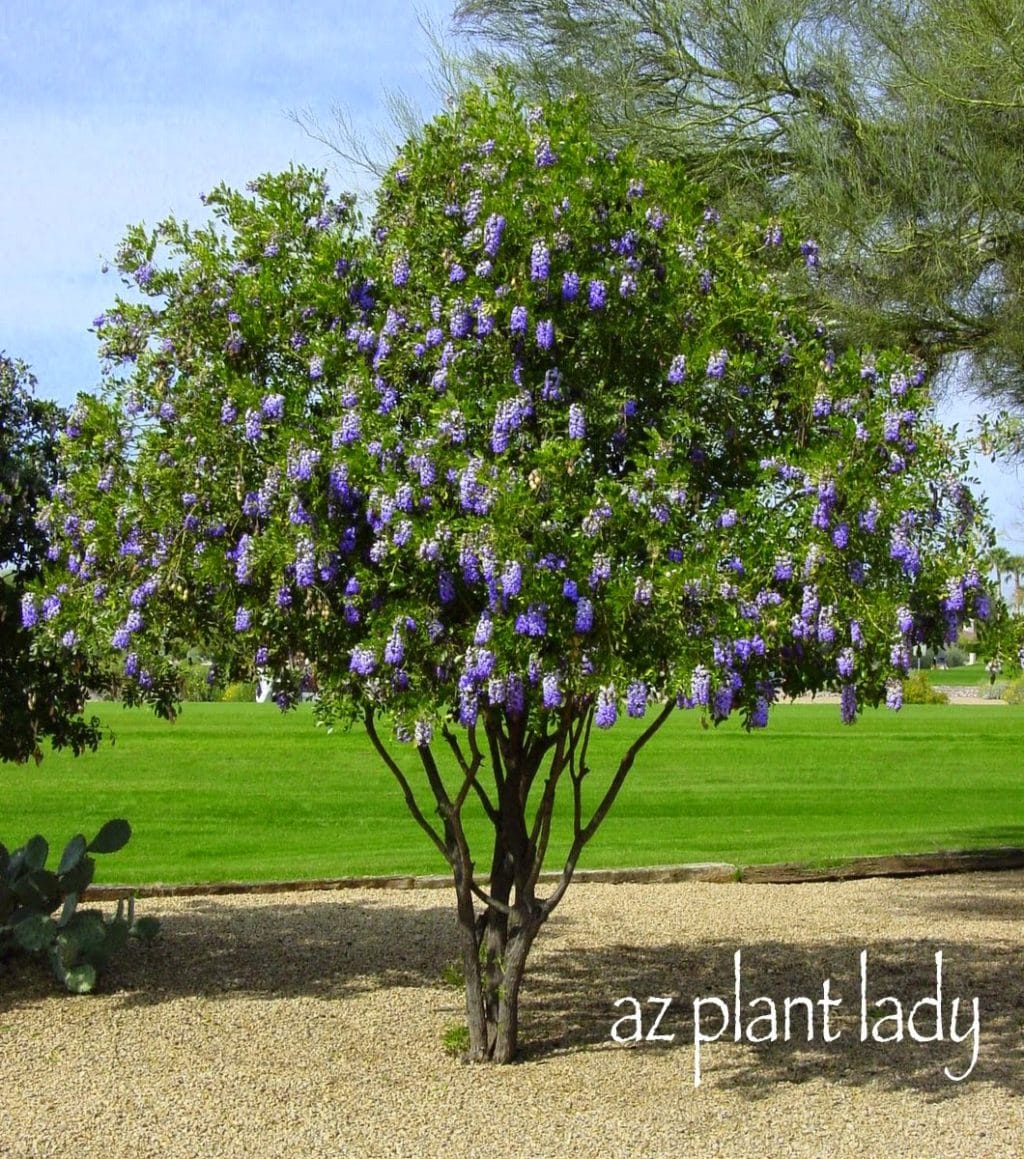
My sister made Christmas ornaments using seed pods from a variety of trees, including these little snowmen made from the seedpods from the Texas Mountain Laurel (Sophora secundiflora) tree.
We sold out of a lot of items and I must admit that I had so much fun. We’re already planning for next year.
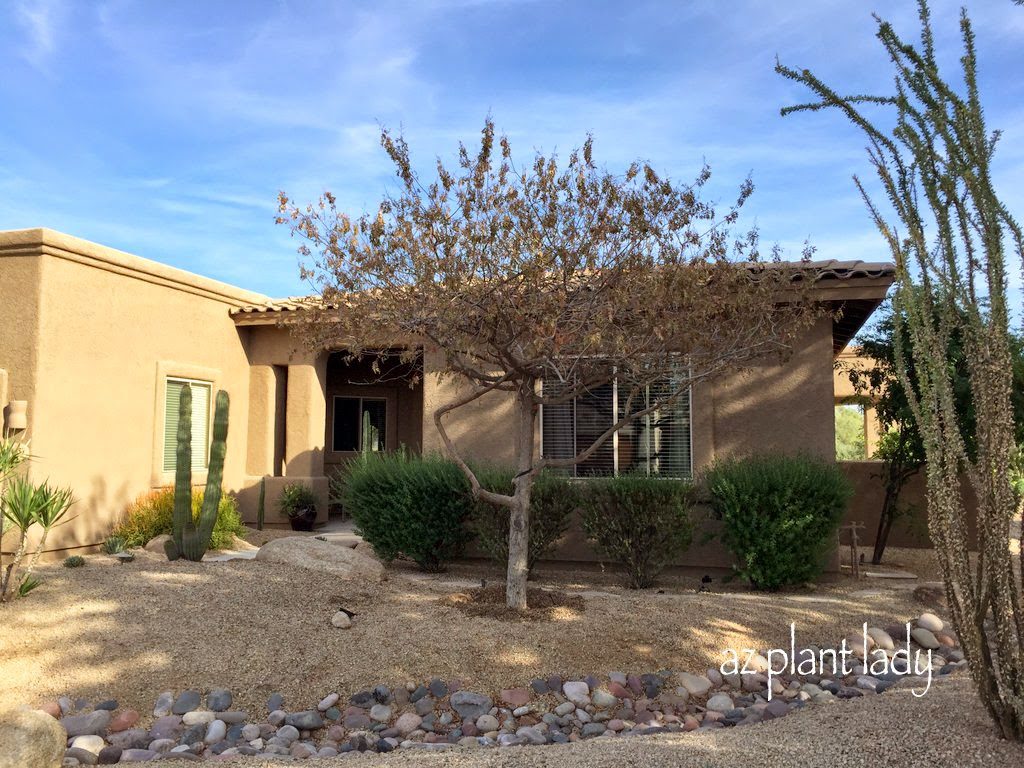
Back in the garden, I was asked to consult on a landscape where a Brazilian Pepper tree (Schinus terebinthifolius) had suddenly died
If you look closely, you’ll notice that the leaves are still on the tree. Also, two of the Texas sage shrubs, underneath the window, were also starting to die.
The homeowners were understandably concerned. It didn’t take long to diagnose a case of Cotton (Texas) root rot. The classic signs are plants suddenly dying toward the end of summer and retaining their leaves.
Some plants are more susceptible to root rot and Brazilian peppers top the list. The solution to this problem is to remove the affected plants and replace them with plants that are resistant to root rot. Trees that are resistant include desert willow, mesquite and palo verde.
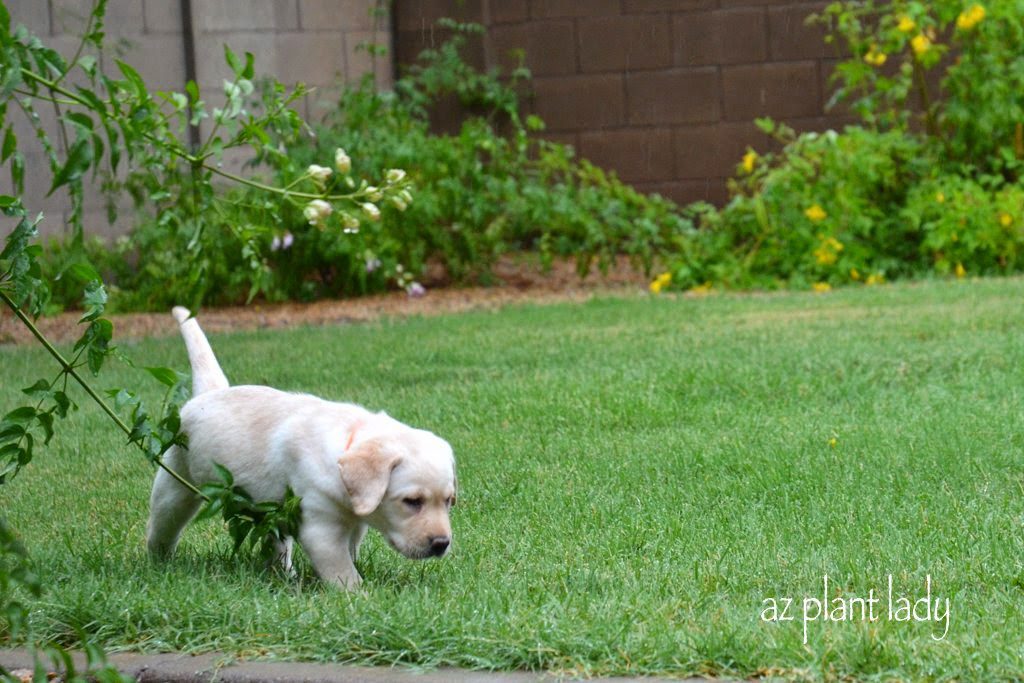
Some of you may remember that we welcomed a new yellow labrador puppy into our family in September.
Polly is growing fast and although she gets into trouble now and then, she is doing great!
Last weekend, was a day that I had long been waiting for…
My second-oldest daughter, Rachele, is expecting her first child – a boy.
She came home from her Navy base to celebrate her birthday and baby shower, which were on the same day. Rachele had been looking forward to this day when her family and friends would celebrate with her.
But, the day didn’t go quite as planned…
That morning, I was busy getting the house and food ready for 50+ people when she walked out of her room with tears in her eyes to tell me that she had been up all night being sick to her stomach.
We didn’t have time to cancel, and she was determined to make it through the shower.
It was obvious to all that she didn’t feel well, but she did get through the shower without having to leave. However, as soon as everyone left, she got sick to her stomach again.
Needless to say, the rest of the day was spent in bed with a large bowl ;-(
Thankfully, it was only a 24-hour bug and she was up and feeling much better the next day.
Now, you’d think that that was the end of my busy month – but, no…
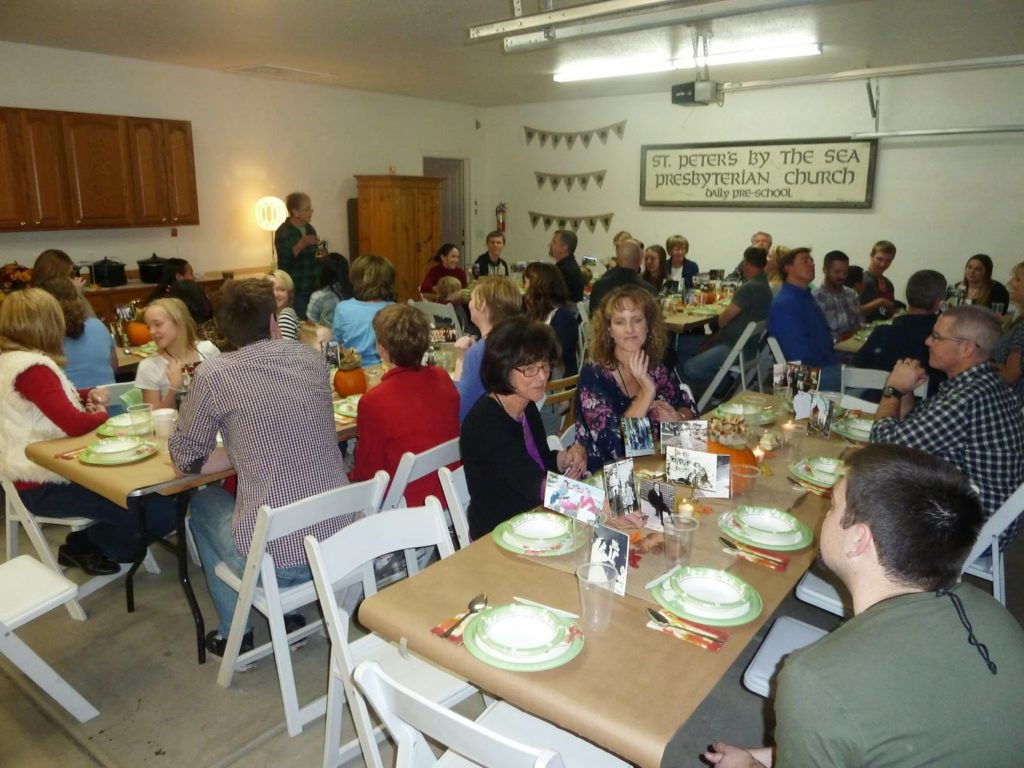
We were hosting a large family reunion for Thanksgiving just days later!
My mother spearheaded the family reunion and asked my sisters and I to help her with it.
I was tasked with making centerpieces using old family photos AND more importantly, making food for 54 people.
Our family started out in California and hasn’t spread very far – we all live in either Arizona, California or Washington.
We gathered together, on the eve before Thanksgiving, for dinner. My mother didn’t have enough room for 54 people inside her house, so she rented tables and we ate inside the garage.
As I mentioned earlier, I made a lot of food for our reunion, which lasted 3 days. I traded the busyness of work for working in the kitchen. I contributed two batches of meatball soup, 4 loaves of artisan bread, 2 batches of toffee bars, 6 loaves of pumpkin bread, 2 carrot cakes and an icebox birthday cake to our reunion.
For our Thanksgiving meal, we searched high and low for a place where we could purchase a hot, Thanksgiving meal. It wasn’t that easy – grocery stores will provide you with a meal, but you have to pick it up the night before and heat it up on Thanksgiving day. Same with some restaurants. But, we did find that Cracker Barrel does provide ‘to-go’ Thanksgiving dinners – it was really delicious!
*************************
And so, that is a brief synopsis of the past 30 days. I am happy that I survived with my sanity intact – mostly 😉
I hope you enjoyed a very happy Thanksgiving!
I have lots to share with you in the upcoming monthy on a variety of gardening subjects including some really cool garden accessories.
https://www.azplantlady.com/wp-content/uploads/2014/12/IMG_0892-1.jpg7681024arizonaplantlady@gmail.comhttps://www.azplantlady.com/wp-content/uploads/2025/08/AZ-Plant-Lady-Logo-small.jpgarizonaplantlady@gmail.com2014-12-01 13:30:002022-10-31 00:50:12Twinkies, a Princess, Turf, Seedpods, Root Rot, a Puppy, a Shower & Thanksgiving
Do you like to decorate your home with natural objects?
I do.
Recently, I’ve been busy creating items using things found in nature.
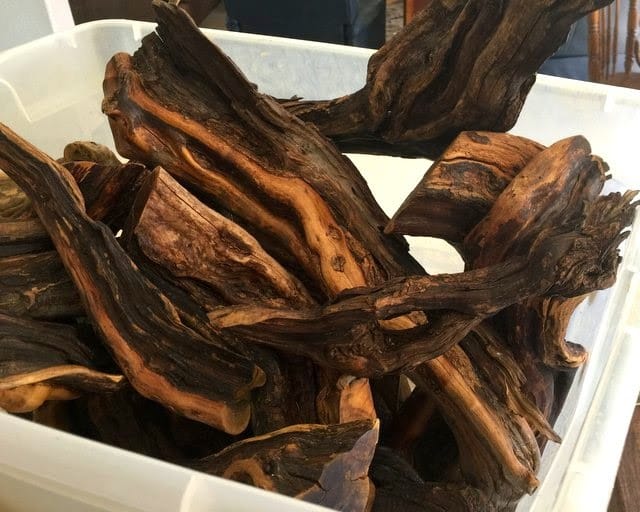
For example, these may seem like regular pieces of wood from a tree – but what if I told you that they were actually old roots from a cresote bush?
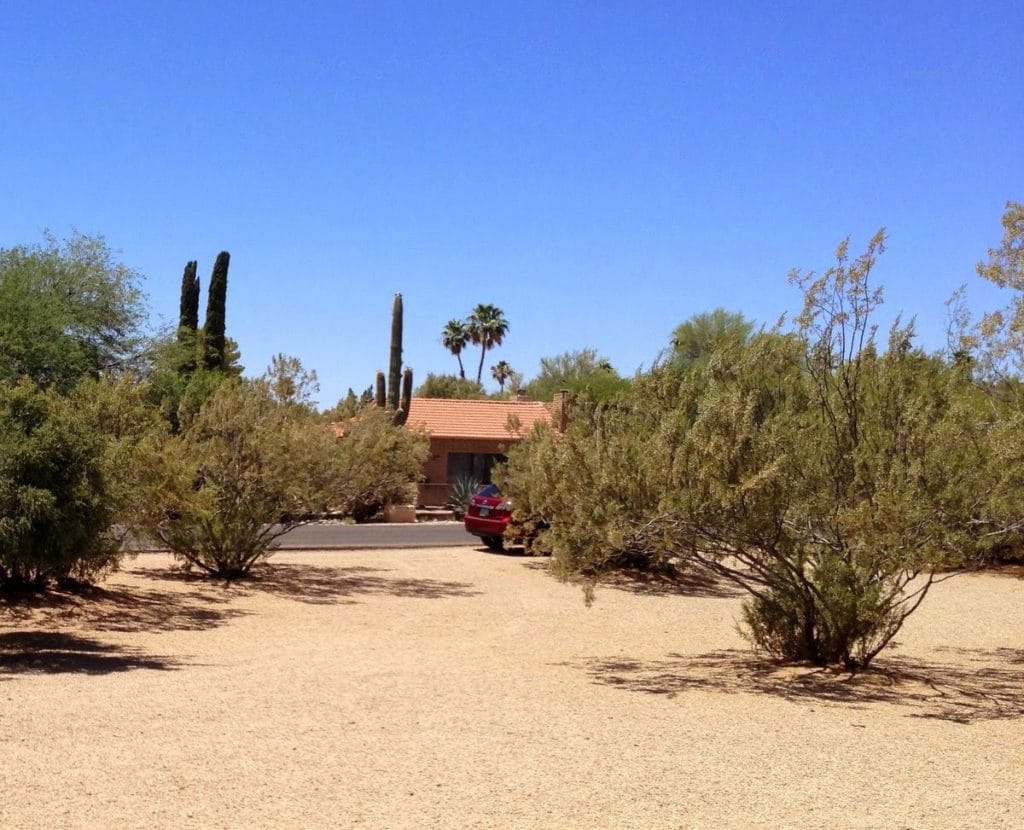
You may not know what a creosote bush is, but if you live in the desert – you’ve seen them. They are the shrubs scattered throughout the desert.
The roots that I used for my project came from one of the creosote shrubs in the picture, above.
This creosote shrub was in an area that I was asked to design next to a golf course. While I kept most of the creosote, I had one removed to make room for new plants.
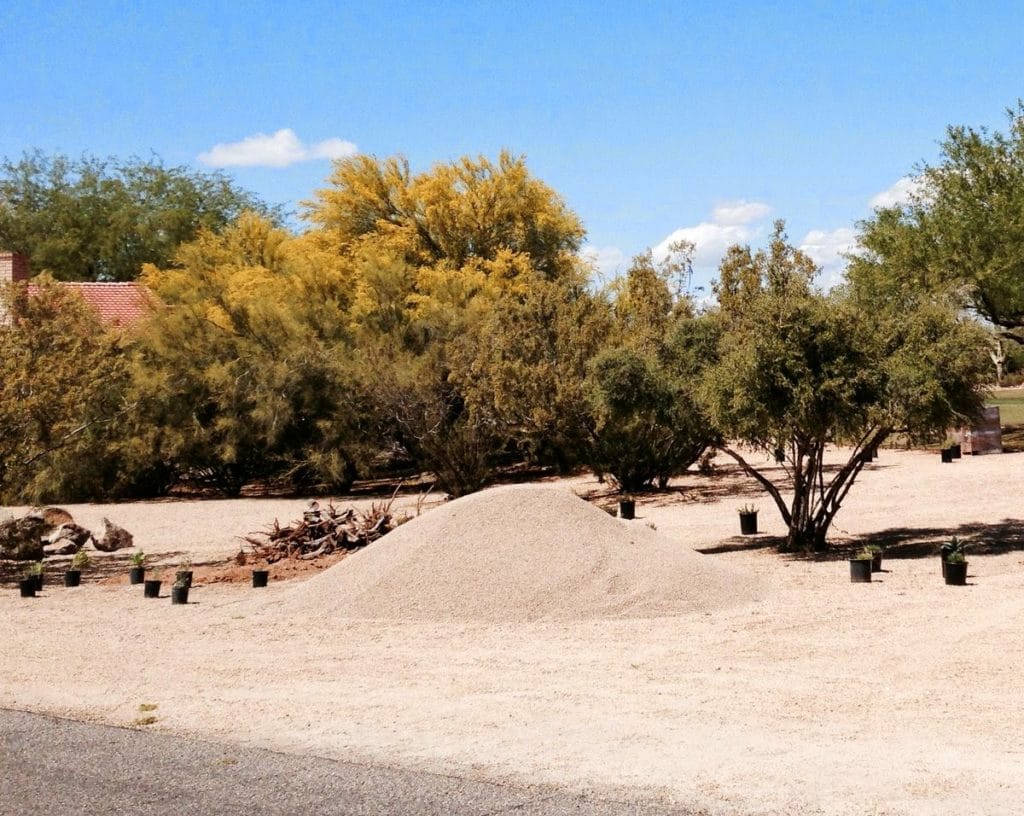
You can see the pile of creosote roots left over after the shrub was pulled out.
I came up on these roots after placing the new plants and thought that they would be great for a future project. They were woody, twisted and had great character. I loaded them up in my truck and stored them in my side yard until I could find the right project in which to use them.
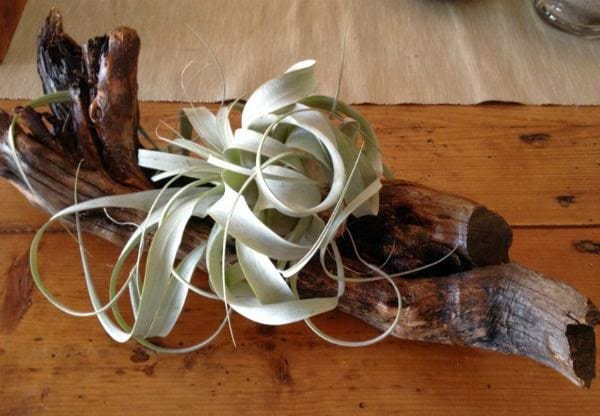
I decided to pair my old wooden roots with air plants.
My mother, who is extremely creative, introduced me to air plants and I immediately fell in love with their unique shapes.
Air plants are unique in another way in that they do not need soil. All they need to grow is air, water and a sunny window, which makes them perfect for using in home decorating projects since you don’t have to worry about soil.
You can read more about air plants and how to care for them, here.
So what do you get when you pair air plants with pieces of natural wood?
A very attractive centerpiece that looks great on the coffee table.
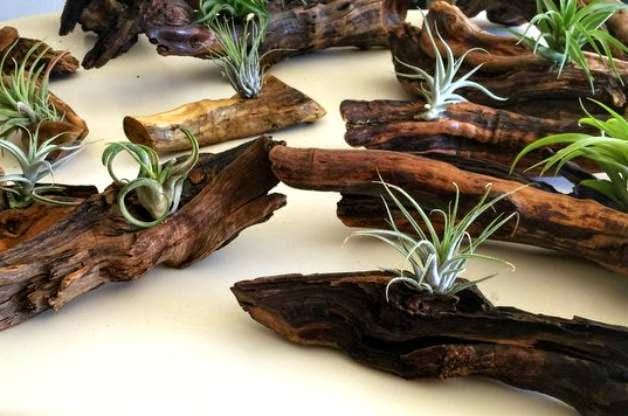
I was so excited about how nice it looked that I decided to try using smaller pieces of wood and different air plants.
Because each piece of wood was unique and had been twisted over time by nature, each pairing looked different.
I must admit that I had so much fun playing with different combinations.
So, what am I going to do with so many creosote wood / air plant combinations?
Earlier this year, my mother proposed going together with my sister and create items for the home that are made from natural elements for a large holiday boutique.
My sister and I both agreed and have been working on making different items focused on using natural and/or recycled elements, along with my mother.
Here are just a few of the items we will be selling:
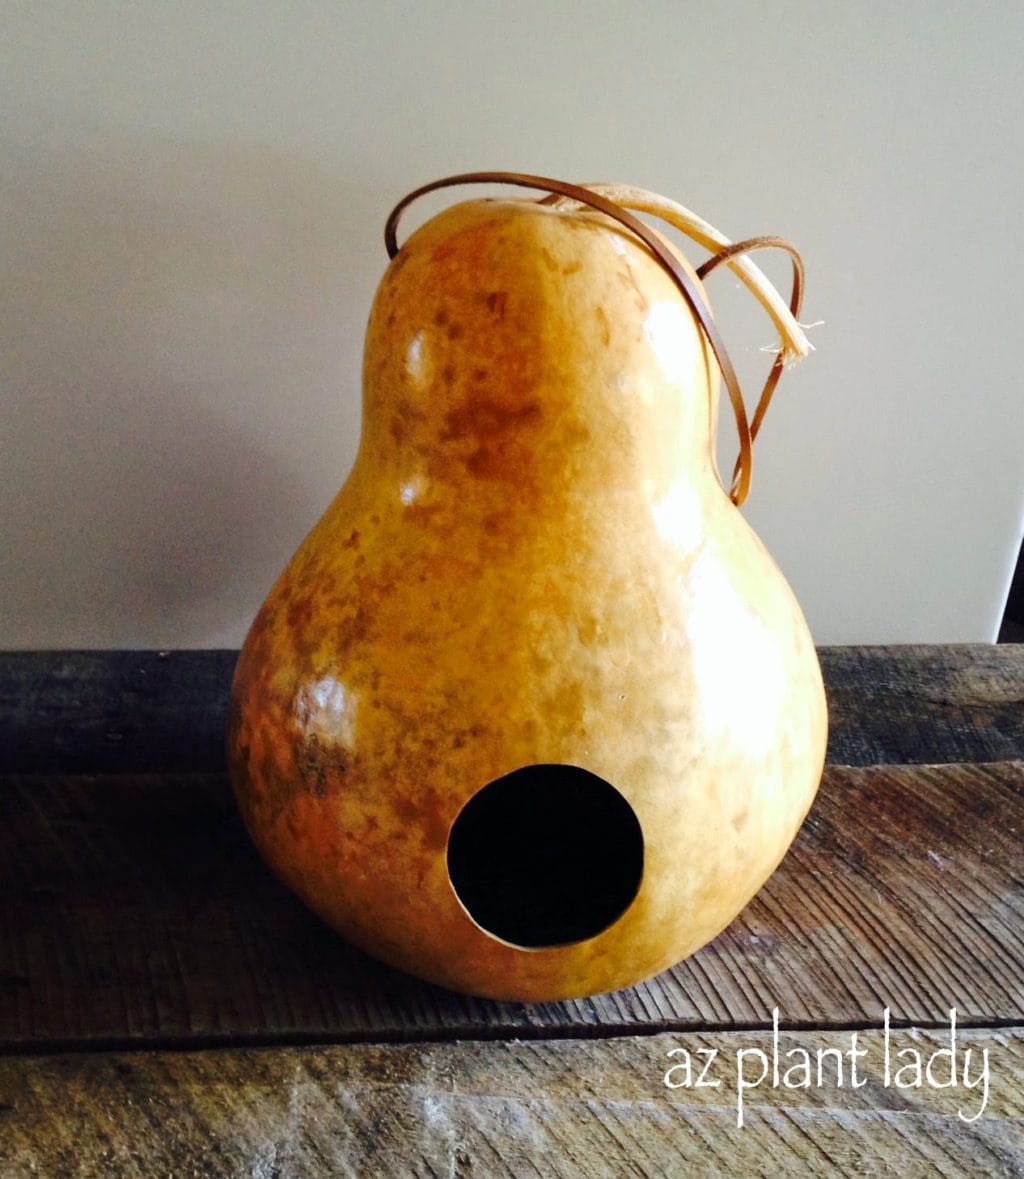
Gourd Bird Houses
My mother and I have both grown gourds in our gardens and transformed them into bird houses and feeders.
Seed pod Christmas ornaments
Can you tell what type of tree/shrub this seed pod comes from?
If you guessed Texas mountain laurel (Sophora secundiflora), you’d be right.
My sister has made a variety of Christmas ornaments using seed pods. I love the idea of transforming natural items and using them to decorate your home for the holidays!
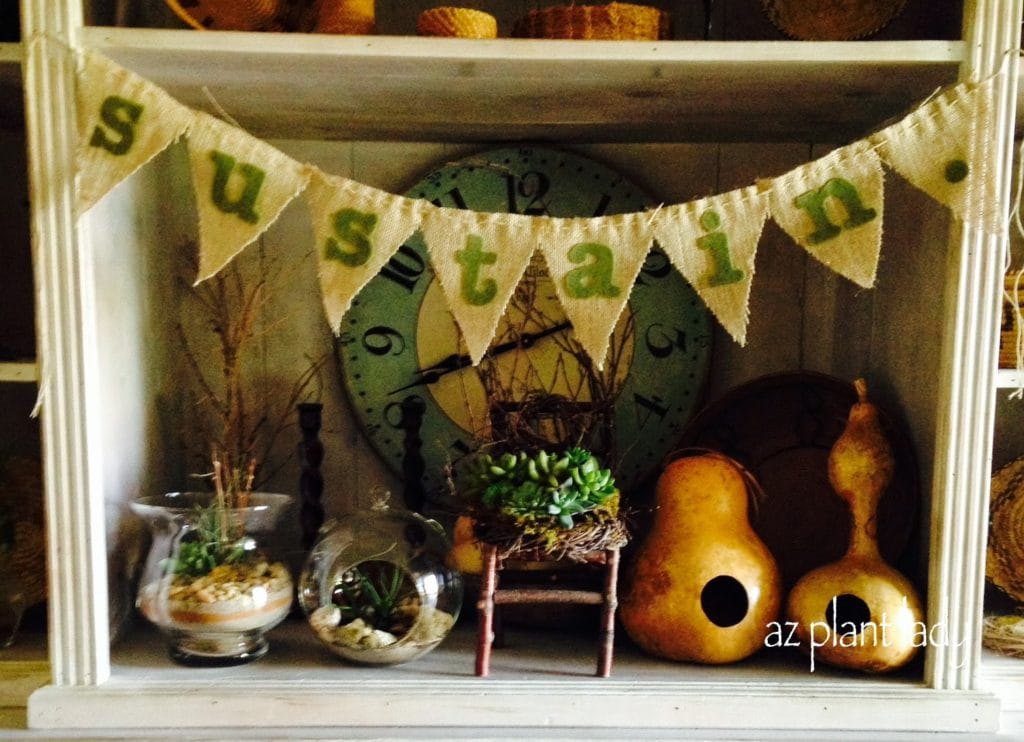
Terrariums with air plants
Do you like terrariums? I think of them as small worlds enclosed by glass. There will be quite a few terrariums with air plants, including hanging ones.
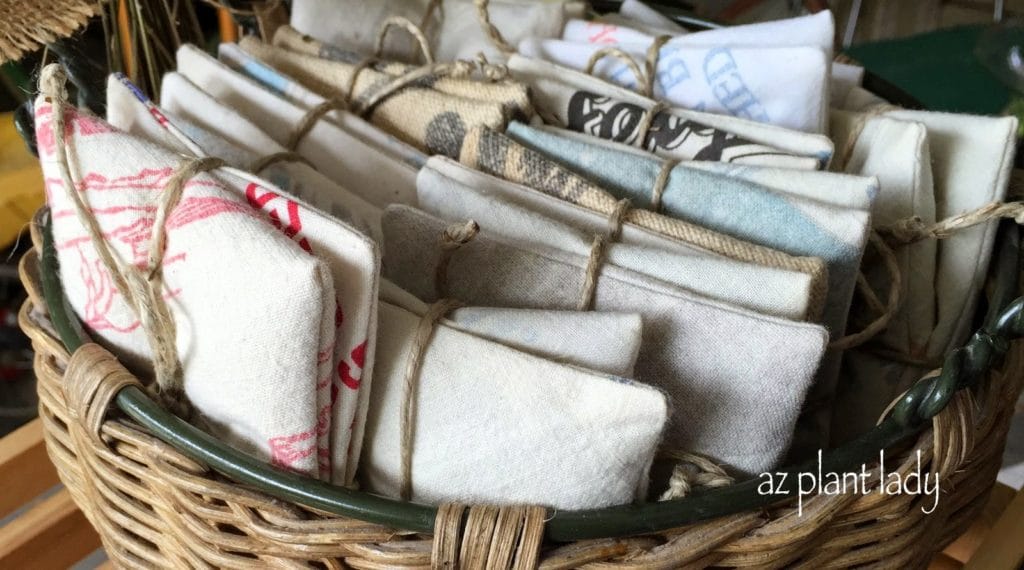
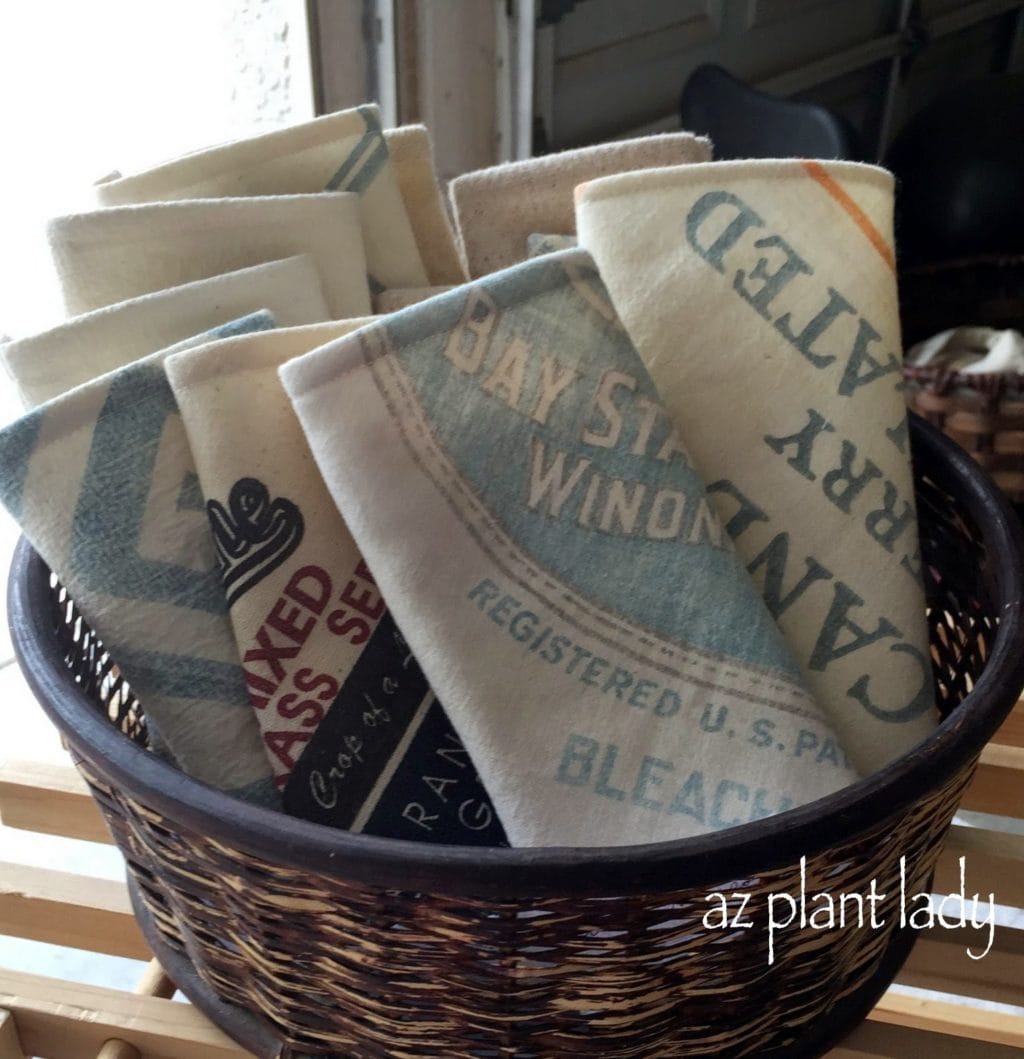
Lavender sachets made from antique seed bags.
During a trip to Winona, Minnesota – we bought quite a few old seed bags from antique stores. My mother, who is an excellent seamstress, made them into sachets, glass cases and aprons.
Reading glass cases made from antique seed bags.
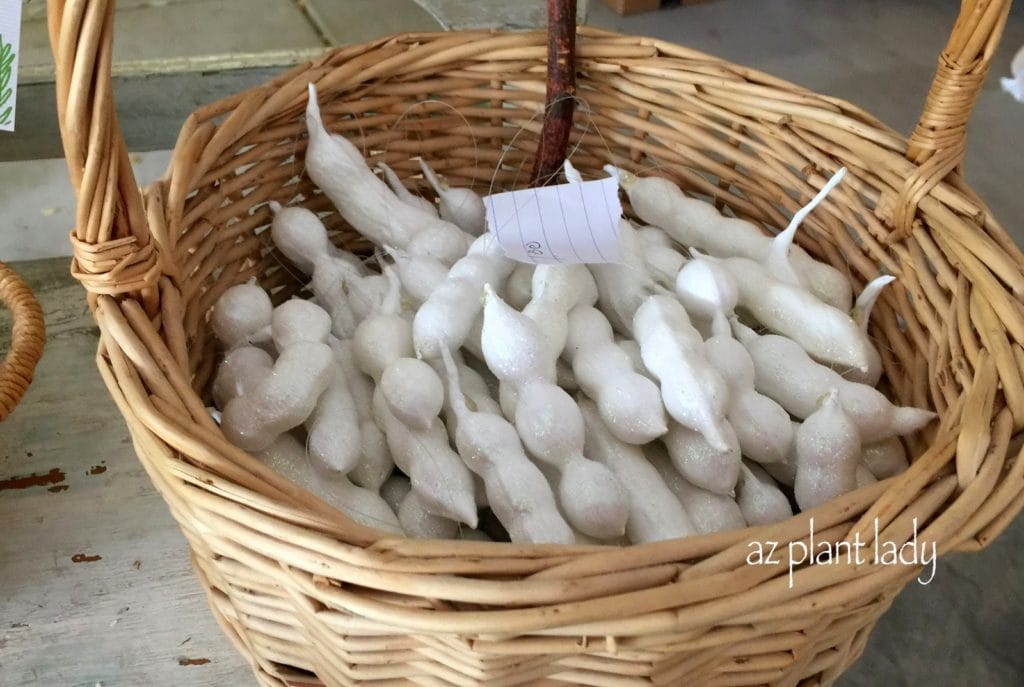
‘Sparkly’ white Christmas seed pod ornaments
My sister has made a variety of Christmas ornaments using seed pods. I love the idea of transforming natural items and using them to decorate your home for the holidays!
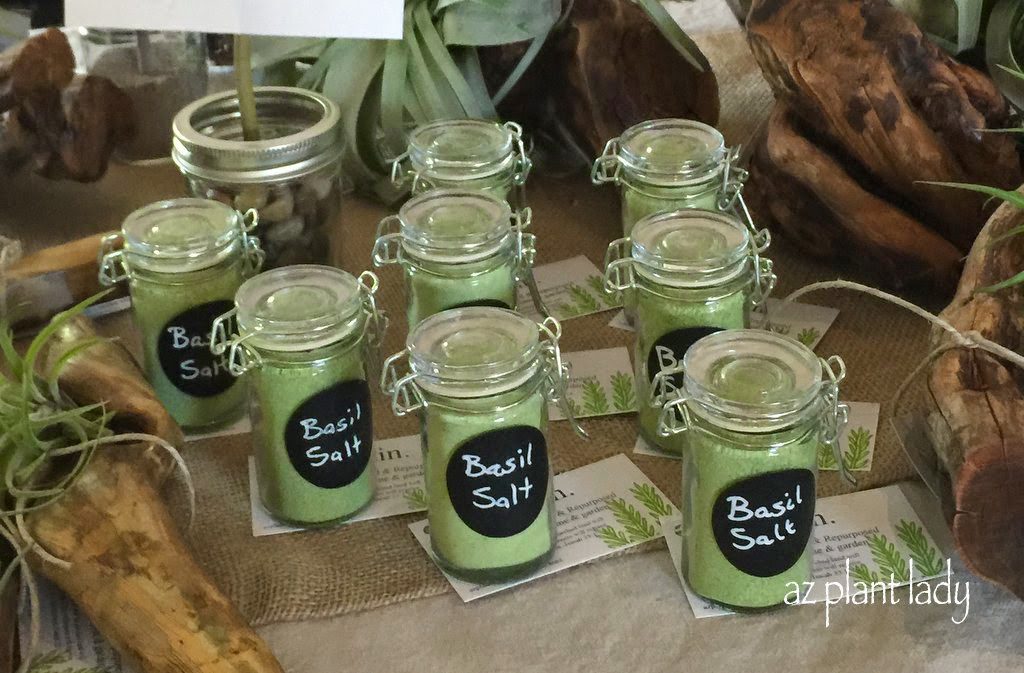
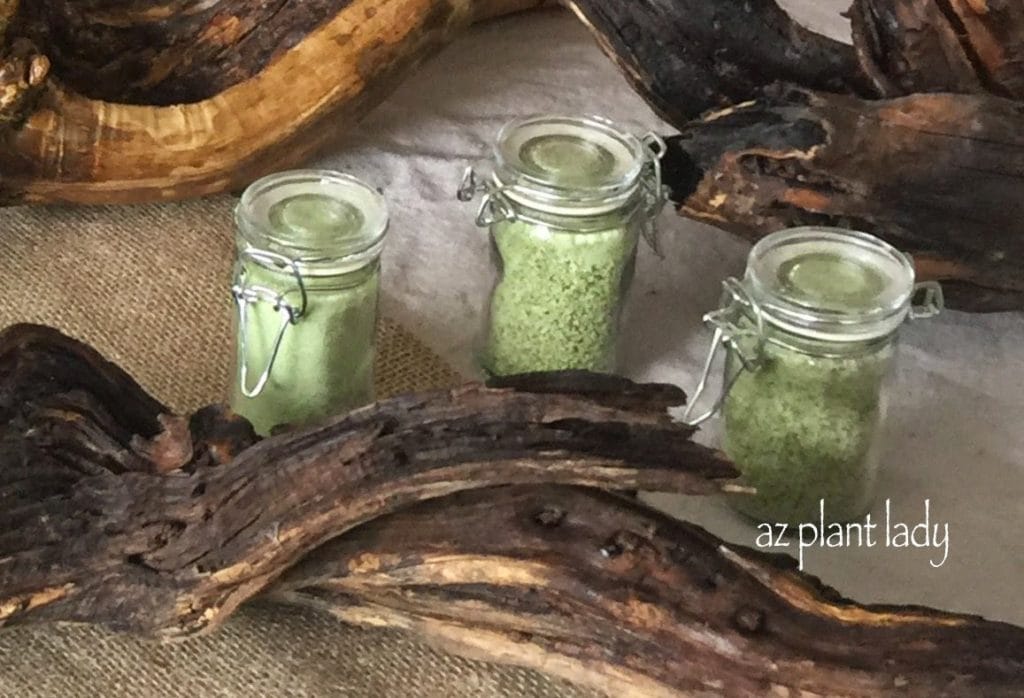
Basil Salt
I love using basil salt on my favorite Italian dishes. The basil came straight from my garden 🙂
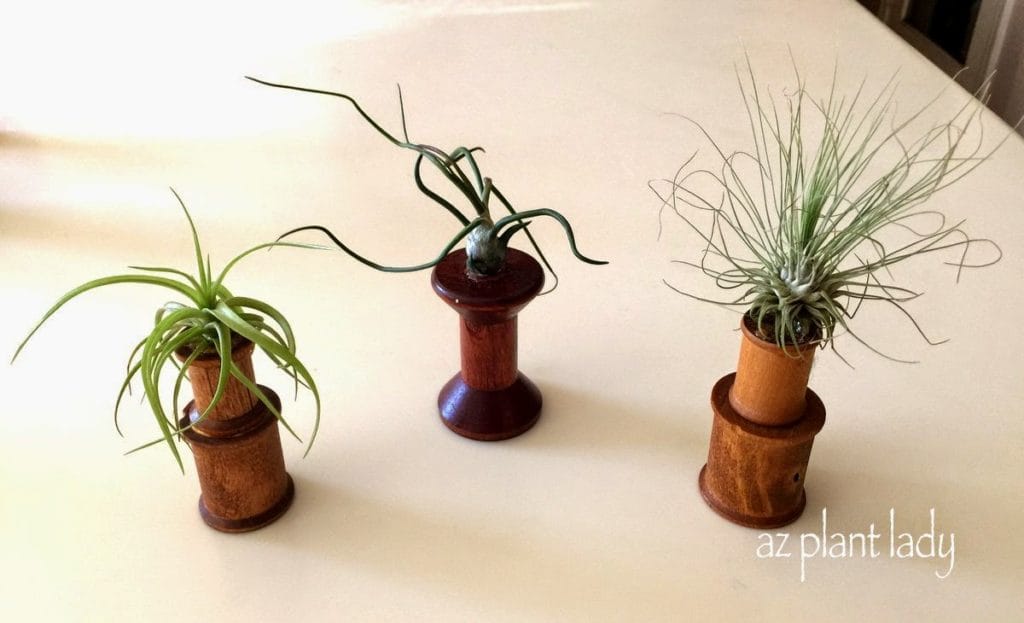
Mini air plants on antique wooden spools
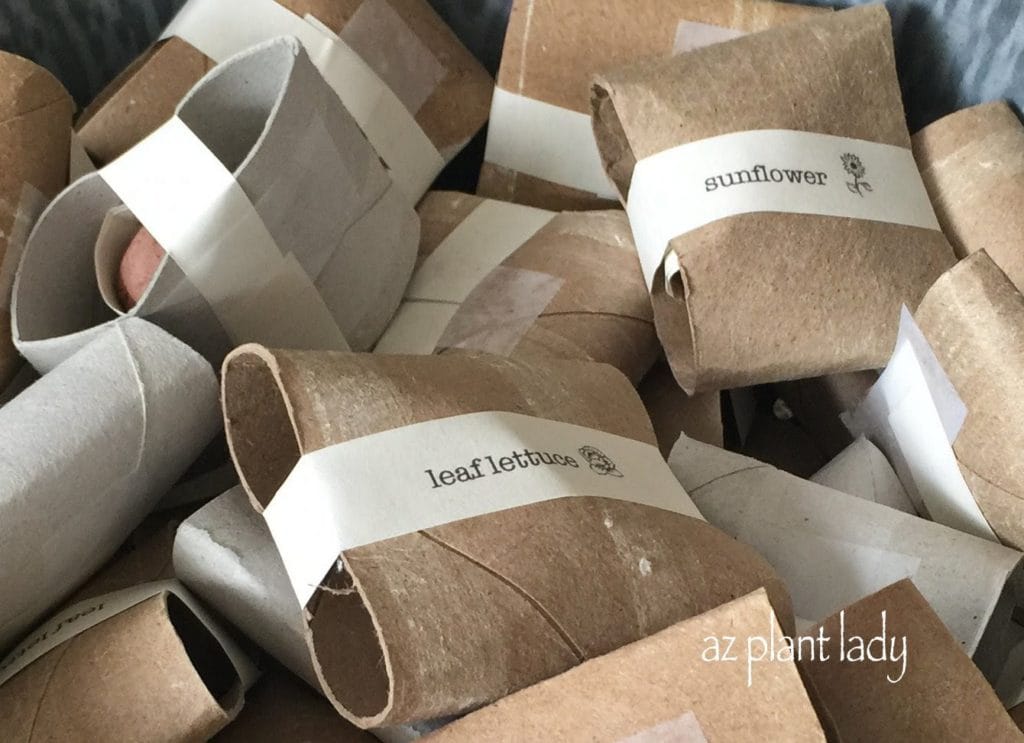
Seed Bombs
Have you heard of seed bombs? I wrote about this fun garden trend last year. I first saw these at the Sustainability Festival last year.
*Can you tell that they are wrapped in ‘recycled’ packaging?
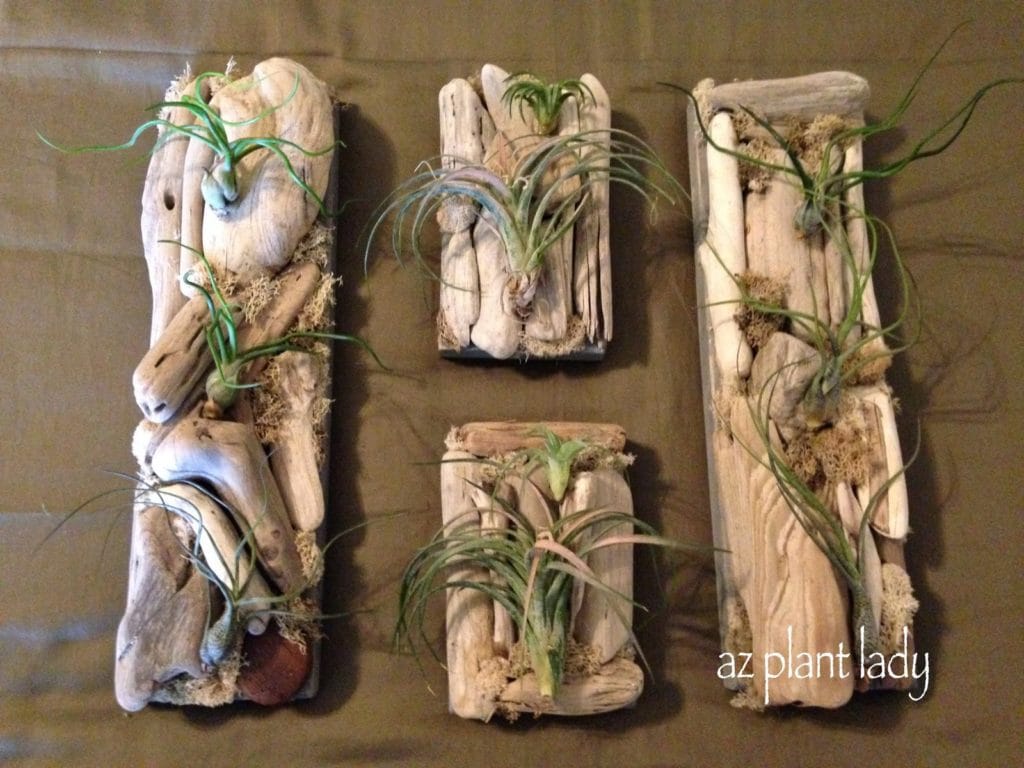
Air plants mounted on driftwood sitting on top of wooden plants ready for hanging.
My mother and I collected much of the driftwood during our trip to Lake Michigan this summer.
In addition to what I’ve shown you above, we will have aprons, totes made from seed bags, terrariums made from light bulbs and fairy garden houses made from wood and moss.
Our goal was to create items using natural and/or recycled items.
If you live in the greater Phoenix area, we would love to see you!
We will be selling our natural items at the Believe Boutique, which is a large holiday boutique with over 125 vendors. It is being held at Cornerstone Church in Chandler, Arizona on Friday, November 7th from 4:00 – 9:00 and again on Saturday, the 8th from 10:00 to 3:00.
**We’ll be located in the main lobby in the ‘Sustain’ booth. I’d love to meet you, if you have time to stop by!
https://www.azplantlady.com/wp-content/uploads/2014/11/IMG_0706-1.jpg512640arizonaplantlady@gmail.comhttps://www.azplantlady.com/wp-content/uploads/2025/08/AZ-Plant-Lady-Logo-small.jpgarizonaplantlady@gmail.com2014-11-06 13:00:002021-01-06 06:59:06Natural, Recycled DIY Items for the Home & A Sale!
I am always on the lookout for new things to make from the garden.
Recently I learned how to make specially flavored salts using herbs from my garden. ‘Herb salts’ have become a popular flavoring tool in the culinary community and they are very easy to make.
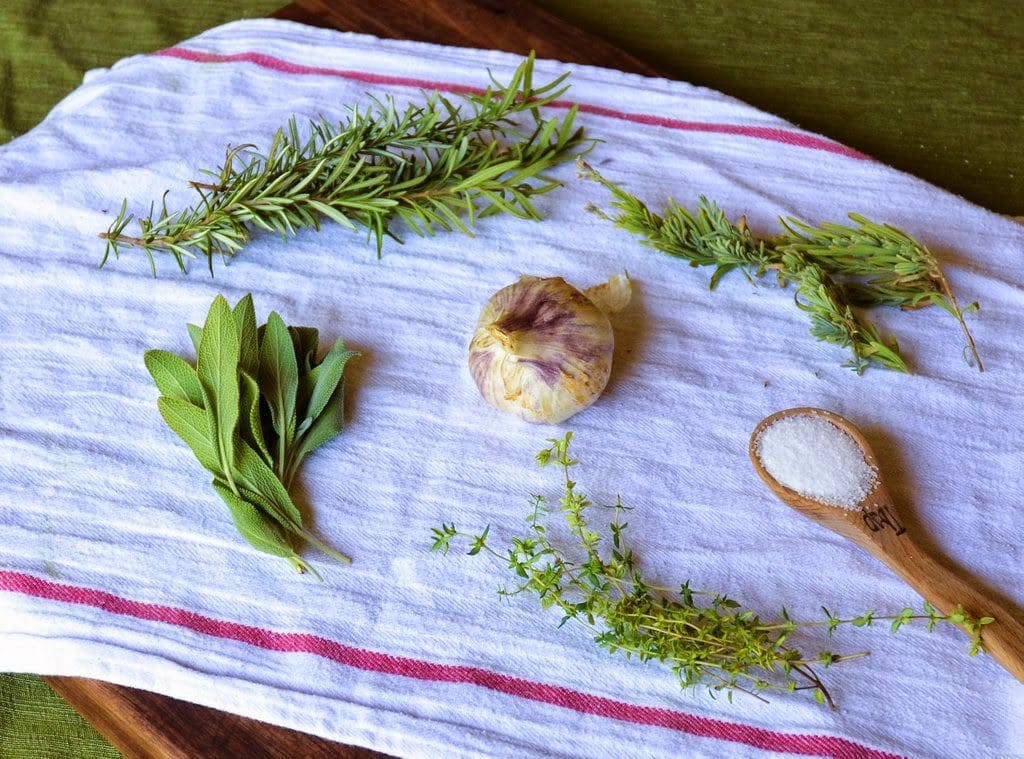
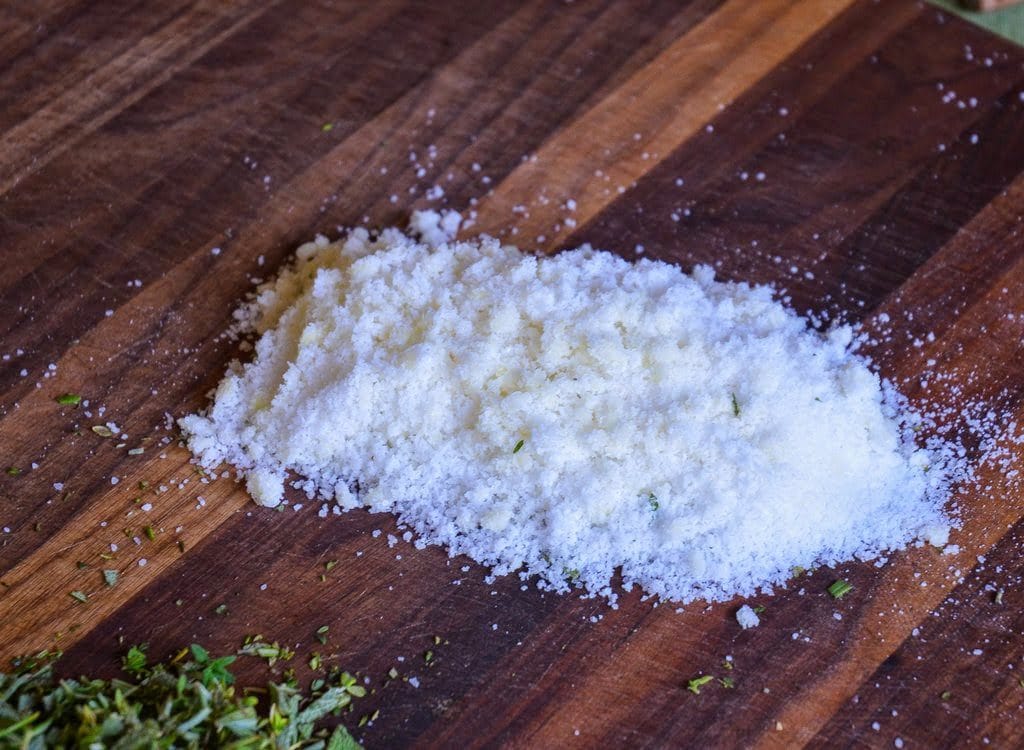
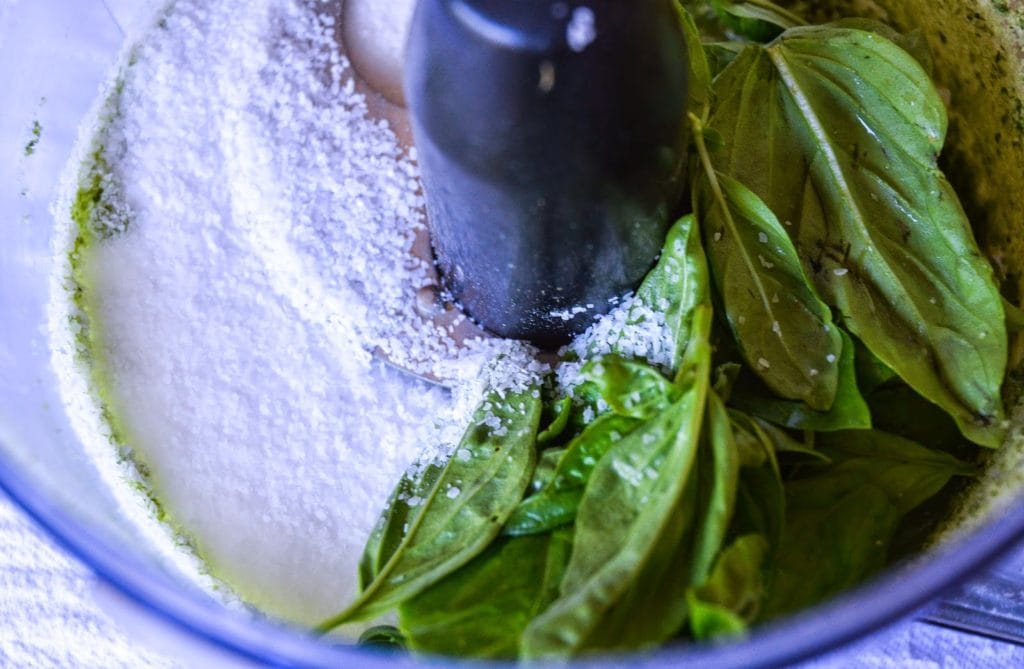
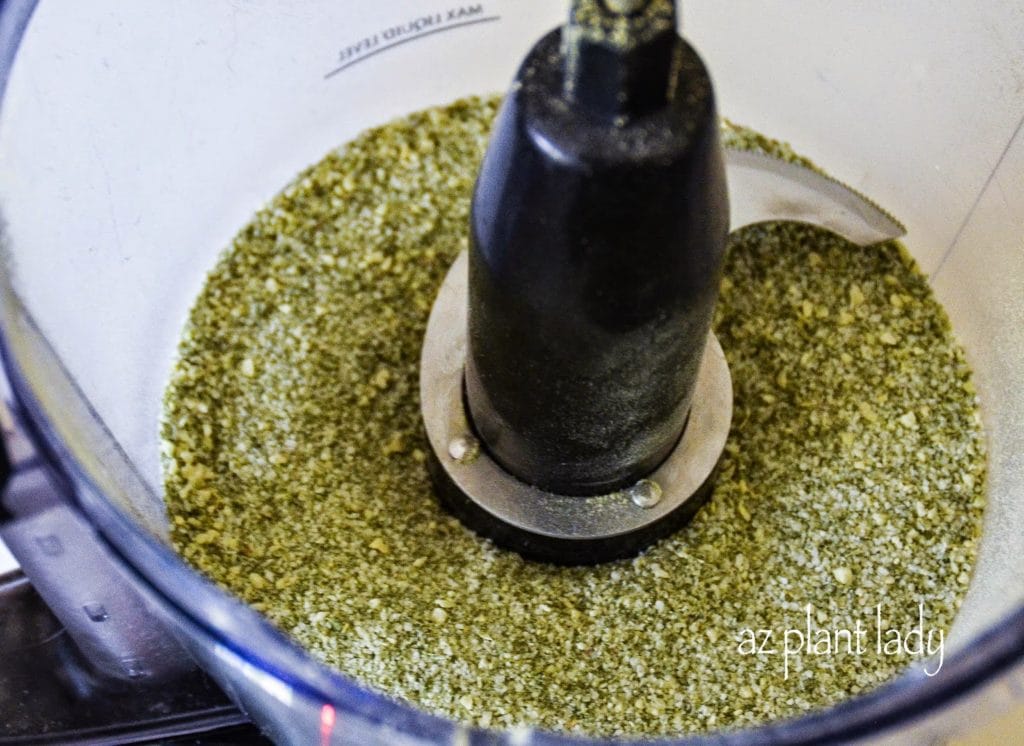
The process of making herb salts starts out looking like this…
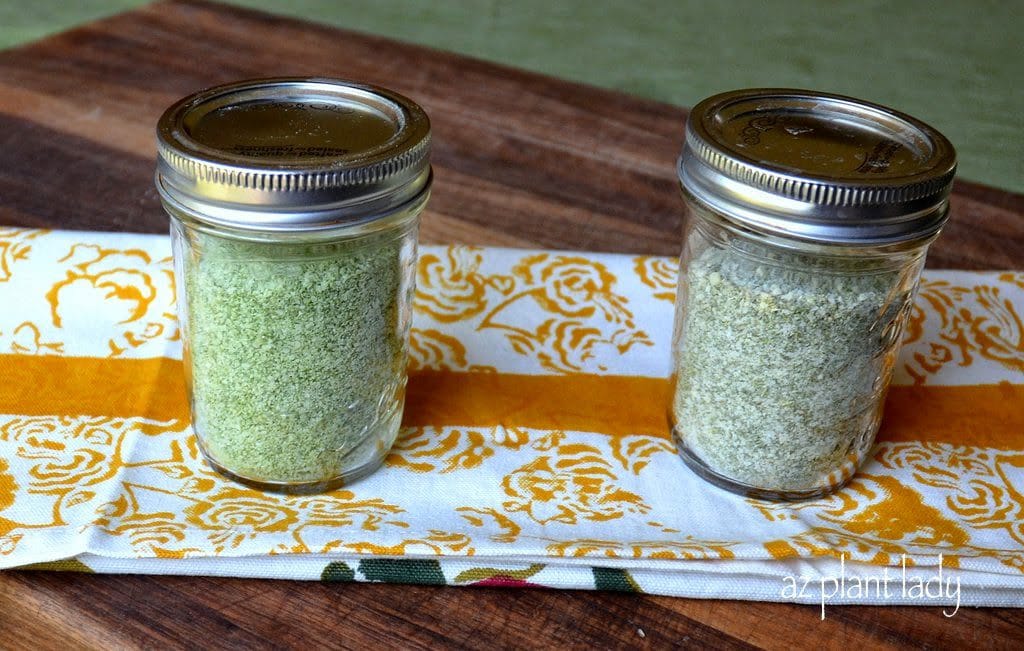
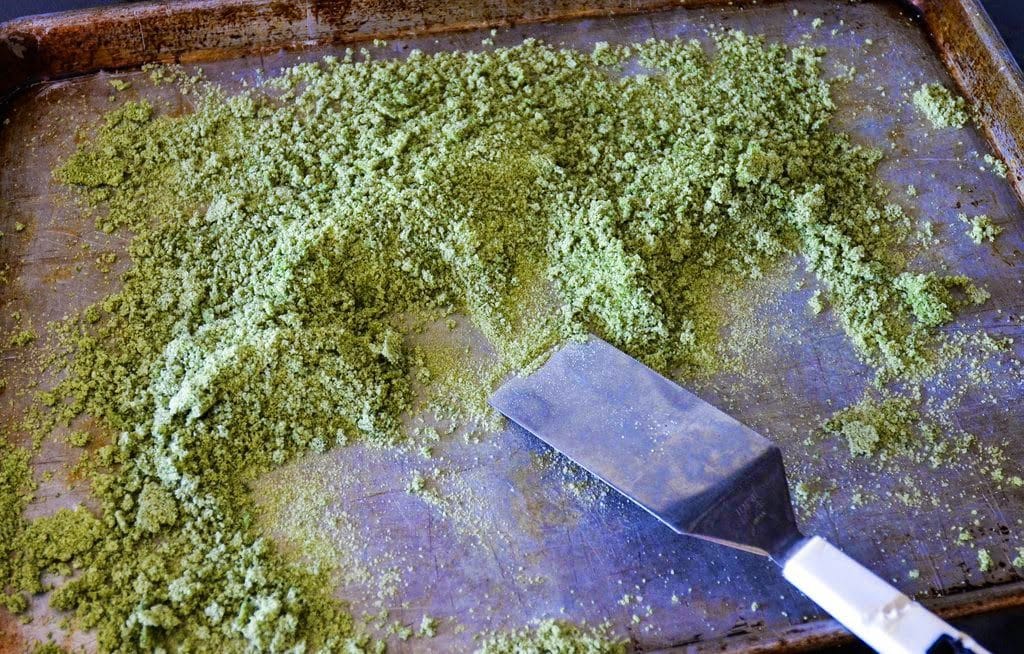
And ends up transformed into this…
Are you interested in making your own herb salts?
Summertime means that many of my herbs are actively growing and I sometimes run of ways to use all of the fragrant leaves of them.
Herb or ‘gourmet’ salts are a great way to preserve herbs while adding a new twist to flavoring my favorite foods.
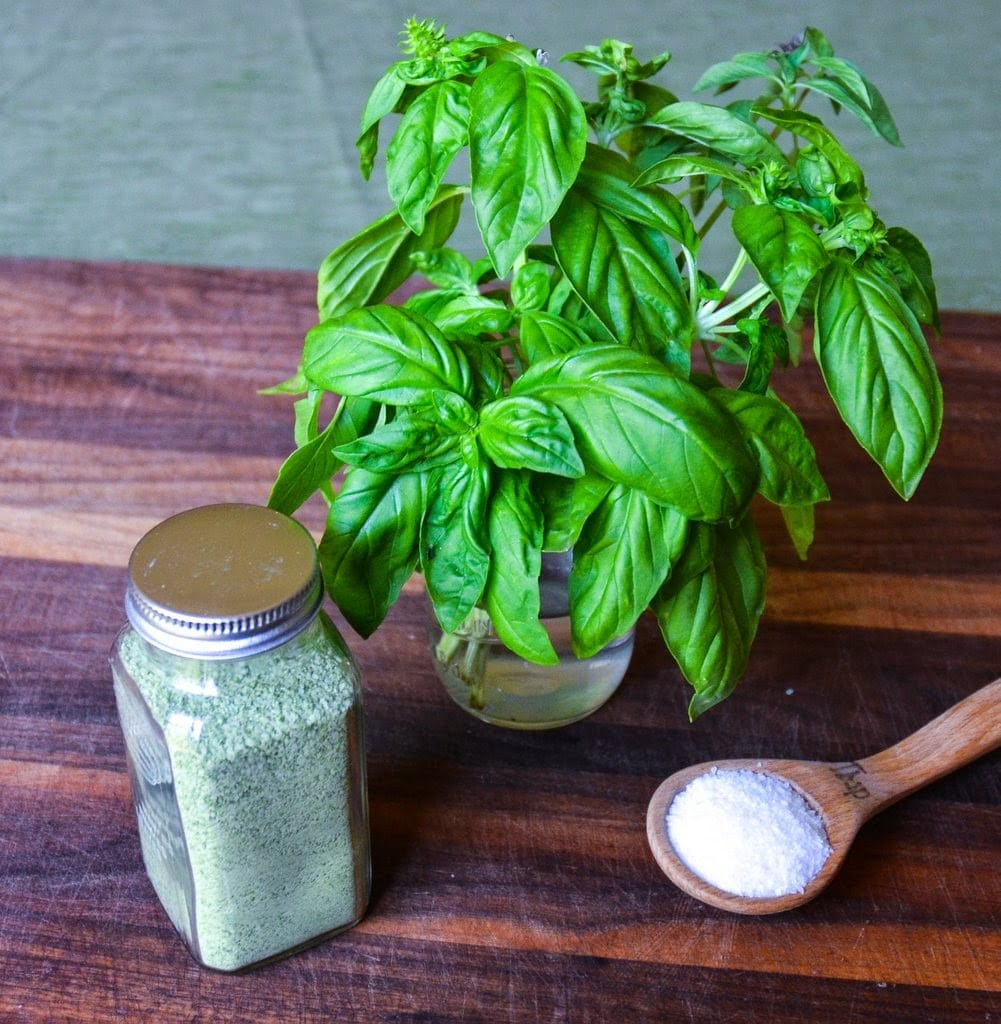
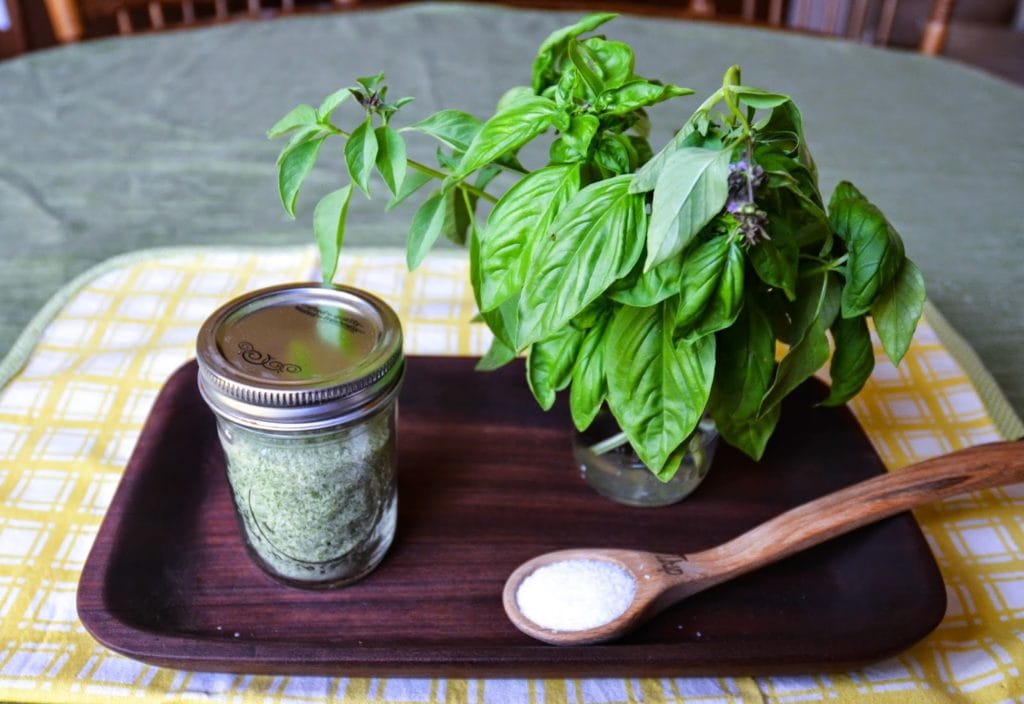
Photo: Basil Salt
In my last post, I shared how to make basil salt using two ingredients – fresh basil leaves and kosher salt.
Today, I’d love to show you how to make your own unique herb salt blend.
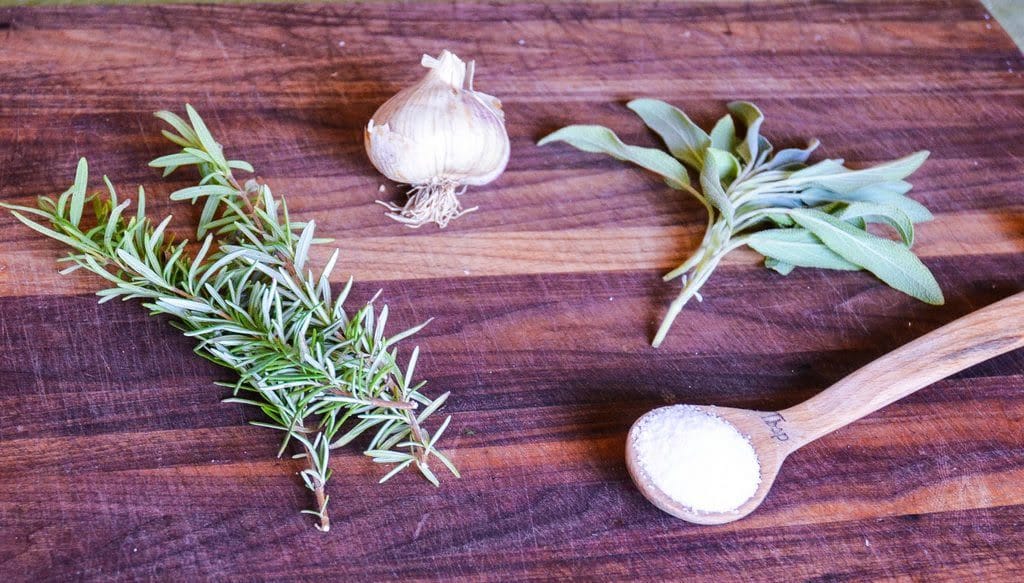
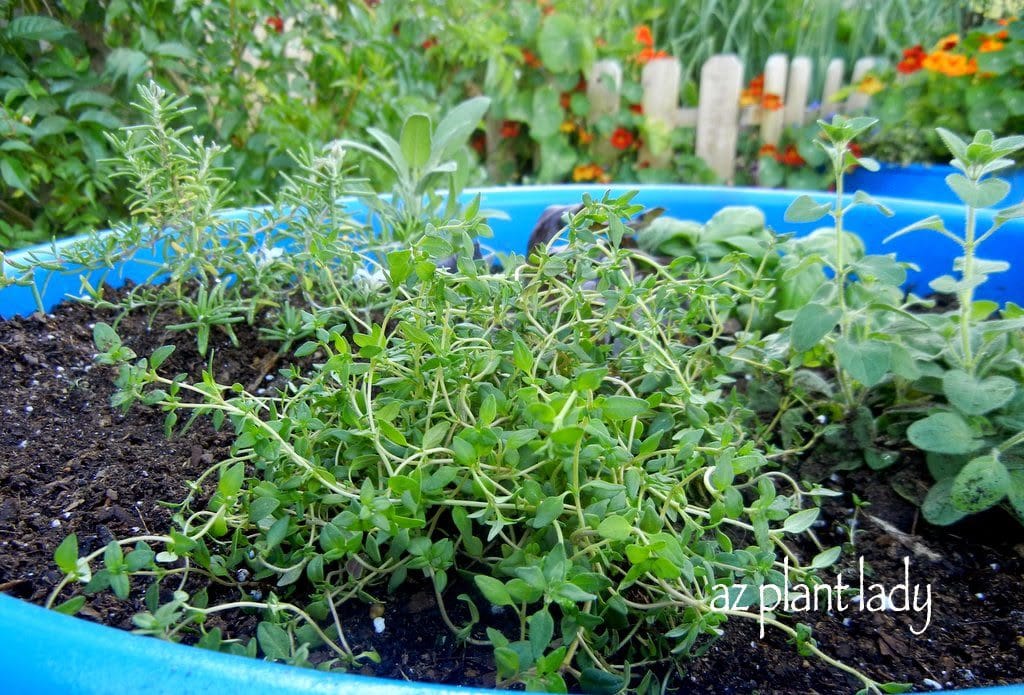
For my herb salt blend, I went out into the garden and looked for a variety of herbs that I love to cook with. I found rosemary, sageand thyme. I then grabbed a head of garlic and kosher salt. I must admit that I was thrilled that I had all these herbs growing in my garden. I grew the garlic too!
For equipment, you should have a cutting board, a sharp knife for chopping, a baking sheet and a glass jar with a lid.
You can make this recipe using a food processor, but it is optional.
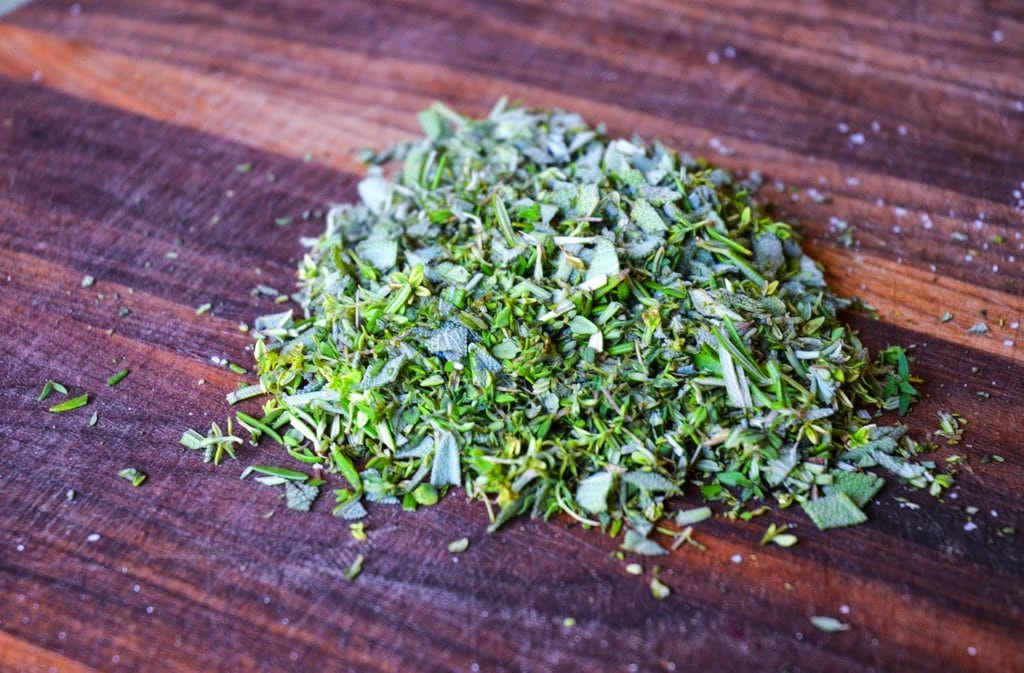
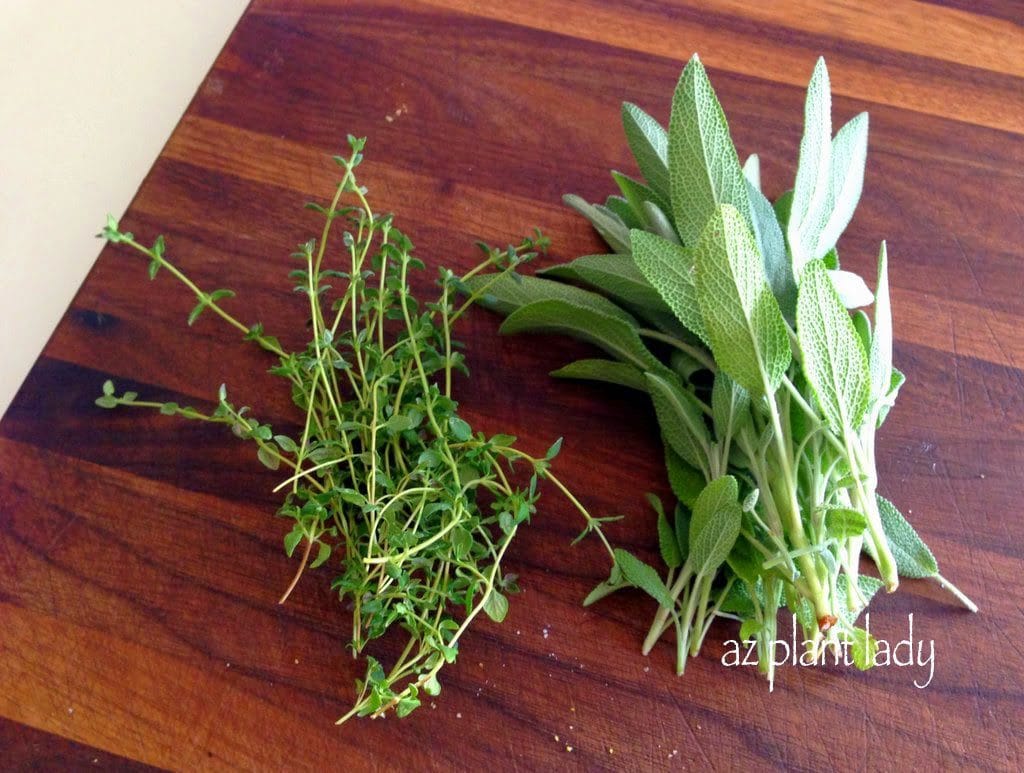
1. You will need 2/3 cup rosemary, 2/3 cup sage and 2/3 cup thyme leaves. These are the amounts I used to get the flavor I liked, but you can play around with the ratio of each herb or choose different herbs to get the flavor you want.
2. Place 1/2 cup kosher salt on your cutting board and add 5 peeled garlic cloves and chop them together. The garlic should be finely minced at this point.
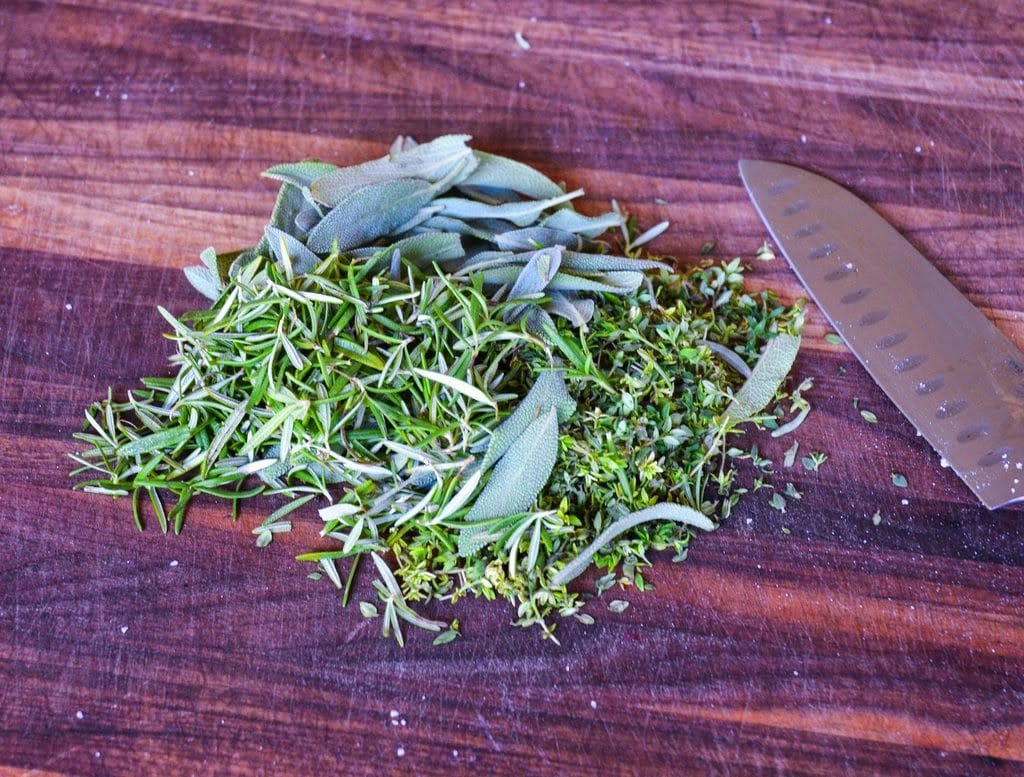
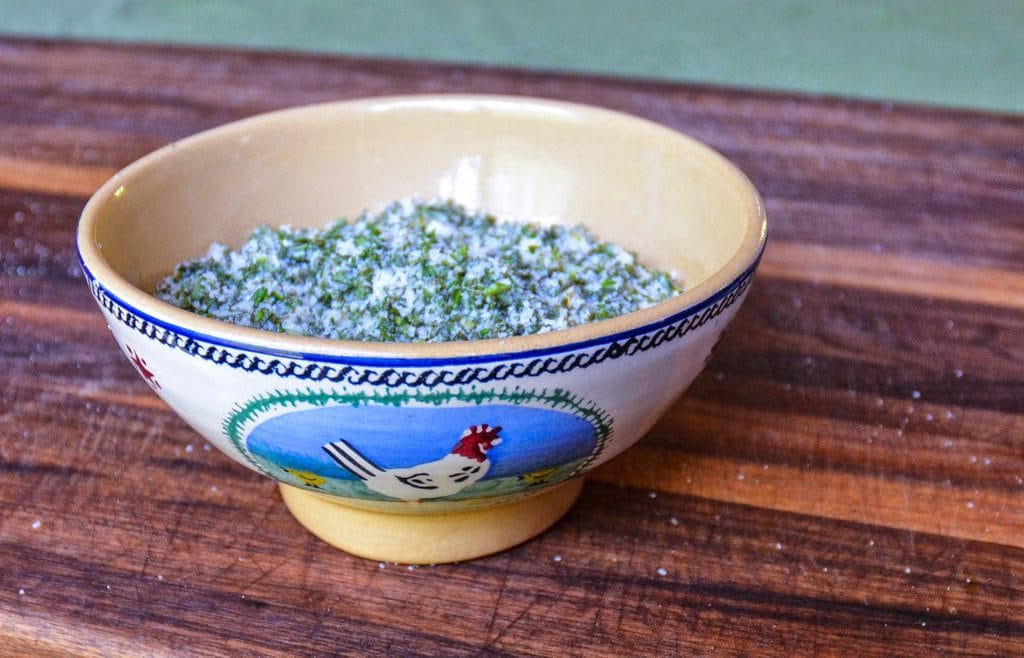
3. Chop all of the herbs together.
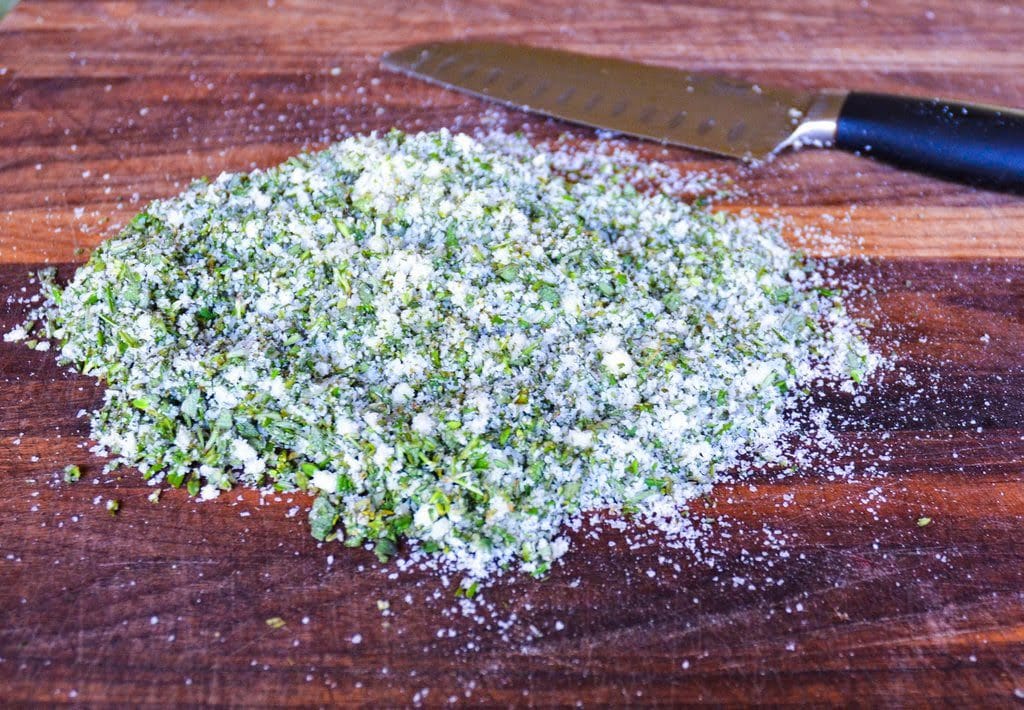
4. Combine the salt/garlic and the herbs together and continue chopping until finely chopped.
**You can use a food processor for steps 3 & 4 instead of chopping. Simply put all ingredients in at once and pulse for 30 seconds.
At this point you can use your herb salt to flavor a roast of beef, chicken or pork before cooking or to flavor roasted vegetables. But, if you aren’t using the herb salt right away, continue on…
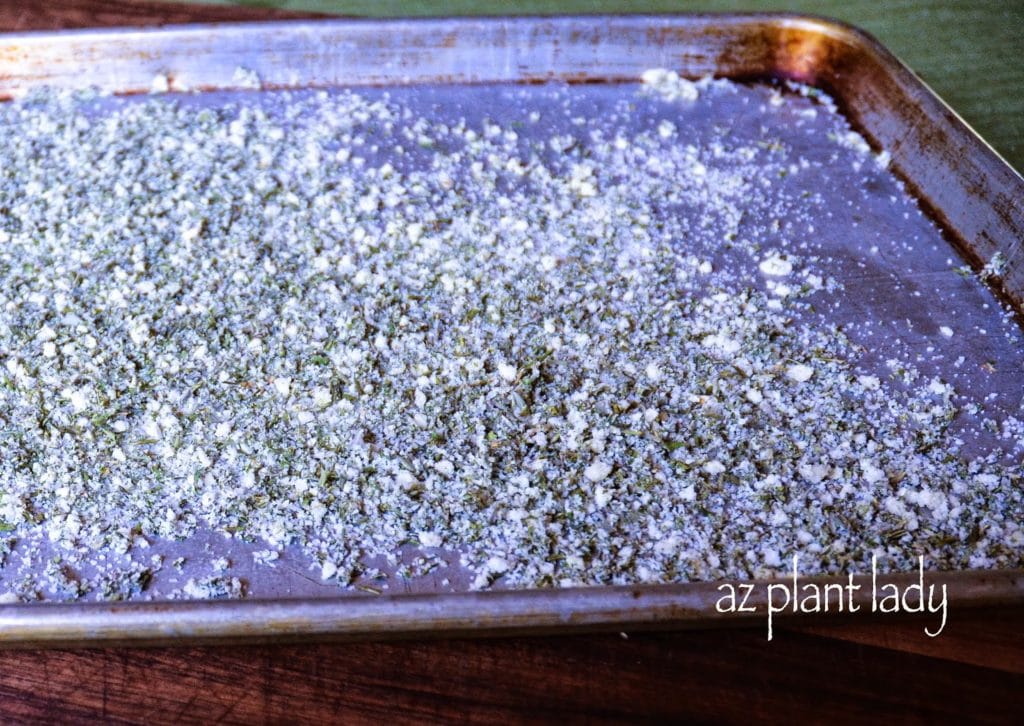
5. Put your herb salt mixture onto a baking sheet in a thin layer and bake in a 200 degree oven for 30 minutes. This step dries out the herb mixture. You can also allow it to air dry over a couple of days instead of putting it into the oven.
6. Place your dried mixture into a food processor and pulse for 30 seconds to get rid of any lumps.
If you don’t have a food processor, you can put the dried mixture into a Ziploc bag and roll it with a rolling pin until it is finely ground up.
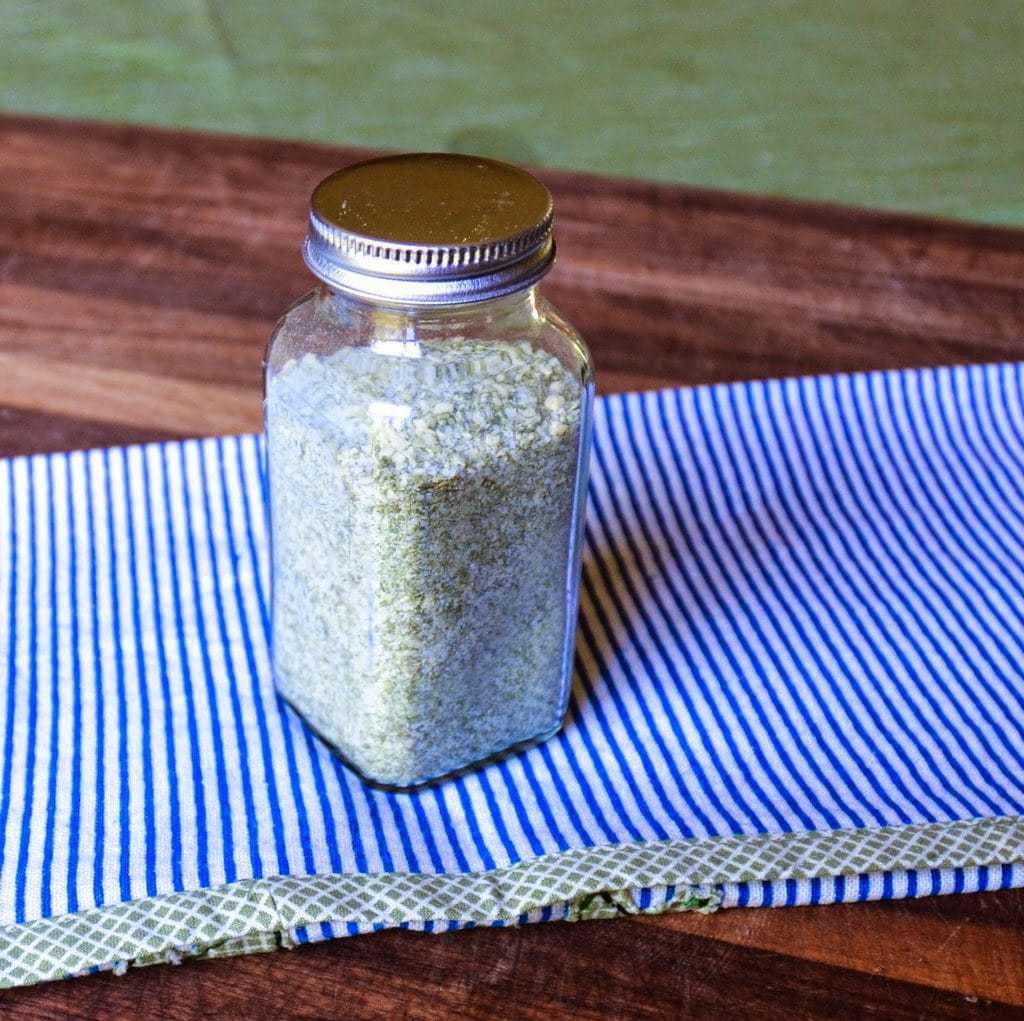
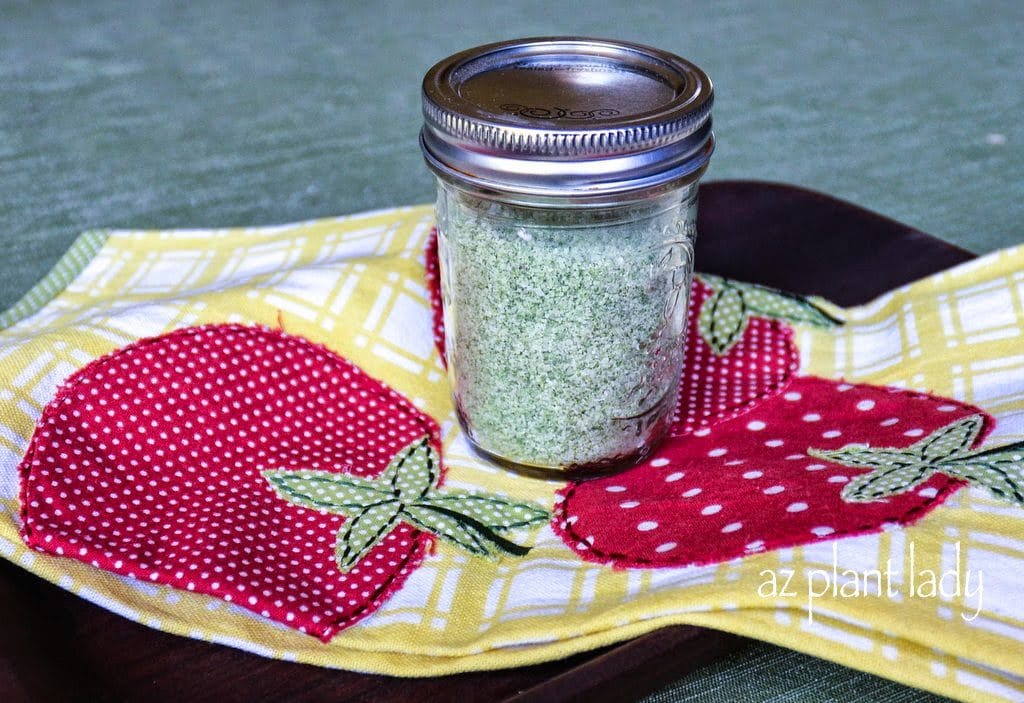
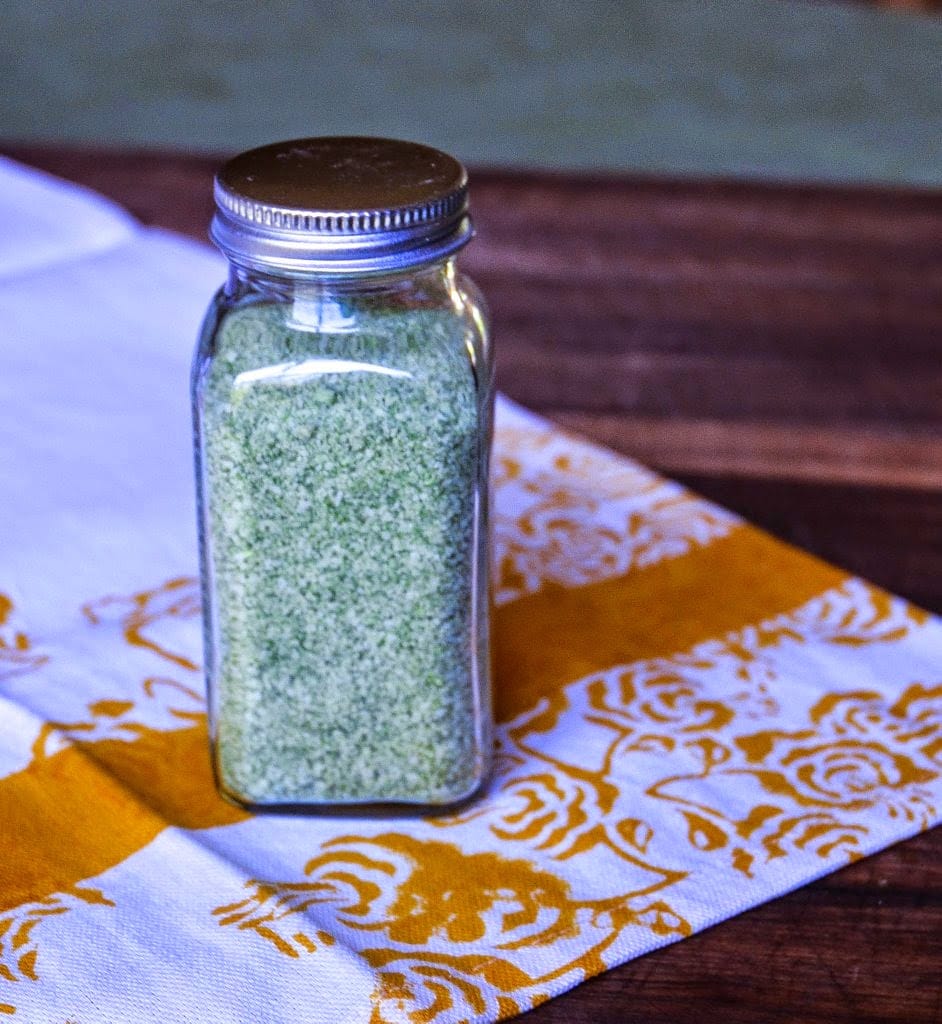
7. Put your herb salt into a glass jar with a tightly-fitted lid. Store in a dark, dry place with your spices and dried herbs to preserve its flavor.
I will use my herb saltblend to flavor a pork loin, baked chicken or even a beef roast. It would also taste great when sprinkled on roasted vegetables or put into soups, don’t you think?
As you can imagine there are a number of different types of herb salts that you can make. Here are a few different combinations that you might want to try:
Photo: Rosemary Sage Garlic Salt
All of these herb salt blends can be made following the same steps as I have done for my herb salt blend – except where noted.
Rosemary Lemon Pepper Salt – 1/3 cup rosemary leaves, 2 tablespoons lemon zest, 1 teaspoon freshly ground black pepper and 1/2 cup kosher salt. *(Increase cooking time to 1 hour)
Rosemary Sage and Garlic Salt – 1/2 cup of rosemary leaves, 1/2 cup sage, 5 peeled garlic cloves and 1/4 cup kosher salt.
Sage Thyme and Garlic Salt – 1/2 cup sage, 1/2 cup thyme, 5 peeled garlic cloves and 1/4 cup kosher salt.
If your garden is filled with herbs, this is a creative way to use them in the kitchen or give them as gifts. Even if you don’t have a garden filled with herbs, you can find fresh herbs at your local grocery store or farmers market.
So, how about you? What would herb(s) would your ideal herb salt contain?
https://www.azplantlady.com/wp-content/uploads/2014/08/DIY-Herb-Salt-1.jpg7591024arizonaplantlady@gmail.comhttps://www.azplantlady.com/wp-content/uploads/2025/08/AZ-Plant-Lady-Logo-small.jpgarizonaplantlady@gmail.com2014-08-12 14:10:002022-11-05 00:53:15DIY Herb Salt Blends From the Garden
I do. But, I don’t like buying herbs from the store because they can be expensive and often aren’t very fresh looking.
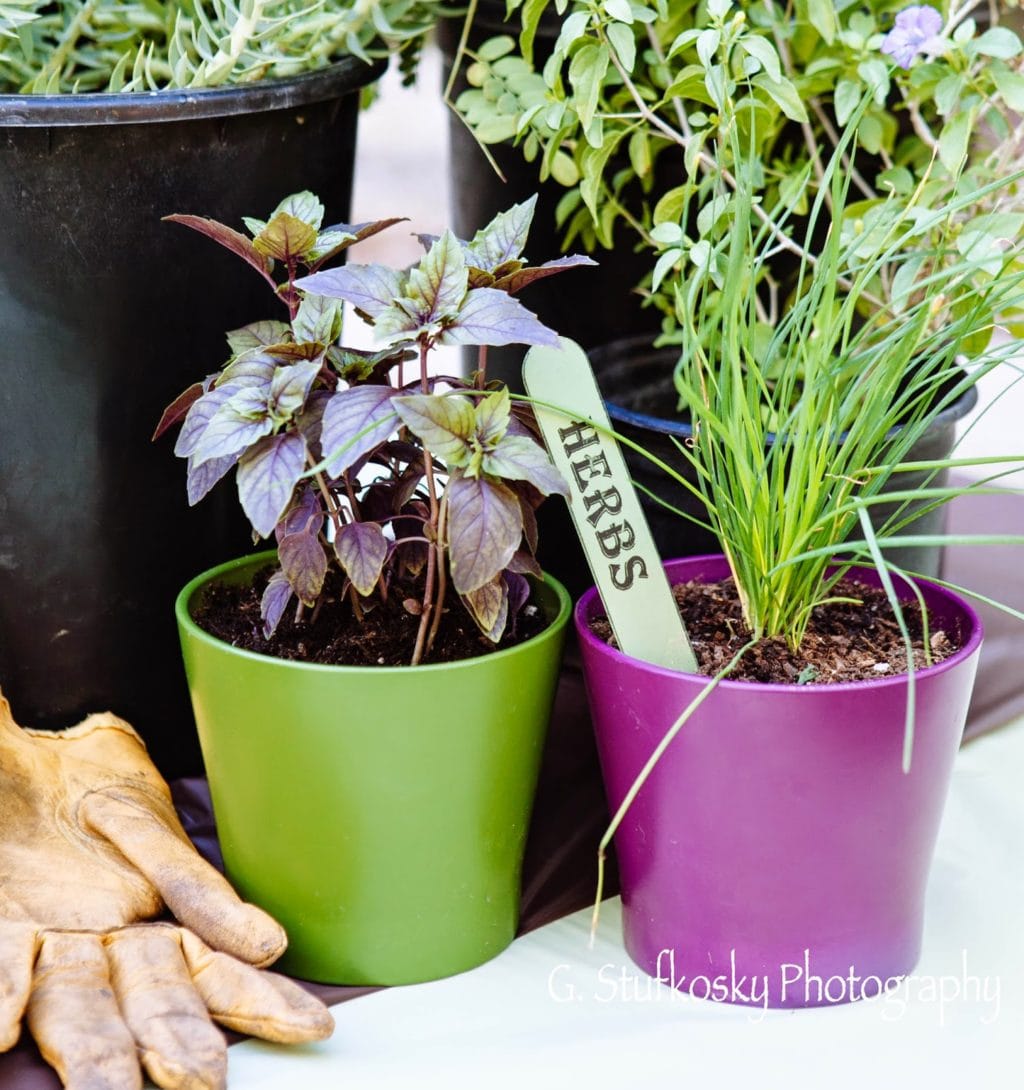
Photo: Purple basil and chives
I enjoy growing herbs outdoors in my garden, but I also grow herbs indoors on my kitchen windowsill.
Whether you have a garden, a balcony or a windowsill, you can grow herbs inside.
Many people grow herbs indoors during the winter time, but you can grow them inside all year long.
So, are you ready to grow your own fresh herbs? Let’s get started…
1. Select a place to put your potted herbs that has a sunny window. – A window that faces south is best, but east facing will also work. West facing windows may be too hot in if you live in the desert, but you can experiment with it. Herbs need at least 4 – 5 hours of sun.
It’s important to note that herbs grown indoors won’t look as compact or lush as those grown outdoors, which is due to the fact that they don’t get as much sun indoors.
2. Choose plastic or glazed containers with holes for drainage.
It’s best to avoid terra-cotta pots, which can dry out – especially during the winter when the air in our homes can be dry from heating.
growing herbs indoors
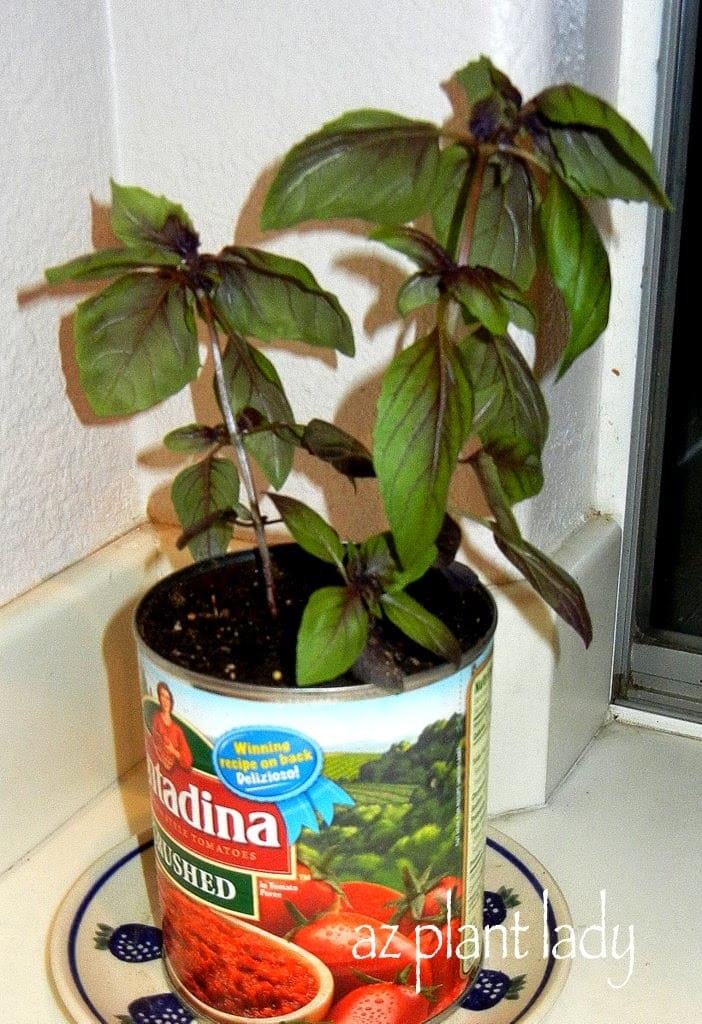
You can also use cans as recycled containers. I have grown herbs in tomato cans as well as coffee cans.
A row of cans with their labels removed, filled with herbs would add a real contemporary look to the kitchen, don’t you think?
3. Use potting or planting mix. Avoid using potting soil, which is not formulated for containers and can become soggy.
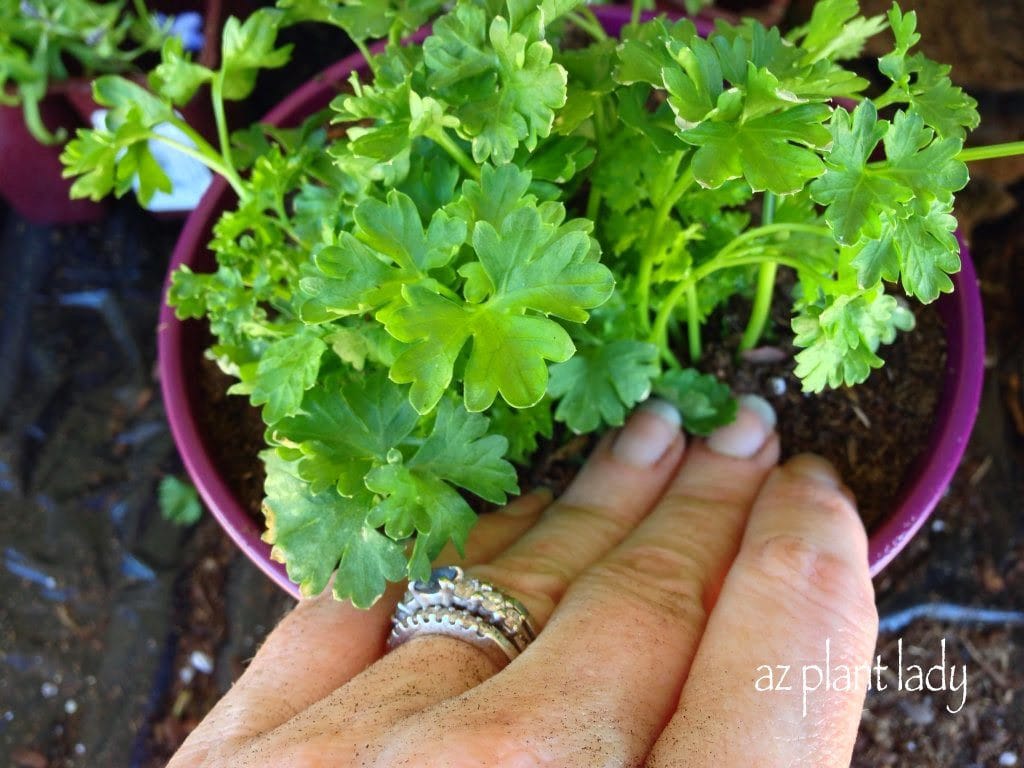
4. Select what herbs you want to grow.
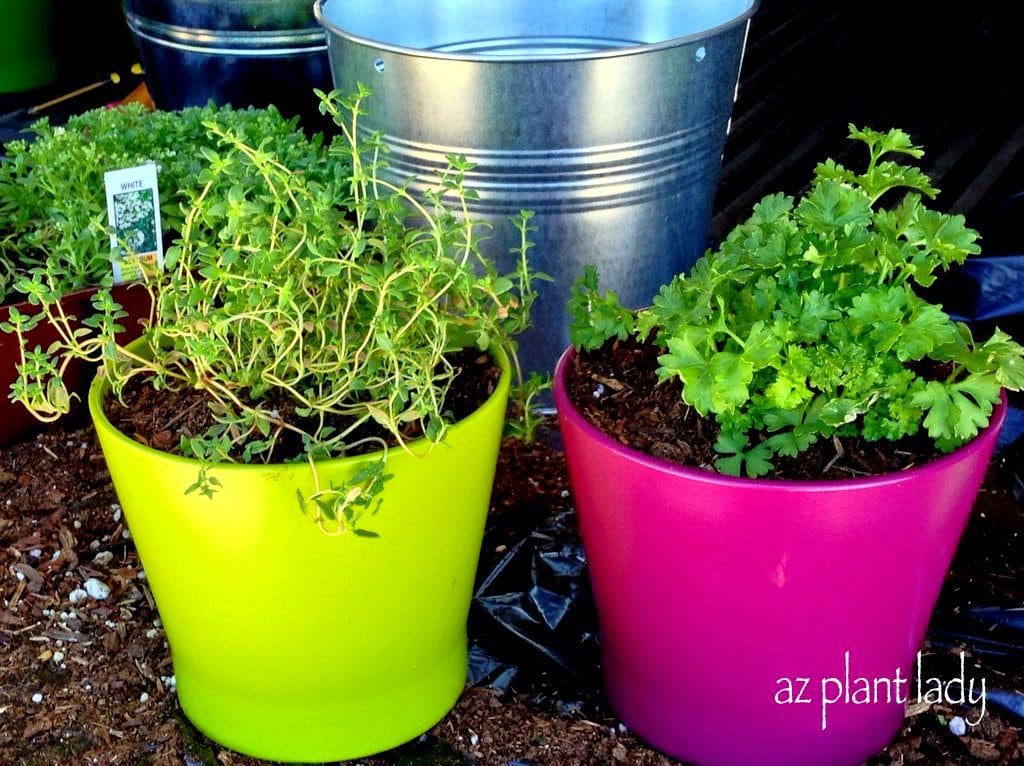
There are many different herbs that will grow well indoors, which include basil, chives, lemon balm, mint, parsley, sage and thyme.
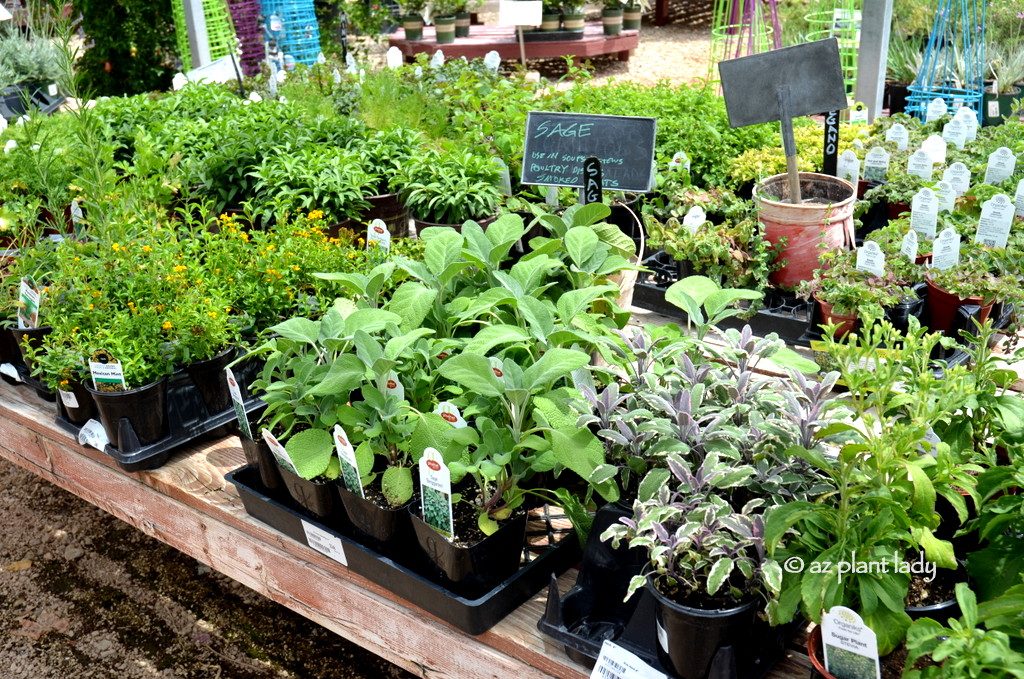
You can buy herb transplants from your favorite nursery or sometimes at the grocery store.
growing herbs indoors
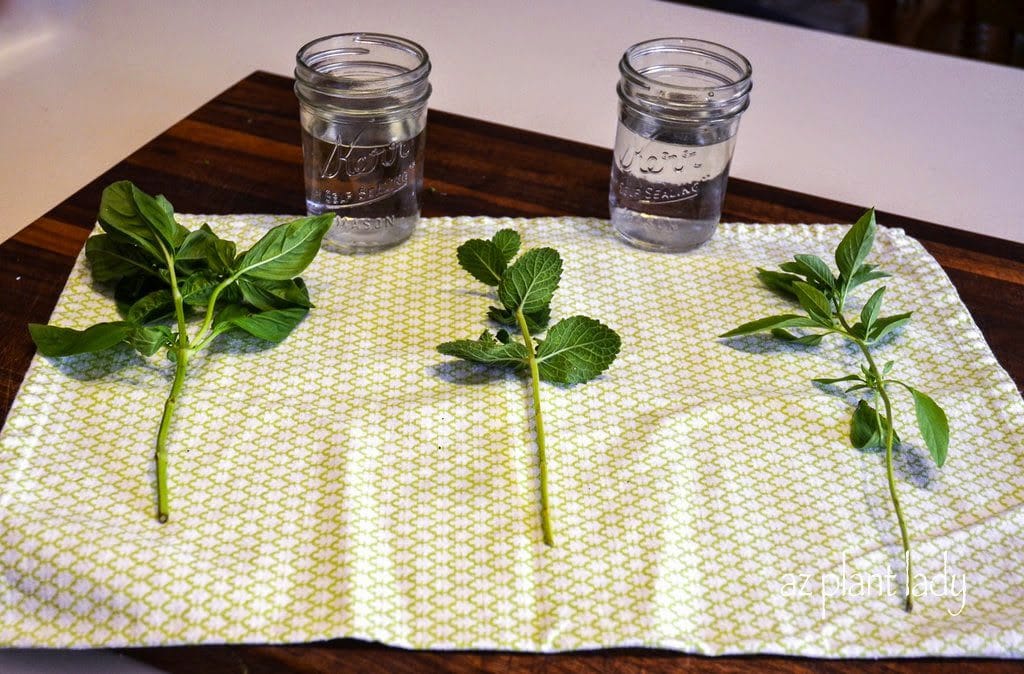
Another way to grow certain herbs is to start them from cuttings.
I ran out to the garden to grab two types of basil and some apple mint to show you how to do this. Basil and mint are both easy to start from cuttings.
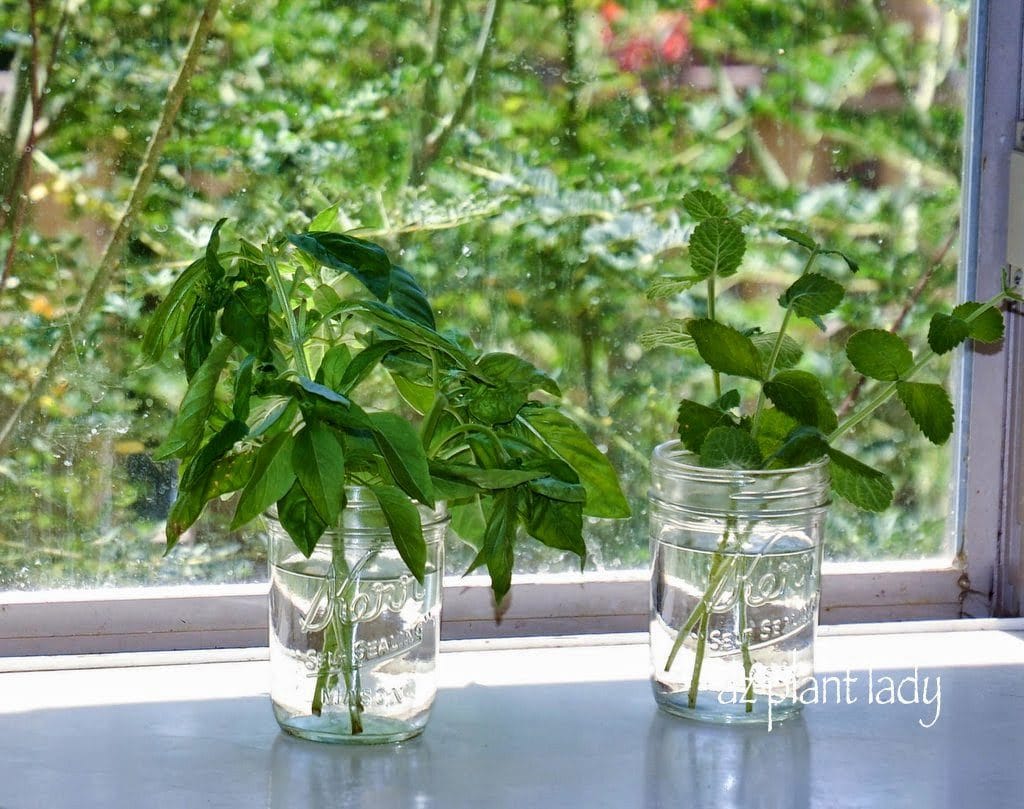
Remove the leaves from the bottom as shown, above. Place the cuttings in a glass of water so that most of the stem is submerged in water, but take care that no leaves are in the water.
growing herbs indoors
Place in a window with bright, indirect sun. Change the water every other day and watch for roots to develop. Once roots have grown 1/2 – 1 inch, transplant each cutting into a container filled with potting mix and your are done!
I told you it was easy.
5. Water your potted herbs when the top of the soil feels dry.
Herbs don’t like soggy soil, so it’s best to allow the top of the soil to dry out before watering deeply until the water runs out the bottom.
An easy to tell when it’s time to water is to stick your finger into the soil till you reach your first knuckle – slightly less than an inch. If it feels barely moist, then it is time to water again.
6. Fertilize your herbs.
When plants are grown in pots, they need to be fertilized and herbs are no different. You can apply organic fertilizer granules and work into the top inch of soil OR you can use an organic liquid fertilizer such as fish emulsion.
Follow directions on the granular fertilizer package when applying and guidelines for frequency. In general, liquid fertilizer can be applied every 2 weeks.
Soon you will have fresh herbs close at hand and ready to use in your favorite dishes.I recently made herbs salts from my herbs, which is fun and easy to do. The flavor that they add to food is just delicious!
I enjoy DIY projects – particularly when they involve things that I have grown in my garden.
It seems that a lot of the things that I make from the garden include herbs. I have dried herbs, frozen them into ice cubes and have done homemade herb butter.
Using herbs from my garden when I cook always gives me a special satisfaction, and my food tastes great too!
Photo: Basil herb Salt
Today, I am excited to share with you how to make basil herb salt. If you haven’t heard of herb salts before, they are referred to as ‘gourmet salts,’ which are very popular in the foodie community.
Herb salts are easy to make – especially if you have a food processor. The salt helps to preserve the fresh flavor of your favorite herbs, and they add fabulous flavor to your favorite dishes.
Gourmet salts also make great gifts.
It is hard to find anyone who doesn’t love basil and the flavor it adds to so many different dishes. I enjoy making Italian food and am often using basil. Usually, I tear or chop some fresh basil leaves and add them as flavoring.
Basil salt can be used in a variety of ways including sprinkling into your favorite tomato sauce, on top of a fresh-baked pizza, adding to bruschetta or simply sprinkling some on the top of fresh tomatoes. Are you ready to get started?
You will need fresh basil (either from your garden or the store) and kosher salt – pretty simple!
Grab your food processor, a baking sheet and a glass jar with a lid.
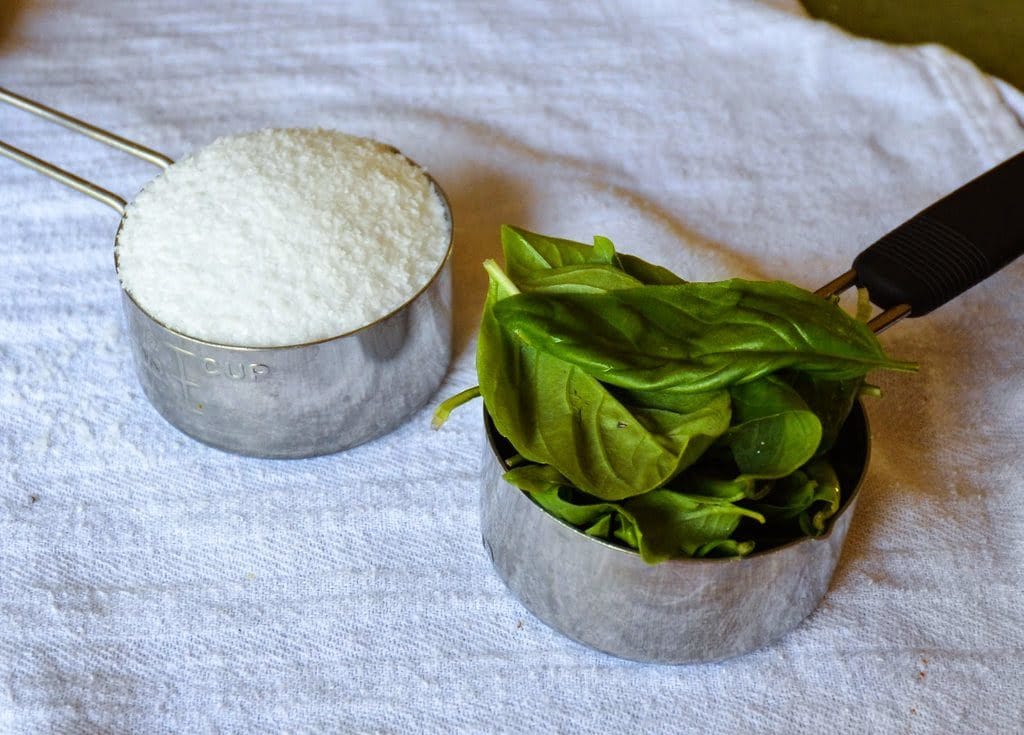
1. You will need 1/2 cup each of kosher salt and basil leaves.
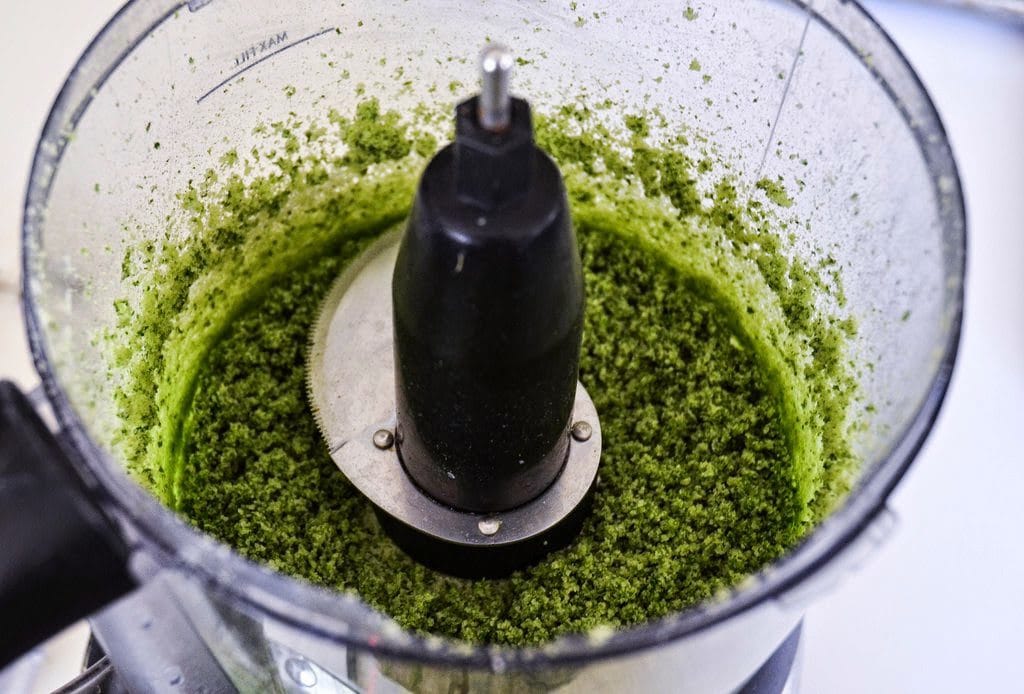
2. Add the basil and kosher salt to your food processor and pulse for 30 seconds.
The finished mixture should look like this.
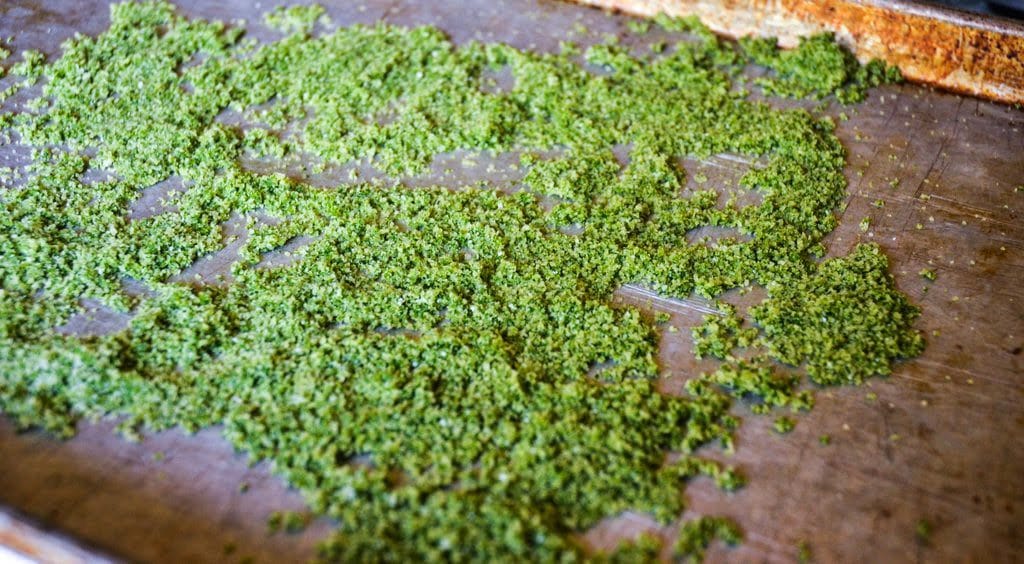
3. Pour the mixture out onto a baking sheet in a thin layer. The mixture will be somewhat moist.
4. Bake for 20 minutes in a preheated 225-degree oven. After the first 10 minutes, lightly mix the basil salt mixture and bake for another 10 minutes – this helps it to dry out completely.
5. Put the dried basil salt mixture back into the food processor and blend to remove any remaining lumps. *Make sure that the food processor is dry beforehand.
6. Put your basil salt into a glass container with a tight-fitting lid.
That’s it – you are done!
I must admit that this is a pretty easy project and the food processor does most of the work.
Keep your basil salt in a dark, cool space where you keep your other herbs/spices to help preserve its flavor. Use it within a few months for the best flavor.
*******************************
This is one of the rare times that I didn’t have to spend any extra money on a DIY project – I had the basil growing in my garden, the kosher salt was in the pantry, and I used a mason jar that I had on hand.
I made three batches of basil salt and will keep one for myself and start using it right away. The rest I plan on giving away as gifts.
Gifts from the garden and kitchen are personal and much appreciated by others. Last year, I gave away homemade jam from my peach tree. This year it will be basil salt.
I can’t wait for my basil plant to grow more leaves so I can make more!
Photo: ‘Herbes de Provence’ salt
**Basil salt is just the beginning of different types of herb salts you can make. In my next post, I will show you how to make a customized herb salt blend as well as some ideas of other herb salts you can make.
What would you use basil salt to flavor?
https://www.azplantlady.com/wp-content/uploads/2014/08/DIY-Basil-Salt-006-2.jpg10241001arizonaplantlady@gmail.comhttps://www.azplantlady.com/wp-content/uploads/2025/08/AZ-Plant-Lady-Logo-small.jpgarizonaplantlady@gmail.com2014-08-09 12:00:002022-11-05 08:11:20Got Basil? Create Delicious Herb Salt
We use cookies on our website to give you the most relevant experience by remembering your preferences and repeat visits. By clicking “Accept All”, you consent to the use of ALL the cookies. However, you may visit "Cookie Settings" to provide a controlled consent.
This website uses cookies to improve your experience while you navigate through the website. Out of these, the cookies that are categorized as necessary are stored on your browser as they are essential for the working of basic functionalities of the website. We also use third-party cookies that help us analyze and understand how you use this website. These cookies will be stored in your browser only with your consent. You also have the option to opt-out of these cookies. But opting out of some of these cookies may affect your browsing experience.
Necessary cookies are absolutely essential for the website to function properly. These cookies ensure basic functionalities and security features of the website, anonymously.
Cookie
Duration
Description
cookielawinfo-checkbox-analytics
11 months
This cookie is set by GDPR Cookie Consent plugin. The cookie is used to store the user consent for the cookies in the category "Analytics".
cookielawinfo-checkbox-functional
11 months
The cookie is set by GDPR cookie consent to record the user consent for the cookies in the category "Functional".
cookielawinfo-checkbox-necessary
11 months
This cookie is set by GDPR Cookie Consent plugin. The cookies is used to store the user consent for the cookies in the category "Necessary".
cookielawinfo-checkbox-others
11 months
This cookie is set by GDPR Cookie Consent plugin. The cookie is used to store the user consent for the cookies in the category "Other.
cookielawinfo-checkbox-performance
11 months
This cookie is set by GDPR Cookie Consent plugin. The cookie is used to store the user consent for the cookies in the category "Performance".
viewed_cookie_policy
11 months
The cookie is set by the GDPR Cookie Consent plugin and is used to store whether or not user has consented to the use of cookies. It does not store any personal data.
Functional cookies help to perform certain functionalities like sharing the content of the website on social media platforms, collect feedbacks, and other third-party features.
Performance cookies are used to understand and analyze the key performance indexes of the website which helps in delivering a better user experience for the visitors.
Analytical cookies are used to understand how visitors interact with the website. These cookies help provide information on metrics the number of visitors, bounce rate, traffic source, etc.
Advertisement cookies are used to provide visitors with relevant ads and marketing campaigns. These cookies track visitors across websites and collect information to provide customized ads.