decorating for fall
Crafting Your Own Paper Mache Pumpkins for Fall: A DIY Guide
Paper Mache pumpkins? Yes please. I love decorating for fall and so I always grow some pumpkins in my garden. But, I must admit that I also use a few ‘faux’ pumpkins as well when I decorate.
Fall is the season for pumpkin decor, both natural and faux, and I relish in embellishing my space with a touch of autumnal charm. While I cultivate pumpkins in my garden, I also embrace the art of crafting ‘faux’ pumpkins for an added flair. This year, I am particularly thrilled to host our family’s annual Halloween party, given our prime neighborhood for trick-or-treating.
I visited our local craft store to buy a few extra ‘faux’ pumpkins and was shocked at how expensive they have become. Even with a coupon, I left the store without buying any. Determined to maintain both my festive spirit and my budget, I embarked on a DIY journey to create paper mache (or papier-mâché) pumpkins. Here’s how:
The Materials You’ll Need to Make a Paper Mache Pumpkin
Before diving into the process, keep in mind that paper mache can be a bit messy, so I recommend wearing an apron and covering your work surface with plastic trash bags.
Gather the following supplies:
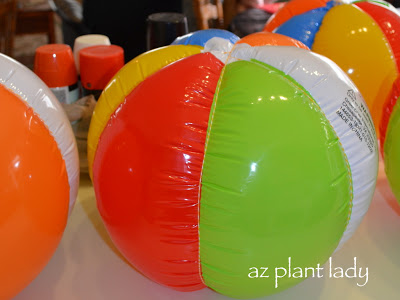
- Beach balls
- Twine
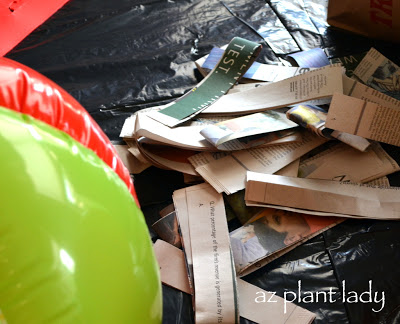
- Newspaper strips (approximately 1-inch wide)
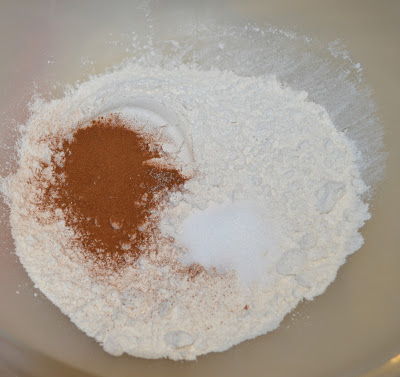
- Flour and water for the paper-mache mix (1:2 ratio)
- Optional: 1 teaspoon cinnamon to mask odor and 1 teaspoon salt to prevent mold
- Spray paint (black, orange, or off-white)
- A small piece of tree branch
- Glue gun
Crafting Your Paper Mache Pumpkins – the How To
Creating the Paper Mache Base
Start by tying twine around a beach ball. Enlist someone’s assistance to hold the knot down as you secure it. This forms the foundation of your pumpkin shape.
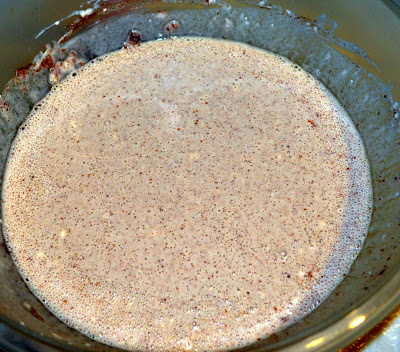
Preparing the Paper Mache Mix
Mix flour and water in a 1:2 ratio to create your paper-mache mixture. For a pleasant fragrance and to prevent mold, consider adding a teaspoon of cinnamon and salt respectively. Dip newspaper strips into the mixture, ensuring they’re coated without excess.
Applying the Paper Mache Pumpkin Strips
Layer the coated newspaper strips onto the beach ball, overlapping them to create a sturdy structure. Tear the strips to fit as needed. Allow each layer to dry before applying the next. Depending on humidity levels, drying times may vary. Using a fan can expedite the drying process.
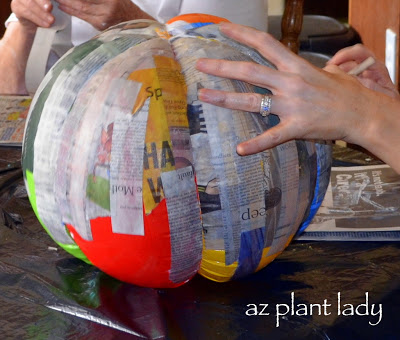
Apply strips to beach ball, overlapping. Tear the strips to whatever size you need.
Allow to dry. This will take longer in more humid areas. I used a fan to help speed up the process.
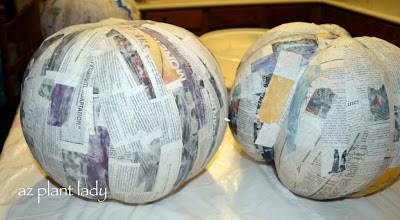
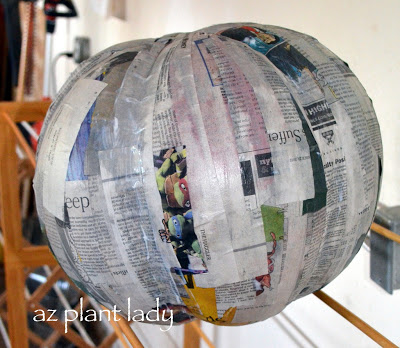
Adding Depth and Color
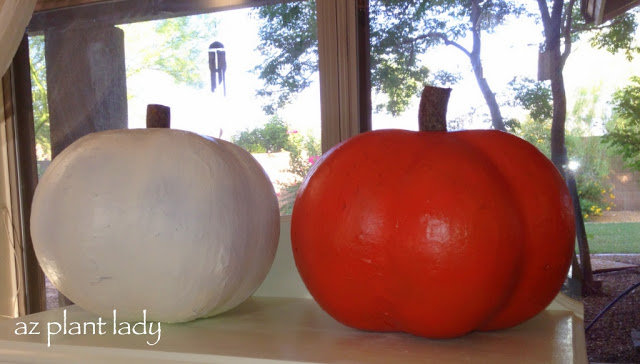
Apply a total of four layers of paper mache, allowing ample drying time between each layer. After achieving the desired thickness, paint the pumpkin with black spray paint and let it dry. This step prevents the black and white hues of the newspaper from showing through the final coat of colored spray paint.
Bringing Your Paper Mache Pumpkin to Life
Next, apply two coats of spray paint in your chosen shade – either orange or off-white. The pumpkin’s color sets the tone for your decoration.
Finishing Touches for the Pumpkin
Complete your paper mache pumpkin by gluing a 1-inch piece of a tree branch onto the top using a glue gun. This serves as the stem of your lifelike creation.
Paint with Non-Toxic Paint
Your handmade paper mache pumpkin is ready to grace your fall decor. Although carving isn’t an option, you can paint on a ‘jack-o-lantern’ face or leave it unadorned. While the crafting process may span a couple of days due to drying times, the end result is truly satisfying.
A Budget Friendly Craft
Crafting your own paper mache pumpkins is not only a budget-friendly alternative but also a creative endeavor that allows you to infuse your space with your unique style. Whether you’re hosting a Halloween gathering or simply seeking to embrace the fall spirit, this DIY project offers a delightful way to celebrate the season. Give it a try and relish in the artistic satisfaction of crafting something truly special. I am so happy with my paper mache pumpkin results!

Feel free to ‘Pin’ the image above to your Pinterest!


