You may remember that earlier this year, I was excited to try my hand at growing container corn.

I learned about container corn when I was reading through Burpee’s catalog.  They had a hybrid corn called, ‘On Deck’, which was specially bred to grow in containers.  Each stalk was said to produce 2 – 3 ears.  

Well, I like to try new things in the garden and then tell you all about them.  So, I ordered the seeds and got ready.  You can read about how I prepared in my earlier blog post “An Old Whiskey Barrel and Corn Seeds”.

Container Corn

I hand-watered my seeds and was delighted when they quickly sprouted.

I planted a few nasturtiums in the front because I like to grow flowers with my vegetables.

Container Corn

The corn grew quickly, but I started to see a problem…

The corn on the outside was not growing as quickly as those in the middle.  I suspect that maybe that was because the corn in the middle received more water and/or had more room to grow their roots.

The reason it is a problem is because in order to have a good corn crop with ears full of kernels, they need to be adequately pollinated.  This is achieved by having multiple rows of corn.

In this case, I had plenty of corn stalks for pollinating.  The problem was that the outer corn weren’t maturing as quickly as those in the middle.  

Container Corn

As a result, the inner corn stalks started sprouting corn before the outer stalks and there was not enough pollen available.

I did get 3 tiny ears of corn among the center stalks – not worth eating at all.

I was going to pick the ears of corn so that I could show you how small they were.  But…  

Container Corn

The birds got to my container corn first.

I have grown corn in my vegetable gardens every year and have never had a problem with birds eating it.

But, they evidently loved my container corn.

**I watered my container corn diligently, taking care not to over water.  They were planted in good-quality planting mix and given slow-release fertilizer.

While I did like how they looked growing in my whiskey barrel, I am not impressed with their uneven growth and lack of corn.

Needless to say, I won’t be growing container corn anytime soon.  I am planning on planting strawberries in it this next spring though 🙂

One of my favorite stops on our road trip this year was visiting the gardens at the University of Tennessee.


Earlier in our trip, I visited the gardens of the University of South Carolina, so I was looking forward to seeing more campus gardens.

Even though, I had heard great things about the gardens at UT, I was surprised at how much there was to see. 

The kitchen gardens were the first area we came up to.

kitchen garden

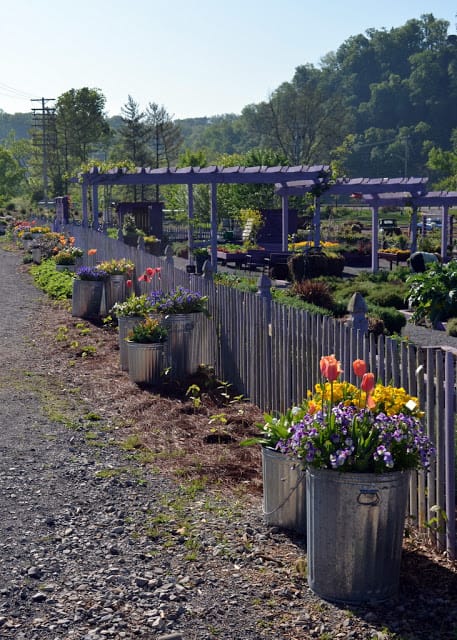
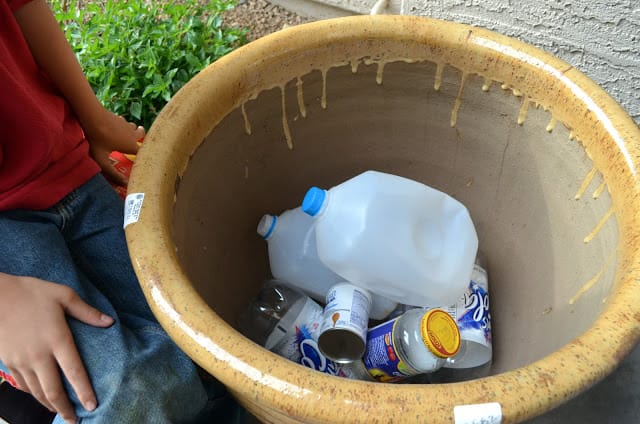
The kitchen garden was bordered by trash cans filled with flowering annuals and tulips.

kitchen garden

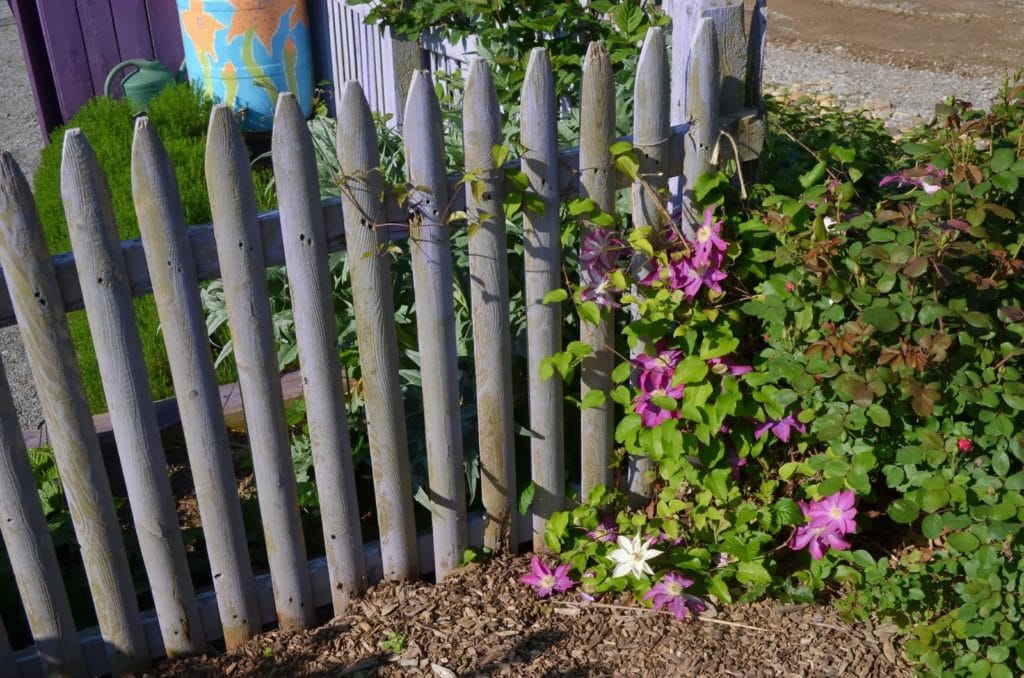
Roses and a clematis vine greeted us at the entrance of the kitchen garden.

I wish I could grow clematis vines in Arizona.  I tried once – it did grow, but wouldn’t flower.  Definitely NOT a ‘fuss-free’ plant for a desert garden.

kitchen garden

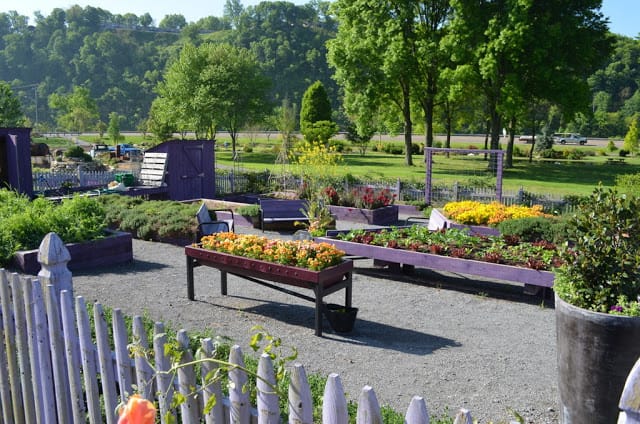
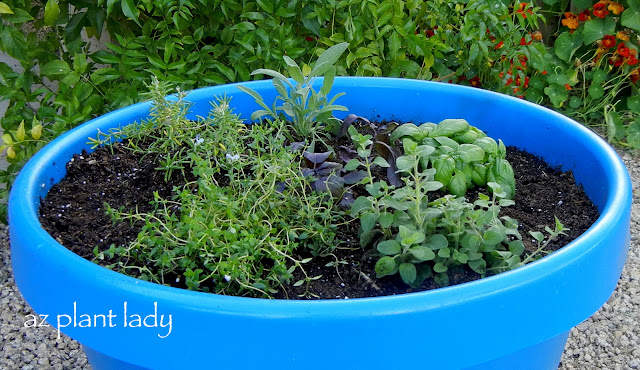
The fence was made up of tree stakes, sawed in half and painted lavender.  The area inside was filled with vegetables, herbs and other plants.  The garden was a also a test garden for many yet to be released plant varieties.

kitchen garden

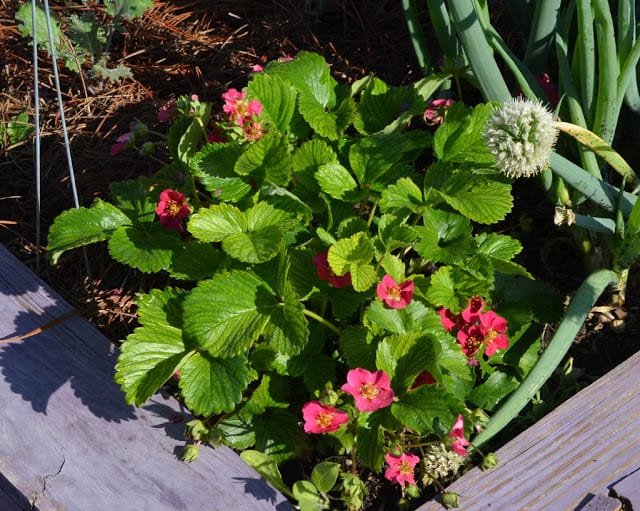
Here is a strawberry with red flowers, called ‘Toscana’.

kitchen garden

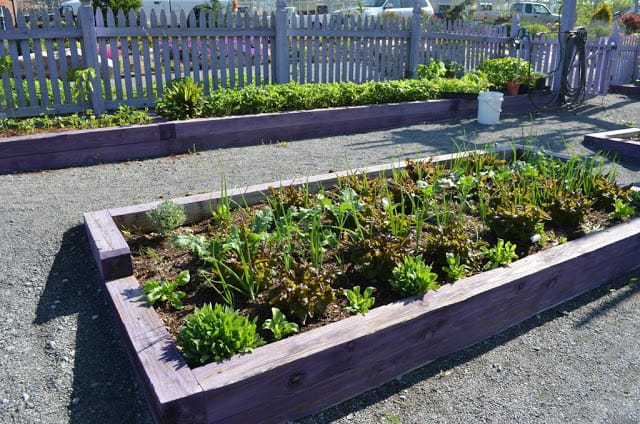
Garlic planted among leaf lettuce look so attractive, don’t you think?

Did you know that garlic keeps bad bugs away from the lettuce?  It’s true!

square-foot gardening

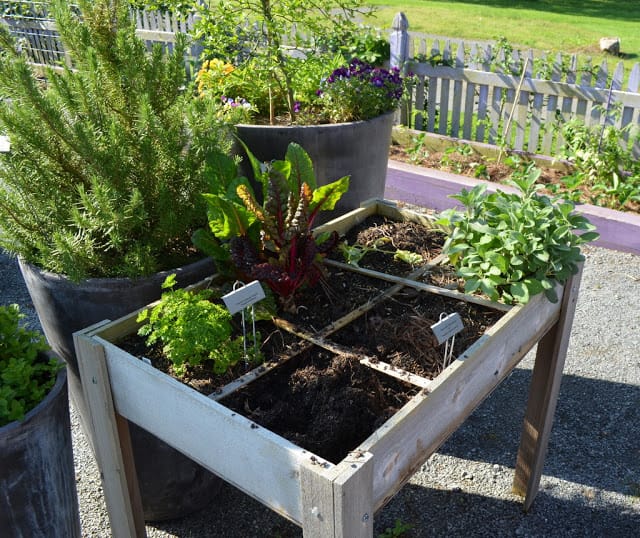
Here is a great example of ‘square-foot gardening‘.

Flowering chives

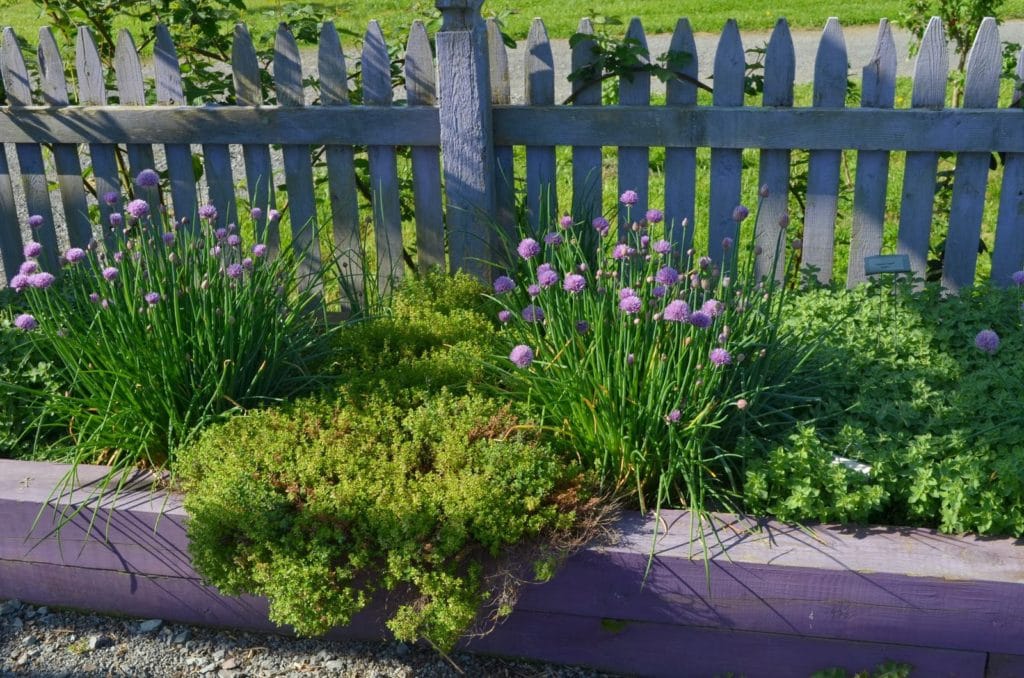
Flowering chives were just a few of the herbs that bordered the outer area of the garden.

The flowers are so pretty, that I think I’ll let some of my chives go to flower this year.

artichoke plants

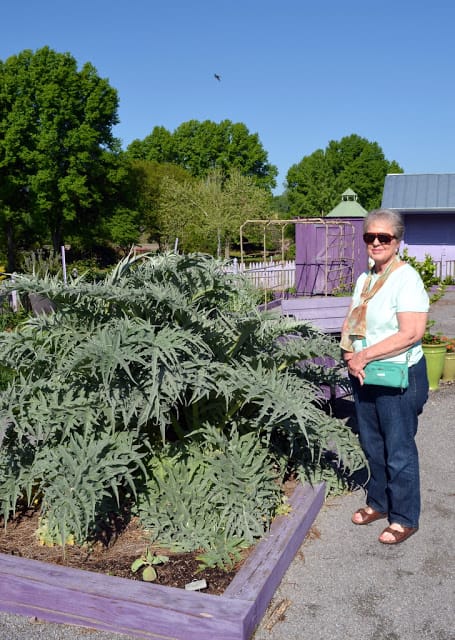
The artichoke plants were huge – my mother posed beside it so you could see how big it was.

kitchen garden

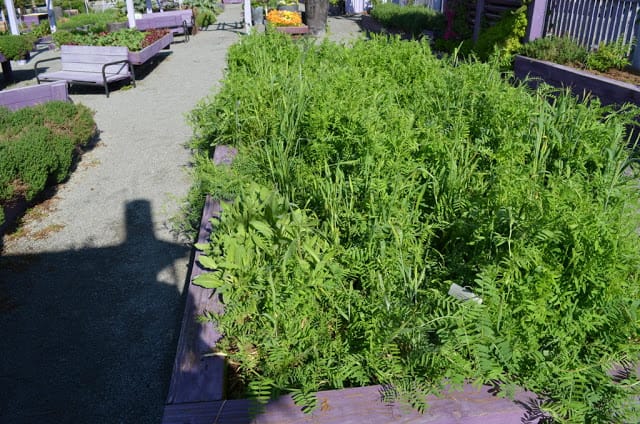
Some of the beds were full of what many would call weeds.  But this crop of ‘hairy vetch’ is actually a cover crop, which is planted in between seasons because it adds nitrogen to the soil.

kitchen garden

Have you heard of the newest trend of vertical gardening?  I love this display.

kitchen garden

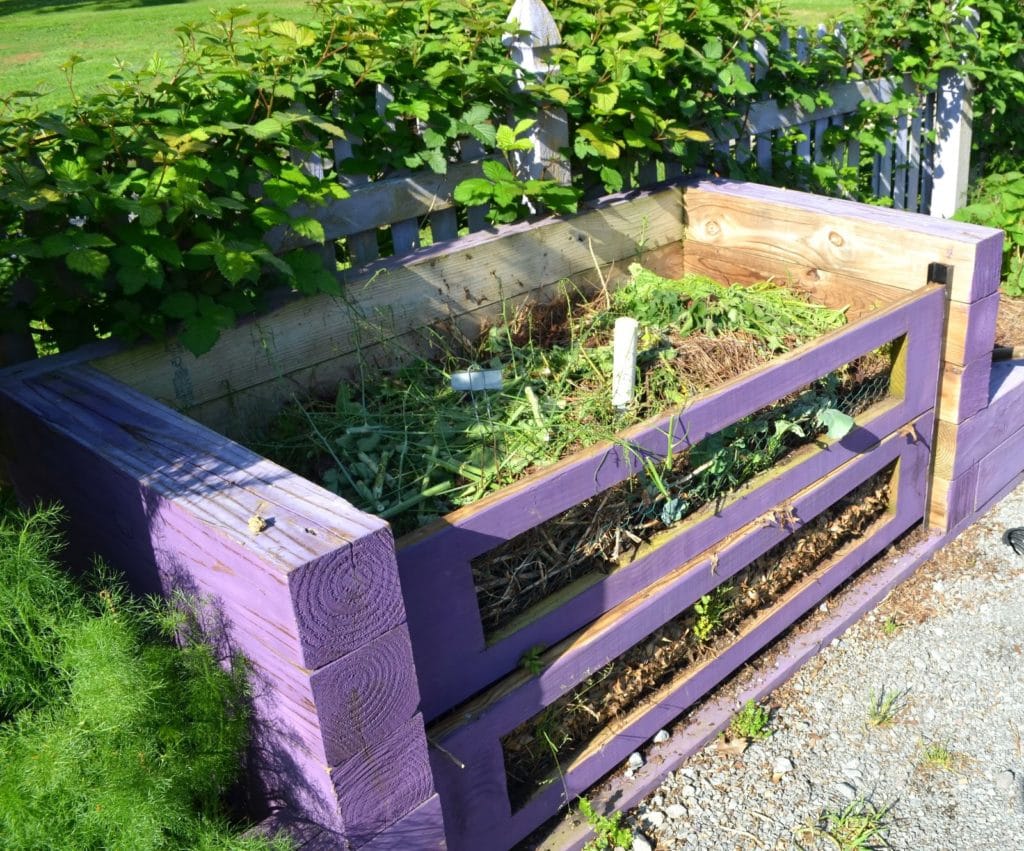
Of course, a kitchen garden should have a compost pile.

Do you see the plastic tube in the middle?  That is perforated all the way down, in order to get air to all layers of the compost pile, which helps with decomposition.

kitchen garden

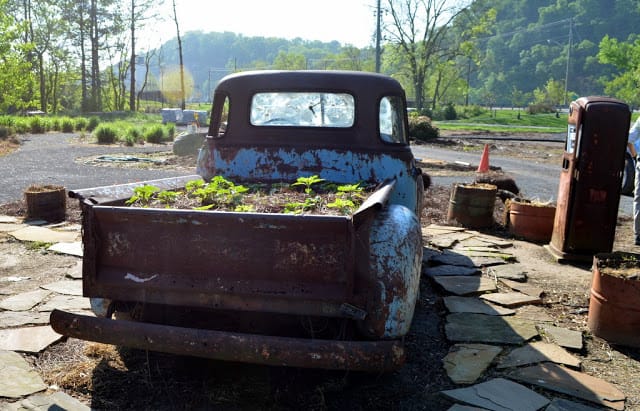
Outside of the kitchen garden was an old, rusty truck that had potatoes growing in its bed.

This was a great example of what I like to call ‘functional garden art’.

A Rusted Pick-Up, Trash Can Containers and a Kitchen Garden

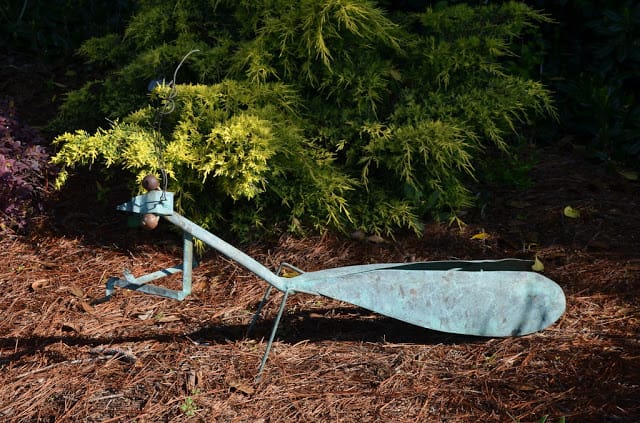
Here is a cute praying mantis figure.

Glandularia pulchella

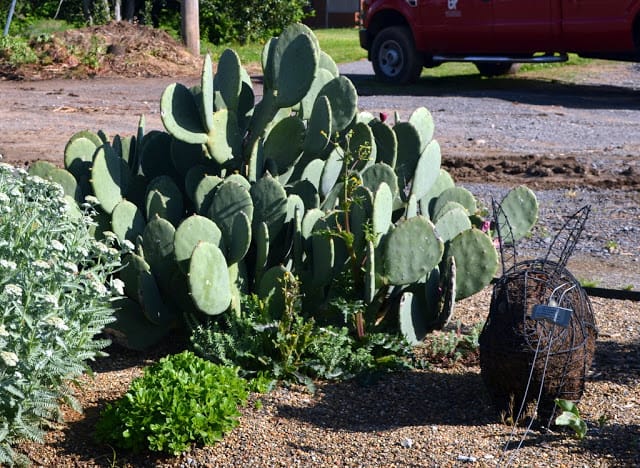
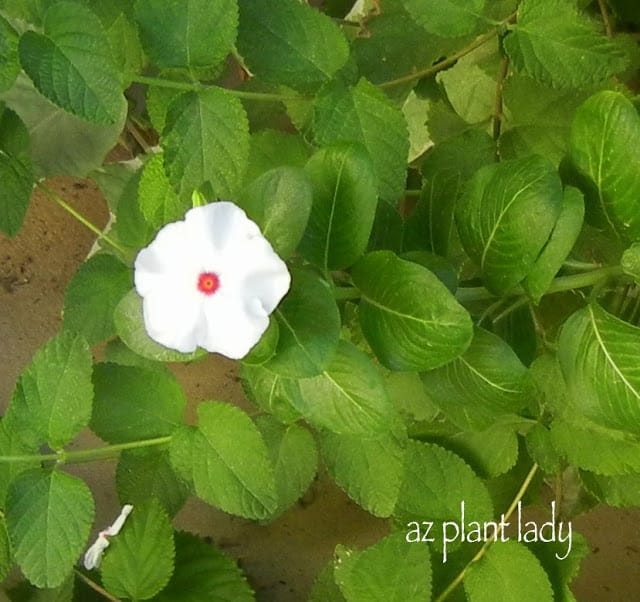
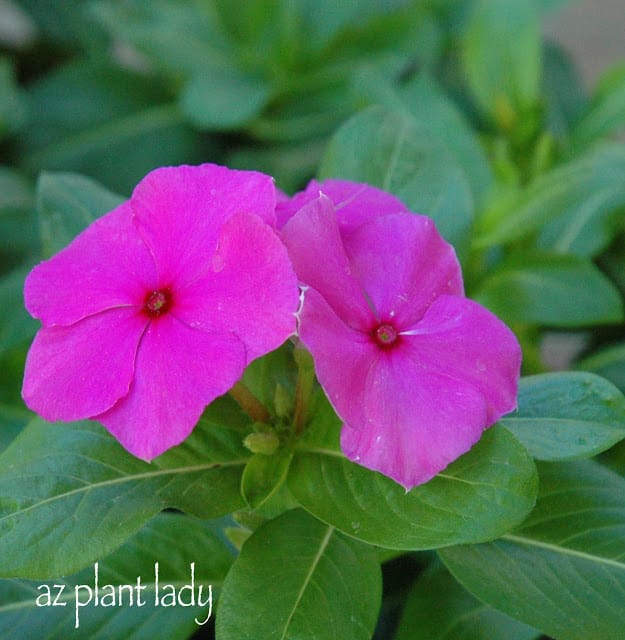
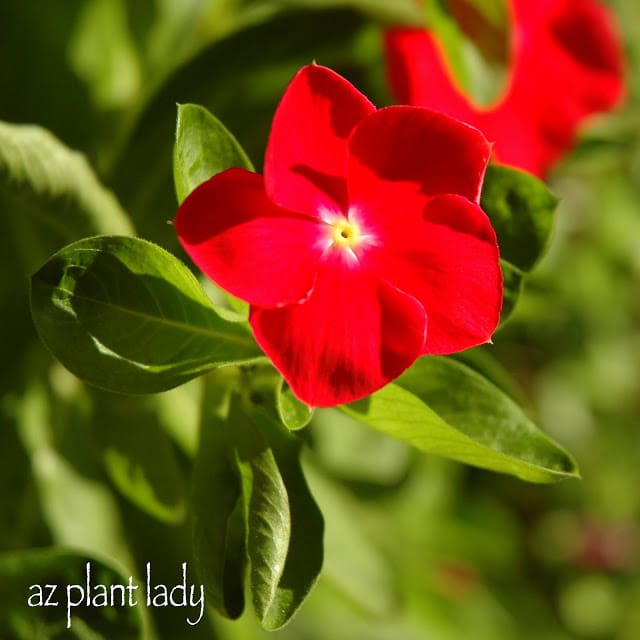
I did see some familiar plants that are equally at home in the desert southwest like this prickly pear and verbena (Glandularia pulchella), below.

university garden

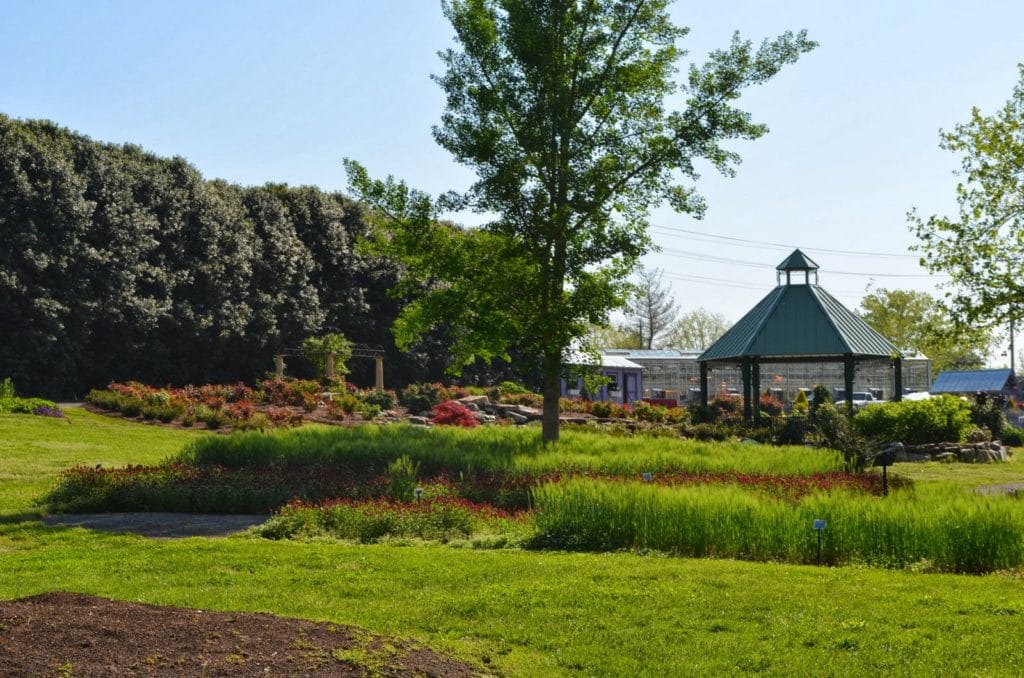
After leaving the kitchen gardens, I walked through the larger part of the university gardens.

university garden

One of the things that I enjoy about traveling, is discovering new plants that don’t grow where I live.  

Viewing this garden, I was often surprised to find quite a few plants that I also grow, even though my garden was about 1,800 miles away from here.

beautiful shade plants

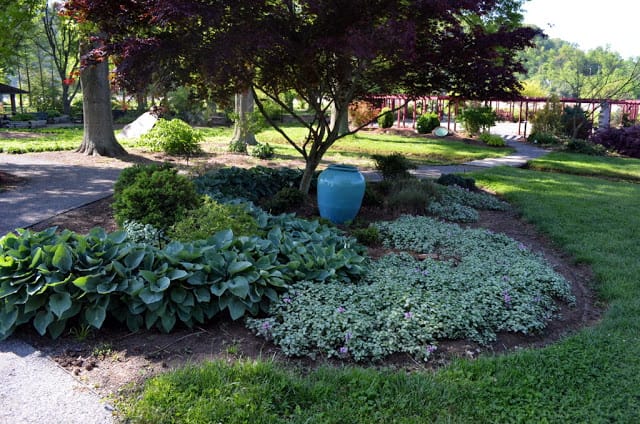
As I walked through the larger garden, there were beautiful shade plants, like these hosta.

Brightly colored azaleas

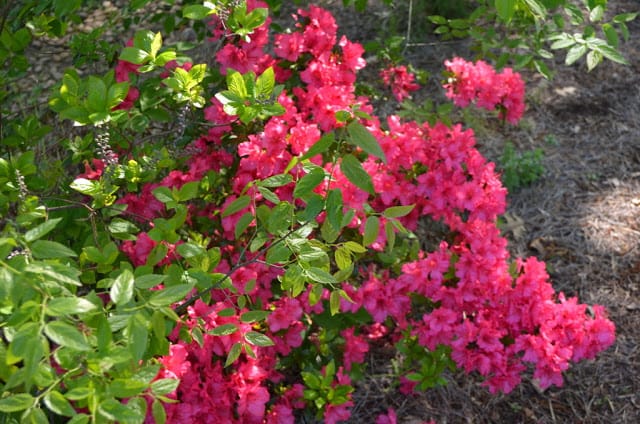
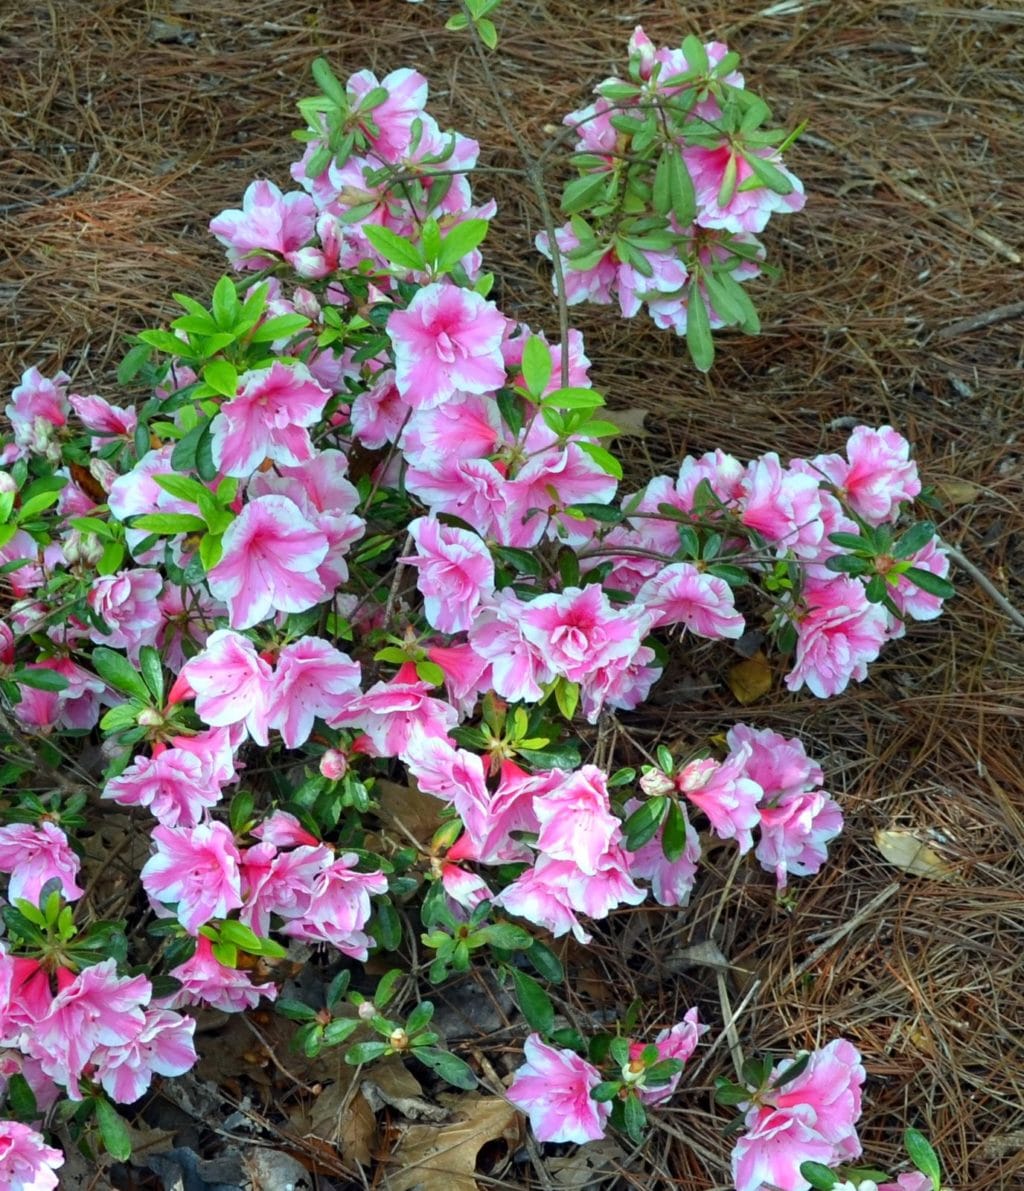
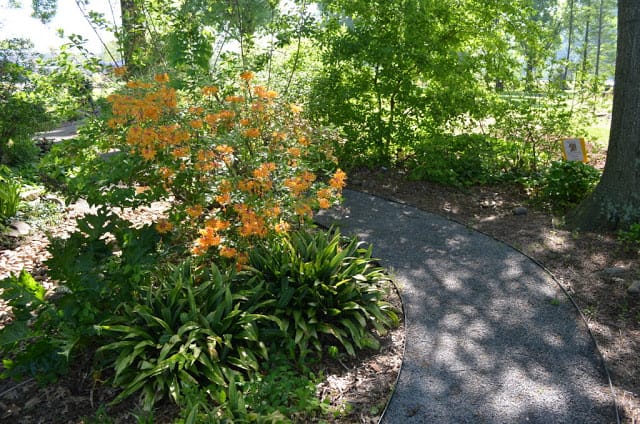
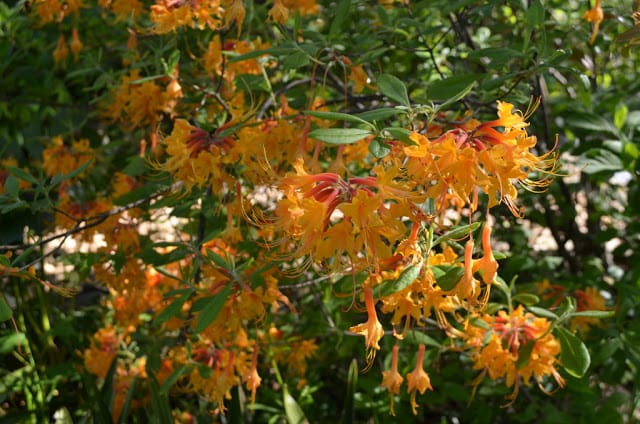
Brightly colored azaleas dotted the landscape.

University of South Carolina

Isn’t this ‘Encore’ azalea beautiful?

delicate flowers

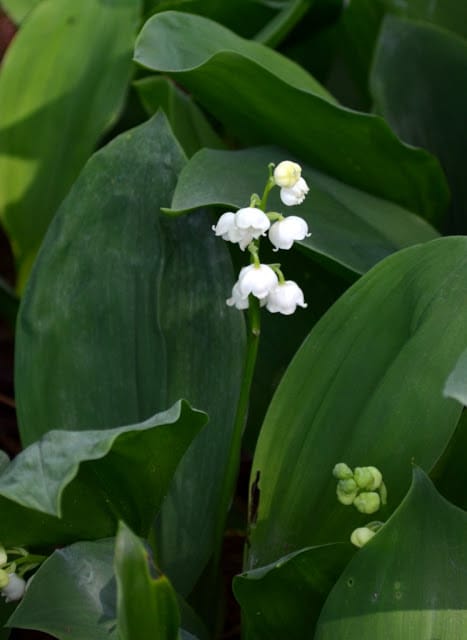
Lily of-the-Valley was blooming.  I love their small, delicate flowers.

hosta

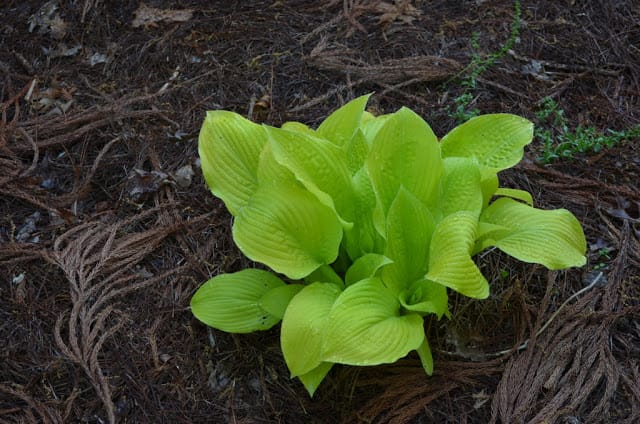
I love the lime-green color of this hosta, don’t you?

honeysuckle

This honeysuckle smelled heavenly!

University of South Carolina

It was so pretty, too.

wisteria vine

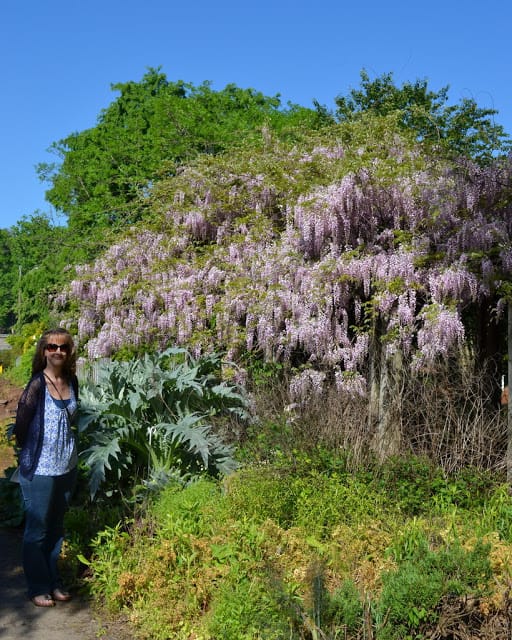
We also found a huge wisteria vine, which also had a wonderful fragrance.

dogwood trees

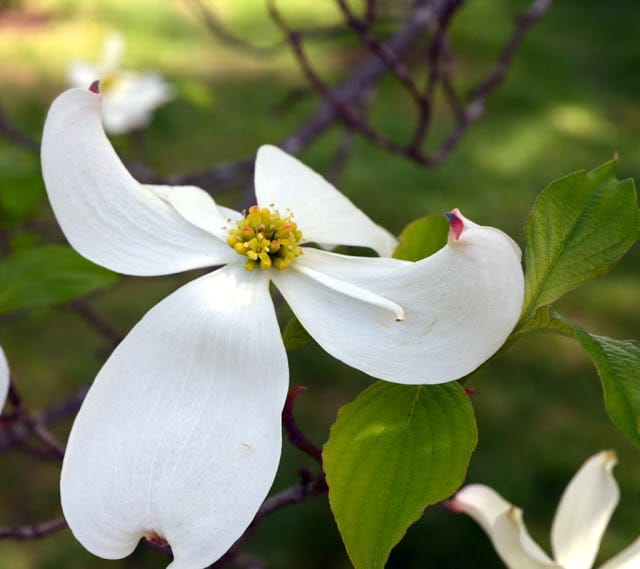
The dogwood trees were blooming.

Did you know that the outer white petals aren’t the actual flower?  They are called ‘brachts’.  The real flower is in the center and isn’t too showy.

Road trip
Road trip
Willowleaf 'Blue Star

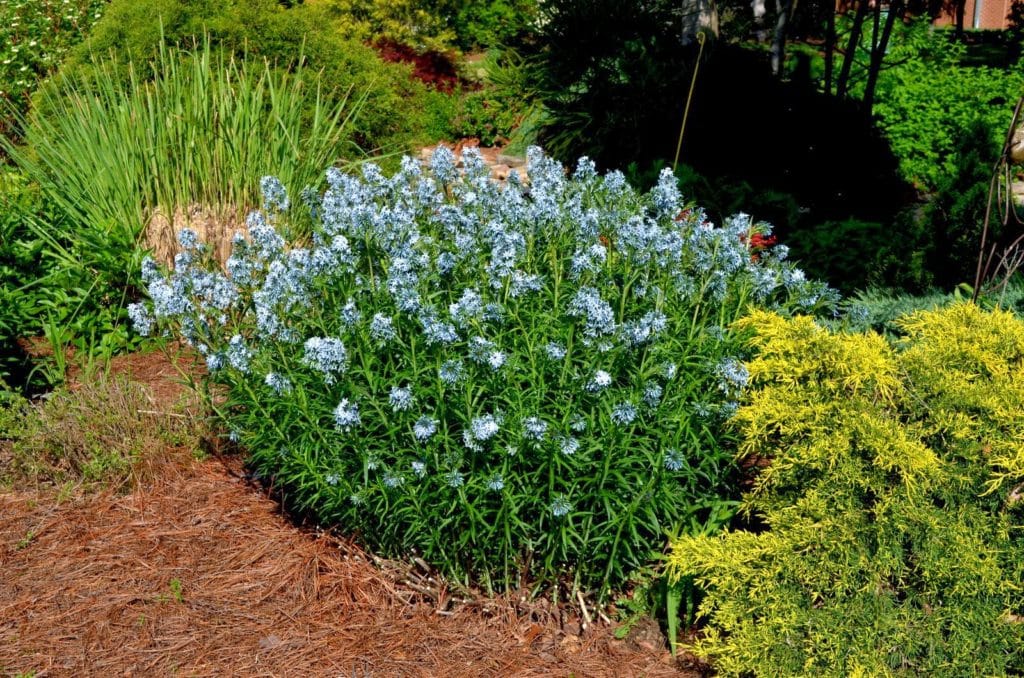
Willowleaf ‘Blue Star’ was in full bloom.  

lawn

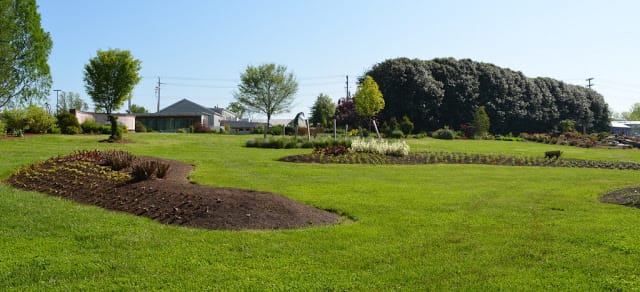
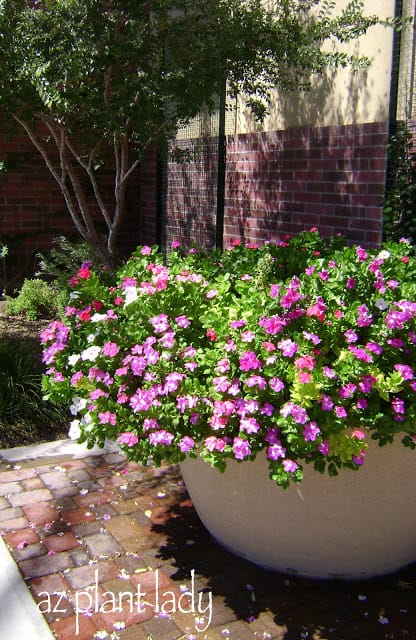
Throughout the lawn areas were softly mounded planting beds, which I liked because they added height and interest to this large expanse of lawn.

red-flowering plant

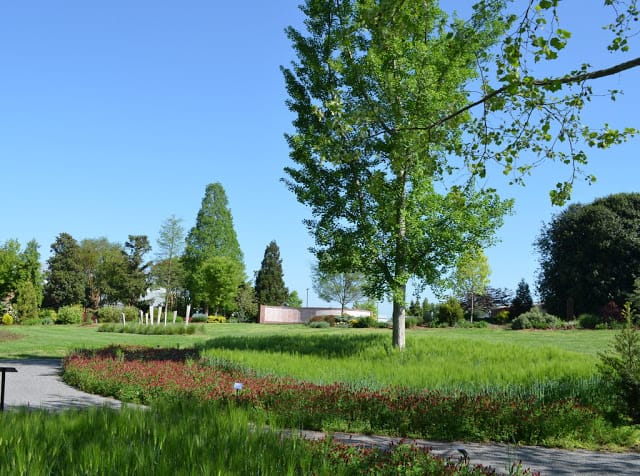
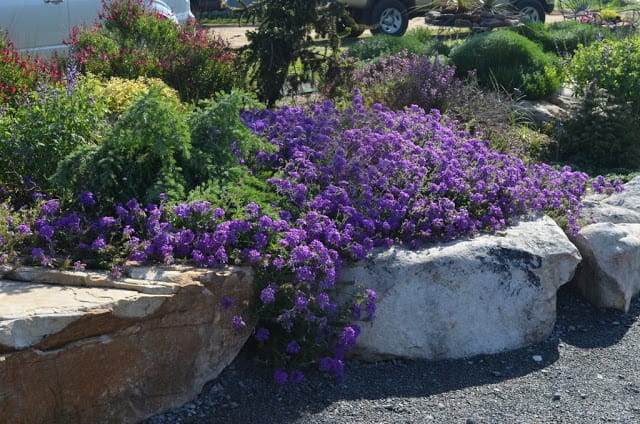
From a distance, I could see a red-flowering plant. I walked closer to see what it was…

Trifolium rubens

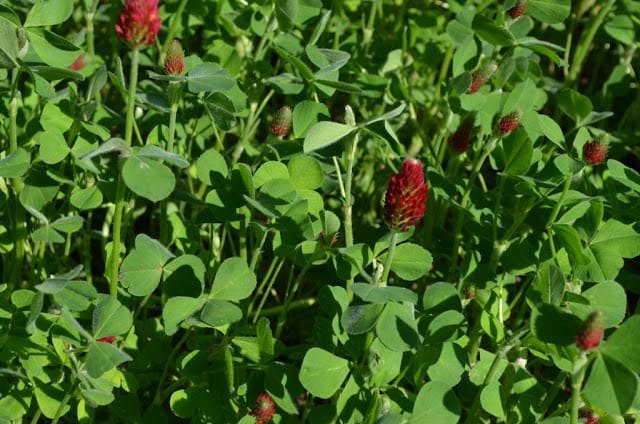
I was surprised to find that it was Red Clover (Trifolium rubens).  It was very pretty, but you need to be careful when using it as a groundcover, because like other clovers; it can be invasive.

shade garden

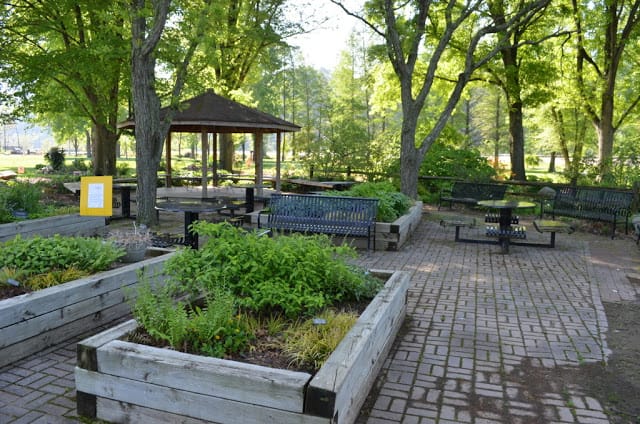
As we got ready to leave the garden, we walked through the shade garden, which had places to sit and eat.

The UT Gardens have so many different events for the public.  I only wished that I lived closer 🙂

I encourage you to take some time and visit the gardens at your local university.  You may be pleasantly surprised at what you find there.

Our trip is nearing its end, but I am looking forward to visiting Kentucky.

****************

“Thank you” to my friend, Dave Townsend (from Tennessee) who sent me to this wonderful garden.

I encourage you to visit Dave’s blog, Growing the Home Garden, which is a hugely popular blog – once you visit, you’ll see why.

Last week, I decided to get rid my older pots that I have in my front entry.

Years ago, I received these plants from a client who decided that she wanted fancier pots.  So, I took them home, painted them bright colors and installed them by my front entry.

While they have served me well for the past 13 years, they weren’t very big, which limited what I could plant in them.

For quite some time, I have wanted to get some nice, large glazed pots.  I realized that it was finally time to practice what I preach to my clients…

“Choosing colorful, glazed pots is a great way to add color to the landscape.”

So, my husband and I went out searching for three pots for our front entry.

I was thrilled to find all three at our first stop – Home Depot.  The price was good and they even gave us 10% off for a small chip we noticed.  No one will see the chip since it will be on the back side.

I had my plants all selected and was ready to go.

My son, Kai, offered to help.  So I told him to raid the recycle trash can and get an empty milk carton,  soda/water bottles and empty jars.

Kai looked at me like I was a little crazy, but he did as I asked.

He then put them into my new containers…

plastic containers

plastic containers

Can you guess why I had my containers filled with ‘trash’?

I’ll let you know why you’ll want to start collecting plastic containers for your next potting project in my next post…

*****************************

Today, my daughter, Rachele, is on a plane to Chicago.  She has joined the Navy.

I am so proud and happy for her!

But, I must admit that part of my heart has left with her. 

Rachele

I remember being sad when I held her by the hand and took her to her first day of preschool.  She had her pretty dress on and her curly hair was short and cute.  I stood outside her classroom for over a half hour, just watching her through the window.  

Then I went home and cried.

I have done my best as her mom and it’s time for her to stretch her wings and make her way into the world. 

This family photo was taken yesterday, just before Rachele left

This family photo was taken yesterday, just before Rachele left.

I just wish it didn’t have to hurt to let her go…

Why Adding Trash to Pots is a Good Idea

I recently re-planted my herb container for the cool-season.

Last spring, I planted my container with rosemary, green basil, purple basil, sage, thyme and oregano. All of these herbs do well in the warm-season and I enjoyed being able to step outside the kitchen with cut fresh herbs whenever I needed them.

Herb Container

You can read the post here, to see how to grow herbs in containers.I also did a “How-To” video about this too 🙂

Okay, so now that cooler weather is on its way, I wanted to add some different herbs that would do well through the winter in my zone 9 garden.

Herb Container

I planted Dill, Garlic, Lavender, Parsley, another Thyme and kept the Sage the I had originally planted.

My kids added some of their Petunias that their grandma bought them in the container too, which will add some nice color.

Other herbs that can handle cooler weather in USDA zones 9 and above are Cilantro, Chives, Fennel, Lemon Grass and Rosemary.

I highly recommend planting your own herb container.  It is very easy and so fun to be able to harvest your own herbs!

*This blog post contains affiliate links. If you click through and make a purchase, I may receive a commission (at no additional cost to you). Thanks for your support in this way.*

Last winter, I was enjoying a rare moment of peace….no kids or husband in the house, the garden didn’t need any attention and no articles to write. So, I decided to see what was on television.  As I was channel surfing, I saw a gardening show and of course, I stopped and watched.

What I saw was the host and featured garden expert, showing how to grow vegetables and flowers together in containers. Since I love both vegetables and flowers, I was intrigued.  So I bought the book written by the featured garden expert and got started.

I found nice plastic containers on sale along with some tiny trellises, as well as planting mix (NOT potting soil, which gets too soggy for container plants).
Planting mix is specially formulated for containers – it has a light texture and holds just the right amount of moisture for plants.

Then, I started planting.  I came up with the vegetable and flower combinations on my own and I must admit that I was happy how they turned out…

 growing flowers in containers

The first container has purple violas, spinach, bell pepper plant and nasturtiums. I started all of these from transplants, except for the nasturtiums, which came from seed that I planted.

I periodically snip the spinach for salads and I have harvested a single bell pepper so far.  However, there are flowers on my pepper plant, so more peppers are on the way.

 growing flowers in containers

This container was planted with red and green leaf lettuce, pink dianthus and cucumbers.

I snip the lettuce for salad and the dianthus has been blooming nonstop. The only problem that I have had with this container are the cucumbers.

Cucumbers do best when started from seed, not transplants.  I have grown a lot of cucumbers over the years.  So, I placed two small trellises in the back of the container and planted cucumber seeds at their base. I picked a variety of cucumbers that were small and would do well in a container.

Unfortunately, they never came up.

I tried planting them in my regular vegetable garden and they never came up.

I tried starting them indoors and they didn’t sprout.

*I had purchased the seeds online from a very reputable seed company, but the entire package of seeds was defective.

So I planted my go-to cucumber seeds and they are starting to grow beautifully.

 growing flowers in containers

My last vegetable/flower container has romaine lettuce, sugar snap peas and Icelandic poppies.

The lettuce has done very well, BUT my little dog discovered that he likes lettuce, and he would take some little bites from the sides of the lettuce.  I simply put some plastic patio chairs around the pot and he kept away.  Later, I took the chairs away and he left the lettuce alone.

The poppies haven’t bloomed yet, but I can see their buds, so it won’t be long now.

I have been picking off sugar snap peas every time I am in the garden and eating them on the spot.

So, does the idea of growing vegetables and flowers together appeal to you?

The book I read was “Easy Container Combos: Vegetables and Flowers” by Pamela Crawford. (I haven’t been asked to promote her book – I bought it myself and really enjoyed it so much).

I can’t wait to try some different combos this summer once the lettuce fades away.  I promise I will share 🙂

**One thing I love so much about gardening is trying new things. This one was a home run for me.  

Growing Annuals: An Unusual Flower Container

Do you love visiting your local Starbucks for that perfect cup of coffee?  Or maybe you prefer an iced coffee like I do.

 coffee cup containers

 Well, my mother absolutely LOVES coffee and Starbucks is a frequent stop of hers.  The other day, she brought over a bunch of used coffee cups and sleeves.

 coffee cup containers

She had the great idea of using the sleeves for starting seeds in.

Of course when my mother has a good idea, I usually listen 😉

So I got to work….

 coffee cup containers

coffee cup containers

The kids helped me plant the seeds.

Then I started looking at the cups and I thought that they would make great planters too.

So I cut them in half and then cut out the bottom of the lower  part of the cup using a knife.

 coffee cup containers

Because there are no bottoms to the planters, it is important to place the containers before you fill them with soil.

I think it turned out pretty good, don’t you?

Tomato, Bachelor's Button and a Marigold plant

Tomato, Bachelor’s Button and a Marigold plant.

Once your plants are ready to be transplanted, simply plant the cardboard coffee sleeve in the soil.  The cardboard will break down.

The coffee cup containers won’t break down easily, so place the plant and container in your prepared hole and then simply cut down the side of the container and carefully remove it and finish filling in the hole with soil.

So the next time you stop your local coffee house, don’t throw away your cup – save it and use it for starting seeds.

**To learn more about how to start seeds indoors, you can read my earlier blog post.

I came upon this group of containers yesterday.  

uncontrolled plants

Pretty uncontrolled plants, huh?

Well, hidden underneath all the plants are actually 4 containers.

AND

they are all mine…..

I know, I know.

How could I have let things get so out of control?

Well, life sometimes gets a bit crazy and other then watering my pots, they didn’t get any other attention this summer.

I didn’t go out of my way to plant colorful annuals this past spring, opting instead for perennials.

uncontrolled plants

My Sweet Potato Vine did wonderfully despite being neglected.  It is a newer variety called ‘Pink Frost’ (Ipomea batatas ‘Pink Frost’).

container plants

A single Vinca flower pushes its way through the other plants.  I planted Vinca for my father-in-law, in his garden, this summer before he passed away in September.  He gave me his leftover plants, which I threw in one of my containers.

Purple Trailing Lantana

Purple Trailing Lantana is spilling over and has reached the ground because I never pruned it back.

container plants

I also planted White Trailing Lantana, which is mixed in with my Sweet Potato Vine.

Now I must admit, that my container plants are usually better maintained.  But under the circumstances, I think that they did great considering that all I did was water them.

Believe it or not, I used to be in charge of hundreds of of container plants every year (usually annuals).  They had to look perfect because they were in high profile areas.

You certainly wouldn’t know it looking at my own containers right now would you?

I sometimes describe myself as more of a “Do as I say, not as I do” kind of horticulturist at times 😉

For those of you who maybe can’t stand my messy containers, don’t worry.  I have plans for ripping out some of the plants, some pruning and some new additions.

I’ll show you what I did next time 🙂

**********************

My daughter and her husband came over tonight for dinner.  She is definitely ready to ‘pop’.  I remember being so anxious for her to be born (she was 5 days late).

I think it is even harder now, waiting for my first grandchild to be born.

ONE more day until her due date!

I wonder if her baby knows that 😉

Vibrant blooms, Annual Vinca

Vibrant blooms, Annual Vinca (Catharanthus roseus)

One of my favorite summer annuals is vinca.

Vibrant blooms

Stop by any nursery this time of year, and you will find flats full of their vibrant blooms, and there are many different colors available.

Vibrant blooms

From purples and pinks to bright reds.

Vibrant blooms

Vinca works excellent in containers or when planted in the ground.  They prefer well-drained soil in a warm, sunny area.

This warm-season annual enjoys regular watering and does best with some fertilizer, but don’t overdo it.  I usually apply a slow-release fertilizer when planting and follow up with monthly applications of a liquid fertilizer such as Miracle-Gro.  If you want to go organic, then you can just use a mixture of good potting soil mixed with compost.  

Vibrant blooms

Now some of you may have had the experience of growing beautiful vinca one year and the next year; you have a terrible time with them. Shortly after planting you notice your vinca beginning to wilt, and no amount of water seems to help.

Vibrant blooms

Has this happened to you? Extra water will not help because the vinca is suffering from a case of ‘Vinca Wilt’.  This is not the scientific term, but for those of you who like long scientific names, your vinca is likely the victim of a Phytophthora fungus, which affects the roots, preventing them from absorbing water – hence the dried out look of the vinca.  

This fungus lives in the soil and infects the roots, causing them to rot. It loves moist conditions, and so more water hastens the demise of vinca.  

So, what can you do? The fungal spores can last for months or even years in the soil. You can usually rely on one good year of vinca growth, but then the spores start to multiply, and by the next year, they begin to affect your new plants.

Vibrant blooms

I recommend using vinca for one year and then use something different the next three years. Of course, you can remove all the soil from your containers and sterilize the inside with a bleach water mixture and then add new soil, which can work for a few containers at home, but it is not cost-effective in a larger setting.  For me, it is not worth it either, because there are so many other beautiful summer annuals that you can use. 

I hope this solves any mystery surrounding vinca.  They are beautiful and well worth growing – for a year at least.

I’m sure most of you know how much fun it can be to garden with your kids.  I remember my dad building each of us a raised planter where we could grow vegetables and flowers.  Today, my kids and I went to the store to buy flowers for their new garden.  You will NEVER guess what they are planting their flowers in…

Easy Garden

Our first stop was our local nursery.  Each was allowed to pick out two six-packs of flowers.  The kids decided to each pick a different type of flower and then shared them.  My youngest daughter, Gracie, selected geraniums and blue petunias.

Easy Garden

Ruthie went the fragrant route and selected stock, (beautiful and fragrant despite its ordinary name) and white alyssum.

Easy Garden

Dianthus and snapdragons were Kai’s choice.

Easy Garden

We finished making our selections and then got ready to go home and start planting.  The only question the kids had was – where were they going to plant their flowers?

Easy Garden

How about their old kiddie pool?  You know – the ones that cost about $10 that your kids play in during the summer.  However, once summer is over, most people either throw out their pool or store it somewhere out of the way.  

Well, now you can use it as a planter for either flowers or shallow-rooted vegetables or herbs.

The process is easy, and your kids will have fun assisting you.

First, move the pool where you want the garden to be as it will be too heavy once you fill it with soil.  Then make multiple holes on the bottom for drainage.  Then fill with a mixture of potting mix.  Sprinkle some slow-release fertilizer and now begin planting!

Easy Garden

Gracie planted her first plant, a peach-colored geranium.

Easy Garden
Easy Garden

My teenage daughter, Rachele, was overseeing our progress while texting on her phone.

flowers

We finished!  The kids are so excited to see their flowers grow.  The garden will be a riot of different colors and has no sense of design, which is as it should be for a children’s flower garden.

flowers

This will be our ‘before’ picture.  We planted alyssum, dianthus, geraniums, petunias, snapdragons, and stock.

If you would like to try this at home and want the garden to become a more permanent part of the landscape, you can add a brick border or plant shrubs and perennials around the outside of the pool.