Have you decorated your home for the fall holidays yet?  I decided to do a little something different for this fall.  Instead of spending a lot of money on fake pumpkins and other decorations that I would later need to find storage space for – I went a more ‘natural’ route with a little help from the produce aisle.

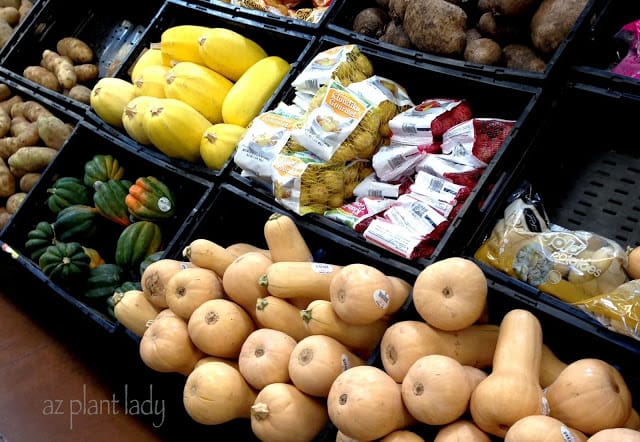
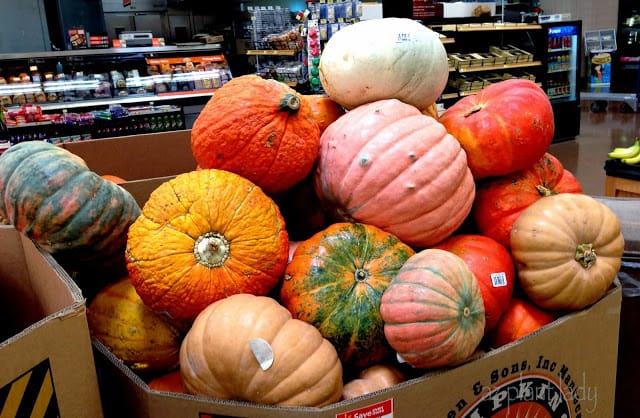
Of course, you can find the expected pumpkins and gourds.  BUT, my goal was to find other types of fruits and vegetables to use as well.

fall holidays

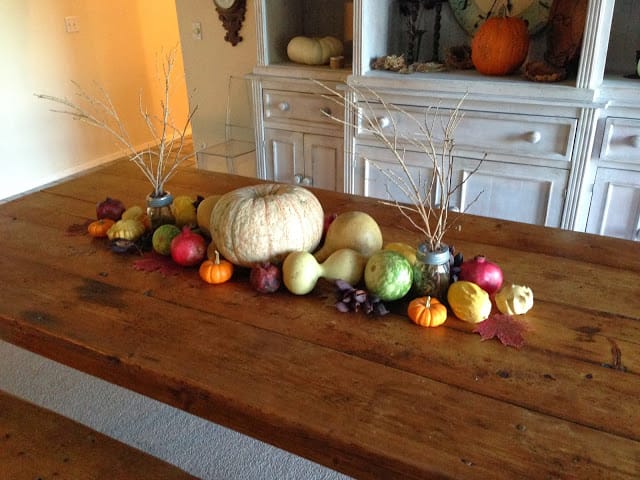
Here are the results of my shopping trip and the display I made.  It is all natural and while there are a few gourds and pumpkins – there are also a few other produce items that are not often found in a fall centerpiece. 

fall holidays

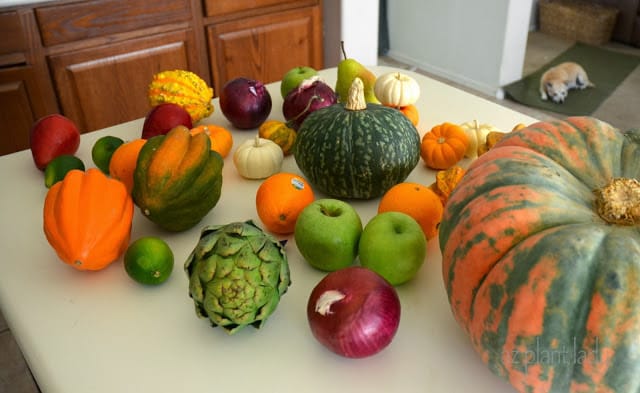
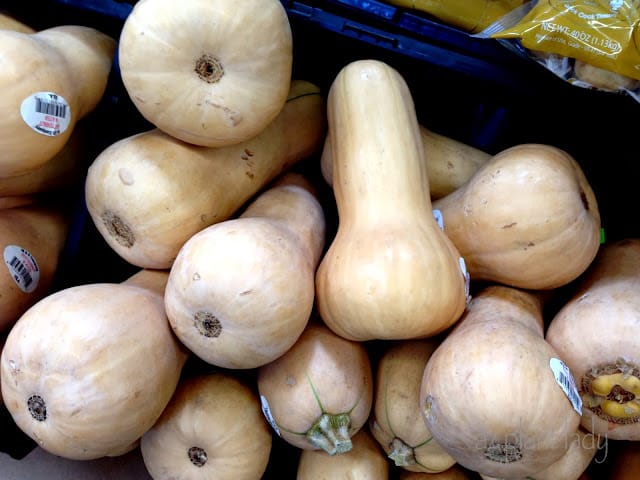
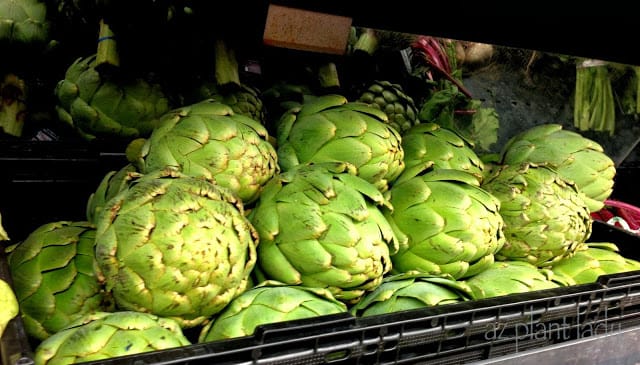
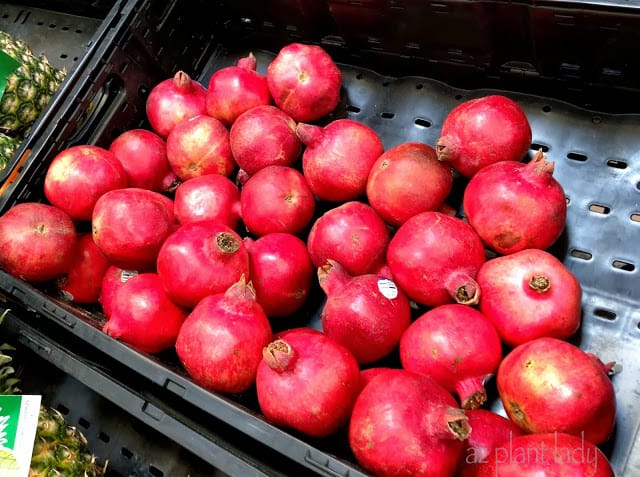
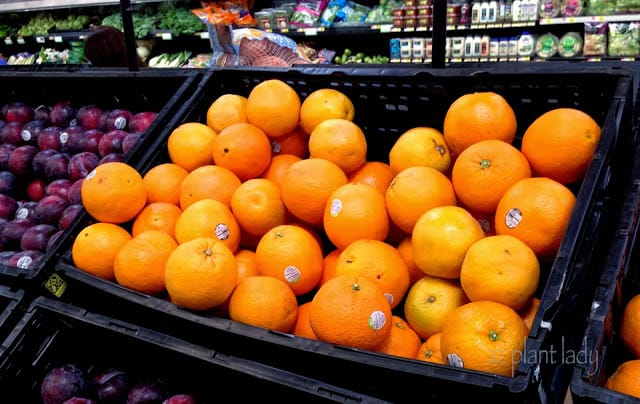
Here are some of what I came home with – acorn squash, artichokes, green apples, red onions, oranges, limes, a Kabocha squash, red pears and miniature pumpkins to go along with my large heirloom pumpkin.

Before creating my main centerpiece, I decided to see how many smaller arrangements I could make from my fruits and vegetables.

So, I pulled out a variety of serving dishes and vases and got started…

fall holidays

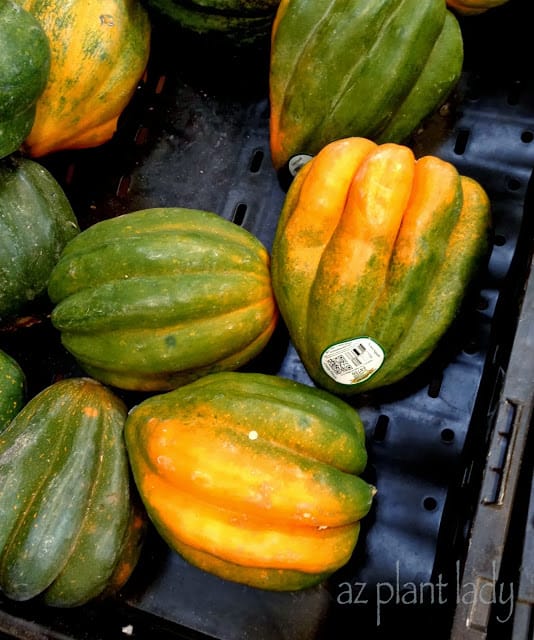
I placed a green/orange acorn squash, two gourds, an artichoke, a red pear, a white miniature pumpkin and a single lime in my sweet grass basket that I purchased in South Carolina, earlier this year.

I really like how all of these colors look like the changing leaves of fall (of which, we have very little in the desert 😉

fall holidays

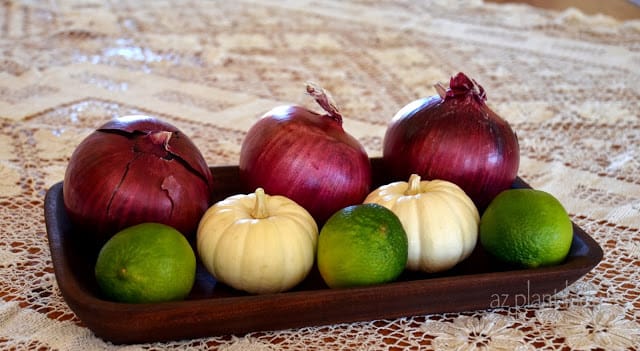
A combination of red onions, limes and miniature pumpkins look great in the wooden bread bowl that my husband made for me.

The tablecloth was my grandmother’s and has seen countless wedding receptions and dinner parties while she lived.  She gave it to me before she died years ago and sadly, it doesn’t see a lot of action in my house.  

fall holidays

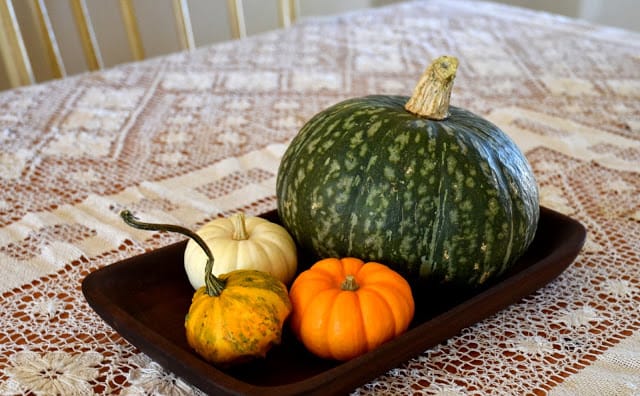
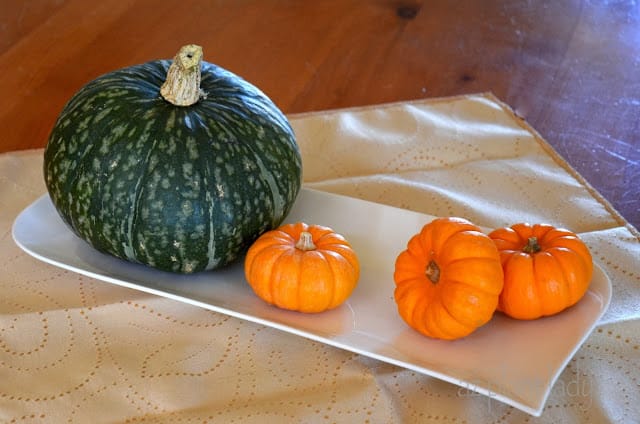
This may look like a smaller green pumpkin, but you would be wrong.  It is actually a Kabocha squash that I found in the produce aisle of my local supermarket.  I just love it’s small size and great color.

fall holidays

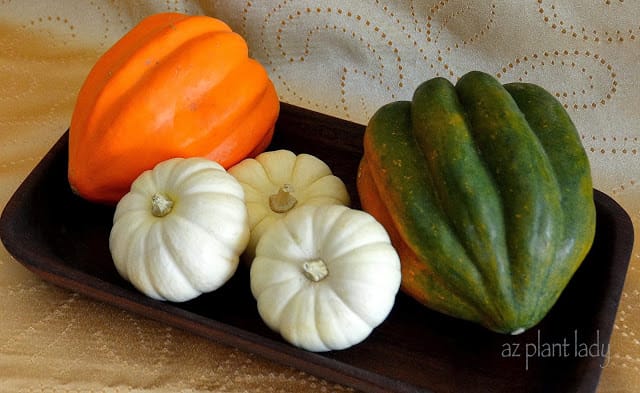
Did you know that pumpkins are considered a squash?  It makes sense then, that other types of squash, like the acorn squash, above, would look great in fall displays.

fall holidays

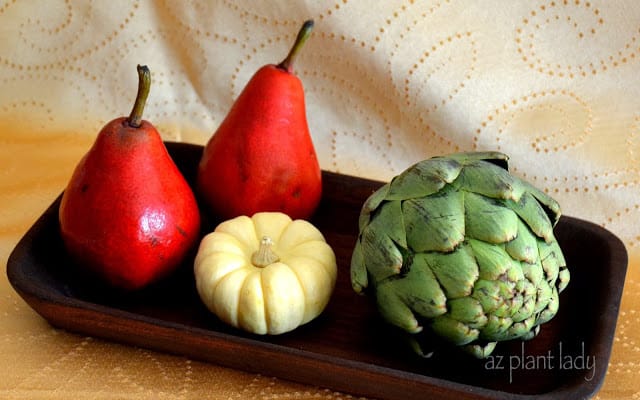
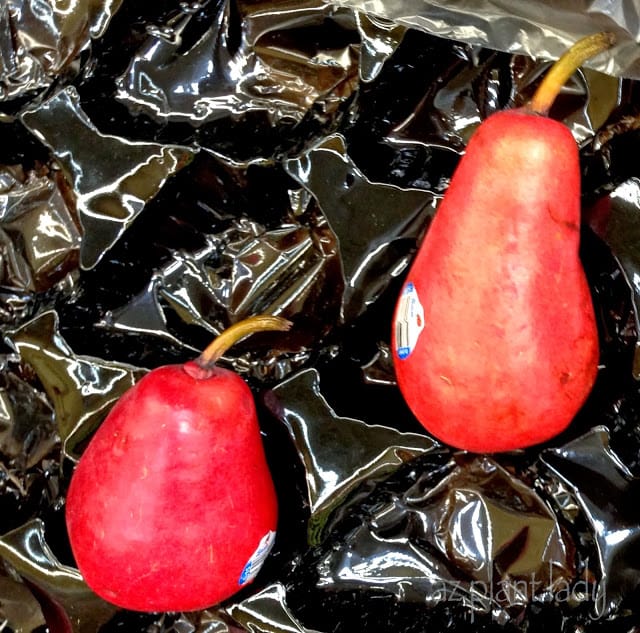
I think red pears are just beautiful, don’t you?

fall holidays

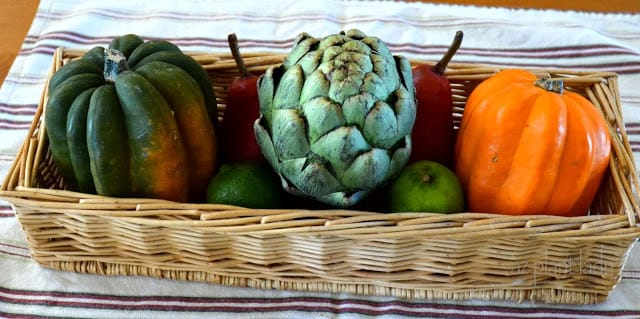
A long bread basket, houses two acorn squash, a artichoke and two limes and red pears.

fall holidays

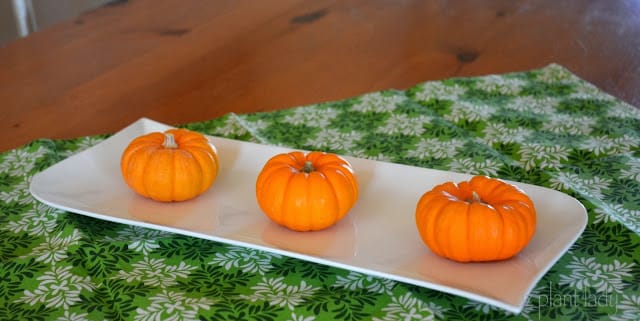
A fall display doesn’t have to be fancy.  I love the simplicity of this long white serving plate with the miniature pumpkins.  A green dish towel provides great color contrast.

fall holidays

I like this arrangement too.

fall holidays

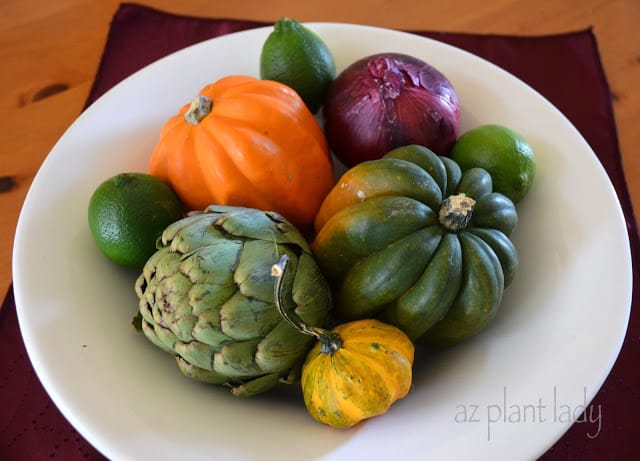
When my mother-in-law was preparing to move from her house to an apartment, she gave me this large white bowl as well as the long white serving plate.  They make the colors of fruit and vegetables really ‘pop’, like the two acorn squash, red onion, artichoke, small gourd and limes, above.

fall holidays

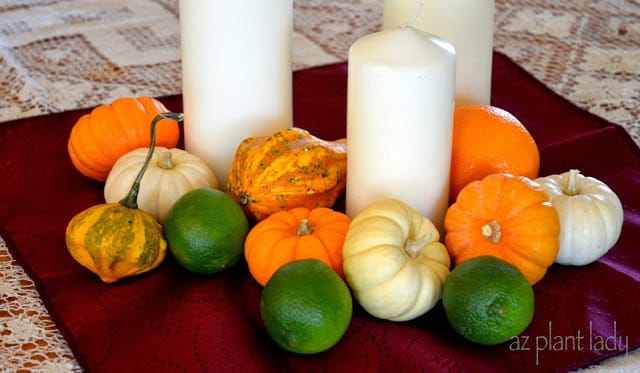
Gather together three pillar candles at differing heights and group fruits and vegetables underneath for a lovely centerpiece.

fall holidays

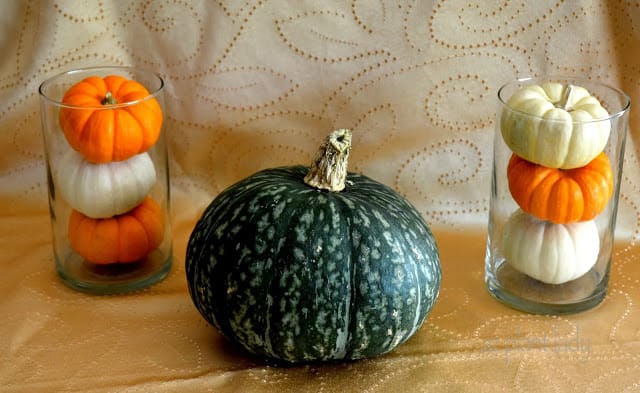
I used plain glass vases to put miniature pumpkins in.

fall holidays

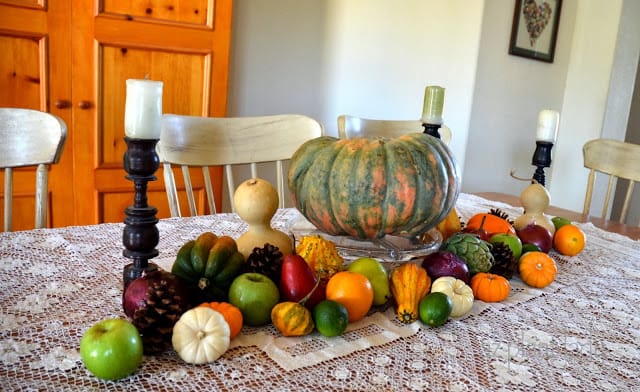
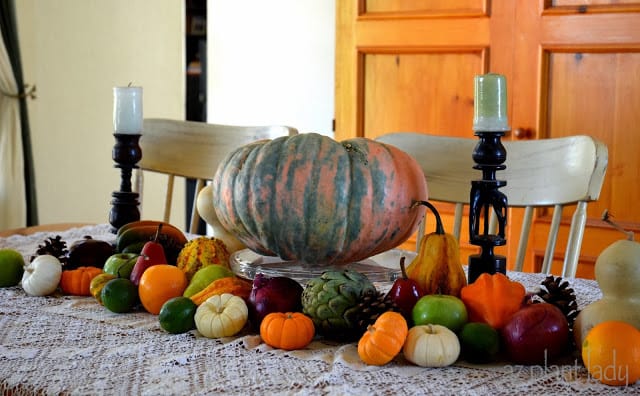
To create my main fall centerpiece, I grabbed some candles from the mantle over the fireplace to add to the display for a little height.

I placed my heirloom pumpkin onto a cake plate to raise it above the other fruits and vegetables.

I grabbed a few pinecones that I had picked up over the summer during out trip to the mountains.  

fall holidays

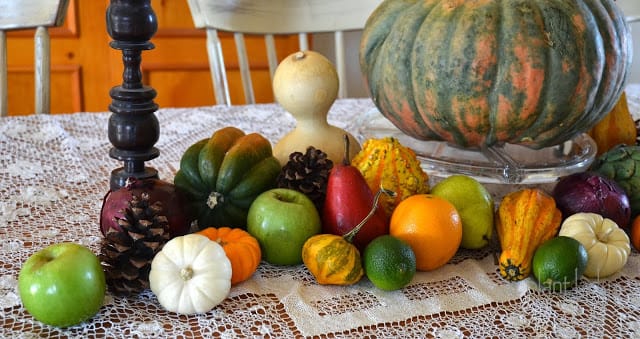
I also used a few dried gourds that I had grown in my garden a few years ago.

As you can see, there is no right or wrong way to arrange the produce.  Just place things where you like them – I prefer larger fruits and vegetables toward the back and smaller ones in front.

Some of the produce will last longer then others.  Switch out the apples, oranges, limes and pears every week.

In addition to creating a beautiful centerpiece, using produce for decorating is natural, you can eat much of it and you don’t have to find room to store it when the fall holidays are over – I can’t tell you how many boxes of Christmas decorations I have stored away, so it is nice to not have to worry about storing my fall decorations.

So what do you think?

Will you be inspired to create your own fall display the next time you push your cart through the produce aisle?

What fruit and/or vegetables would you like to use?

Is you home decorated for fall yet? I am still working on getting my house ready for the fall holidays.  

Fall Centerpiece

Normally, I am content to buy a single pumpkin and set it in the middle of my dining room table.  But, after seeing my mother’s beautiful fall centerpiece (above), I decided to try to do something a little more creative…

Fall Centerpiece

So, I decided to challenge myself to see what I could come up with for my own unique fall centerpiece by taking a visit to the produce section of my local supermarket.  I was determined to look beyond the normal fall offerings of pumpkins and Indian corn to see if I could be inspired. 

Fall Centerpiece

Surprisingly, I found quite a few vegetables and fruits that would look nice in a fall centerpiece.  So, armed with my cell phone camera, I started taking photos of some of my favorites…

Fall Centerpiece

Acorn Squash

Now, I don’t like to eat squash at all.  I still remember hiding the cooked squash in my napkin that my grandmother would try to get us to eat.

Spaghetti Squash

Spaghetti Squash

BUT, squash looks great when used as a fall decoration.

Butternut Squash

Butternut Squash

In fact, I have even seen Butternut squash decorated as a ‘Jack-O-Lantern’ with a ghost face colored in using black markers.

Artichoke

Artichoke

Okay, artichokes are another vegetable that I don’t like.  But, they look great in arrangements, so I bought one.

Pomegranates

Pomegranates

Finally, I found something that I do like to eat AND decorate with – pomegranates.  I love their deep color, don’t you?

Oranges

Oranges

Limes

Limes

Let’s not forget citrus, which is always beautiful no matter how you use it – whether in a bowl in the center of the table or as part of a larger arrangement.

Heirloom Tomatoes

Heirloom Tomatoes

I admit that heirloom tomatoes aren’t the first thing that comes to mind when creating a fall centerpiece.  But, their deep and rich colors would accent any centerpiece.  Tomatoes won’t last as long as the other produce I have profiled, so use for a few days and then eat them.

Mangoes

Mangoes

How about mangoes? 

Apples

Apples

Apples are great for decorating the tabletop.  I like to use them at Christmas time as well.

Red Pears

Red Pears

I don’t think I have ever noticed all of the different types of produce that my grocery store had before now.

I did come away with a few things that I will attempt to create a centerpiece out of.  I promise to share it with you later.

In the meantime, I did find myself captivated by the unusual pumpkin offerings at the store…

Fall Centerpiece

Aren’t they beautiful?

I selected one for my centerpiece.  When I got home, I excitedly showed it to my kids, who to my surprise, were not happy about it.  They asked, “Is this the pumpkin we are going to carve?”

I assured them that this pumpkin is for decoration only and will hopefully last until Thanksgiving.

I did promise them a ‘regular’ pumpkin for carving later on.

So, when you head to the supermarket this weekend, take a closer look at the produce aisle and see what you can use to create your own ‘natural’ fall centerpiece.

Is It Fall Yet?

Last week, I hinted at the garden video that I created for the folks at Troybilt as part of my paid partnership with the ‘Saturday 6’.

In the past, I have been in gardening videos, but I had a film crew who did all the filming and editing for the videos for their website.

This time, there was no film crew.  I was asked to create a homemade ‘how-to’ video for Troybilt on a gardening subject that I selected.

I decided to create a video on one of my favorite subjects…

“How to grow vegetables with ornamental plants in containers.”


The video is supposed to be amateurish and not polished.  I can assure you that I fulfilled their requirements.  There is no way that anyone can mistake my video as professionally done.

But, I had fun and I hope you like it.


Today was a beautiful winter’s day.  The temperature was a little above normal for this time of year. 

We spent time out in the garden today with our granddaughter, Lily.

I spent time harvesting leaf lettuce, radishes, carrots and cauliflower for our dinner salad.

Picking Vegetables

 I used our bounty to make a delicious salad for dinner.

The only thing from the grocery store in our salad was the cucumbers, which aren't in season until summer

The only thing from the grocery store in our salad was the cucumbers, which aren’t in season until summer.

As I was picking the vegetables earlier today, Lily was busy picking something entirely different…

Picking Vegetables or Rocks?

Rocks!

She absolutely loves to pick up rocks.

Thankfully, she doesn’t like to eat them 😉

You won’t believe what I have been working on…

indoor plants

I have been inspired by the book,

Don’t Throw It, Grow It! 68 Windowsill Plants from Kitchen Scraps

So, I decided to grow indoor plants using a radish, garlic, lentils, a sweet potato vine and green bean seeds.

The object isn’t to grow food itself, but to enjoy the pretty plants that these kitchen scraps will grow.

I’d love it if you would follow along on my Birds & Blooms blog “An Unorthodox Winter Gardening Project”.

I promise to keep you updated on how it is doing 🙂

The gifts are wrapped and the house is decorated for Christmas.

I do still have to clean my house and start baking goodies for Christmas Eve dinner.  My mother-in-law is bringing her famous lasagna, so I only have to focus on side dishes and dessert – yum!

I am fairly prepared for the holidays at this point.  Tonight, we are expected to experience our first freeze of the season.  I needed to harvest the remaining green peppers and tomatoes today before they were harmed by the frost.  So, I went out this morning to my vegetable garden to harvest the remaining green bell peppers on my two pepper plants and my tomatoes.

Green Vegetable

Green Vegetable

I had some big peppers left along with some smaller ones…

Green Vegetable

It is amazing how hidden the peppers are under the leaves of the pepper plants.  But, I got them all.

Then I got to work on my tomato plants.  They are over a year old and I decided to start over with new tomato plants this coming season, so I will let them go ahead and freeze.

I did however, pick off the green tomatoes.

When I came inside and poured out my bounty, I was surprised at how many green vegetables I had.

Green Vegetable

I got to work at cutting up my peppers and diced them before putting them into freezer bags.

Green Vegetable

Over the next 8 months, all I have to do is take out  as many diced peppers as I need.

I realize that I probably should have ‘flash frozen’ them by placing the diced peppers on a single layer on a baking sheet until frozen before putting in a freezer bag.  That way, they are separate and come out of the bag easily.

But, I am a bit lazy and don’t like to wash extra dishes so when I need some diced peppers, I simply bang the freezer bag on the counter, which loosens them so I can take out the amount I want.

Now, all I have to do is decide what to do with all those green tomatoes.

I could make a green tomato salsa OR I could let them ripen.

What would you do with green tomatoes?

Grow Vegetables in Pots!

Plant Shopping

Guess who went plant shopping!

Not me….

But, my mom did.

She went to buy her fall vegetables at Baker’s Nursery, which is a hugely popular nursery in Phoenix.

Since I knew was going, she kindly offered to buy the remaining plants on my list.

And as another example of how wonderful she is – she took my two youngest kids (Kai and Gracie) with her and treated them to lunch.

So, what did we get?

Plant Shopping

Dill, Parsley and Thyme, which are herbs that will do well through the winter in my garden.

Green and Purple Leaf Lettuce that I will be growing in pots and in a very unusual place that I will share later.

Lobelia and Alyssum, which are great flowering, low-growing annuals that I will use in a unique container.

Lots of Broccoli, which is my favorite vegetable.

I didn’t get the garlic from Baker’s Nursery.  I usually buy my garlic from my local grocery store and it works just fine.  Although, you can buy different varieties from online nurseries.

The last thing they bought were Petunias, which weren’t on my list.  But, my mother loves to help foster a love for gardening with her grandchildren.

So, she let Kai and Gracie each choose a six-pack of flowering annuals.  They choose Petunias, which they planted just after they got home.

Plant Shopping

Okay, I admit that my son looks less then thrilled.  But to be honest, that is how he looks in most of his pictures now.  He really was happy – he spent a few hours with me helping me to plant everything.

Why is it that young boys get this ‘fake’ smile once they hit 5 years old and then later – it is almost like pulling teeth to get them to smile at all?

I promise to share with you the few different things we did with our ‘goodies’ from Baker’s Nurseryover the next few posts 🙂

Summer’s Delight: Roasted Sweet Corn and BBQ

When the sun shines brightly and the aroma of barbecue wafts through the air, you know summer has arrived. But for me, nothing quite captures the essence of this season like the taste of sweet corn. For the past three summers, I’ve reveled in the joy of growing my own sweet corn, and this year promises to be just as delightful.

Sweet Corn Harvest

A Season of Growth and Anticipation

As the days grow longer and the temperatures rise, there’s a remarkable transformation happening in my backyard. It begins with the sprouting of the corn stalks, their vibrant green leaves reaching for the sky. Then, the first delicate appearance of corn silk marks the beginning of a mouthwatering countdown to the ultimate summer treat: fresh-roasted corn on the cob.

Roasted corn recipe starts with fresh corn

Easy Cultivation, Easier Cooking

Growing sweet corn is not only a rewarding experience but also surprisingly easy. However, the real magic happens when you turn those homegrown cobs into a delectable dish. In my quest for a simpler and tastier way to cook corn, I stumbled upon a game-changing roasted corn recipe that eliminates the need for boiling water and shucking corn ahead of time. The best part? It imparts a delicious, roasted flavor that will have your taste buds dancing with joy.

Instructions:

The Roasted Corn Recipe

Let’s dive right into it – here’s how you can effortlessly prepare Oven Roasted Corn on the Cob:

Ingredients:

  • Fresh ears of corn (with husks still on)
Roasted Corn Recipe baking in the oven
  1. Preheat your oven: Begin by preheating your oven to a toasty 350 degrees Fahrenheit (175 degrees Celsius).
  2. Prepare the corn: Take your whole ears of corn, ensuring that the husks are still on, and place them directly on your oven rack. This step is a game-changer because it allows the corn to roast within its natural protective casing.
  3. Bake to perfection: Slide your corn-laden oven rack into the preheated oven and let them bake for approximately 30 minutes. You’ll be amazed at how this short time span is all it takes to fully cook your corn to perfection.
  4. Unveil the golden treasure: Once the timer goes off, carefully remove the corn from the oven. Then, with gentle hands, pull down the husks. As if by magic, the corn silk will come off easily, leaving you with pristine, golden kernels.
  5. Ready to enjoy: To add the final touch of charm to this delightful dish, use the peeled husks as convenient handles for eating your corn. It’s both practical and visually appealing, making every bite a summer sensation.

Roasted Corn Recipe

B

Roasted Corn Recipe baked and browned

Roasted Corn Recipe

There you have it – a fuss-free and incredibly satisfying way to prepare fresh-roasted corn on the cob. It doesn’t get much easier or tastier than this!

Peel down the husk and eat the corn on the cob

Roasted Corn Recipe

Summertime Roasted Corn Bliss

As you revel in the simple pleasures of summer, remember that the joy of growing your own sweet corn can be elevated to new heights with the right recipe. This Oven Roasted Corn on the Cob is not only a time-saver but also a flavor enhancer that will make your summer gatherings truly memorable.

So, fire up that oven, embrace the beauty of your homegrown corn, and savor the flavors of the season with this mouthwatering roasted corn recipe.

It doesn’t get much easier than that, does it? 


New Vegetable Garden Finally Finished!

Ripening Corn in My Vegetable Garden

In my vegetable garden, I’ve been closely monitoring the growth of our corn stalks and corn ripening stages; it’s been a fascinating journey.

Each day, these corn stalks grow noticeably by inches, and recently, we’ve observed a significant development – the emergence of the tassel, the male part of the corn plant.

Ripening Stages of My Garden Corn

Corn with tassle corn ripening stages

Corn Ripening Stages

Did you know that corn is actually an edible herb that comes from the same family as grass?

–Noelle Johnson
Closeup of corn tassel corn ripening stages

Corn Ripening Stages

As we marveled at the tassels, full of yellow pollen, we couldn’t help but notice another intriguing phenomenon occurring on the sides of the corn stalks – the formation of corn silk. Each silk strand leads to a single ovary, and when fertilized, it will ultimately become a single kernel of corn.

Corn silk on plant corn ripening stages

After Pollen Comes Corn Silk

Corn silk has started to form.  Each silk leads to a single ovary and when fertilized will turn in a single kernel of corn.

Now, when it comes to growing corn, it’s important to plant it in rows of at least three to ensure proper pollination.  My vegetable garden only has two rows. To compensate for this, my kids and I decided to assist with the pollination process by gently shaking the cornstalks daily. This action creates a delicate cloud of yellow pollen that falls onto the silk.

Corn silk with pollen corn ripening stages

After Fertilization Comes Corn Growth

Once the corn has been fertilized, the silk turns brown within 30 minutes indicating that it has been successfully pollinated.  If you look closely at the picture above, you can see the pollen sticking to the silk. Below is a complete list of the 9 corn ripening stages you might see when growing corn.

The 9 Corn Ripening Stages

A fascinating and critical part of the corn growth cycle are the corn ripening stages. Understanding these stages can help farmers and gardeners alike determine the best time for harvesting corn. Here are the key stages of corn ripening:

1. Vegetative Growth:

This is the initial stage of corn development, where the plant focuses on building a strong root system and growing tall stalks and leaves. During this phase, the plant is primarily concerned with capturing sunlight and nutrients to support future growth.

2. Tassel Formation:

As the corn plant matures, it begins to develop the tassel, which is the male part of the plant. The tassel consists of long, slender structures that release pollen into the air. This pollen is essential for fertilizing the female parts of the plant.

3. Silk Emergence:

Concurrently with tassel development, the corn plant also produces silk, which is the female part of the plant. Each silk strand corresponds to a potential kernel of corn. The silks emerge from the ear (the part of the corn plant where the kernels will develop) and extend outward.

4. Pollination:

Pollination is a critical stage in corn ripening. Wind plays a crucial role in this process. Pollen from the tassels is carried by the wind to the silks, where fertilization takes place. Each silk strand must be pollinated for a kernel to develop. Proper pollination is essential for a good corn yield.

5. Kernel Formation:

After successful pollination, the fertilized silks start to develop into kernels. Each kernel corresponds to a single strand of silk. The kernels begin to swell and fill with starch, nutrients, and moisture.

6. Milk Stage:

At this stage, the developing kernels are filled with a milky fluid that contains sugars, proteins, and other nutrients. The kernels are still soft and not yet fully mature. This is a common stage for sweet corn harvest.

7. Dough Stage:

As the corn continues to ripen, the milky fluid in the kernels starts to become more solid, and the kernels become dough-like in texture. The corn is no longer suitable for sweet corn consumption but is ideal for certain types of corn products like cornmeal or hominy.

8. Dent Stage:

The kernels in this stage develop a dent at the top, giving the stage its name. The kernels have lost most of their moisture content and are considered mature. This stage is important for field corn varieties used for livestock feed and processing into various corn products.

9. Physiological Maturity:

At this final stage, the corn plant has reached its maximum dry weight. The kernels have hardened and have a low moisture content, making them suitable for harvesting. This stage is crucial for corn grown for grain production.

corn stalk with corn ripening stages

Multiple Ears of Corn on a Single Stalk

Surprisingly, some corn stalks produce not just one, but two ears of corn. While a typical corn stalk yields at least one ear, many varieties can produce two. Interestingly, the second ear forms after the first and is always smaller in size.

I bet you didn’t expect all of this corn trivia when you started to read this post, did you?  Well, I love learning new things and vegetable gardening is somewhat new to me and I find so much of what I have learned fascinating.

I hope you enjoyed this exploration of corn ripening stages in my garden. Wishing you all a wonderful day!

Container Corn is “For The Birds”