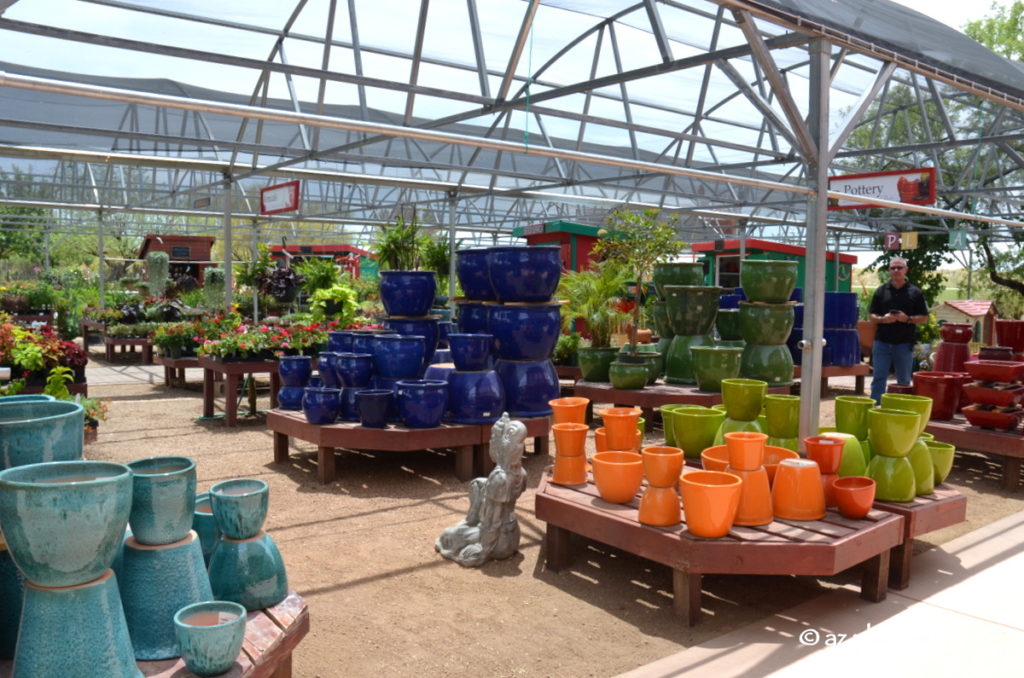
Photo: Colorful containers at Civano Nursery, Tucson
Does your garden have a case of the ‘blahs’?
One of the most frequent desires for homeowners that I meet with is more colorful interest in their outdoor spaces. One of the easiest ways to add a splash of color to the garden is by introducing brightly colored pots.
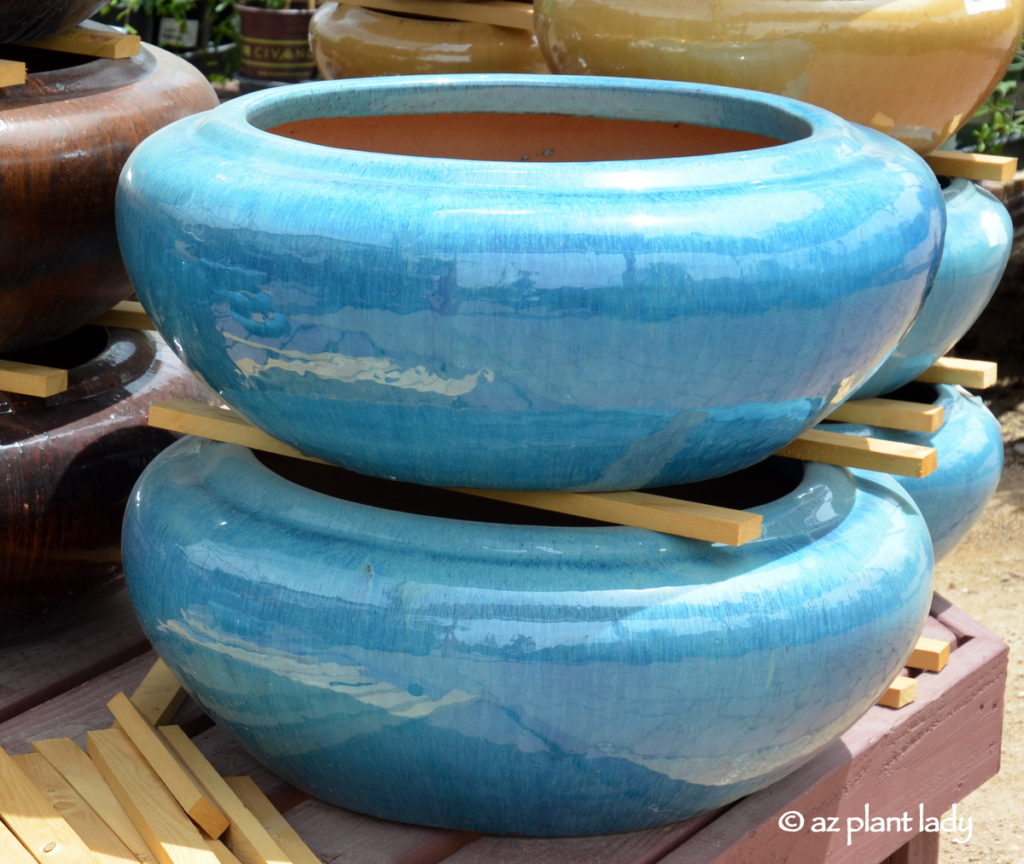
Photo: Colorful containers at Civano Nursery, Tucson
There are some situations where adding color using flowering plants is difficult, particularly when there is a lot of shade as most plants won’t bloom in heavy shade.
My favorite solution for that problem is to plant a shade-loving succulent in a colorful pot such as elephant’s food(Portulacaria Afra).
Adding a color element to a shady entry is just one of the many ways to use vibrant pots to add colorful interest year-round. In my latest Houzz article, I share a number of ways how you can utilize pots as a decorative element in the garden.
https://www.azplantlady.com/wp-content/uploads/2016/12/colorful_pots.jpg7951200arizonaplantlady@gmail.comhttps://www.azplantlady.com/wp-content/uploads/2025/08/AZ-Plant-Lady-Logo-small.jpgarizonaplantlady@gmail.com2016-12-15 15:41:472022-06-08 10:05:19How to Add a Splash of Color to Your Garden With Pots
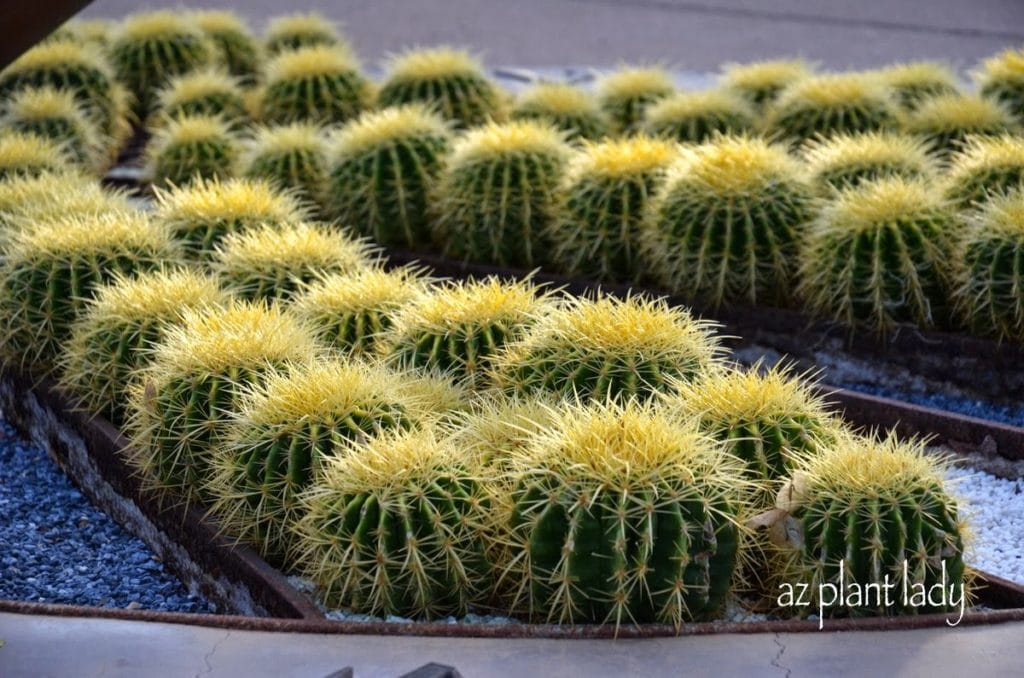
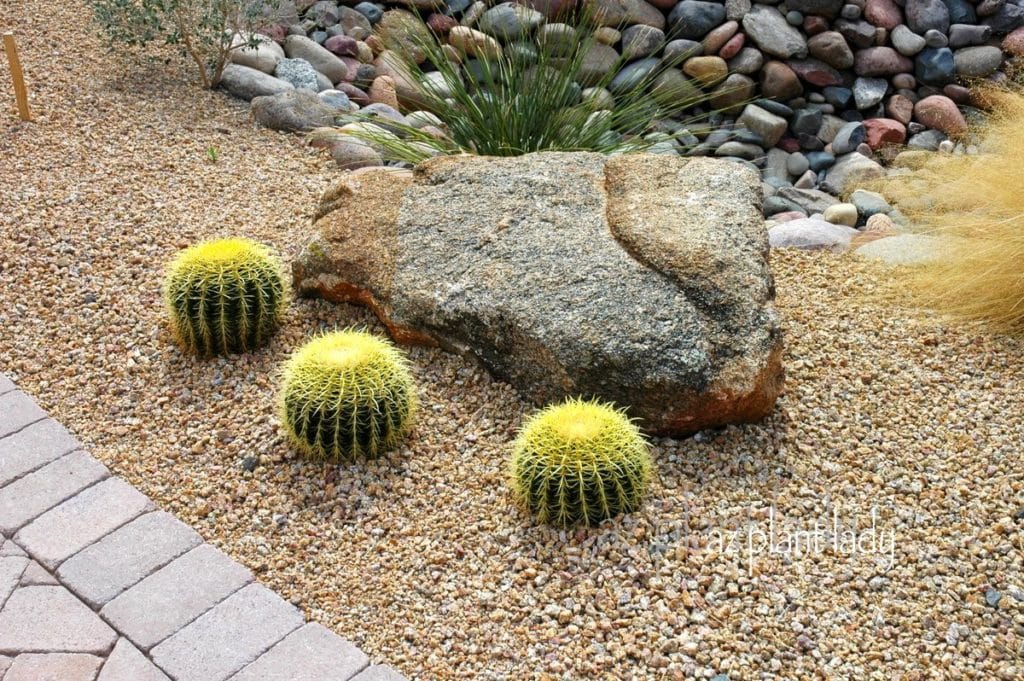
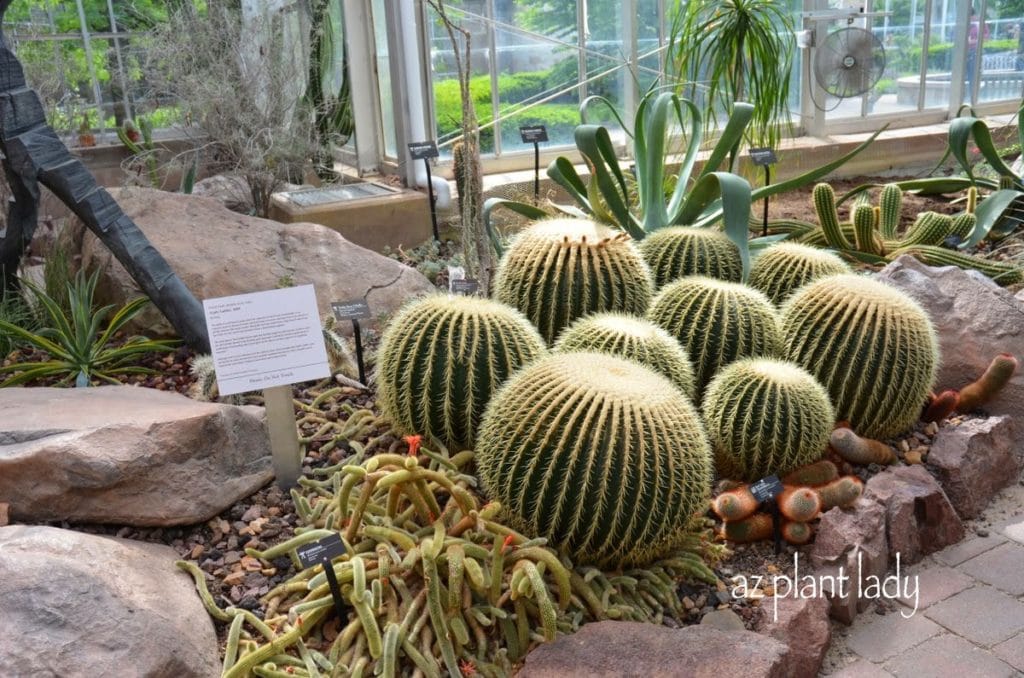
I find that even people who aren’t huge fans of cacti, tend to like make an exception for golden barrels (Echinocactus grusonii).
I think one of the reasons for its popularity is because of its globular shape and yellow spines.
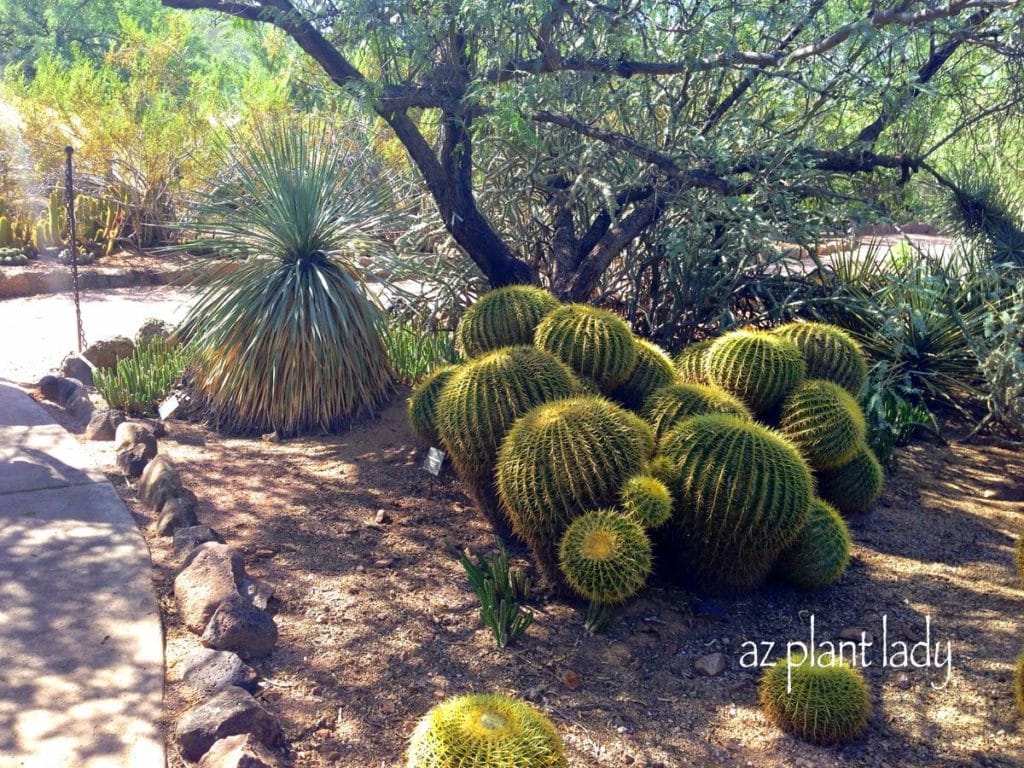
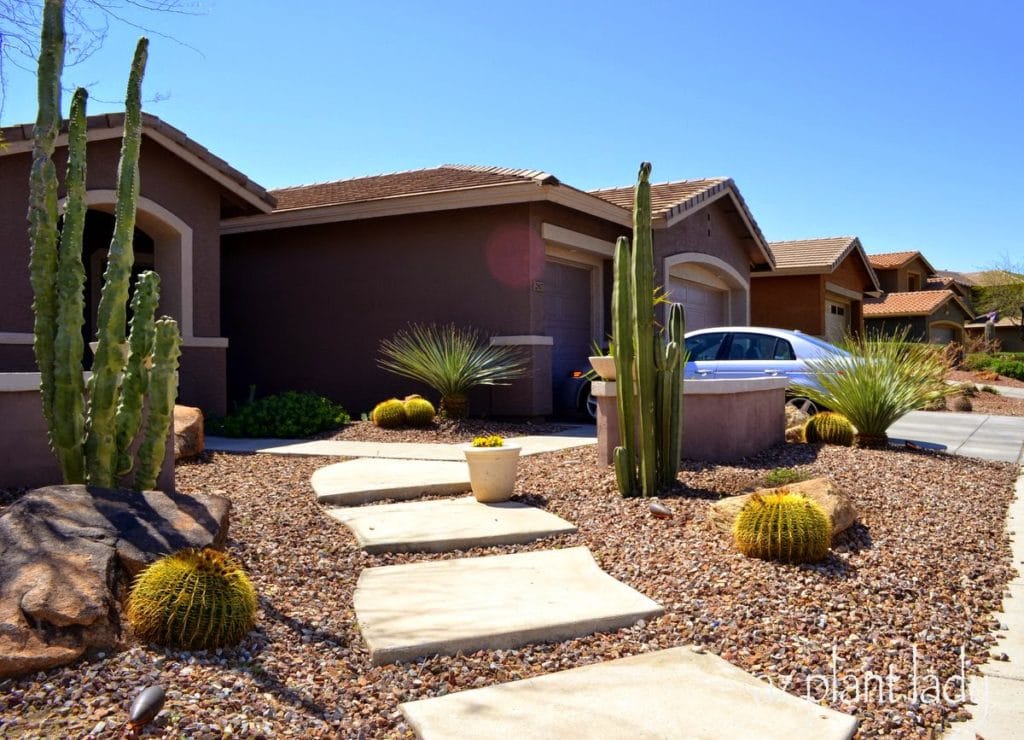
Another reason may be that golden barrel cacti are extremely versatile in the landscape. Whether you prefer a contemporary landscape with golden barrels planted in neat, orderly rows or in a more natural grouping – they can be used both ways.
I like to place golden barrel cacti next to boulders, where their round shapes and sunny color provide great contrast.
These popular cacti are native to the desert Southwest and can be grown outdoors in zones 9 and above. However, larger specimens have been known to handle temperatures in the teens.
In colder regions, they can be planted in containers and brought inside in winter.
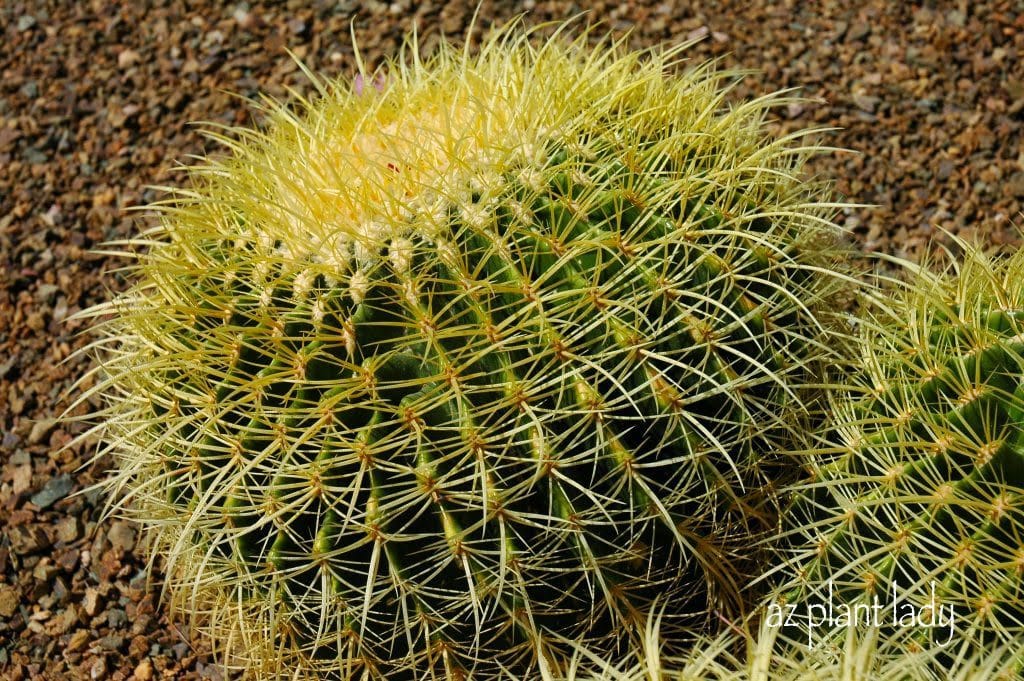
If you look closely at a golden barrel’s spines, you’ll notice how they criss-cross each other, forming an interesting geometric pattern.
You can probably guess one of the spines purposes – to provide protection from predators who may want to eat them.
However, there is another, somewhat surprising way that the spines help the cactus, which you read here:
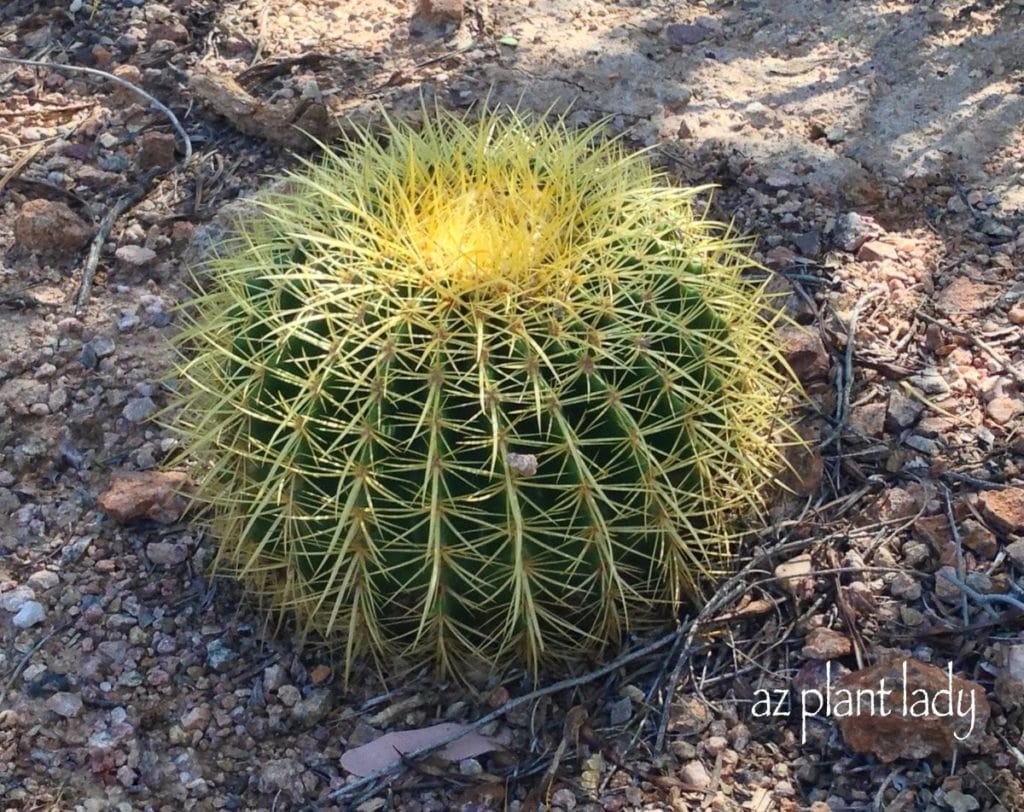
The care for golden barrels is quite simple. They do best in well-drained, native desert soil in full sun to filtered shade.
Although they start out small, mature specimens can reach 3 feet tall and wide. However, they can take years to reach that size, so they are often planted in much smaller areas and later replaced.
Now for the big question – how much water do they need? Established golden barrels can get by with existing rainfall, but will grow faster and look their best with they recieve a deep watering once a month May through August. The rest of the year, they should be fine with existing rainfall.
Earlier today, I mentioned on my azplantlady facebook page that I had seen golden barrel cacti growing in a very unusual place.
Well as promised, here is the answer:
I came across this cluster of golden barrel cacti growing in Michigan!
To be precise, they were located in a greenhouse at the Frederik Meijer Gardens in Grand Rapids, which I visited back in June. I was looking forward to visiting these beautiful gardens and seeing examples of plants that grow in more temperate climates, so I was quite surprised to come across a plant from home.
So, even if you live in a climate that experiences frigid winter temperatures – you can grow golden barrels….inside.
How about you? Do you have golden barrel cacti growing in your landscape? Do you like seeing them in a more formal setting or a natural one such as when planted next to a boulder?
https://www.azplantlady.com/wp-content/uploads/2014/10/goldenbarrelwhydocactushavespines-1.jpg7951200arizonaplantlady@gmail.comhttps://www.azplantlady.com/wp-content/uploads/2025/08/AZ-Plant-Lady-Logo-small.jpgarizonaplantlady@gmail.com2014-10-06 18:13:002022-11-02 00:46:12Golden Barrel Cacti – So Many Uses
Do you have a list of favorite plants for your Southwestern garden?
I do.
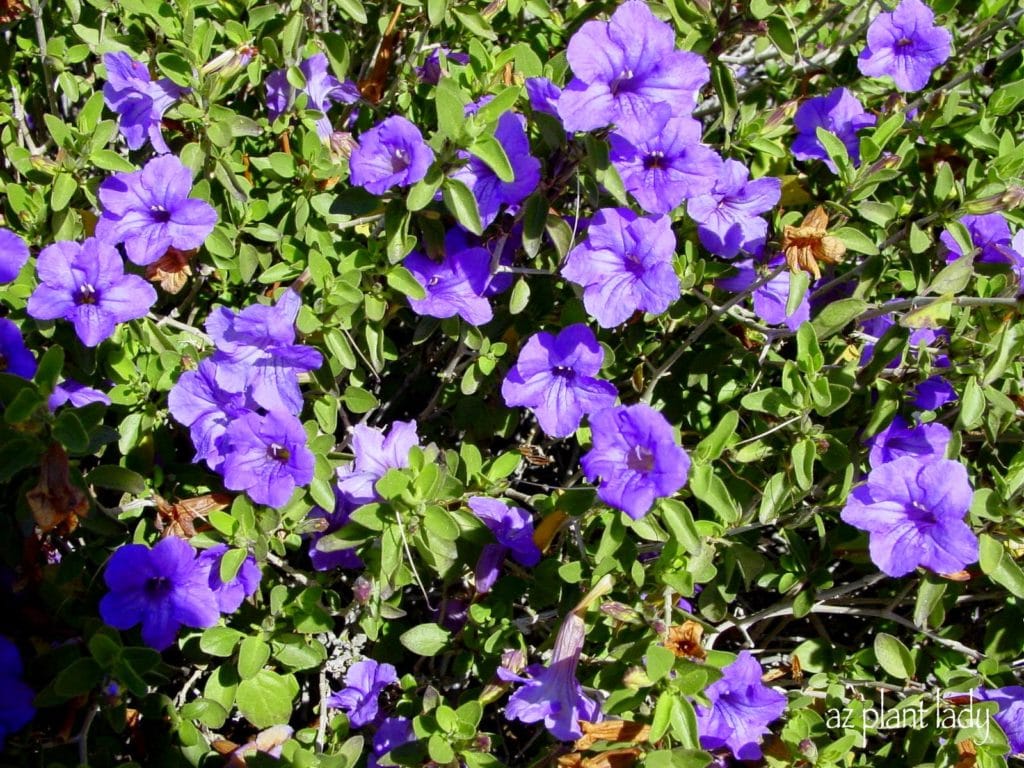
Today, I’d like to share with you about one of my favorite shrubs, desert ruellia (Ruellia peninsularis).
It has beautiful, light-green foliage and purple flowers that appear off an on throughout the year, with the heaviest bloom occurring in spring.
Unlike its cousin (Ruellia brittoniana), this drought-tolerant shrub does not take over the garden space.
It needs little maintenance, and looks great with a variety of other flowering plants.
For more information on where this lovely shrub grows, how to plant it and how to use it in the landscape, check out my latest plant profile for Houzz.com
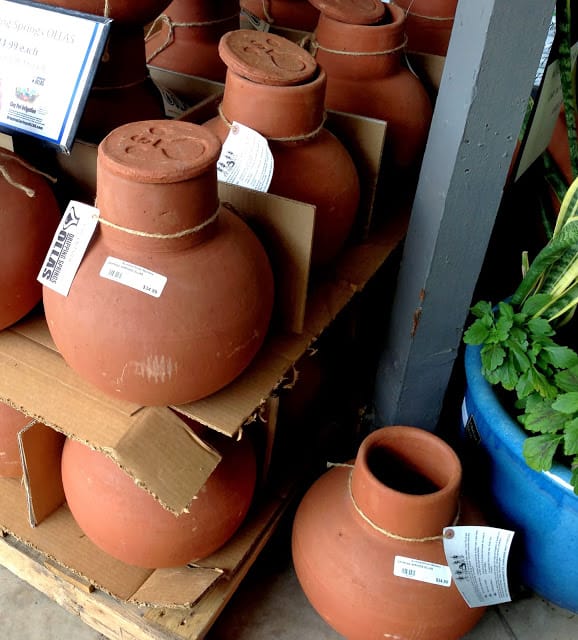
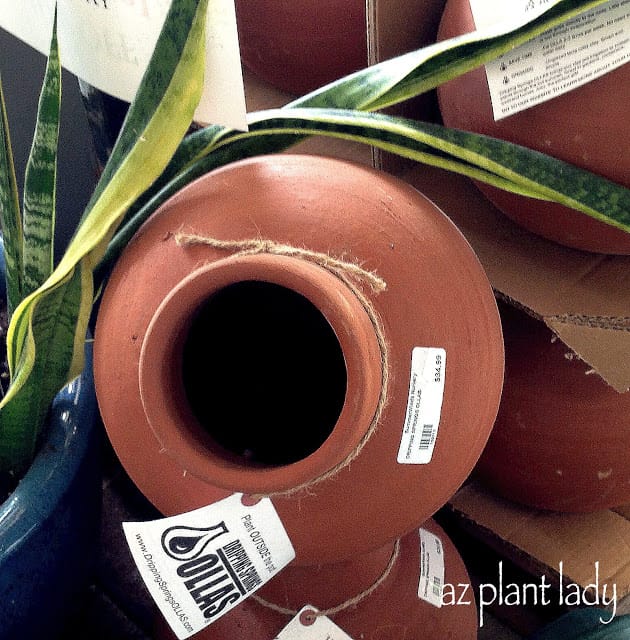
I posted a photo of the uniquely-shaped pottery that I came across at a local nursery, yesterday on facebook and asked you to guess what they were used for.
This unglazed pottery was commonly used in arid regions long ago to store both food and water. They are called ollas.
Ollas are making a comeback in the garden – particularly in arid regions.
Why?
Ollas are a great way to deep water plants.
They are buried so that only the top is exposed. Water is added and slowly seeps through the walls of the olla, providing uniform moisture to plant’s roots.
The top of the soil remains dry, so that evaporation is limited and decreases problems with weeds because their roots can’t reach the moist soil underneath.
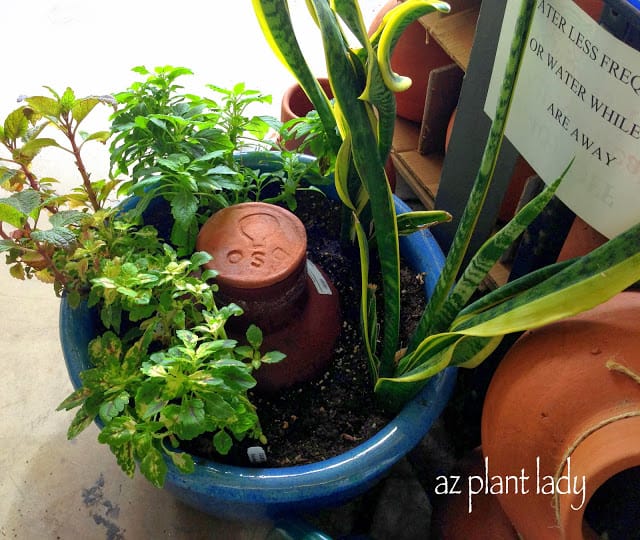
Ollas can be used in vegetable gardens, containers and among other plants in your garden that may not be attached to an irrigation system.
To use, simply take the lid off, and fill with water. Every few days, refill and then let the water slowly percolate into the soil.
There are companies now making ollas for the home gardener. They are not cheap. The ones above were going for $35.
I would love to buy one, but they are not in my budget right now. Maybe I can add one to my Christmas list?
You can make your own inexpensive olla using a plastic milk jug or 2-liter soda bottle, with small holes punched all around and then bury it.
OR, you can take two unglazed tera-cota pots and glue them together with silicone. *Learn how to make both types of homemade versions, here.
I really like when the old-fashioned ways of doing things come back into style. Technology is a wonderful thing, but it doesn’t mean that the older ways of doing things is obsolete.
**For those of you who would like to purchase an olla, like the ones pictured above – they are available at local Summerwinds nurseries throughout the Phoenix area.
For those of you who live elsewhere, here is a link to the company who created the ollas in the photos above.
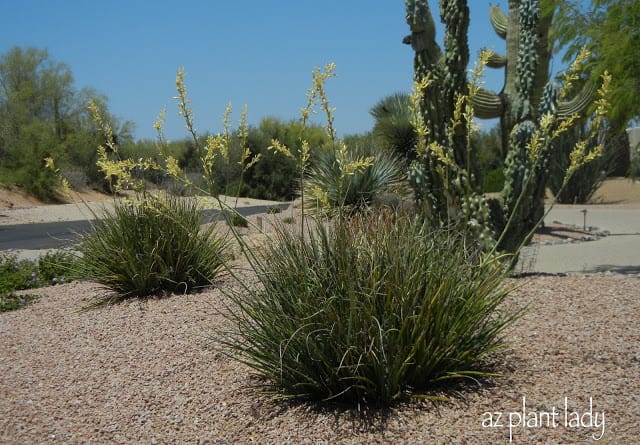
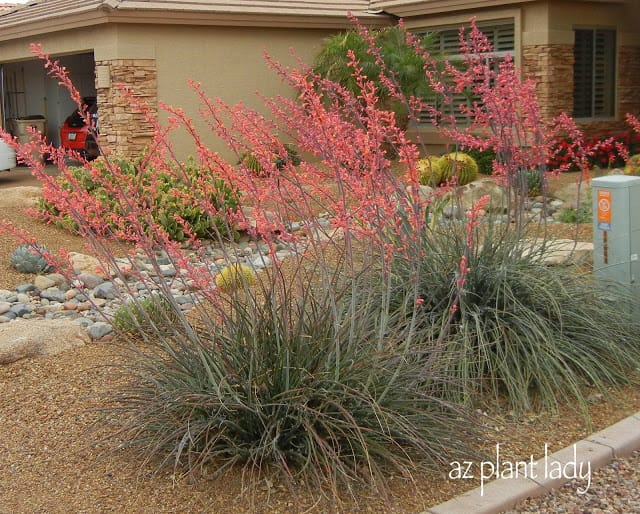
When you pair beauty and low-maintenance in a single type of plant – that is one that I highly recommend.
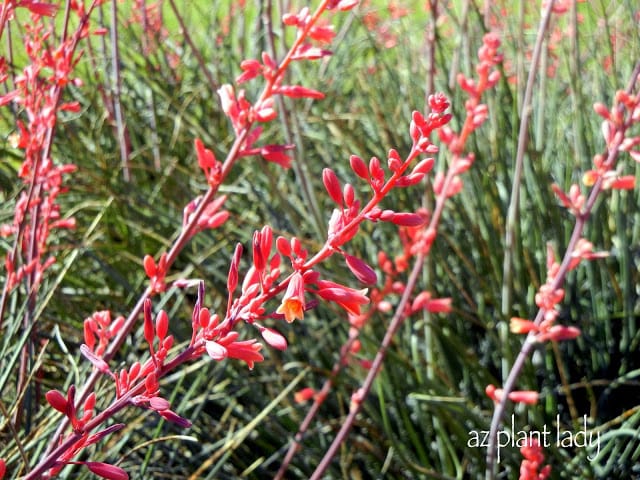
Earlier this week, I was doing a landscape consult with a client who had multiple (Hesperaloe parviflora) plants throughout his garden and I was reminded again, how much I enjoy this succulent plant.
I’d love to share with you just a few of the many reasons to add red yucca(Hesperaloe parviflora) to your landscape…
First of all, its flowers are beautiful and appear May through September and hummingbirds find them irresistible. Red yucca isn’t only drought tolerant but is hardy to -20 degrees, making it suitable for planting in many different planting zones. Although it often referred to by the common name ‘yucca’ – it isn’t a yucca at all.
Even when not in flower, its grass-like succulent foliage add texture to the landscape. I really like how they look when planted in groups of three.
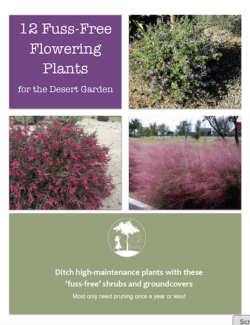
Grab my FREE guide for Fuss-Free Plants that thrive in a hot, dry climate!
**When adding multiple plants of the same kind – focus on adding them in odd numbered groupings such as 3 or 5. The reason is that odd numbered plant groupings are more pleasing to the eye.
In addition to the more traditional red/pink colored flowers, there is also a yellow variety available. They are the same as red yucca with the flower color being the only difference.
Their requirements are few…. full sun, well-drained soil and periodic deep watering.
Red yucca plants are extremely low-maintenance. All you need to do is to prune off dead flower stalks in the fall.
Don’t prune the foliage like the homeowner did in the photo above – why create more maintenance then is needed? Especially when it results in turning an attractive plant ‘ugly’?
**You can read more about my past experience with this type of pruning to red yucca that was done by a member of my crew in a previous blog post:
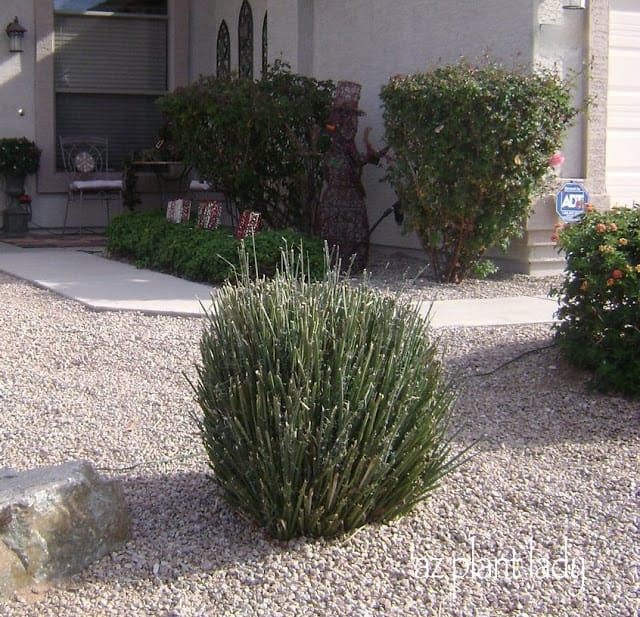
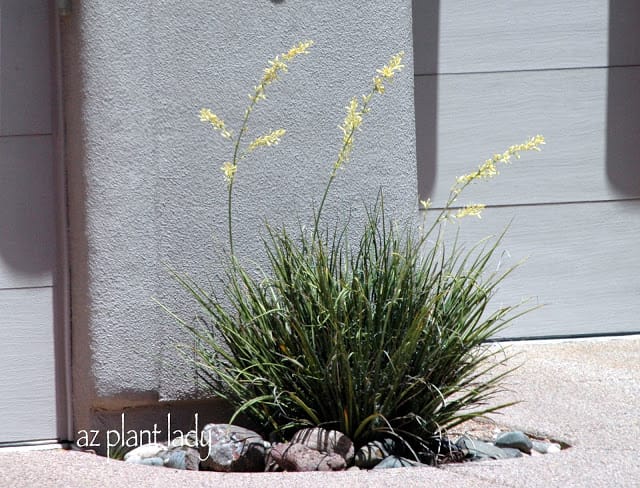
Red or yellow yucca thrive in areas with reflected sun and heat. They also do well around swimming pools and in pots.
I love how this yellow yucca was placed between garage doors, don’t you? It is almost impossible to find a plant that will do well in this unforgiving location.
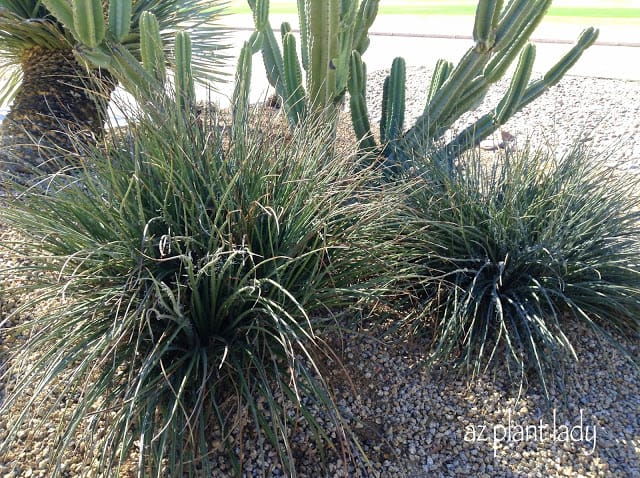
Over time, red yucca can become overgrown. The photo above are from my client’s front yard. His red yucca aren’t quite overgrown yet, but will eventually get there in 2 – 3 years.
What I recommend is to simply take them out and replace them when that happens. You don’t even have to buy a new red yucca to replace them with. Simply separate a small section of the overgrown plant that you just removed and re-plant it.
What’s not to love about this fabulous plant? I hope you will decide to try red or yellow yucca in your landscape.
https://www.azplantlady.com/wp-content/uploads/2013/02/Red-Yucca-flowers-2.jpg480640arizonaplantlady@gmail.comhttps://www.azplantlady.com/wp-content/uploads/2025/08/AZ-Plant-Lady-Logo-small.jpgarizonaplantlady@gmail.com2013-02-28 17:45:002021-05-22 10:45:59Beautiful, Low-Maintenance Red Yucca
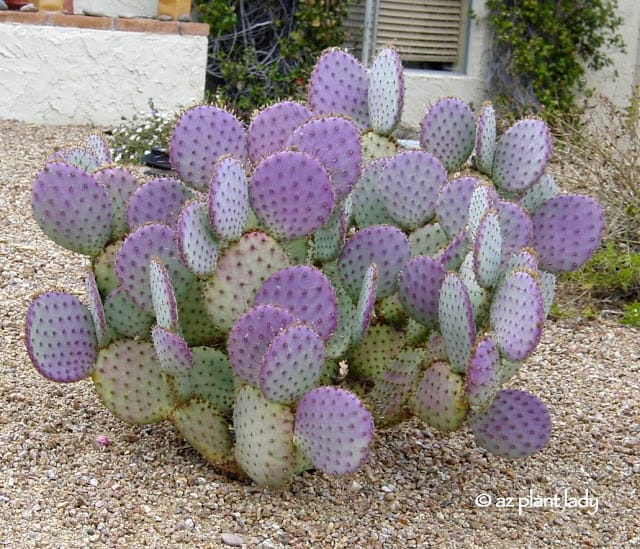
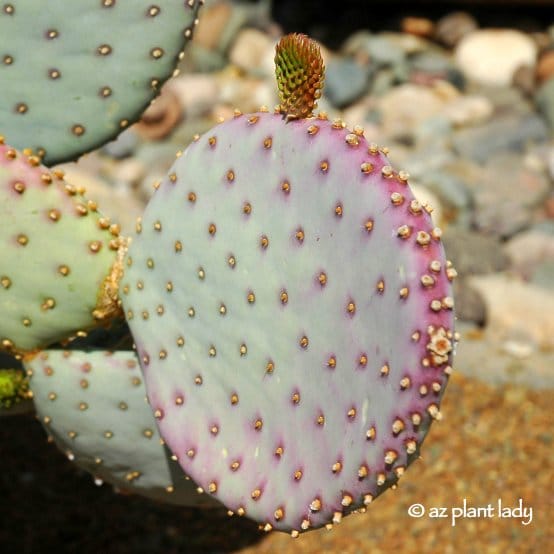
Do you like prickly cactus? I have a few favorites, one being the Santa-Rita Prickly Pear (Opuntia violaceae var. santa rita). The color contrast of their blue-grey pads and the shades of purple are so striking in the landscape.
The Santa-Rita Prickly Pear: A Stunning Accent Plant
The Santa-Rita prickly pear is a captivating addition to any landscape. Its blue-grey pads and vibrant shades of purple create a visually striking contrast. Not only is this cactus aesthetically pleasing, but both its pads and fruit are edible (though you may want to remove the spines first). Cold temperatures and drought conditions intensify the vivid purple color of this remarkable cactus.
Native Plant Beauty of the Southwest
Native to the Southwestern regions of North America, the Santa-Rita prickly pear can reach impressive dimensions, growing as large as 6 feet by 6 feet. However, if you prefer a smaller size, careful pruning at the junction where the pads connect can maintain a more manageable shape.
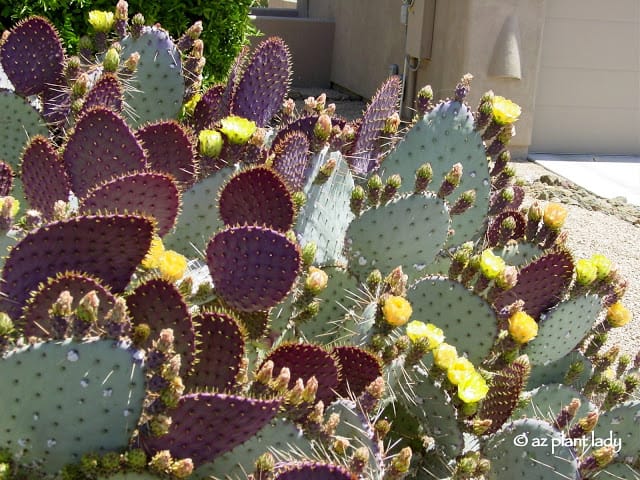
Blossoms and Wildlife with Prickly Cactus
In spring, the Santa-Rita prickly pear graces the landscape with lovely yellow flowers that later give way to red fruit during the summer months. Keep in mind that javelina, rabbits, and pack rats are occasional visitors that might nibble on the pads, while pack rats ingeniously use the pads to build their homes.
Handle with Care: Dealing with Spines and Glochids
Prickly pear pads are covered with clusters of 2″ spines and tiny spines known as glochids. Glochids are especially irritating to the skin and easily detach from the pad, making them challenging to remove. When handling these prickly cacti, use multiple layers of newspaper or a piece of carpet to protect your hands. Avoid gloves, as glochids can render them useless.
Removing Glochids Caused by Prickly Cactus
If you encounter glochids with prickly cactus, there are different methods to remove them, including applying Elmer’s glue, allowing it to dry, and then peeling off the glochids. However, many find greater success using duct tape for a more efficient removal process.
Versatile Uses in Landscaping
Beyond being a landscape accent, the Santa-Rita prickly pear serves as an excellent screen. Surprisingly, it can thrive in containers as well, although it’s essential to keep them away from high-traffic areas. These resilient cacti flourish in full sun or light shade and well-drained soil.
Low-Maintenance Prickly Cactus Beauty
Santa-Rita prickly pears are incredibly low-maintenance plants. When pruning, use tongs or newspaper to handle the trimmed pads. While they are highly drought-tolerant, occasional watering during the hot summer months, especially in the absence of rain, can enhance their appearance. Shriveled pads signal acute drought stress, so a little extra water can work wonders.
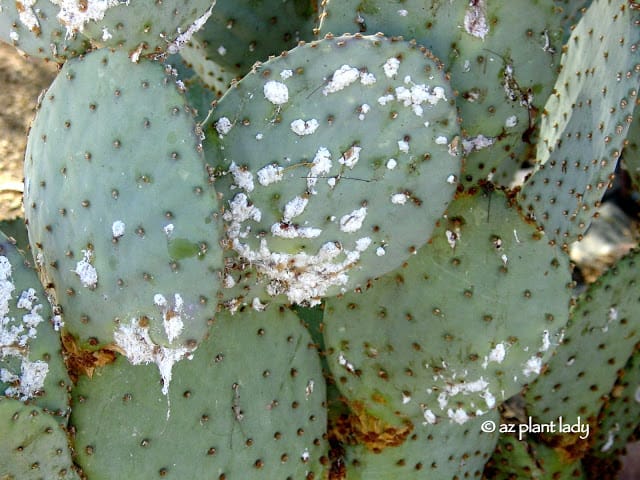
Addressing the Cottony Mystery on Prickly Cactus
Some might mistake white, cotton-like areas on the pads as a fungal infection, but it’s actually caused by a small insect known as cochineal scale. Removing this cottony mass is simple—just spray it off with a strong jet of water from the hose.
Propagation: A Simple Guide
You can propagate Santa-Rita prickly pear cacti with ease. Simply cut off a pad that is at least 6 inches tall, let it callus upright in a shady, dry spot for about two weeks, and then plant it with the cut end down.
Plant with the cut end down, do not water for the first month because the bottom is susceptible to fungal infections. After the first month, water every 2 – 3 weeks until established.
Timing Matters
Planting in the summer requires shade until the cactus is established (approximately three months). However, it’s often advisable to wait until spring when the soil warms up for planting, especially in regions with cold winters.
Renewed Growth: Pruning and Propagation
For those with established Santa-Rita prickly pear cacti, you can rejuvenate growth by pruning or starting anew. Simply remove the cactus, cut off some pads, and replant them in the same location. Many have embraced this method and have been delighted with the results.
An Interesting Historical Fact
The Aztecs would cultivate prickly pear cactus infected with cochineal scale because the insects secrete a dark red dye with crushed. This was used to dye cloth. The Spanish exported this dye from Mexico back to Europe where it was used to dye royal garments and British military uniforms. The dye was highly valued by the Spanish, next to gold and silver. It takes 70,000 insects to produce 1 pound of dye.
*This is but one of many beautiful prickly pear species available to the home gardener. Do you have a favorite species of prickly pear cactus?
https://www.azplantlady.com/wp-content/uploads/2009/09/Purple_Prickly_Pear_Opuntia_violaceae_santa-ritaFeb202C20042C2-05PM.jpg549640arizonaplantlady@gmail.comhttps://www.azplantlady.com/wp-content/uploads/2025/08/AZ-Plant-Lady-Logo-small.jpgarizonaplantlady@gmail.com2009-09-21 07:31:002023-09-01 14:45:45Purple, Prickly and Beautiful: Santa-rita Prickly Pear
We use cookies on our website to give you the most relevant experience by remembering your preferences and repeat visits. By clicking “Accept All”, you consent to the use of ALL the cookies. However, you may visit "Cookie Settings" to provide a controlled consent.
This website uses cookies to improve your experience while you navigate through the website. Out of these, the cookies that are categorized as necessary are stored on your browser as they are essential for the working of basic functionalities of the website. We also use third-party cookies that help us analyze and understand how you use this website. These cookies will be stored in your browser only with your consent. You also have the option to opt-out of these cookies. But opting out of some of these cookies may affect your browsing experience.
Necessary cookies are absolutely essential for the website to function properly. These cookies ensure basic functionalities and security features of the website, anonymously.
Cookie
Duration
Description
cookielawinfo-checkbox-analytics
11 months
This cookie is set by GDPR Cookie Consent plugin. The cookie is used to store the user consent for the cookies in the category "Analytics".
cookielawinfo-checkbox-functional
11 months
The cookie is set by GDPR cookie consent to record the user consent for the cookies in the category "Functional".
cookielawinfo-checkbox-necessary
11 months
This cookie is set by GDPR Cookie Consent plugin. The cookies is used to store the user consent for the cookies in the category "Necessary".
cookielawinfo-checkbox-others
11 months
This cookie is set by GDPR Cookie Consent plugin. The cookie is used to store the user consent for the cookies in the category "Other.
cookielawinfo-checkbox-performance
11 months
This cookie is set by GDPR Cookie Consent plugin. The cookie is used to store the user consent for the cookies in the category "Performance".
viewed_cookie_policy
11 months
The cookie is set by the GDPR Cookie Consent plugin and is used to store whether or not user has consented to the use of cookies. It does not store any personal data.
Functional cookies help to perform certain functionalities like sharing the content of the website on social media platforms, collect feedbacks, and other third-party features.
Performance cookies are used to understand and analyze the key performance indexes of the website which helps in delivering a better user experience for the visitors.
Analytical cookies are used to understand how visitors interact with the website. These cookies help provide information on metrics the number of visitors, bounce rate, traffic source, etc.
Advertisement cookies are used to provide visitors with relevant ads and marketing campaigns. These cookies track visitors across websites and collect information to provide customized ads.