Tag Archive for: parsley

UPDATE: This blog post originally was published six-years-ago, and I still like to grow vegetables in pots. It’s hard to believe that my garden helper is now 16 years old and driving a car!

I hope you enjoy it!

I started growing vegetables in pots earlier this year, and it was so easy and the vegetables so delicious AND attractive that I had to do it again.

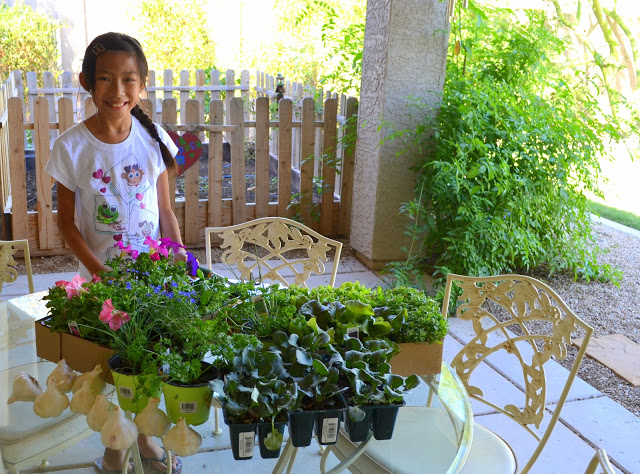
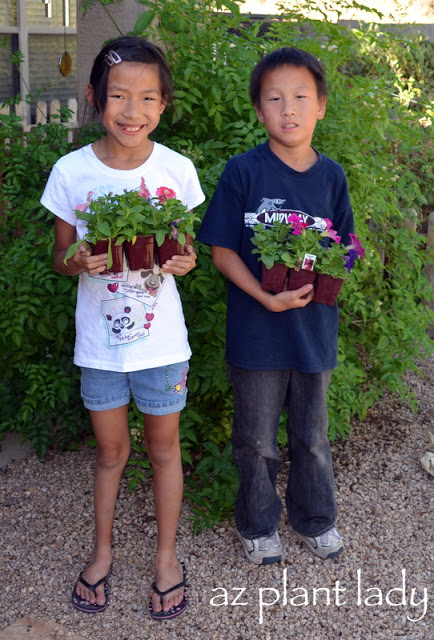
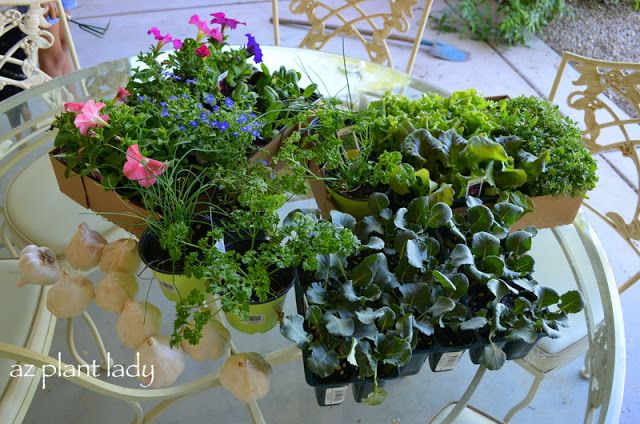
Last week, my mother took my youngest kids to the nursery and picked up some plants for me.

Grow Vegetables in Pots!

You know what?  This is one of the happiest sights in my world 😉

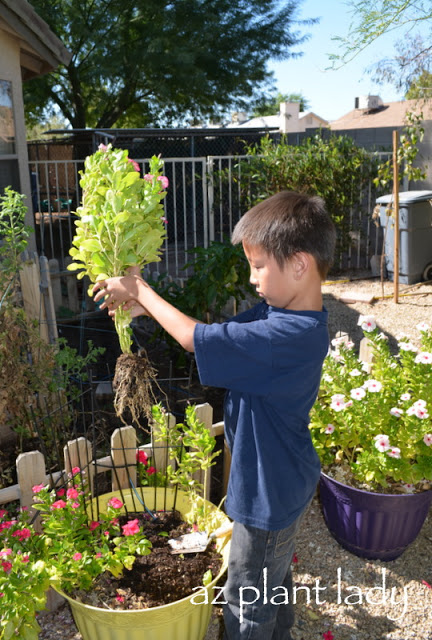
My son, Kai was anxious to pull out the existing plants from our pots.

Grow Vegetables in Pots!

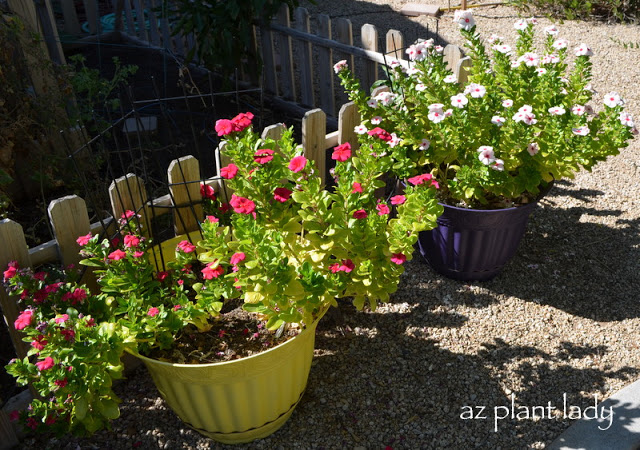
All my summer vegetables had been pulled a while ago, and all that was left was the Vinca that I had planted.  I realize the vinca looks a bit yellow and I admit that I didn’t fertilize them enough (I kind of hibernated inside this summer.

Kai got to work at pulling out the flowers.

Grow Vegetables in Pots!

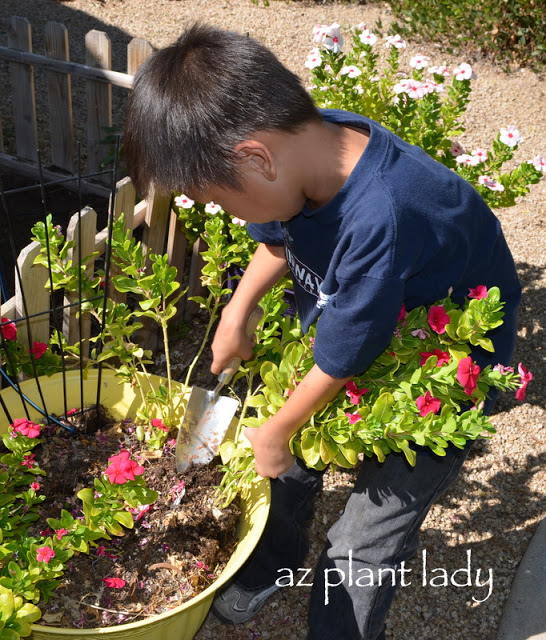
He used the hand shovel to loosen the roots so he could pull out the vinca.

Grow Vegetables in Pots!

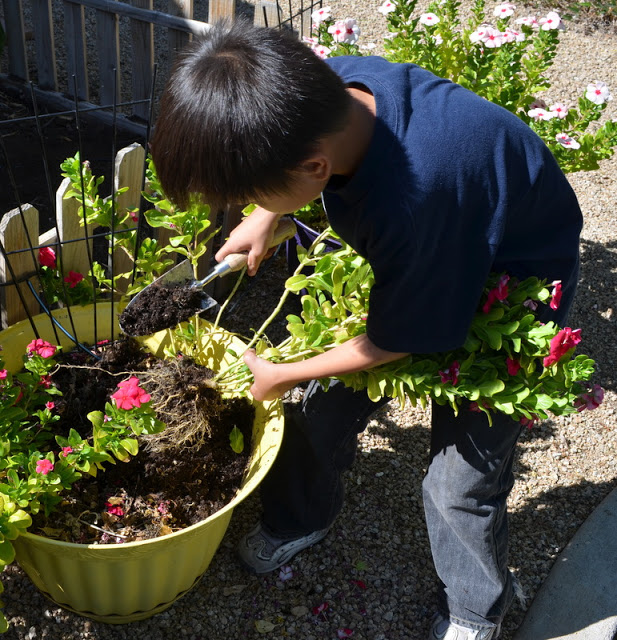
Then he used the shovel to ‘bang’ the root ball to loosen the soil back into the pot.  You don’t want to ‘throw away’ good soil by leaving it around the roots of plants you are pulling out.

Grow Vegetables in Pots!

I think Kai did a good job getting all the soil out of the roots, don’t you?

**Vinca will over-winter in my zone 9 garden, but will not flower much.  I prefer to treat them as an annual.

Now for the fun part – planting!

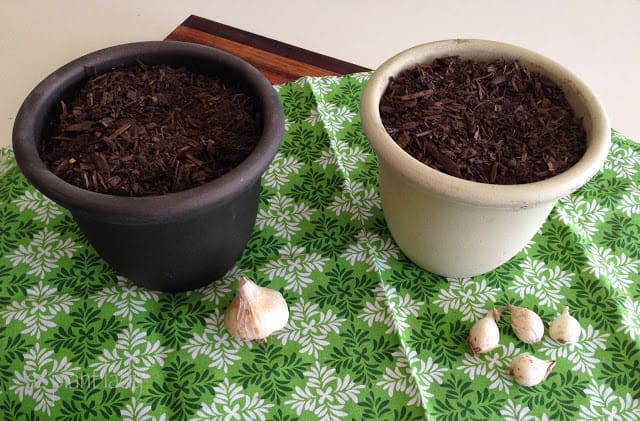
I added some more potting mix (not potting soil, which can get soggy), mixed with some compost to each container.

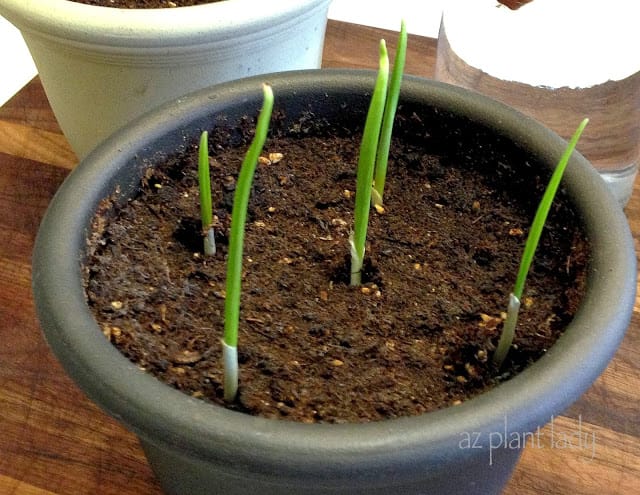
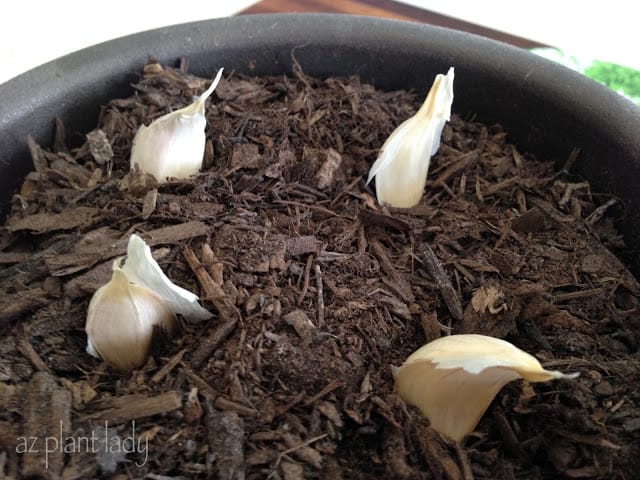
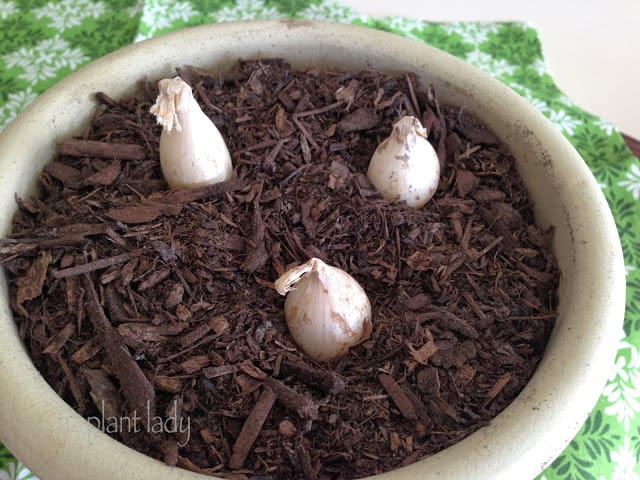
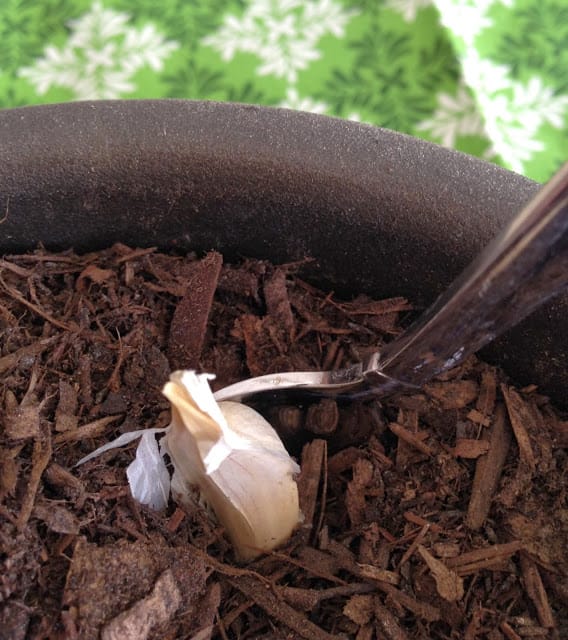
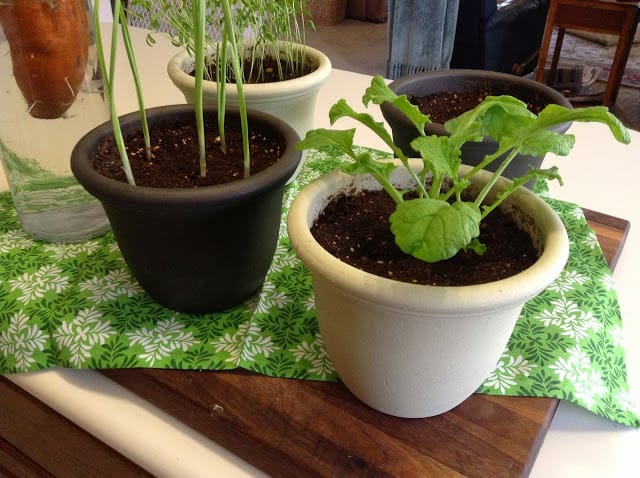
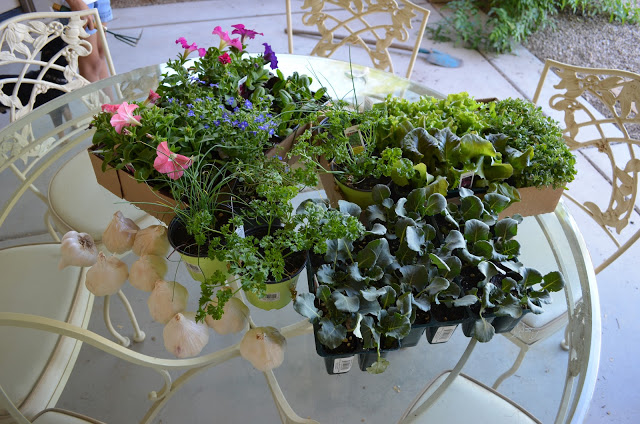
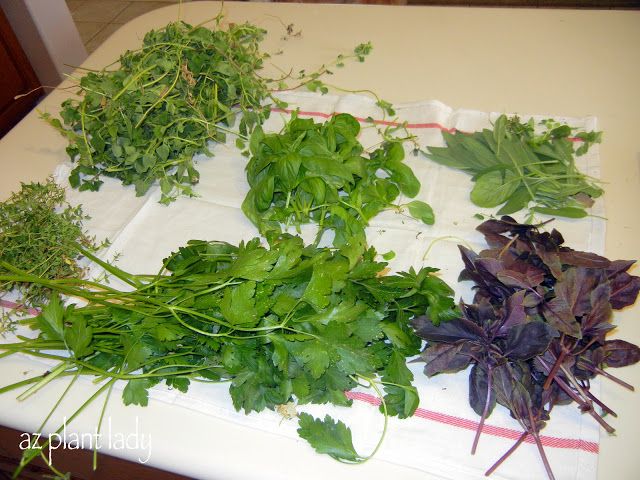
Then each pot was planted with a combination of green leaf lettuce, purple leaf lettuce, garlic, spinach, dill, parsley, nasturtium seeds, and petunias.

Grow Vegetables in Pots!

In just a few weeks, the lettuce and spinach will be ready to start clipping the leaves for salads.  The garlic cloves that I planted will form whole heads of garlic, which will be ready in late spring.   

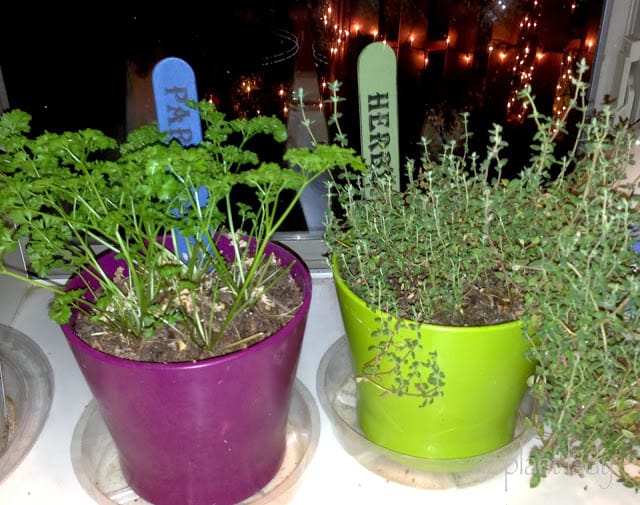
I will start snipping off dill and parsley soon as well.

creating edible container garden

Garlic, leaf lettuce, spinach, parsley, and petunias

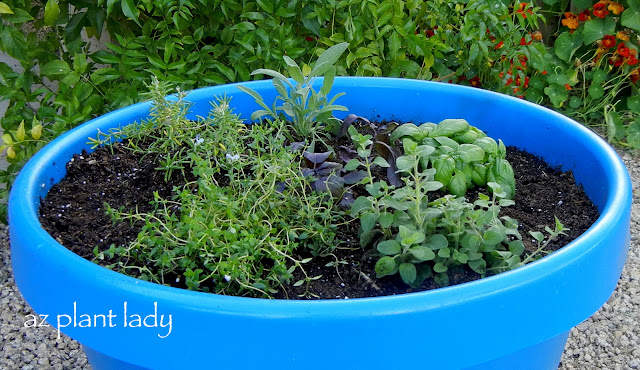
Flowers look great when planted with vegetables, and I always include some.  Nasturtiums are easy to grow from seed, and their leaves and flowers are edible.  Petunias (and nasturtiums) are great companion plants for vegetables because they help to control damaging insects from eating your vegetables.

Do you want to grow vegetables in containers?

Here is more information on how to do it…

“Vegetable and Flower Containers”

I hope you try growing vegetables in containers as much as I do!

I don’t know about you, but I have enjoyed the wet weather of the past few days.  We almost received 3 inches of rain where I live in a period of 48 hours.  For those of you who do not live in the desert – that is considered A LOT of rain for us 😉

I spent Saturday morning dodging raindrops as I visited two different clients regarding their landscapes.  The rest of the day, I spent indoors just thinking of how much my garden is enjoying this rain.

You may not realize that rain water is much better for your plants then the water that comes from your hose or drip emitters.  Our water is somewhat ‘salty’, which is a result of its journey down the Colorado river and all the rock it passes by.

Plants do not like salt much and a heavy rain will help flush the salts away from the soil.

As the sun began to peek through the clouds this afternoon, I ventured out into the garden in order to harvest some lettuce and Swiss chard for our dinner.

A small sampling of today's harvest

A small sampling of today’s harvest.

It had been a while since I had taken a good look at my vegetable gardens and there was quite a bit more to harvest then I had expected.

Swiss chard

I am rapidly falling in love with Swiss chard (yes, I said ‘love’).

While I do not like cooked leafy greens, I have been surprised at how delicious raw Swiss chard is in salads.

It also adds a nice bit of color with its red and yellow veins.

harvesting vegetables

Sugar snap peas are covering their vines, but it is hard to find them all since they blend in so well with the leaves.

I plan on serving them on our veggie tray Thanksgiving morning.

Right now, I have more radishes then I know what to do with.  But, we had 5, thinly sliced radishes in our salad.  In addition to thinly slicing them, I also quarter them so that my kids will eat them.

harvesting vegetables

Two of my favorite types of leaf lettuce – Romaine and Black-Seeded Simpson.

I have had some problems with caterpillars eating my lettuce, so I will head out tomorrow with my spray bottle of BT (Bacillus thuringiensis).

harvesting vegetables

Fall is the best time of year for all of my pepper plants.  While they can handle hot temperatures, they don’t flower during the height of summer.

Once it begins to cool down in mid September, flowers appear again followed by peppers.

Sadly, once the first frost occurs, they will stop producing and will often die.  Last year, I was able to save my bell pepper plant by covering it when temps dipped below freezing.

I have a ton of bell peppers and jalapeños.  I will dice them up and place them in freezer bags so that I can enjoy them throughout the winter months.

harvesting vegetables

harvesting vegetables

I discovered that I had a lot of parsley growing and I only harvested about half of it.

While parsley will last through the winter months, my basil won’t survive the first frost.  So, I picked some basil too.

harvesting vegetables

harvesting vegetables

I plant to dry my basil and parsley.  Once dry, I will crush the leaves and put them into spice jars.

Drying herbs is easy and you can learn how to do it here.

The remainder of the fresh parsley that I have growing outdoors I will harvest on Thanksgiving to use as a garnish for a few of my favorite dishes.

While I spent part of this afternoon harvesting vegetables, I noticed that I still have not thinned out my carrot seedlings.  Oh, they will still grow if I don’t thin them, but what I will get in return are small carrots not worth eating.

So, I’ll grab a pair of scissors and head out into the garden and snip off the extra.

*************************

How about you?

Have you put your garden to bed for the winter or do you still have things growing in it?

I’d love to hear what is happening in your garden…

Yesterday on Facebook, I showed you a photo of my latest project and encouraged you to guess what I was going to do next…

growing garlic and onions

As you can see, I have two pots filled with potting soil.  In front of the pots are a head of garlic (grown in my garden) and onion sets (not grown in my garden 😉

So, what do you think I will do with the garlic and onion sets?

Hint: I am not planning on harvesting the garlic and onions in spring.

growing garlic and onions

I am growing the garlic and onions in order to use the ‘green parts’ to flavor my favorite dishes.

Garlic ‘greens’ like a mild form of garlic while onion ‘greens’ have a mild onion flavor.

You can dice them, much like you would chives and sprinkle them onto garlic bread, on salads or on your favorite Asian or Italian cuisine.

After you snip off some greens, they will grow back.

growing garlic and onions

You can grow them in pots in front of a sunny window or out in your garden.

In my zone 9a garden, I can grow them outdoors if I wanted to, but I like having some food crops growing on my kitchen windowsill in winter, where there are easily within my reach.

 basil, parsley and chives

Other food crops that I like to grow in front of my kitchen windowsill include basil, parsley and chives.

planting the garlic and onion

When planting the garlic and onion sets, be sure to plant them with the pointed side upward and then cover with 1 1/2 inches of soil.

growing garlic and onions

I like to use a regular spoon for planting small things like this.

Now all they need is some water.  *An easy to tell when to water them is to stick your finger into the soil, up to your first knuckle.  If it feels dry, then water.

Of course, you can steal out into your vegetable garden and snip off some of your onion and/or garlic greens now and then.  But, you don’t want to do that too often because these green leaves make the ‘food’ for the garlic and onions growing underneath the soil.

kitchen scraps

**Last winter, I had a real garden growing on my windowsill, using what most of us would call ‘kitchen scraps’.  You can read more about that gardening adventure here.

I recently re-planted my herb container for the cool-season.

Last spring, I planted my container with rosemary, green basil, purple basil, sage, thyme and oregano. All of these herbs do well in the warm-season and I enjoyed being able to step outside the kitchen with cut fresh herbs whenever I needed them.

Herb Container

You can read the post here, to see how to grow herbs in containers.I also did a “How-To” video about this too 🙂

Okay, so now that cooler weather is on its way, I wanted to add some different herbs that would do well through the winter in my zone 9 garden.

Herb Container

I planted Dill, Garlic, Lavender, Parsley, another Thyme and kept the Sage the I had originally planted.

My kids added some of their Petunias that their grandma bought them in the container too, which will add some nice color.

Other herbs that can handle cooler weather in USDA zones 9 and above are Cilantro, Chives, Fennel, Lemon Grass and Rosemary.

I highly recommend planting your own herb container.  It is very easy and so fun to be able to harvest your own herbs!

Plant Shopping

Guess who went plant shopping!

Not me….

But, my mom did.

She went to buy her fall vegetables at Baker’s Nursery, which is a hugely popular nursery in Phoenix.

Since I knew was going, she kindly offered to buy the remaining plants on my list.

And as another example of how wonderful she is – she took my two youngest kids (Kai and Gracie) with her and treated them to lunch.

So, what did we get?

Plant Shopping

Dill, Parsley and Thyme, which are herbs that will do well through the winter in my garden.

Green and Purple Leaf Lettuce that I will be growing in pots and in a very unusual place that I will share later.

Lobelia and Alyssum, which are great flowering, low-growing annuals that I will use in a unique container.

Lots of Broccoli, which is my favorite vegetable.

I didn’t get the garlic from Baker’s Nursery.  I usually buy my garlic from my local grocery store and it works just fine.  Although, you can buy different varieties from online nurseries.

The last thing they bought were Petunias, which weren’t on my list.  But, my mother loves to help foster a love for gardening with her grandchildren.

So, she let Kai and Gracie each choose a six-pack of flowering annuals.  They choose Petunias, which they planted just after they got home.

Plant Shopping

Okay, I admit that my son looks less then thrilled.  But to be honest, that is how he looks in most of his pictures now.  He really was happy – he spent a few hours with me helping me to plant everything.

Why is it that young boys get this ‘fake’ smile once they hit 5 years old and then later – it is almost like pulling teeth to get them to smile at all?

I promise to share with you the few different things we did with our ‘goodies’ from Baker’s Nurseryover the next few posts 🙂

I’m sure you all have been waiting with baited breath for the second installment of how to grow and dry your own herbs….I know I have 😉

Oregano, Basil, Sage, Purple Basil, Parsley and Thyme.

Clockwise from top left – Oregano, Basil, Sage, Purple Basil, Parsley and Thyme.

Last time we talked about how to harvest and dry your herbsThe process is so easy – the ‘air’ does most of the work for you.

Once your herbs are nice and dry, it’s time to get the herbs ready for their containers.

dry your herbs

Now, I will be the first to admit that dried herbs aren’t all that pretty.

dry your herbs

Even though they aren’t all that attractive at this point, they are full of concentrated flavors that will help you create delicious food.

I bought inexpensive glass jars at IKEA for a $1 each in which to store my dried herbs.

jar

Now it is time to get the dried leaves off, without the stems.

dry your herbs

I found the easiest way to do this was to simply press the leaves between my fingers.  They came off easily, without too many stems falling in.

dry your herbs

The few stems that fell in, were easy to pick out.  I then used my fingers to grind up my herbs to the desired size…

dry your herbs

All there is to do at this point is to pour the herbs into my glass jars…

Jars of Oregano, Thyme and Oregano

Jars of Oregano, Thyme and Oregano

My homegrown dried herbs are ready to use right away.  They also make great gifts.

Dried herbs should be stored in a dark, dry place (pantry or cupboard) and taste best when used within 6 months.  

*******************************

I hope your week is off to a good start.

I had two consults last week, which went very well.  In the summer, I don’t do too many consults because many people don’t want to spend a lot of time in the garden in the heat.  I actually enjoy this time of year because it is a bit of a break for me 🙂