I bet you didn’t know that Saguaro cacti can suffer from weight problems, did you?
Well in my travels through countless neighborhoods, I have seen my fair share of ‘fat’ saguaro cacti.
So, are ‘fat’ saguaro feasting upon too much fast food? I don’t think so….
Believe it or not, it isn’t totally their fault that they are fat. The homeowner usually bears some responsibility.
Weight problem
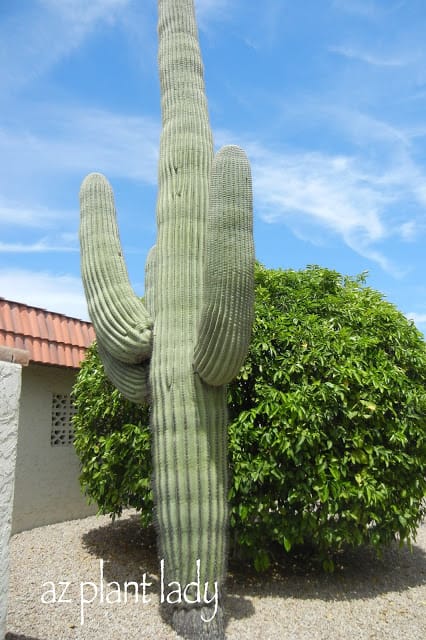
Here is a great example of a saguaro that needs to be put on a diet.
Seriously, it is quite fat.
Can you see why?
Well, all cacti are specially adapted to take advantage of any nearby water source.
When it rains, they quickly send out tiny roots that are very close to the surface. These roots absorb all the water they can and then dry up and die once the ground dries out.
In a landscape setting, the roots will grow towards the nearest water source and keep ‘drinking water’…..usually the water that is irrigating your other plants.
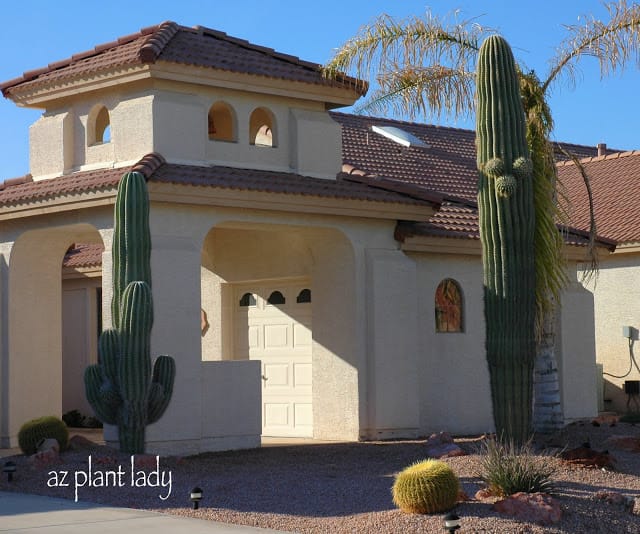
In the photo above, the saguaro is getting quite a bit of water for the citrus tree behind it.
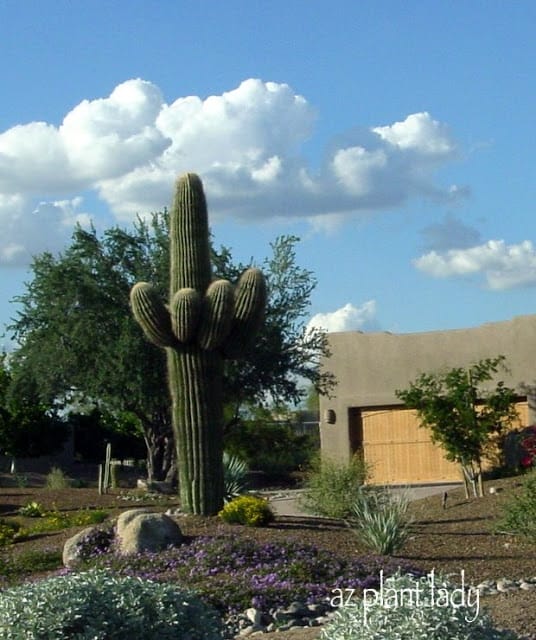
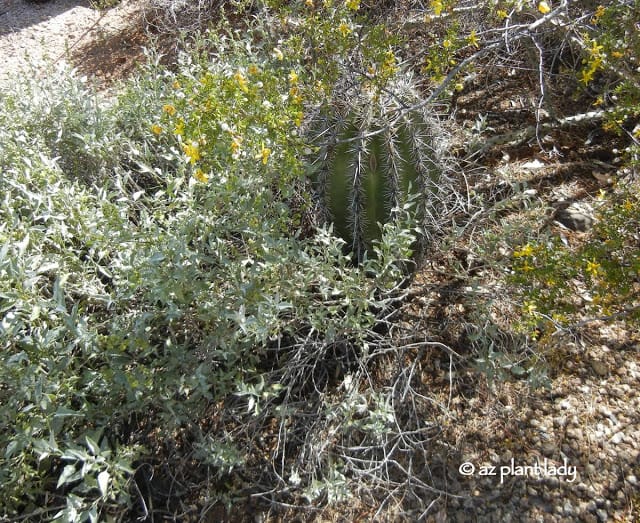
Here is another saguaro that has a weight problem.
It isn’t full of fat…..just too much water.
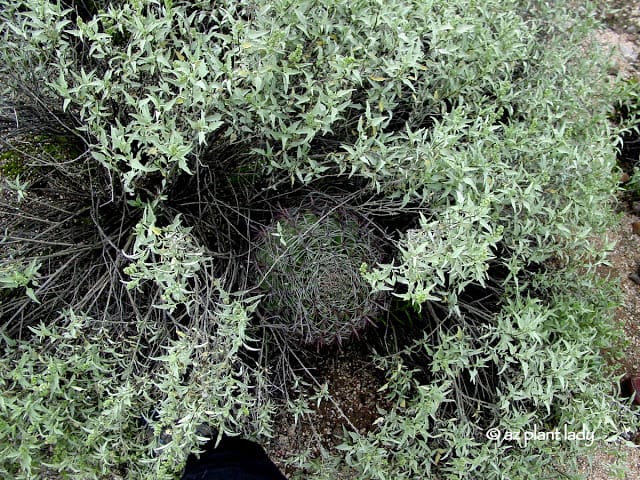
I took this picture of a client’s saguaro that was planted amidst two shrubs that were being irrigated regularly. You can see that the ‘folds’ are almost non-existent.
Unfortunately, I see this quite often. To avoid having this happen to you, do not place any irrigated plants near your saguaro. (I am assuming that you do not water your saguaro).
How far away should irrigated plants be kept away from a saguaro?
Well, a saguaro’s roots extend out roughly the same distance as its height and sometimes twice as far. So, make sure to place your irrigated plants out at least that far.
So what do you do if you already have a ‘fat’ saguaro?
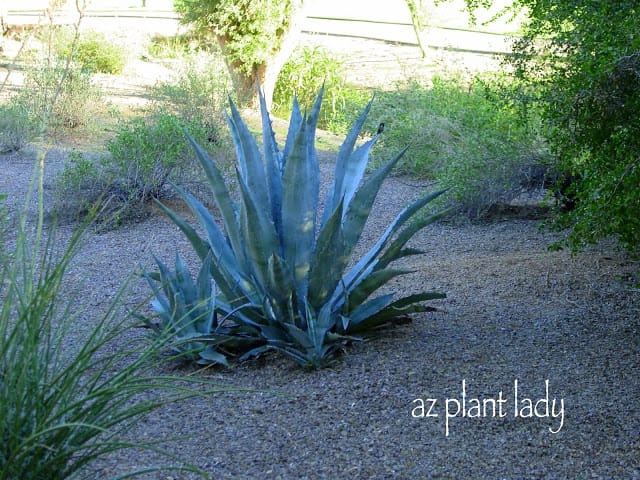
Well first off, remove any nearby, irrigated plants and plug up the irrigation emitters. Then substitute other succulent plants that will require very little water (below).
So, are you fortunate enough to have a saguaro in your landscape?
https://www.azplantlady.com/wp-content/uploads/2011/09/Fat-Saguaro-and-Citrus-tree.jpg640426arizonaplantlady@gmail.comhttps://www.azplantlady.com/wp-content/uploads/2025/08/AZ-Plant-Lady-Logo-small.jpgarizonaplantlady@gmail.com2011-09-07 12:47:002024-02-26 13:04:47Does Your Saguaro Need A Diet?
Engaging With Cardon Cacti: Can You Spot the Odd One Out Among These Unique Cacti?
Do you recall that catchy tune from Sesame Street, where they showcased three similar things and one that stood out? Your task was to spot the odd one among them.
I have fond memories of enjoying Sesame Street with my younger sister, and that song always brought a smile to my face. Inspired by it, I’ve decided to borrow the theme and apply it to the four images below. Can you identify which one doesn’t quite fit in?
In essence, you’re about to embark on a delightful “pop quiz.” Are you prepared? Let’s dive right in.
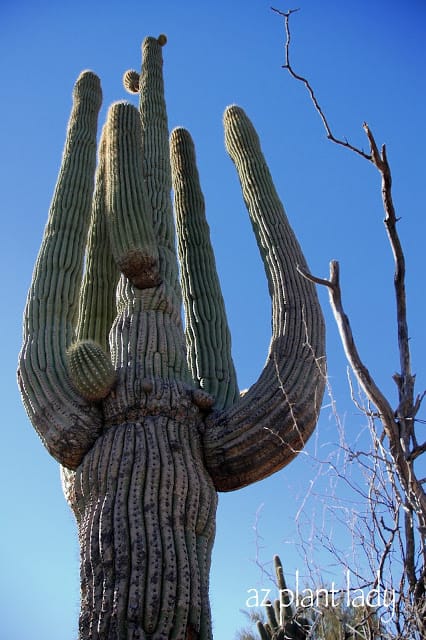
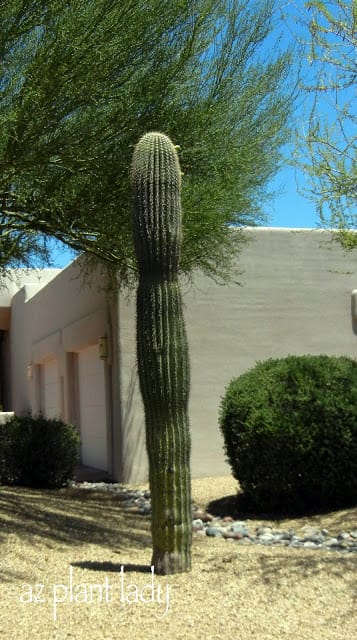
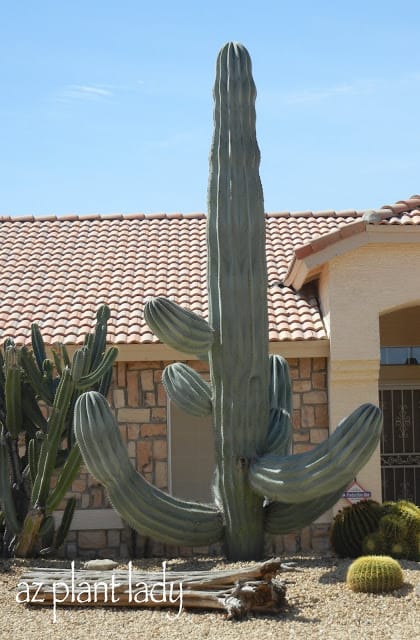
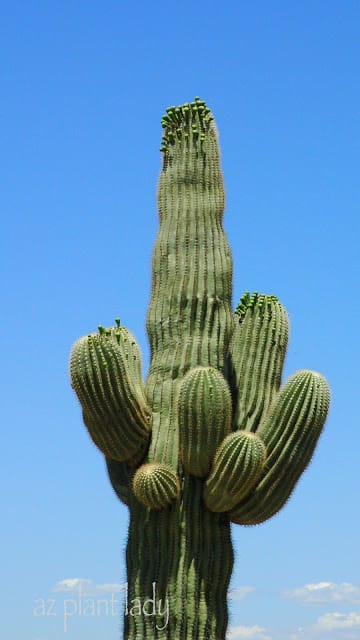
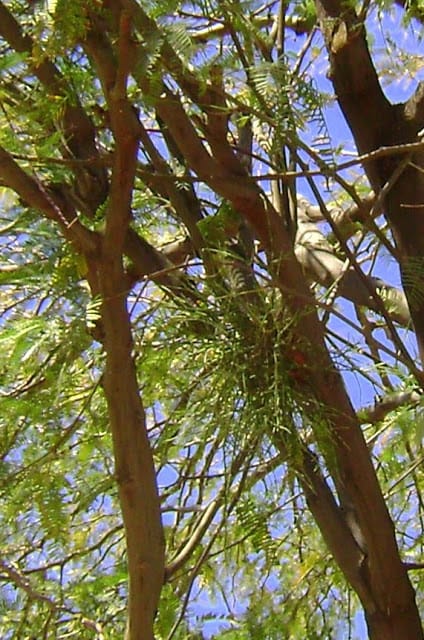
Alright, take a close look at these images and tell me, which one seems out of place among these stunning Cardon cacti?
#1
#2
#3
#4
So, in the images above, can you tell which one doesn’t belong?
Do you want a hint to our pop quiz?
They are all cacti, but one is found in Baja Mexico, while the others are found in the Sonoran Desert.
Give up?
#3 doesn’t belong.
Why not?
Cardon Cactus are Different than Saguaro Cactus
Well, while it looks an awful lot like a Saguaro cactus (Saguaro carnegiea), it is actually a Cardon cactus (Pachycereus pringlei).
I admit, that it can be awfully hard to tell the difference to the casual observer unless you look carefully.
Cardon on the left and a Saguaro on the right.
The Magnificent Cardon Cacti: Giants of Baja, Mexico
Cardon cacti, renowned as the world’s largest cacti, can astonishingly reach towering heights of up to 70 feet and weigh a staggering 25 tons. These remarkable giants are an exclusive inhabitant of Baja, Mexico, where they thrive for up to an astounding 300 years.
Exploring the Unique Features of Cardon Cacti
What sets Cardon cacti apart are their distinctive characteristics. Unlike the Saguaro cactus, their arms extend from a lower position, adorned with fewer spines. But if you examine them closely, you’ll notice that their folds are deeper and wider compared to the Saguaro. Moreover, the Cardon cactus boasts a subtly grayer shade of green, distinguishing it from its Saguaro cousin.
For enthusiasts who wish to cultivate these majestic cacti, Cardon cacti are readily available at cactus nurseries. So, the next time you encounter a Saguaro cactus in a landscaped setting, take a closer look—it might turn out to be a Cardon cactus, surprising you with its unique charm.
Have you ever had the pleasure of encountering a Cardon cactus in person? Share your experiences with us!
https://www.azplantlady.com/wp-content/uploads/2011/09/Large-Saguaro-1.jpg640426arizonaplantlady@gmail.comhttps://www.azplantlady.com/wp-content/uploads/2025/08/AZ-Plant-Lady-Logo-small.jpgarizonaplantlady@gmail.com2011-09-05 16:39:002023-09-18 16:27:58“One of These Things Is Not Like the Other”
Whether or not you live in the desert Southwest, most people are familiar with the iconic Saguaro cactus.
To be honest, they are even more beautiful and impressive in person.
Unfortunately, like most plants, Saguaro cacti are susceptible to some diseases. The most prevalent is called ‘Bacterial necrosis’.
So, what are the signs of this disease?
Well at first, it can be a bit hard to spot unless you know what you are looking for.
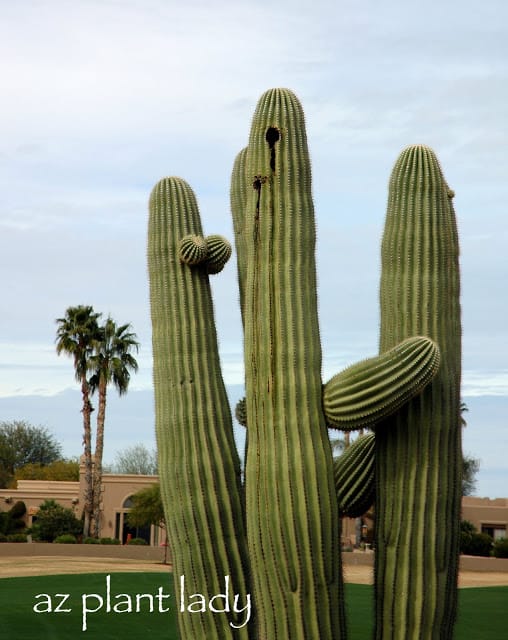
I was revisiting with a client, helping them fine tune their garden when I took a look at their Saguaro.
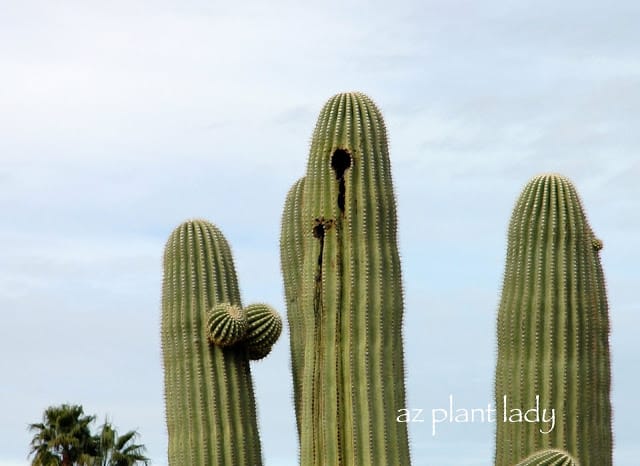
The first noticeable signs are usually a circular, black lesion.
As the lesion grows, black ‘goo’ starts to leak downward on the Saguaro.
The liquid ‘goo’ has an awful odor, but depending on where the lesion is located, it may be too far to be detected during the early stages.
Saguaro bacterial necrosis is caused by the bacteria called Erwinia cacticida. It is spread by insects and/or soil. The bacteria enters through cracks or other wounds caused by rodents, insects, freeze damage or mechanical damage.
So, what can you do if you have Bacterial necrosis?
The vast majority of cases of Saguaro bacterial necrosis will result in the eventual death of the Saguaro, so treatment is needed.
For lesions that are rather small – (2 to 3 inches in diameter), scoop out the diseased tissue with a sharp knife. Cut into the healthy tissue as well, to ensure that you have removed all of the disease. As you cut, make sure the hole slopes downward so that any moisture will drain out easily and not collect on the bottom of the hole.
Then treat the area with a solution made up of a 10% bleach solution. That is it – let it heal on its own.
Unfortunately, if the infection has advanced further and the lesions are larger with quite a bit of ‘black goo’ then there is a good chance that the disease has progressed to a point that it is not treatable. Sadly, the only solution is to remove the Saguaro or the affected arm, which will prevent any damage from occurring since the disease weakens the Saguaro, causing it to fall. Bacterial necrosis can also be spread to neighboring Saguaro via insects as well, so removal is important.
For more information on Bacterial necrosis and how to recognize it and treatment, check out these links….
Now, you may think that I am talking about soft, cuddly puppies finding a new home. But, I am actually talking about my agave pups. The word ‘pups’ refers to the small agave offsets that sometimes form from the adult agave.
Agave americana surrounded by her ‘pups’.
Some agave species produce quite a few pups, while other species rarely do. I do try to stay from agave species like Agave americana because they produce so many pups that it becomes quite a maintenance chore to constantly remove them all. But that being said, I have many friends and clients who just love this particular agave.
Well, the day finally came in my garden for my agave pups to move away from their childhood home.
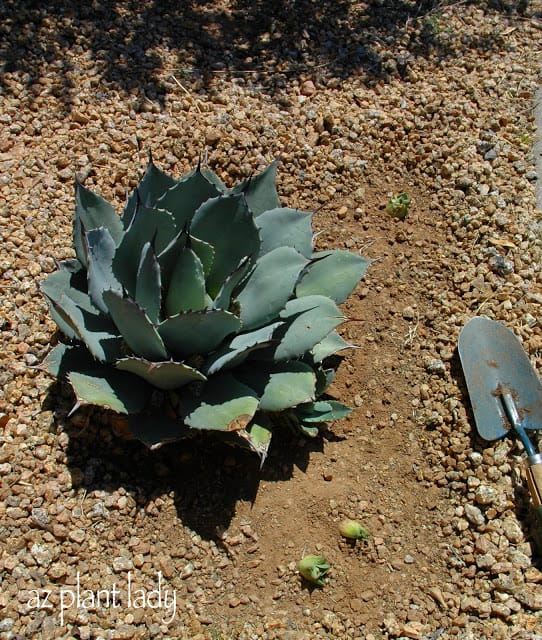
Can you see them? There are 4 in the picture above. Three are quite small still, but more then ready to leave their mother, my Agave parryi. I am actually quite excited to be getting pups from this agave because in my experience, they do not produce many pups. It may be that this one has because it does receive overspray from my lawn sprinklers.
Okay, this may seem obvious, but you would be amazed at how many people just start digging in the middle of their gravel (granite) without clearing it away first. Believe me…you want to clear it away first or else you will be left with a mixture of rock and soil mixed together.
Aren’t they cute in a prickly sort of way? They really are quite tiny.
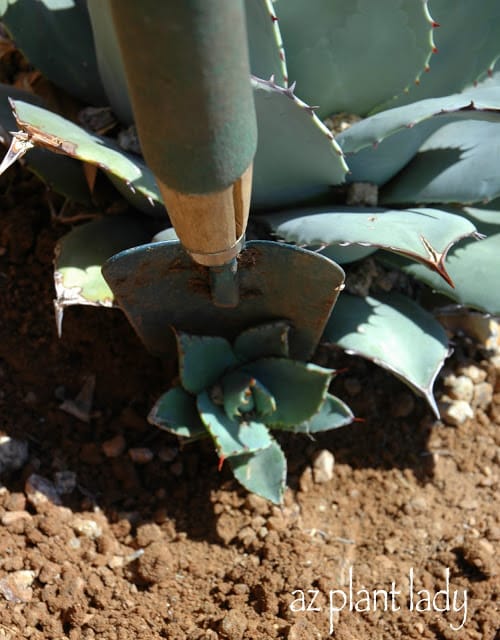
I carefully removed the soil around the pups, leading to the mother plant because the pups are still attached to her by a thick, fleshy root. You can see that the pups are beginning to form their own roots, branching out to the side.
Just cut the root connecting the pup to the adult agave….that’s it. It is really very easy.
Now, this same adult agave also has another pup, which has grown much closer to home then these tiny pups.
This one did not want to leave home, even though it was quite grown up. When the pups are growing right up alongside the adult plant, just insert a shovel and push down firmly, cutting the connecting root. **Sometimes you have to be a bit forceful in getting some pups to leave home 😉
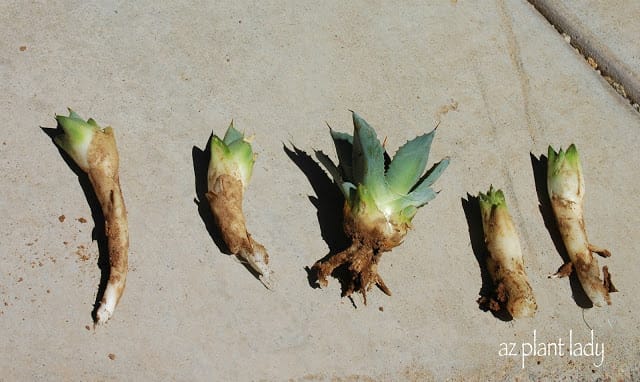
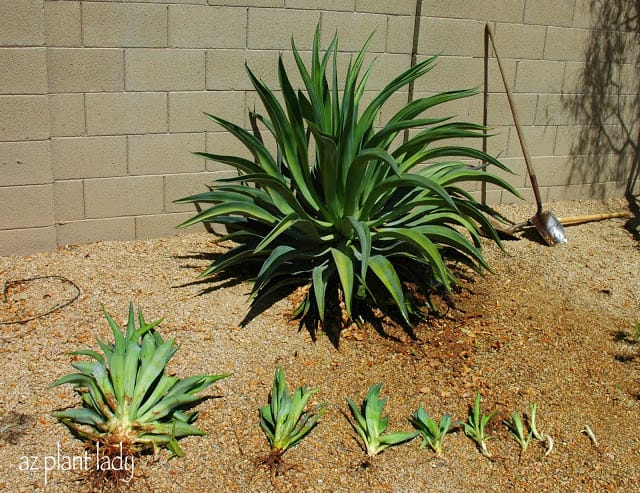
I was able to harvest 5 pups. I was so happy and had fun selecting where I wanted to put them in my garden.
Before you plant them, you need to put them in a dry, shady spot for 4 – 7 days so that the cuts have a chance to dry first. This helps to prevent rot when they are planted. Don’t worry about them surviving without water for a few days….they have plenty stored inside – they are succulents after all.
Once you have planted them, they will need supplemental water to help them establish and grow roots. Agave do best when given supplemental water, even when mature. Most are connected to my drip irrigation system. The others receive overspray from my sprinklers, which is enough for them.
If you haven’t noticed this before, I am not a perfect gardener and am likely to tell people, “Do as I say, not as I do”. But, I do not profess to be a perfectionist and so I will show you one of my larger agave, whose pups should have left home long ago…
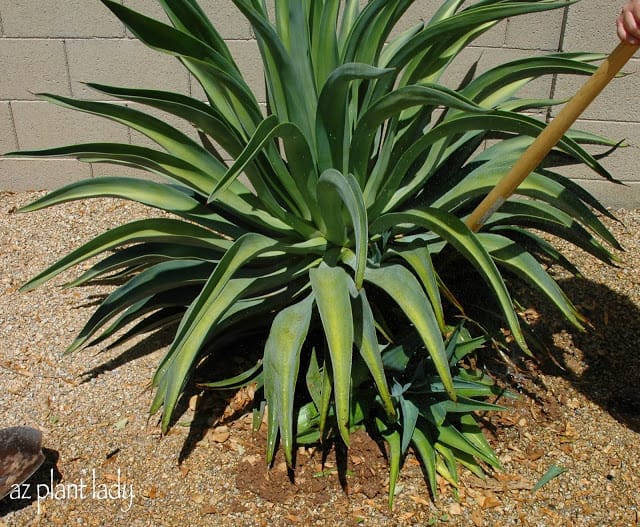
This is my Smooth Leaf Agave (Agave desmettiana). I love this type of agave. It is medium size, and the sides of the leaves do not have thorns. The thorns on the tips can easily be cut off if desired for a more pedestrian friendly agave.
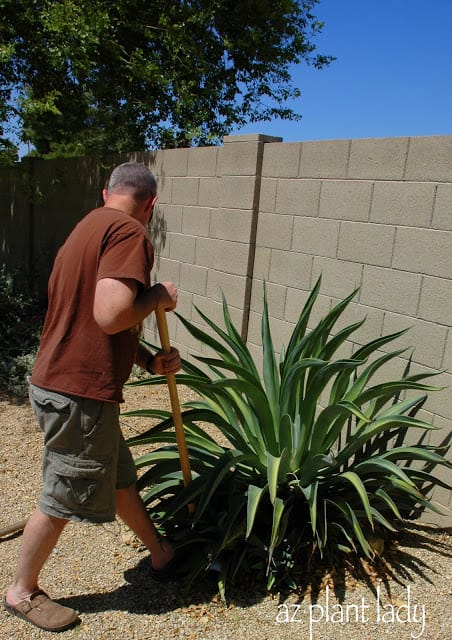
As you can see from the photo above, the pups are quite large and should have been kicked out long ago. So, I brought in the muscle (my husband) to help get them out.
Because the pups were growing close to the parent plant, a shovel had to be used to separate them.
Agave desmettiana is known for producing offsets (pups), but in my experience, there are not too many.
Actually, the adult agave below was grown from a pup.
A proud parent and her 8 offspring. I planted a few and gave some to my mother, Pastor Farmer, of Double S Farms.
There were times when I worked on golf courses that my budget was tight, so I would ask residents to bring their agave pups to me so that we could use them in landscape areas around the courses. The residents were very generous and after a while, we had more then we knew what to do with. So, if you have some agave pups, plant one in a pretty container and give to a friend or donate them to your city, church or other organization.
**My son continues to do better each day. We did have a little bit of a setback on Saturday, but yesterday and today, he is feeling much better. Thank you again for your support and prayers!
https://www.azplantlady.com/wp-content/uploads/2010/06/Agave-americana-pups.jpg480640arizonaplantlady@gmail.comhttps://www.azplantlady.com/wp-content/uploads/2025/08/AZ-Plant-Lady-Logo-small.jpgarizonaplantlady@gmail.com2010-06-07 17:13:002021-02-22 10:45:01Pups Ready to Leave Home….
Each time I go on a landscape consult, it is an adventure. I never know what to expect. Will there be serious problems with any of the trees and plants? Or will my help be needed to re-design the landscape, adjust the irrigation schedule or help people learn how to maintain their plants? Well, life is full of surprises.
Of course, every time I go on a consult, I always bring my camera. I am always looking for examples of beautiful plants and problems to photograph. I then share many of them with you.
Yesterday, was a gorgeous spring day. The high was 78 degrees and I actually had two consults scheduled, within two miles of each other. My first client had just bought a new home and wanted help identifying her plants and how to take care of them. She also had inherited some sick citrus trees and needed help in how to help them.
First the good things that I saw….
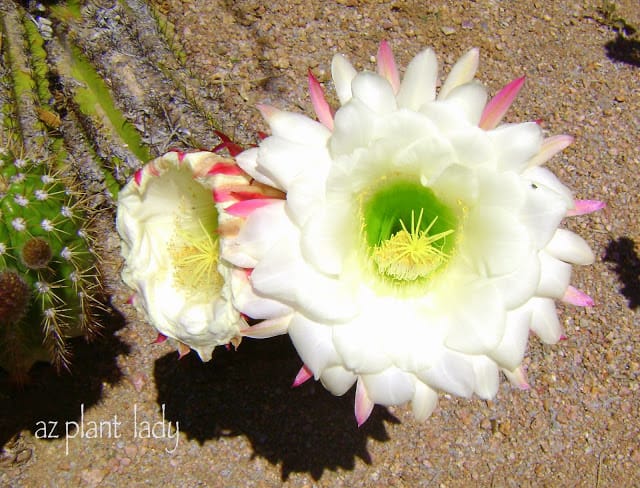
I was greeted by the front entry by this spectacular white flower. Argentine Giant (Trichocereus candicans), is a cactus that is highly desired. It produces flowers a few times during spring and summer months. This particular cactus was absolutely covered in these large blossoms.
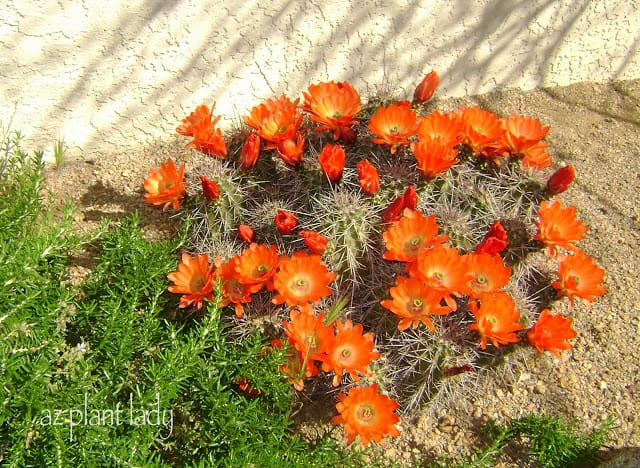
Nearby the Argentine Giant, was the smaller Claret Cup Cactus (Echinocereus triglochidiatus) awash in bright orange blooms.
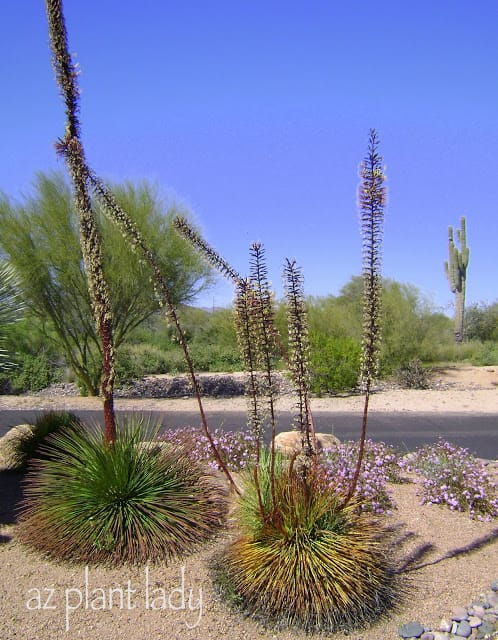
An unusually shaped flowering Twin Flower Agave (Agave geminiflora) caught my eye. Normally, they produce a single flowering stalk like the one on the left. However, the one on the right had seven smaller stalks. I love seeing examples of plants that are doing something out of the ordinary 🙂
Now for the bad….
This is one of the four sickly citrus trees that I was asked to see. The diagnosis was relatively easy. Lack of water and nutrient deficiency. Both problems will be solved by enlarging the basin underneath the tree so that it extends out to where the branches end. As the tree grows, so must the basin since a trees roots extend outwards where the branches extend. A new watering schedule and making sure that the water penetrates to 3 ft. in depth should do much to help these trees.
Nutrient deficiencies are corrected by fertilizing citrus trees three times a year – in Feb/Mar, May and September, using either a synthetic or organic fertilizer specially formulated for citrus which contains not only nitrogen, but also micronutrients that are often deficient in our soils.
More information on citrus care, irrigation and fertilization can be found here.
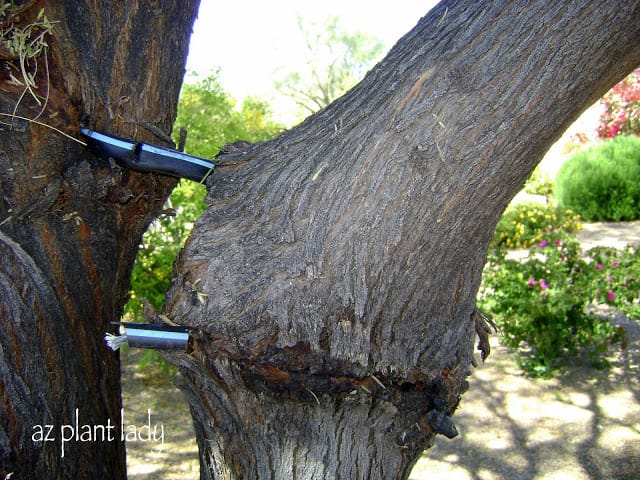
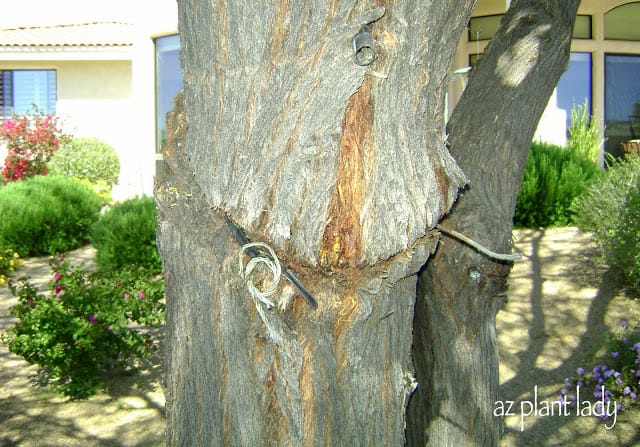
As I walked the landscape with the homeowner, we started looking at the trees that she had inherited with her new home. I quickly noticed something very bad. The previous homeowners had never removed the stake and cables from their tree when it was young.
The tree ended up growing around the wire and there is no way to remove it now without seriously damaging the tree. Usually, when wires are left on the tree, they gradually cut off the nutrients to the tree as the “veins” of the tree are located directly underneath the bark. This usually results in the death of the tree. However, this Mesquite tree appears to have survived and regrown it’s vascular (veins) system around the wire. The tree is 11 years old and is the exception in terms of surviving this type of treatment.
**If your trees are staked, PLEASE make sure to check your wires/cables to make sure that this does not happen to you. Trees are not to be staked forever, only the first 1 – 2 years after planting.
Now the next bad thing I observed was not immediately obvious, but as I began to focus my gaze upwards to evaluate the trees, I saw a few clumps of mistletoe (Phoradendron californicum) growing in the tree. Now, this is not the same kind of leafy mistletoe that is often seen at Christmas. But it is a parasite that will, over time, cause a decline in the tree and stress the tree. This makes the tree more susceptible to disease, insect infestations and other stresses.
As an arborist, I have taken part in discussions regarding whether or not you should leave mistletoe in trees. Mistletoe is part of the natural desert and can be seen growing in trees in the wild. Mistletoe itself will not kill a tree, but does stress the tree and leaves it vulnerable to disease, insects and environmental stresses that will kill the tree eventually.
In managed landscape areas I have always had mistletoe removed. In my opinion, trees do not need any additional stress and the trees are part of a larger landscape design and aesthetics are important.
I also recommend that homeowners also remove the mistletoe from their trees. Not only will it help their tree, but will help keep the mistletoe from spreading to their neighbor’s trees. Mistletoe is spread when birds eat the berries it produces and then they ‘poop’ them out on another tree’s branch and the seed germinates and starts to infect the branch it landed on.
Small clumps of mistletoe are not always obvious, but once you know what to look for, you will easily be able to spot it. I recommend looking at your tree in the winter, when there are fewer leaves to hide the mistletoe.
There are two ways to remove mistletoe. To completely get rid of it, you need to cut the branch that it occurs on at least 12″ below where the mistletoe begins. In most cases, this will completely get rid of the mistletoe. This works best with smaller branches. However, if you have a very large branch that is infected, it may not be feasible to remove the branch. In this case, you can prune the mistletoe off – just take your gloved hand and brush them off of the branch. It is really that easy. Doing this will not get rid of the mistletoe, but help to control it. You will have to continue to do this periodically to keep the mistletoe from becoming larger and spreading.
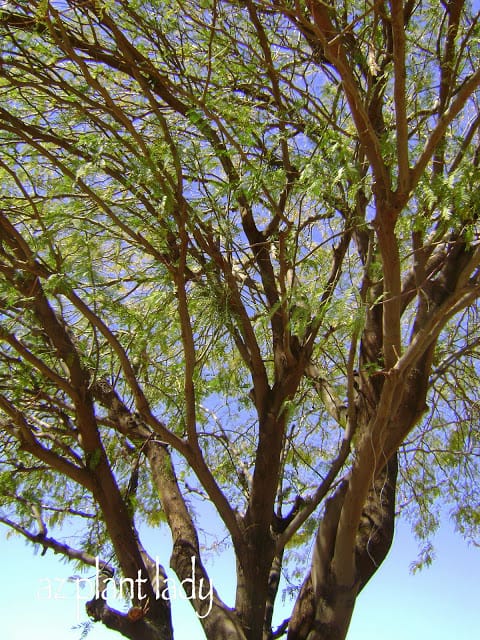
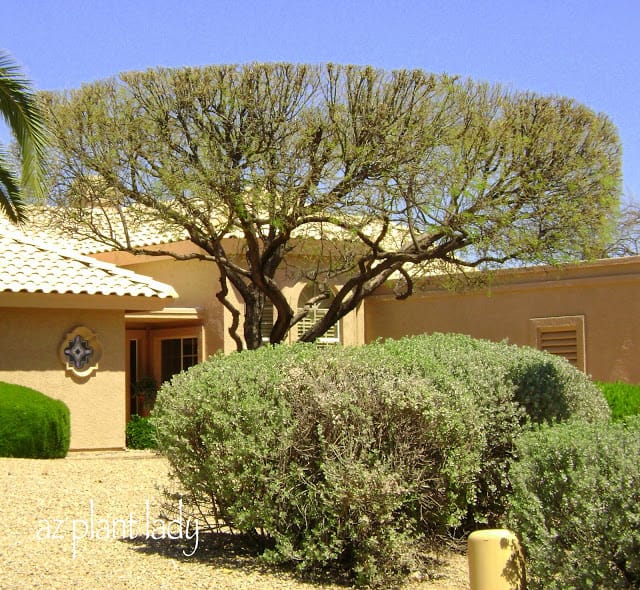
Now on to my second client of the day. Overall, is landscape was in good shape. His citrus trees were healthy as were the rest of his plants. But, the majority of his concerns were in regards to his irrigation system. His mature Palo Brea tree (Parkinsonia praecox), pictured above, still had the irrigation emitters positioned by the trunk of the tree. The same place that they had been place 8 years ago. The problem is, the roots have now moved.
I explained to him that as a tree grows, so do the roots. They grow outwards, toward the edge of where the branches extend. And so as the tree grows, the emitters need to be moved and places around the tree where the branches end. For this tree, three 2 (gph) emitters evenly spaced around the tree will work just fine.
Well, I had a very fulfilling day working with some very nice people. I just love help people learn how to care for their trees and plants and spend time outdoors and admiring the beauty in people’s gardens.
As I was leaving, I saw something very ugly….
This homeowner had ‘topped’ his Mesquite tree. Now, I am not sure why they had this done. I could tell that from looking at the branches, that it was not the first time it had been ‘topped’.
Now any arborist will tell you that ‘topping’ is bad and there are a number of reasons why. I will address it further in another post, but will leave you with these few reasons NOT to top your trees:
-It causes the tree to grow more quickly to replace the leaves lost, therefore increasing the amount of pruning needed.
-The new branches will not be firmly attached and will be more likely to break.
-Topping stresses the tree, making it susceptible to disease, insects and environmental stresses.
-If those reasons are not enough, then maybe this one will be….IT IS UGLY.
Thank you for hanging in there with me…I realize this was a long post, but there was so much to ‘talk’ about from my visits yesterday. I hope you enjoyed the beauty of the flowers and that maybe I have helped people avoid some of the problems that I have highlighted.
https://www.azplantlady.com/wp-content/uploads/2010/04/Argentine-Giant-Flower.jpg488640arizonaplantlady@gmail.comhttps://www.azplantlady.com/wp-content/uploads/2025/08/AZ-Plant-Lady-Logo-small.jpgarizonaplantlady@gmail.com2010-04-08 16:58:002021-02-26 10:32:07The Good, The Bad and The Ugly….
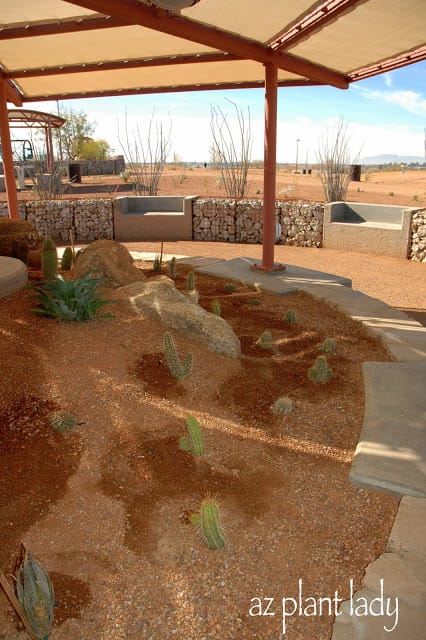
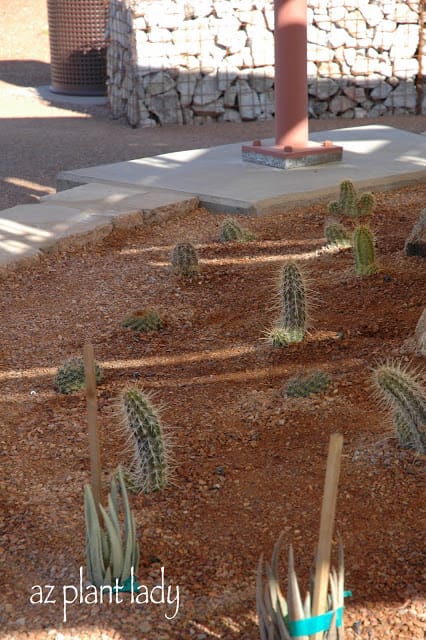
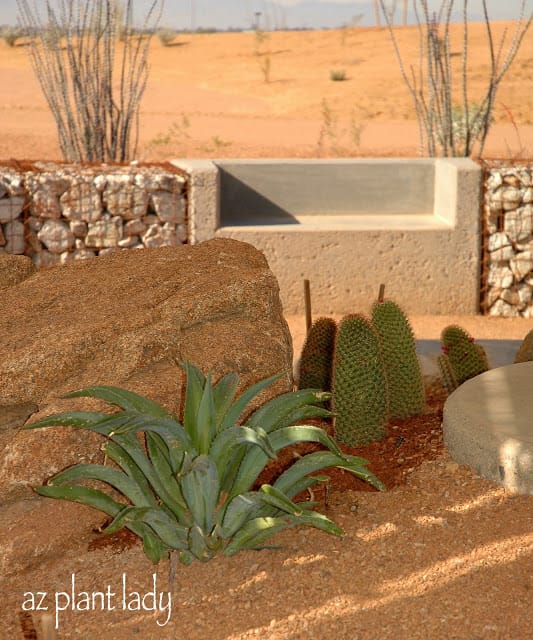
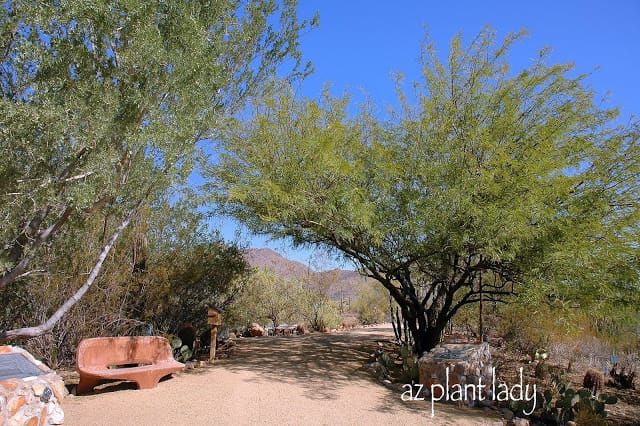
During a visit to a park, I came upon a beautiful little garden that rests on top of 2.2 million tons of trash. This small succulent garden is but a very small part of the park which rests upon a recently closed landfill.
Newly planted cacti, aloe and agave. Ocotillo stand in the background.
In the background, you can see that the walls are made of wire encased stones.
This landfill was closed in 2005 and the new park has not officially opened. However, that did not keep me and my husband from exploring.
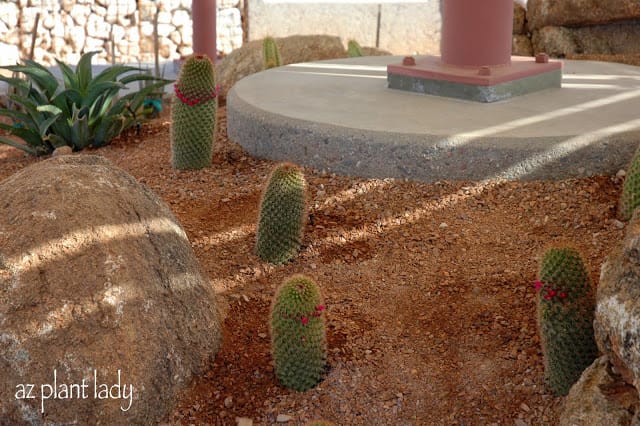
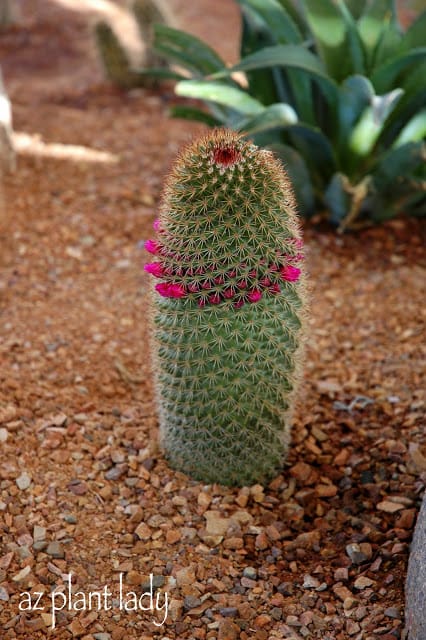
A collection of Mammillaria backebergiana.
Many of them were getting ready to flower.
Close-up of the flowers beginning to open.
I love how the flowers form a ring around this little cactus.
We hiked to the top of the park, (or should I say, the top of the trash heap), which is the second highest point in the city. Once at the top, it is very easy to view the surrounding mountains (Superstition, San Tan, South Mountain, the McDowell’s and Four Peaks).
A collection of Green Strawberry Hedgehog (Echinocereus enneacanthus engelmannii) and young Aloe.
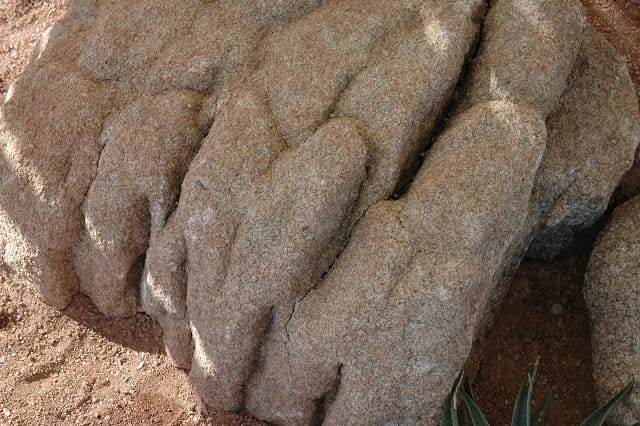
There is just something I love about a boulder with lots of character like this one. They add so much texture to the garden and you don’t have to water or prune them.
The canal runs by the park and paths for both bikes and horses encircle the park.
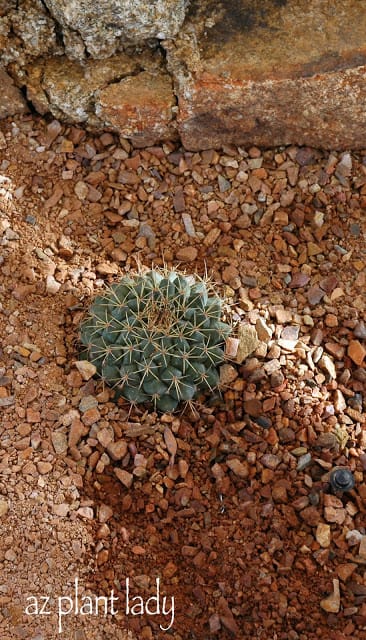
Mammillaria macdougalii
As you can see from the photo above, contrary to popular opinion, cacti and other succulents do best when watered initially until they become established. By using drip-irrigation, it is very easy to just plug up the emitters later or put on an adjustable emitter.
*Note how the emitter is not placed up right next to this cactus – it is placed a little ways away to help keep the roots from rotting.
A young Agave desmettiana and the Mammillaria receive water from the drip-irrigation system.
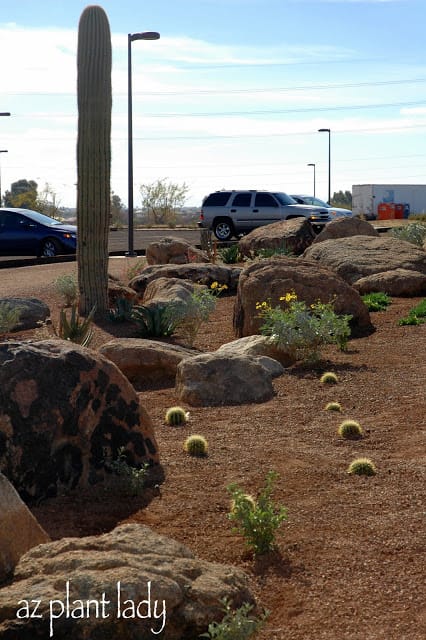
The plantings in the far background look very sparse, but will grow very quickly.
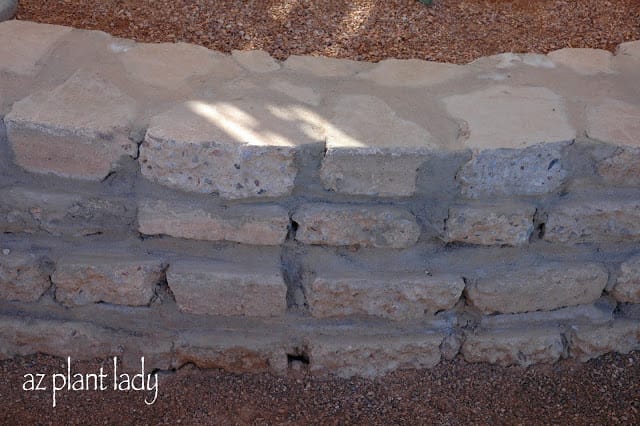
I love how recycled, broken concrete was used to build the walls of this garden.
I love that used recycled, broken concrete was utilized to make the walls of this succulent garden.
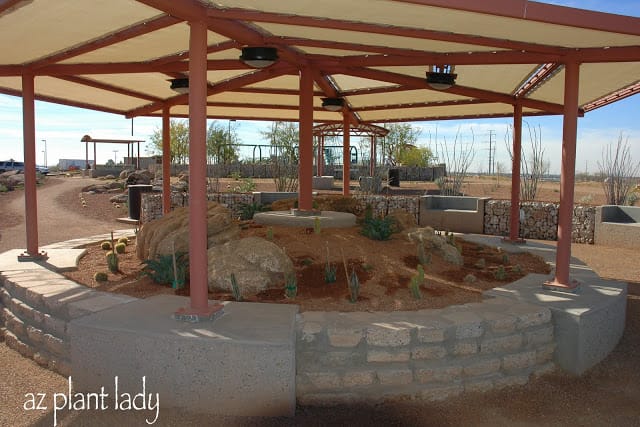
The garden is covered with canvas shade panels which look like they can be easily removed once the cacti and other succulents become established.
*Many cacti and succulents do best when temporary shade is provided when they are moved and transplanted.
I had a wonderful time visiting, but all too soon it was time to leave….for the grocery store.
https://www.azplantlady.com/wp-content/uploads/2010/01/Succulent-Garden-19.jpg640426arizonaplantlady@gmail.comhttps://www.azplantlady.com/wp-content/uploads/2025/08/AZ-Plant-Lady-Logo-small.jpgarizonaplantlady@gmail.com2010-01-08 14:53:002021-03-21 10:30:33A Garden Arises From a Mountain of Trash
Unveiling the Mysteries of Cactus Skeletons in the Desert
When you think of a desert, you likely picture vast stretches of sand, scorching sun, and towering cacti. These iconic desert plants, such as the saguaro cactus, play a crucial role in the ecosystem and are known for their remarkable resilience in arid environments. However, have you ever wondered what lies beneath their impressive exteriors? On a recent walk through the desert, I found these skeletons. We’ll delve into the fascinating world of cactus skeletons in the desert, shedding light on the woody remains known as “ribs” that provide crucial support to these giants.
Saguaro Cactus: A Desert Sentinel
The saguaro cactus (Carnegiea gigantea) is arguably the most recognizable symbol of the American Southwest’s deserts, particularly the Sonoran Desert. These imposing cacti can reach heights of up to 60 feet and have a distinctive columnar shape, often adorned with arms that reach out like welcoming gestures to the desert’s harsh conditions.
A Closer Look at Cactus Ribs
One of the most intriguing aspects of the saguaro cactus is its internal structure. Beneath its fleshy, water-storing exterior lies a hidden framework known as “ribs.” These ribs are not bones, of course, but they serve a similar purpose in providing structural support to the cactus.
The ribs of a saguaro cactus are typically woody and arranged in a vertical pattern within the plant’s body. They extend from the base of the cactus up into the arms, acting as a skeletal framework that gives the saguaro its characteristic shape and enables it to thrive in the harsh desert environment.
Why Do Cactus Skeletons Exist?
The presence of ribs or cactus skeletons in the desert serves several essential functions:
Structural Support: The primary role of cactus ribs is to provide structural support to the plant. This support becomes crucial as the cactus grows taller and heavier, preventing it from collapsing under its weight.
Water Storage: While ribs are not directly involved in water storage, they indirectly facilitate it. The ribs help maintain the cactus’s shape, which, in turn, ensures the efficient storage of water in the fleshy tissue surrounding the ribs.
Growth and Survival: Cactus skeletons play a vital role in the cactus’s ability to grow and survive in the desert. The ribs allow the saguaro to withstand strong winds and maintain its upright posture, ensuring optimal sun exposure for photosynthesis.
As I began my trek through the desert, I found beautiful specimens of cacti, plants and even some wildlife, but I also found a few skeletons as well…..
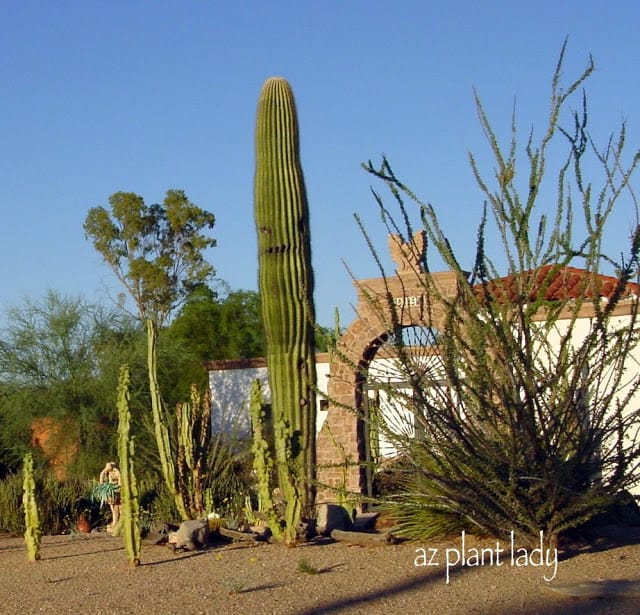
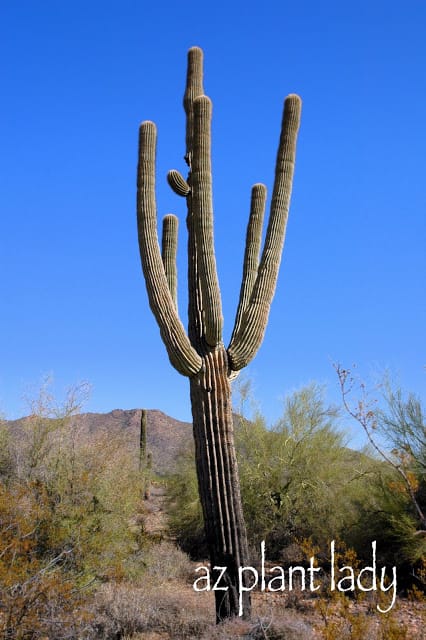
Mature Saguaro
This beautiful Saguaro was one of the first cacti that greeted me on my walk.
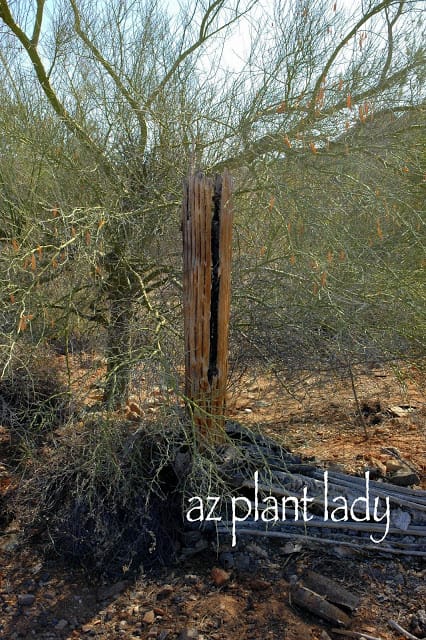
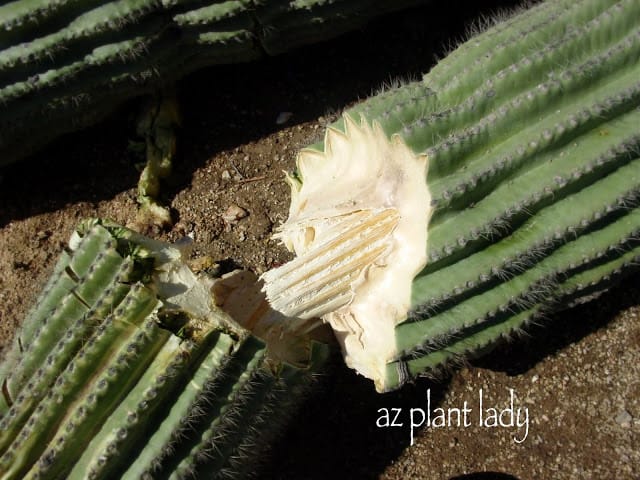
The first skeleton I came across was from a Saguaro cactus; part of it still standing upright. You can see where top part of the skeleton has fallen to the ground after the cactus plant has died.
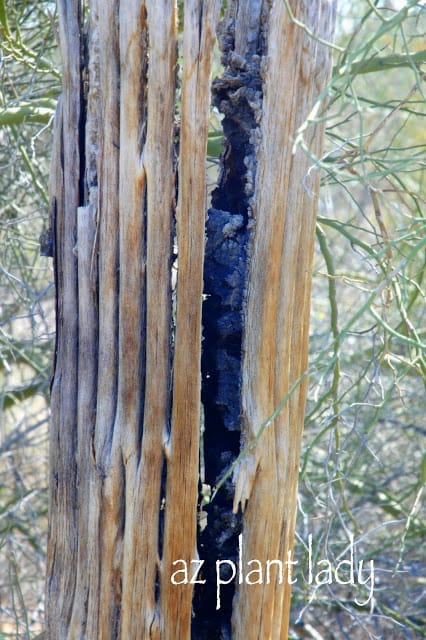
Here it is close up. The decay is till present as you can see inside. The woody remains of the saguaro are called ‘ribs’ and are what supports the Saguaro cactus.
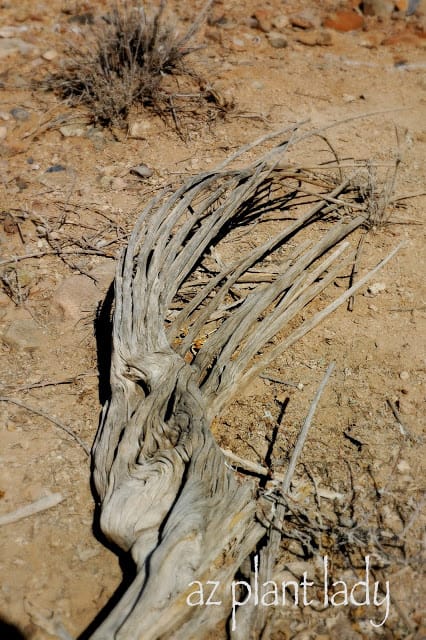
Above, is a photo of a Saguaro that had just fallen. You can easily see the ribs. Whenever a Saguaro cactus would fall in a landscape setting, we would move it to an out of the way area where it could decay. Then we would take the ribs and put them back into the landscape as a display. Saguaro ribs are considered a beautiful accent in the desert landscape and are prized by many.
Skeletons in the Desert can be Building Material
Native Americans used Saguaro ‘ribs’ to build roofs, walls and even furniture. Another use was that they would make long poles that they used to knock off the Saguaro fruit, which is edible.
Saguaro are not the only types of cacti that leave behind skeletons….
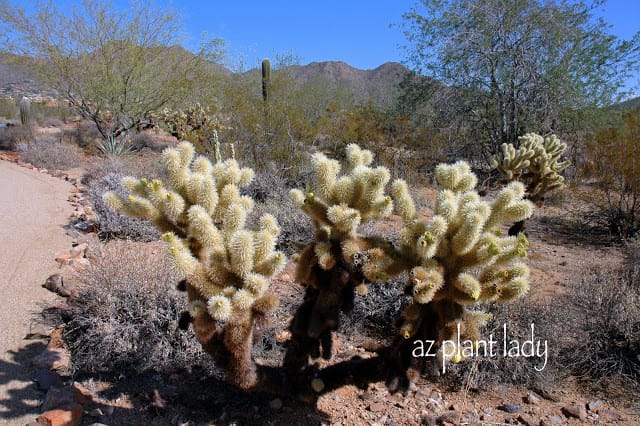
Teddy Bear Cholla (Opuntia bigelovii)
Teddy Bear Cholla (above), also has an interesting skeleton.
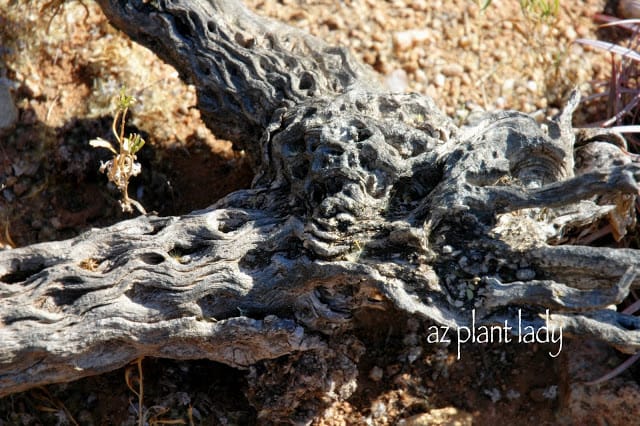
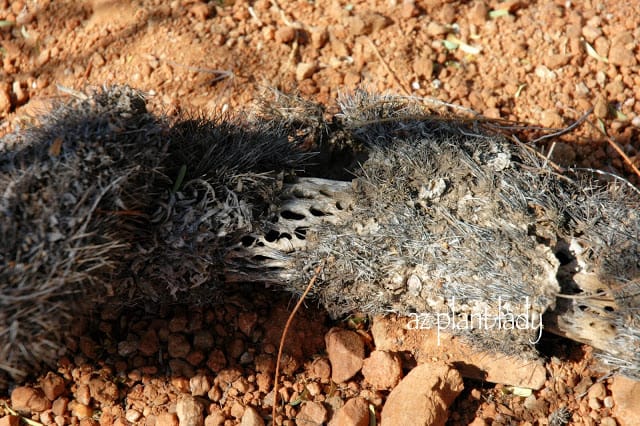
Above, is a photo of a segment of Teddy Bear Cholla that is in the process of decaying. You can see the woody skeleton starting to show.
Cholla skeletons are sometimes used as walking sticks. Artisans also use cholla skeletons to make southwestern forms of art.
Cactus Ribs are the Backbone to the Desert Cactus
Cactus skeletons, or ribs, are nature’s ingenious solution to help these iconic desert plants thrive in extreme conditions. They offer support, aid in water storage, and contribute to the cactus’s overall resilience. The next time you encounter a towering saguaro cactus in the desert, take a moment to appreciate the hidden framework that enables this remarkable plant to stand tall and flourish amidst the harsh desert landscape.
Please note that it is illegal to remove Saguaro and Cholla skeletons from the desert, unless you have permission from the owner. Specimens can sometimes be purchased at certain plant nurseries that specialize in cacti.
So do as I do…..enjoy them out in the desert and take lots of photos.
https://www.azplantlady.com/wp-content/uploads/2015/10/saguaroskeletonssideyard.jpg640441arizonaplantlady@gmail.comhttps://www.azplantlady.com/wp-content/uploads/2025/08/AZ-Plant-Lady-Logo-small.jpgarizonaplantlady@gmail.com2009-11-09 17:15:002023-09-18 14:35:13Skeletons in the Desert
Perhaps the first thing you think of is the spines. If you have ever been unfortunate enough to have been pricked by a cactus, you’ll likely never forget that most of them have needles.
*Did I ever tell you about the time I worked on golf course landscape and backed into a teddy bear cholla and got an entire piece lodged in the back of my leg?
Besides being painful to those who get too near to cacti, did you know that there are important reasons that cacti have spines?
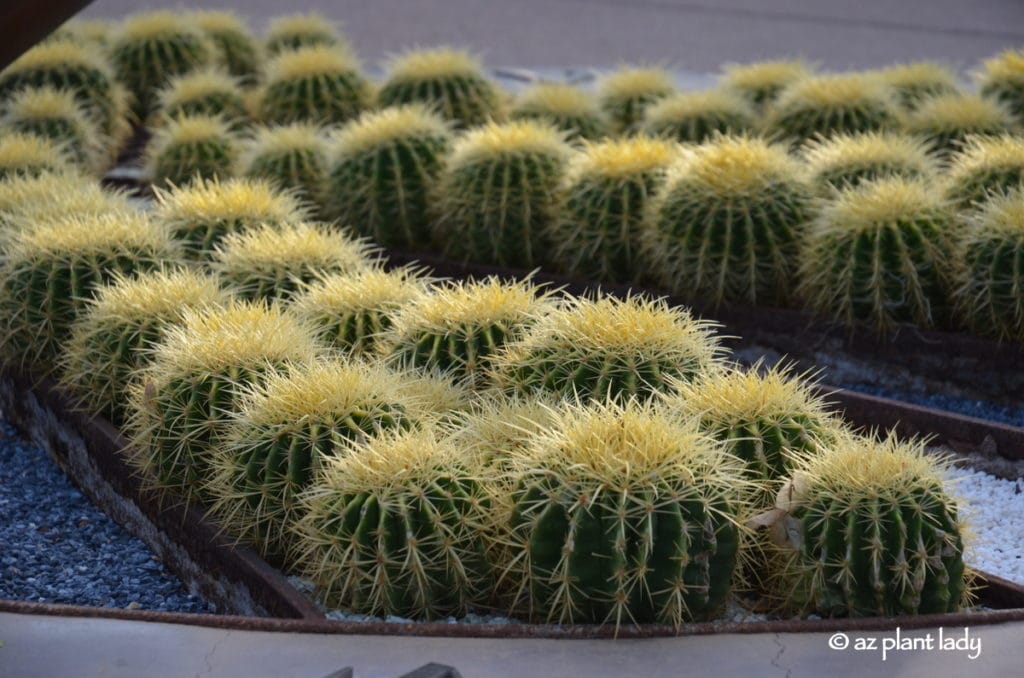
Golden barrel cactuses (Echinocactus grusonii)
First, let’s look at the spines of cactus for what they are – the main part of cactus often functions as a modified stem, and its needles are the leaves.
The most obvious function of cactus spines is to protect the cacti from animals and people. There are, however, a few animals who aren’t deterred by the sharp spines of cacti such as javelina, tortoises and pack rats.
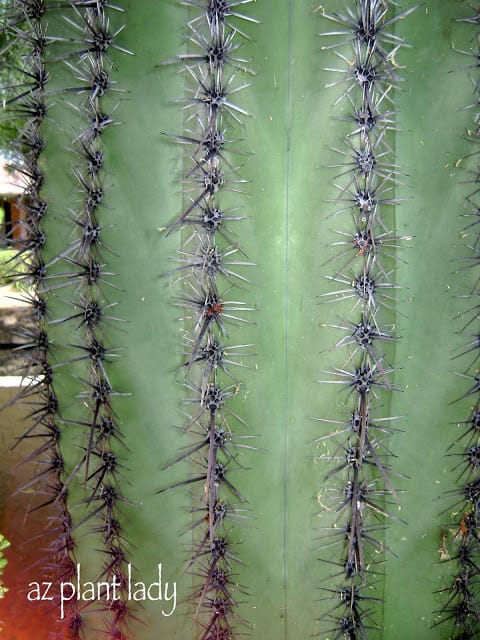
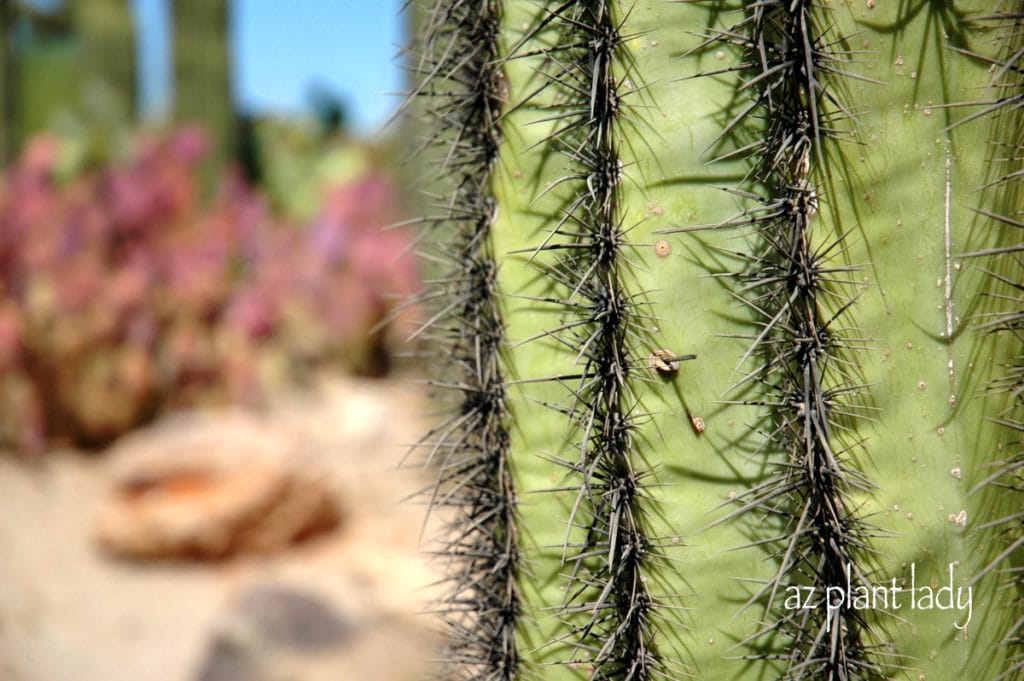
Saguaro cactus (Carnegiea gigantea) spines
Suprise, the primary function of the spines are to actually shade the cactus.
Although just one small spine would hardly provide shade, thousands of them can provide enough.
Why is sun protection needed for the surface of cacti? The shade from the spines let the cactus lose water through the atmosphere. This helps keep the cactus temperature relatively low.
Black-spine prickly pear (Opuntia macrocentra)
Another function that the spines serve is that they help certain species of cacti such as cholla to root and spread.
Teddy bear cholla (Opuntia bigelovii)
Spines of the Cholla are specialized to detach and attach onto anything that comes to close. There are tiny barbs at the tips which grab on to anything that gets too close. It almost appears as if they ‘jump’ off of the main cactus as they latch on the unlucky recipient.
Spines of the Cholla are specialized to detach and attach onto anything that comes to close. There are tiny barbs at the tips which grab on to anything that gets too close. It almost appears as if they ‘jump’ off of the main cactus as they latch on the unlucky recipient.
**If like me, you are ever unlucky enough to find a piece of cholla embedded in your clothes or worse, your skin – you can use a comb to help pull out the barbs. When hiking in the desert, it is easy to get them stuck on your shoes. I usually grab a rock and use it to push off the Cholla segment. When all else fails, a good pair of needle-nose pliers works.
Two young saguaro cactuses are emerging from the shelter of a creosote shrub.
Hopefully, you have a new appreciation for cacti and their spines. But, it’s still important to be careful because it hurts when you get pricked!
https://www.azplantlady.com/wp-content/uploads/2009/10/SonoranDesertlandscape.jpg7951200arizonaplantlady@gmail.comhttps://www.azplantlady.com/wp-content/uploads/2025/08/AZ-Plant-Lady-Logo-small.jpgarizonaplantlady@gmail.com2009-10-07 03:22:002021-03-22 08:37:53Why Do Cactus Have Spines ?
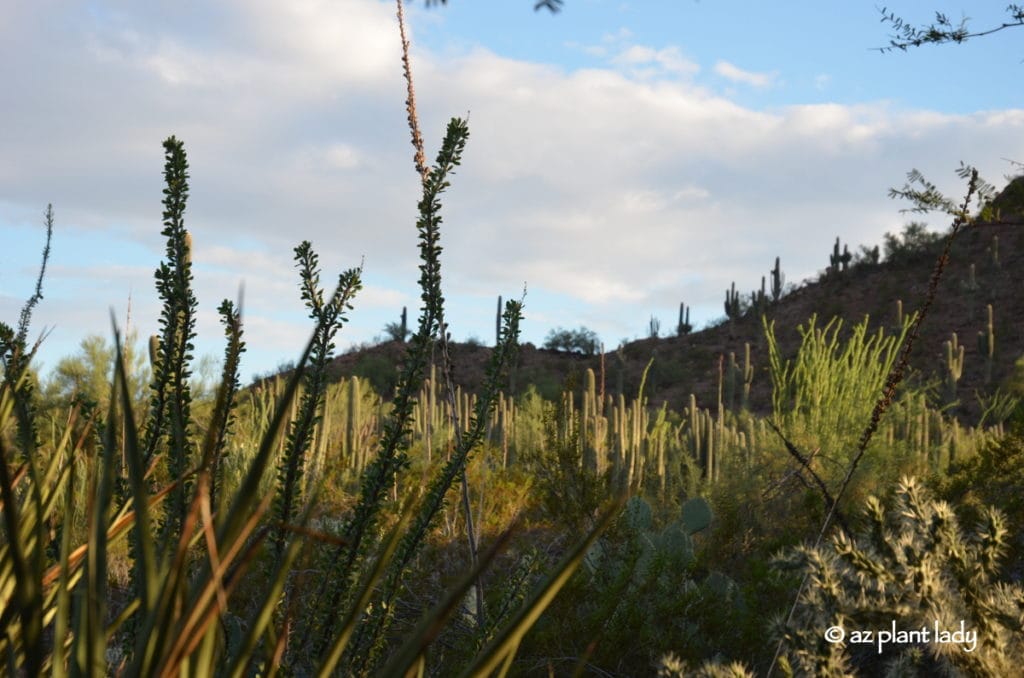
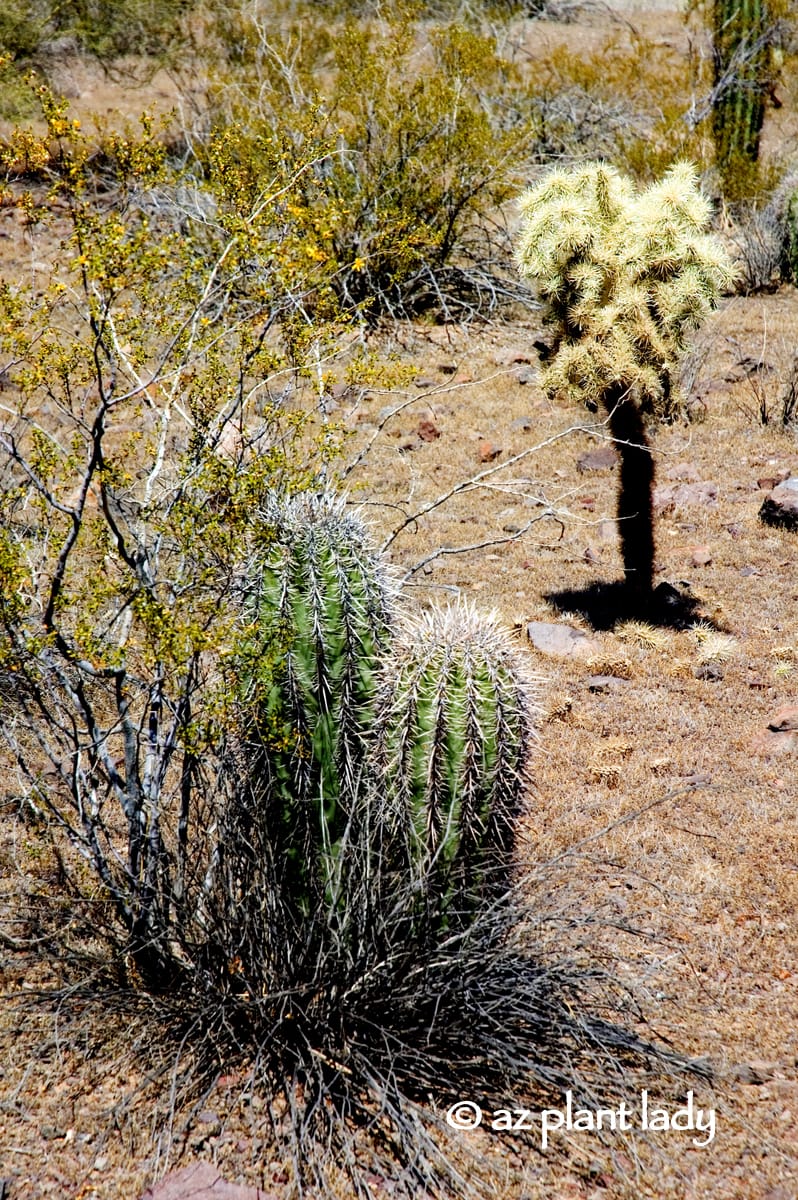
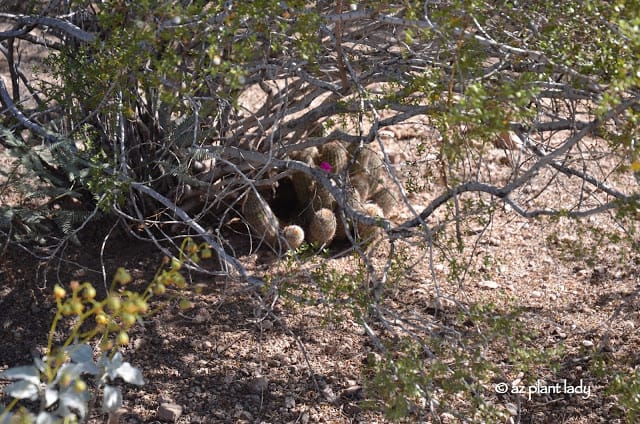
Young saguaro cactus were peeking out from its bursage nurse plant.
As you walk through the desert, there are many opportunities to view some of the striking cacti and their unique shapes. What is not initially apparent, are the many examples of plants helping young cacti survive. However, if you look closely, it is all around you – desert shrubs and trees sheltering growing cacti from the harsh desert climate.
Young barrel cactus underneath a bursage nurse plant
Despite their tough, prickly appearance, cactus are quite vulnerable. Of the thousands of seeds that are released by each cactus, only a tiny fraction grow into new cactus plants. Most would not survive if it were not for “nurse plants.” These plants provide much-needed protection from the sun, cold temperatures and predators (including humans). Nurse plants also provide much needed additional moisture for the new cacti.
Mammillaria microcarpa
It is easy to walk by and not even notice the presence of the small cacti growing underneath nurse plants. Most of the year, the fishhook cactus (Mammillaria microcarpa), pictured above, are almost impossible to see. It is only in the spring when they are blooming that you can spot them.
For the smaller cacti species, bursage (Ambrosiadeltoidea) most often serves as the nurse plant. It also often serves as the first nurse plant for saguaro cacti.
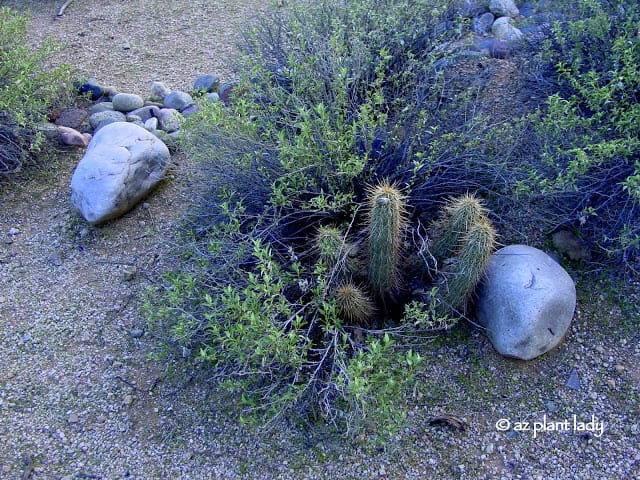
Two young saguaro cacti outgrowing their creosote and bursage nurse plants
Creosote (Larrea tridentata), palo verde, mesquite or ironwood trees often serve as the nurse plants for larger species of cacti. As it grows larger, it requires more water and nutrients from the soil, which leaves little for the nurse plant. So frequently, the nurse plant will decline and die as you can see from the photo above.
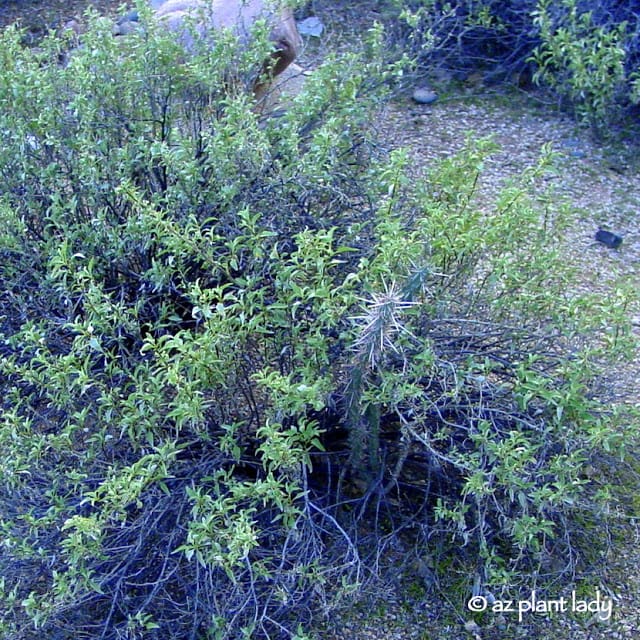
Young buckhorn cholla emerging from its bursage nurse plant.
So next time you have the opportunity to take a walk in the desert, look around….you will most likely see examples of this unique relationship of plants helping young cactus survive.
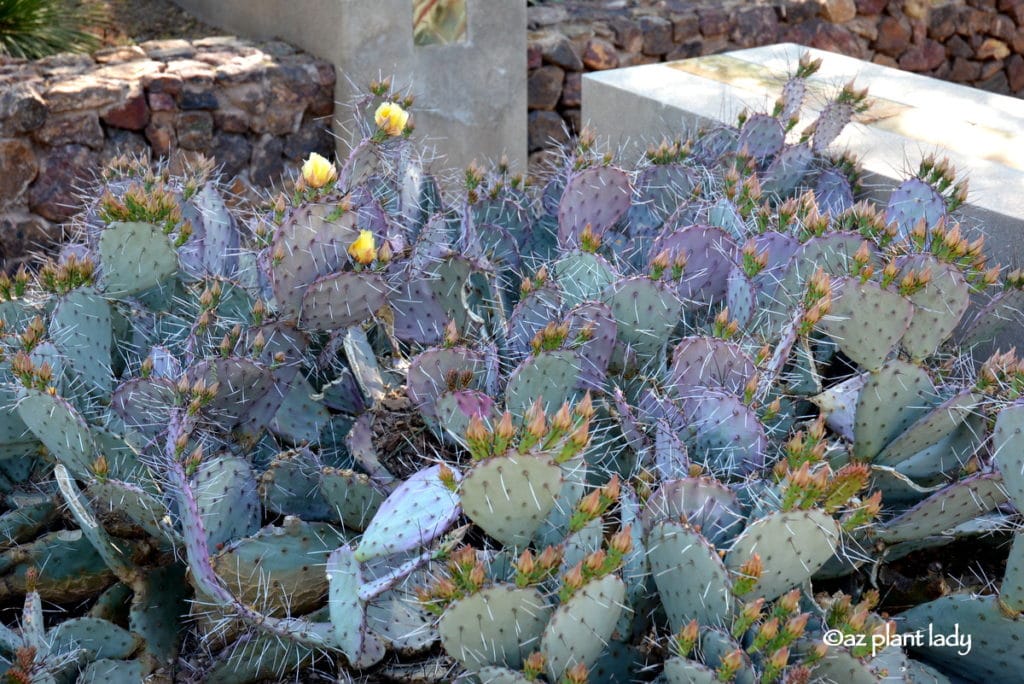
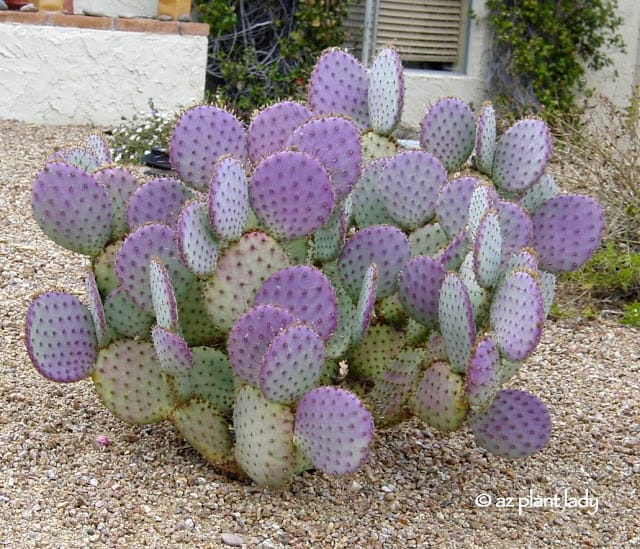
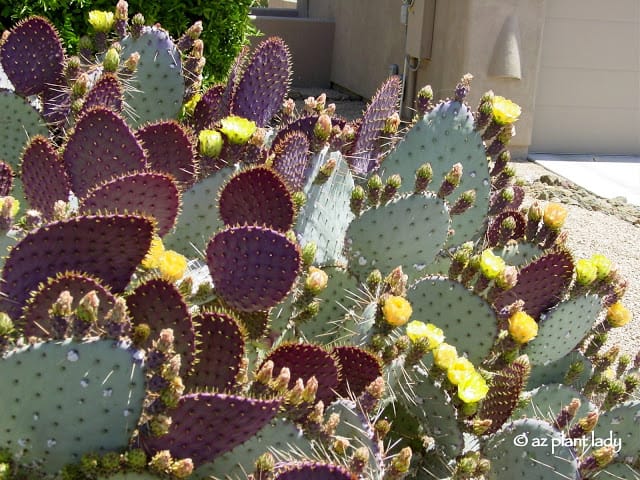
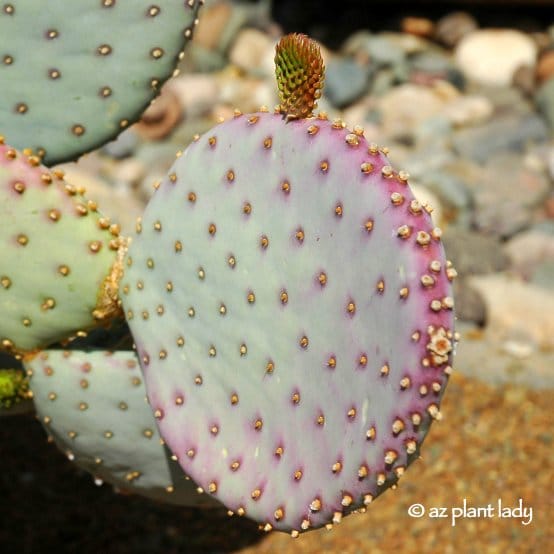
Do you like prickly cactus? I have a few favorites, one being the Santa-Rita Prickly Pear (Opuntia violaceae var. santa rita). The color contrast of their blue-grey pads and the shades of purple are so striking in the landscape.
The Santa-Rita Prickly Pear: A Stunning Accent Plant
The Santa-Rita prickly pear is a captivating addition to any landscape. Its blue-grey pads and vibrant shades of purple create a visually striking contrast. Not only is this cactus aesthetically pleasing, but both its pads and fruit are edible (though you may want to remove the spines first). Cold temperatures and drought conditions intensify the vivid purple color of this remarkable cactus.
Native Plant Beauty of the Southwest
Native to the Southwestern regions of North America, the Santa-Rita prickly pear can reach impressive dimensions, growing as large as 6 feet by 6 feet. However, if you prefer a smaller size, careful pruning at the junction where the pads connect can maintain a more manageable shape.
Blossoms and Wildlife with Prickly Cactus
In spring, the Santa-Rita prickly pear graces the landscape with lovely yellow flowers that later give way to red fruit during the summer months. Keep in mind that javelina, rabbits, and pack rats are occasional visitors that might nibble on the pads, while pack rats ingeniously use the pads to build their homes.
Handle with Care: Dealing with Spines and Glochids
Prickly pear pads are covered with clusters of 2″ spines and tiny spines known as glochids. Glochids are especially irritating to the skin and easily detach from the pad, making them challenging to remove. When handling these prickly cacti, use multiple layers of newspaper or a piece of carpet to protect your hands. Avoid gloves, as glochids can render them useless.
Removing Glochids Caused by Prickly Cactus
If you encounter glochids with prickly cactus, there are different methods to remove them, including applying Elmer’s glue, allowing it to dry, and then peeling off the glochids. However, many find greater success using duct tape for a more efficient removal process.
Versatile Uses in Landscaping
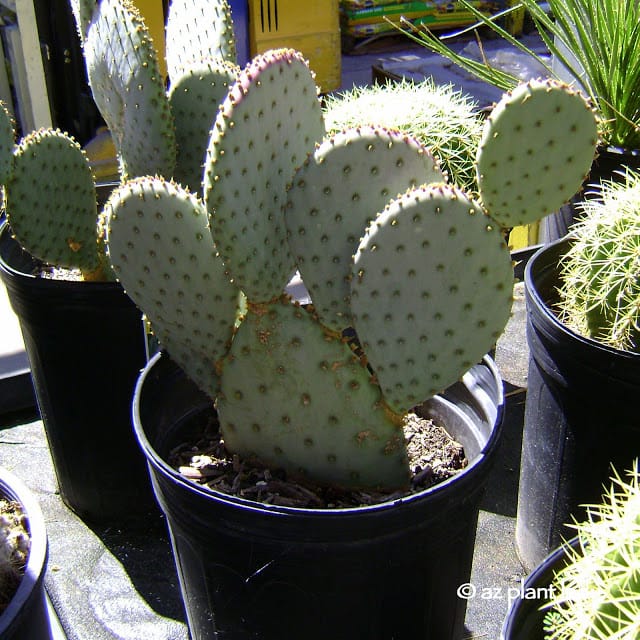
Beyond being a landscape accent, the Santa-Rita prickly pear serves as an excellent screen. Surprisingly, it can thrive in containers as well, although it’s essential to keep them away from high-traffic areas. These resilient cacti flourish in full sun or light shade and well-drained soil.
Low-Maintenance Prickly Cactus Beauty
Santa-Rita prickly pears are incredibly low-maintenance plants. When pruning, use tongs or newspaper to handle the trimmed pads. While they are highly drought-tolerant, occasional watering during the hot summer months, especially in the absence of rain, can enhance their appearance. Shriveled pads signal acute drought stress, so a little extra water can work wonders.
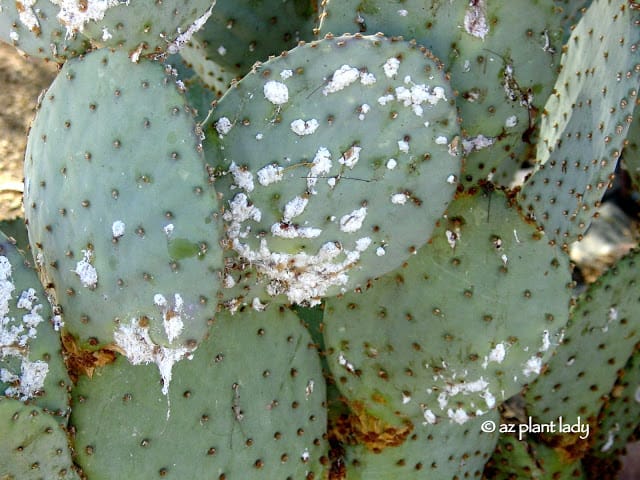
Addressing the Cottony Mystery on Prickly Cactus
Some might mistake white, cotton-like areas on the pads as a fungal infection, but it’s actually caused by a small insect known as cochineal scale. Removing this cottony mass is simple—just spray it off with a strong jet of water from the hose.
Propagation: A Simple Guide
You can propagate Santa-Rita prickly pear cacti with ease. Simply cut off a pad that is at least 6 inches tall, let it callus upright in a shady, dry spot for about two weeks, and then plant it with the cut end down.
Plant with the cut end down, do not water for the first month because the bottom is susceptible to fungal infections. After the first month, water every 2 – 3 weeks until established.
Timing Matters
Planting in the summer requires shade until the cactus is established (approximately three months). However, it’s often advisable to wait until spring when the soil warms up for planting, especially in regions with cold winters.
Renewed Growth: Pruning and Propagation
For those with established Santa-Rita prickly pear cacti, you can rejuvenate growth by pruning or starting anew. Simply remove the cactus, cut off some pads, and replant them in the same location. Many have embraced this method and have been delighted with the results.
An Interesting Historical Fact
The Aztecs would cultivate prickly pear cactus infected with cochineal scale because the insects secrete a dark red dye with crushed. This was used to dye cloth. The Spanish exported this dye from Mexico back to Europe where it was used to dye royal garments and British military uniforms. The dye was highly valued by the Spanish, next to gold and silver. It takes 70,000 insects to produce 1 pound of dye.
*This is but one of many beautiful prickly pear species available to the home gardener. Do you have a favorite species of prickly pear cactus?
https://www.azplantlady.com/wp-content/uploads/2009/09/Purple_Prickly_Pear_Opuntia_violaceae_santa-ritaFeb202C20042C2-05PM.jpg549640arizonaplantlady@gmail.comhttps://www.azplantlady.com/wp-content/uploads/2025/08/AZ-Plant-Lady-Logo-small.jpgarizonaplantlady@gmail.com2009-09-21 07:31:002023-09-01 14:45:45Purple, Prickly and Beautiful: Santa-rita Prickly Pear
We use cookies on our website to give you the most relevant experience by remembering your preferences and repeat visits. By clicking “Accept All”, you consent to the use of ALL the cookies. However, you may visit "Cookie Settings" to provide a controlled consent.
This website uses cookies to improve your experience while you navigate through the website. Out of these, the cookies that are categorized as necessary are stored on your browser as they are essential for the working of basic functionalities of the website. We also use third-party cookies that help us analyze and understand how you use this website. These cookies will be stored in your browser only with your consent. You also have the option to opt-out of these cookies. But opting out of some of these cookies may affect your browsing experience.
Necessary cookies are absolutely essential for the website to function properly. These cookies ensure basic functionalities and security features of the website, anonymously.
Cookie
Duration
Description
cookielawinfo-checkbox-analytics
11 months
This cookie is set by GDPR Cookie Consent plugin. The cookie is used to store the user consent for the cookies in the category "Analytics".
cookielawinfo-checkbox-functional
11 months
The cookie is set by GDPR cookie consent to record the user consent for the cookies in the category "Functional".
cookielawinfo-checkbox-necessary
11 months
This cookie is set by GDPR Cookie Consent plugin. The cookies is used to store the user consent for the cookies in the category "Necessary".
cookielawinfo-checkbox-others
11 months
This cookie is set by GDPR Cookie Consent plugin. The cookie is used to store the user consent for the cookies in the category "Other.
cookielawinfo-checkbox-performance
11 months
This cookie is set by GDPR Cookie Consent plugin. The cookie is used to store the user consent for the cookies in the category "Performance".
viewed_cookie_policy
11 months
The cookie is set by the GDPR Cookie Consent plugin and is used to store whether or not user has consented to the use of cookies. It does not store any personal data.
Functional cookies help to perform certain functionalities like sharing the content of the website on social media platforms, collect feedbacks, and other third-party features.
Performance cookies are used to understand and analyze the key performance indexes of the website which helps in delivering a better user experience for the visitors.
Analytical cookies are used to understand how visitors interact with the website. These cookies help provide information on metrics the number of visitors, bounce rate, traffic source, etc.
Advertisement cookies are used to provide visitors with relevant ads and marketing campaigns. These cookies track visitors across websites and collect information to provide customized ads.