What if you could just step outside your door and snip some herbs without having to go to the store?
Have you seen how expensive fresh herbs are at the supermarket by the way?And, who wants floppy herbs when they can have fresh ones?
I am often asked whether it is easy to grow herbs in the desert garden and I always answer, “yes!”
Herbs come from mostly arid regions and so they flourish in our climate. They also like the sun, which we have plenty of.
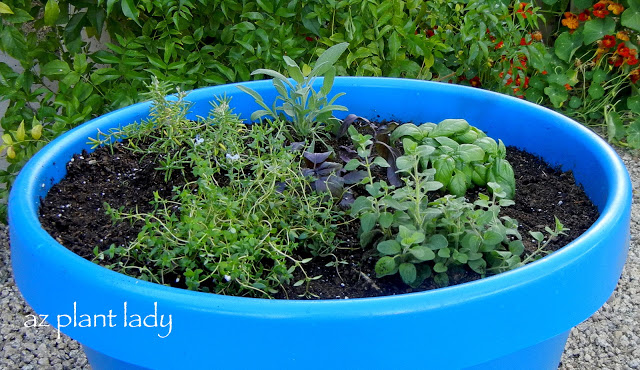
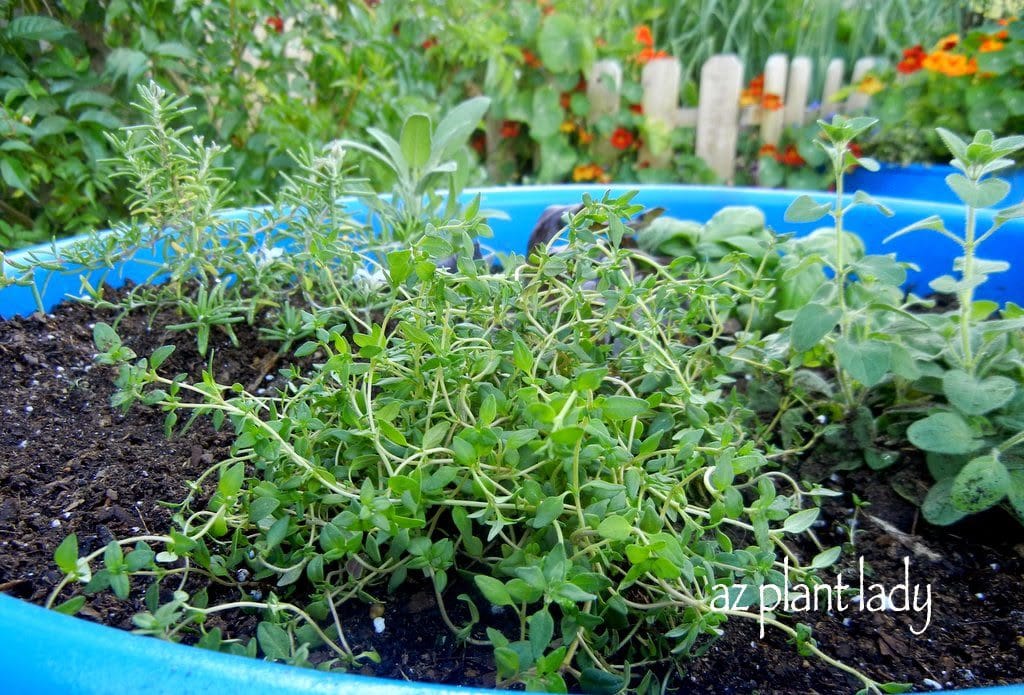
One of my favorite ways to grow herbs in containers. In fact, they do extremely well in pots – especially when planted together. Imagine having a variety of herbs growing in a container near your kitchen door.
It’s easy to do and here is how:
1. Place your container in an area that receives at least 6 hours of sun.
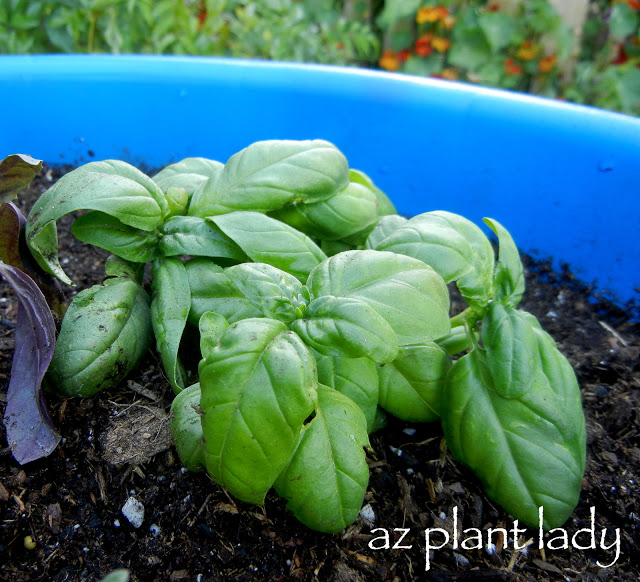
Basil
2. Fill your container with planting mix, which is sterile, has a light texture and is specially formulated for container plants. It retains just the right amount of moisture for plants. Potting soil can become soggy.
3. Add a slow-release fertilizer, such as Osmocote, and work it into the top 2-inches of soil.
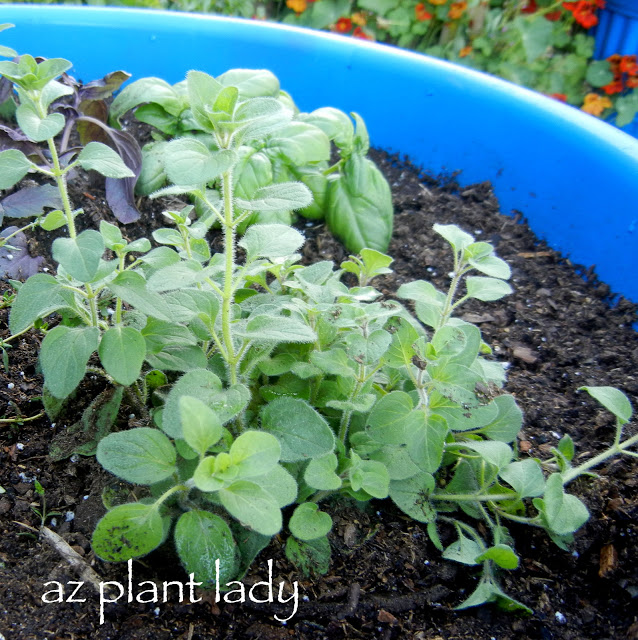
Oregano
4. Plant your herbs. Oregano, rosemary, sage, and thyme are easiest to grow when you start out with transplants. Basil grows easily from seed, but can you also use transplants?
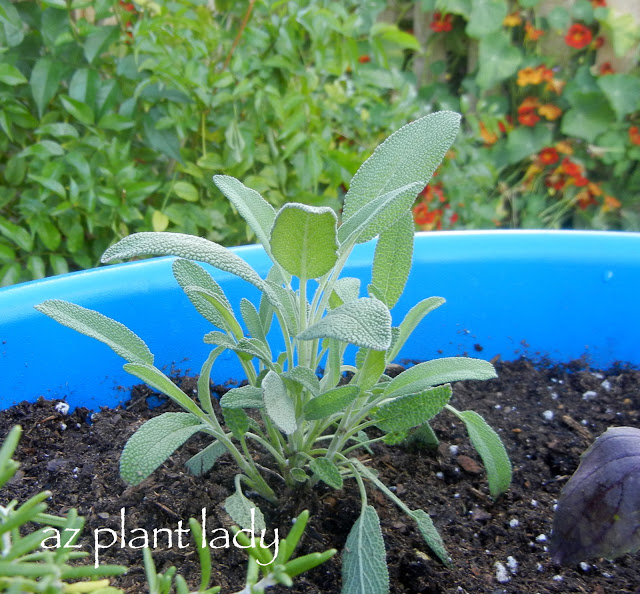
Sage
5. Water deeply. Do not wet the foliage when you water them as they prefer to stay dry.
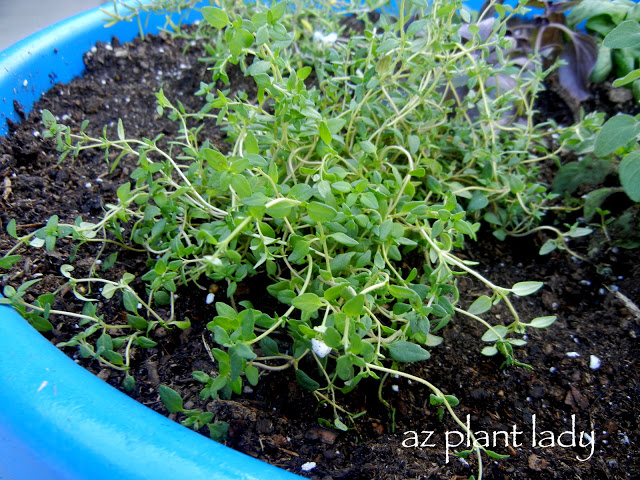
Thyme
6. Herbs like to dry out between watering. To check when they need water, simply stick your finger down to 1-inch deep – if the soil is moist, don’t water. However, if it’s almost dry, then water deeply until water runs out the bottom drainage hole.
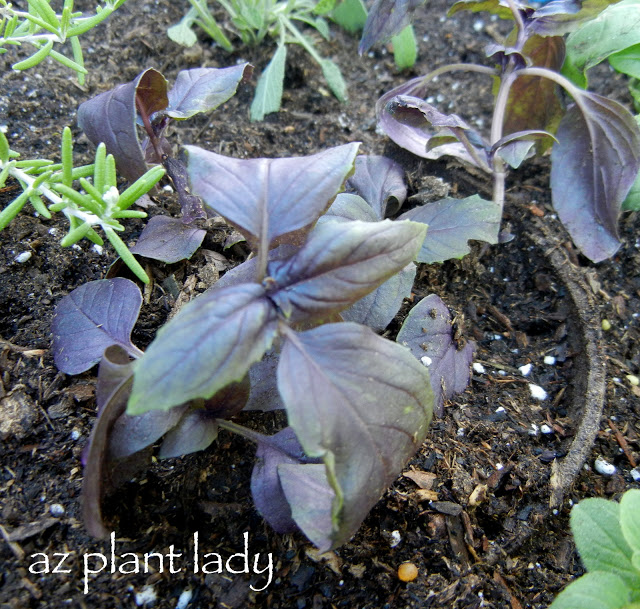
Purple Basil (Not the healthiest specimen, but it was the only one they had – it was over-watered at the nursery).
7. Don’t add any additional fertilizer after planting. Herbs don’t like extra fertilizer since it causes them to grow larger leaves with fewer oils, which is what gives them their flavor.
I like to place my herbs near my vegetable garden.
Here in the desert, we can grow herbs all year long. However, I do like to dry herbs like basil, which don’t live through our winters.
I encourage you to dip your toes into growing your own herbs. You can find transplants at your favorite nursery, so find a sunny spot and get started!
https://www.azplantlady.com/wp-content/uploads/2012/04/Herb-Container.jpg370640arizonaplantlady@gmail.comhttps://www.azplantlady.com/wp-content/uploads/2025/08/AZ-Plant-Lady-Logo-small.jpgarizonaplantlady@gmail.com2021-05-03 11:35:002022-09-11 23:27:54Create a Herb Container
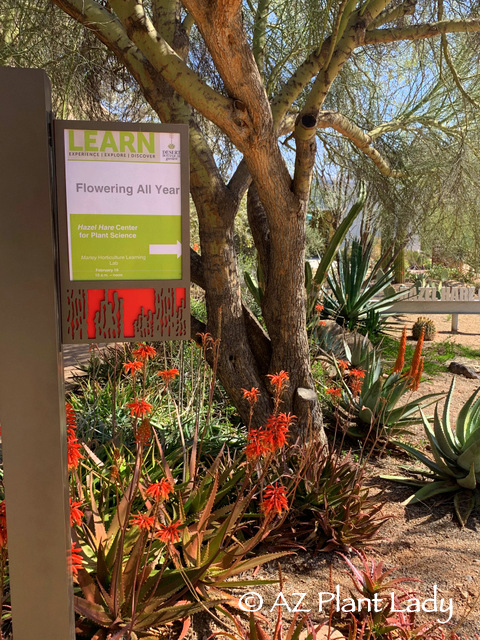
Winter Garden Wonders: Did you know that you can have plants blooming in your landscape every month of the year? In the desert garden, this is definitely true!
One of the most popular programs that I teach at the Desert Botanical Garden in Phoenix is ‘Flowering All Year’. During the presentation, I teach students how to incorporate plants in their gardens so they can enjoy colorful blooms all year long.
A Winter Wonderland of Desert Blooms
Sadly, many desert dwellers miss this opportunity. Drive down a typical neighborhood street in winter, and you will have a hard time finding plants in bloom except for colorful annual flowers. As you’ll note, the focus in our gardens is typically on plants that flower through the warm season.
So, how can we change that? It’s quite simple – add plants that will flower in winter. Believe it or not, there are quite a few plants that fit the bill.
I invite you to come along with me on a virtual tour of the plants I showed to the students in the class as we walked through the winter garden in mid-February.
*Before we embark on our walk, I have a confession to make. Usually, I arrive early before my classes to see what’s in bloom so I can plan our route. But, my daughter’s bus arrived late that morning, so I was running a bit late. As a result, I didn’t know what we would see. Thankfully, there was plenty to see.
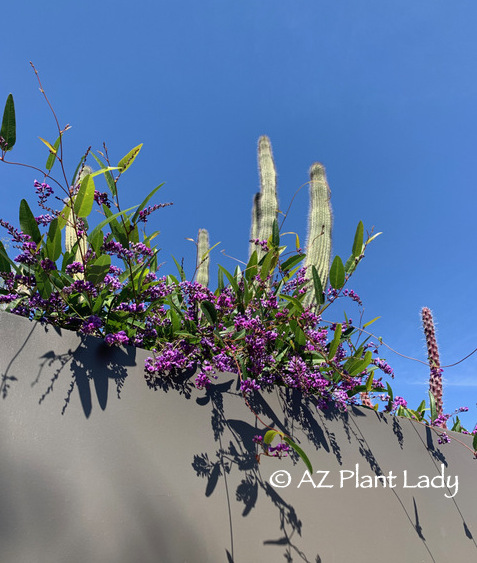
Purple Lilac Vine (Hardenbergia violaceae)
Plants for Cool-Season Winter Garden Color
Let’s start by discovering some of the remarkable plants that grace the winter garden with their presence:
1. Purple Lilac Vine (Hardenbergia violaceae)
The vibrant, blooms of purple lilac vine never disappoint. Blooms appear in mid-winter, adding a welcome relief to colorless winter landscapes. Here it is planted in a tall raised bed and allowed to trail downward. In my garden, it grows up against a wall with a trellis for support.
Whale’s Tongue Agave and Mexican Honeysuckle underneath an Ironwood tree
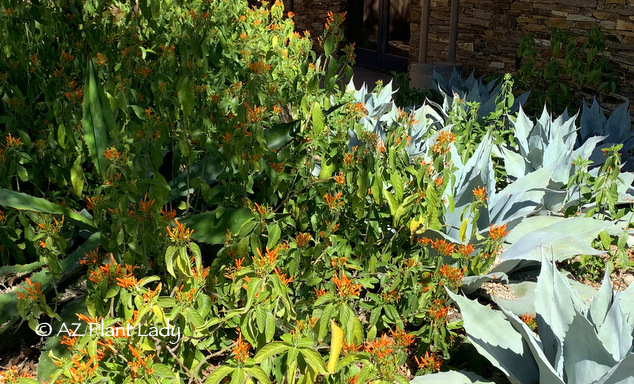
2. Mexican Honeysuckle (Justicia spicigera)
Mexican Honeysuckle (Justicia spicigera)
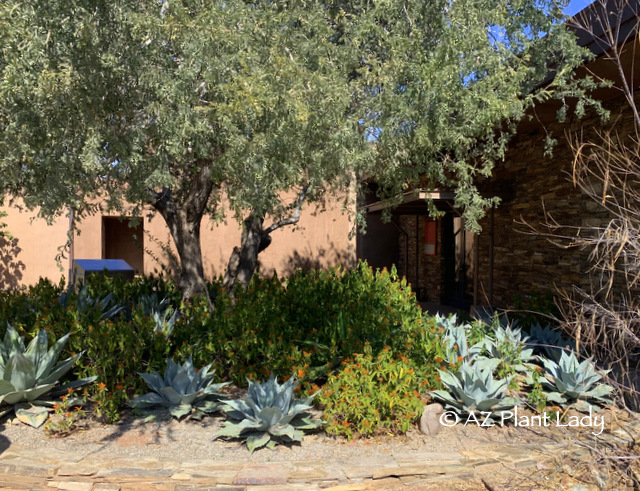
Several perennials and small shrubs do best in the desert garden when planted in filtered sunlight. Desert trees like ironwood, mesquite, and palo verde are excellent choices for producing filtered sunlight. Mexican honeysuckle doesn’t do well in full sun. As a result, it thrives under the shade of this ironwood tree. I love the texture contrast in this bed next to the whale’s tongue agave in this winter garden.
3. Desert Marigold (Baileya multiradiata) and Weber’s Agave (Agave weberi)
Weber’s Agave (Agave weberi) and Desert Marigold (Baileya multiradiata)
Desert marigold is a short-lived perennial that resembles a wildflower. Yellow flowers appear throughout the year on this short-lived perennial. I like to use them in wildflower gardens or natural desert landscapes because this yellow bloomer will self-seed.
4. Firesticks (Euphorbia ‘Sticks on Fire’) and Elephants Food (Portulacaria afra)
Firesticks (Euphorbia ‘Sticks on Fire’) and Elephants Food (Portulacaria afra)
Shrubs, vines, and perennials aren’t the only plants that add winter color in the landscape. Colorful stems of the succulent ‘Firesticks’ add a splash of orange all year. I am a fan of the use of blue pots in the garden, and here, it adds a powerful color contrast with the orange.
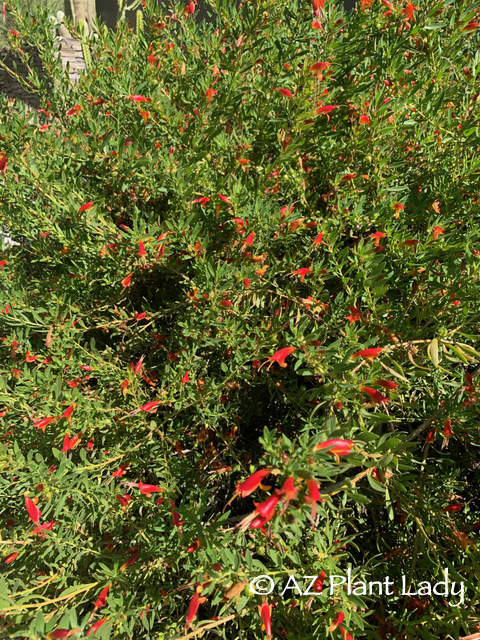
5. ‘Winter Blaze’ (Eremophila glabra)
‘Winter Blaze’ (Eremophila glabra)
Lush green foliage decorated with orange/red blooms is on display all year long with this Australian native. Several types of Eremophilas add cool-season color to the landscape, and this one deserves more attention. There must be a blank space in my garden for one…
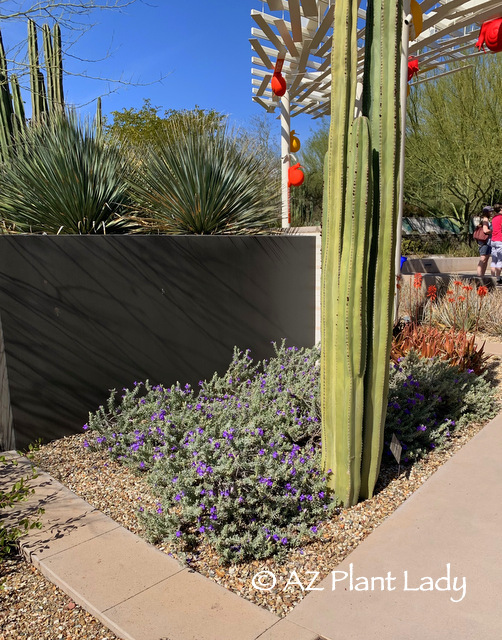
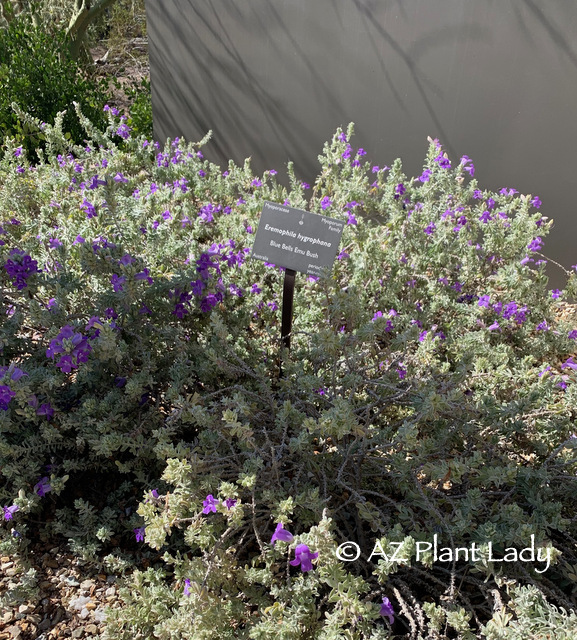
Blue Bells Eremophila and Mexican Fence Post Cactus
‘Blue Bells’ (Eremophila hygrophana)
Without a doubt, ‘Blue Bells’ is arguably one of my most favorite plants. It resembles a compact Texas sage (Leucophyllum spp.) but doesn’t grow as large AND blooms throughout the year. For best results, plant in full sun, but well-drained soil is a must.
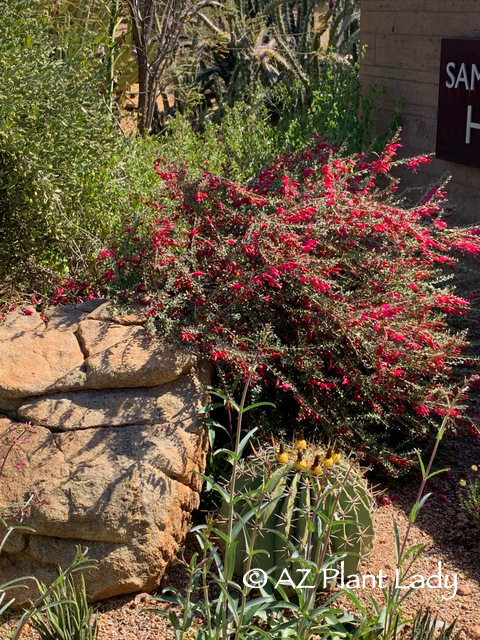
7. Valentine Bush (Eremophila maculata ‘Valentine’)
Valentine Bush (Eremophila maculata ‘Valentine’)
My favorite choice for winter color is Valentine bush. Red/fuschia blooms begin to appear in January and last into April. For maximum color impact, use them in groups of 3 – 5. They are low maintenance – prune back to 1/2 their size in mid-April after flowering. No other pruning is required.
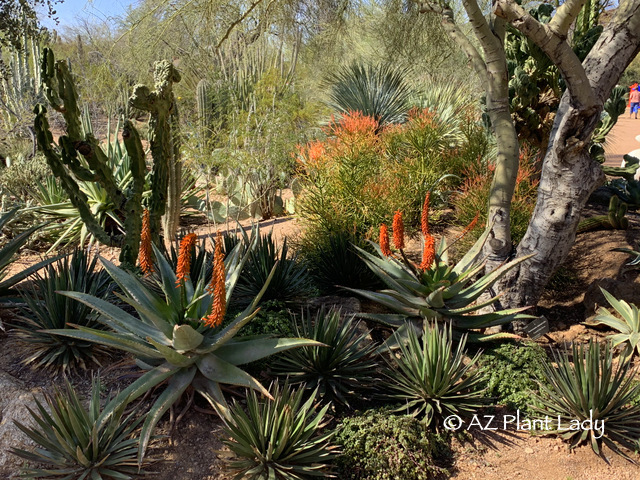
8. Aloe ferox
Aloe ferox
Winter into spring is a busy time for aloes, and many species do well in the desert garden. Most require filtered sunlight to do their best, but ‘Blue Elf’ aloe does well in both full sun and bright shade.
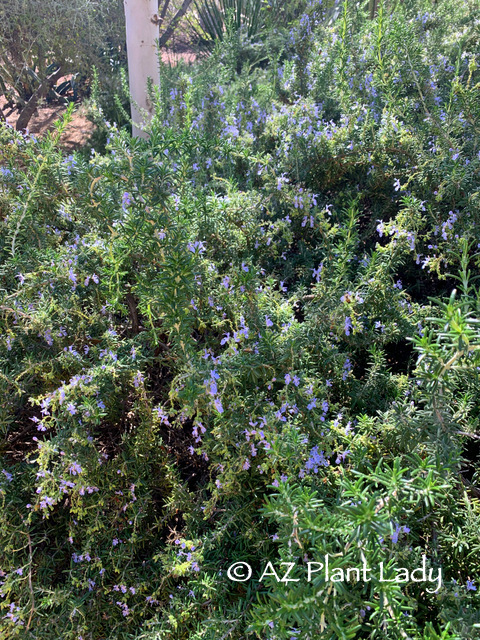
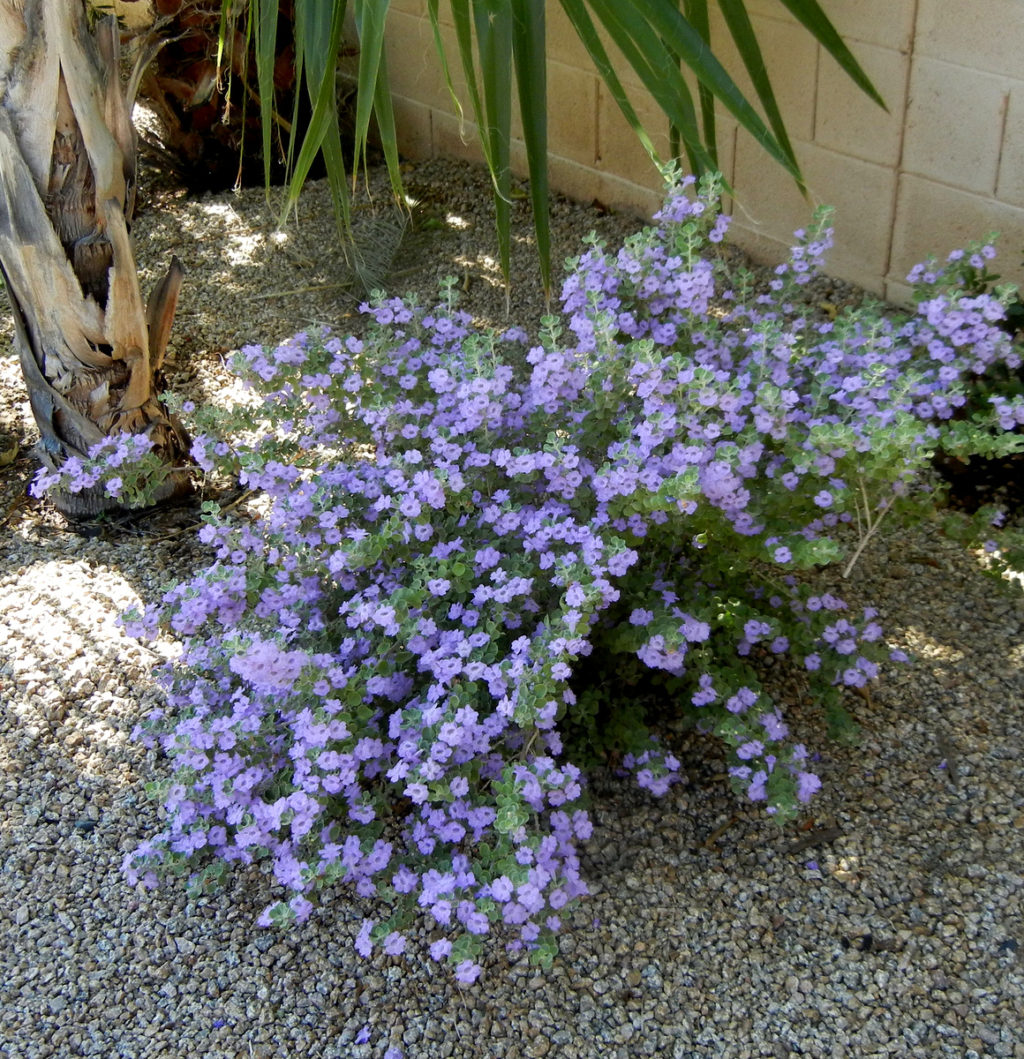
People from colder climates are often surprised to note that rosemary flowers. In the desert, we are fortunate that we get to enjoy their blue flowers from winter through spring – the bees like them too!
Shrubby Germander (Teucrium fruiticans ‘Azurea’)
Toward the entrance to the garden, I was delighted to see shrubby germander. A star in my own garden, this shrub has flowered all winter long and will continue to do so into spring. The blooms are a lovely periwinkle color.
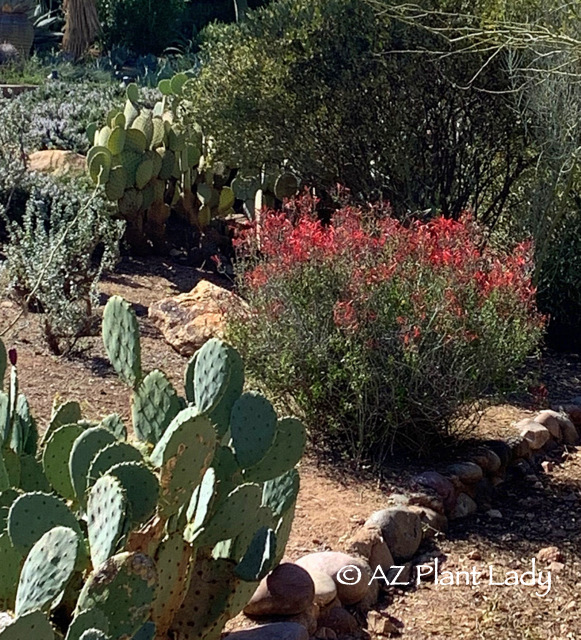
11. Chuparosa (Justicia californica)
Chuparosa (Justicia californica)
As our walk was wrapping up, the bright red blooms of a chuparosa shrub caught our eye. A hummingbird was busily drinking as much nectar as he could. I like to use this shrub in winter garden landscapes with a natural theme as it has a sprawling growth habit. It flowers through winter into spring and an important nectar source for hummingbirds.
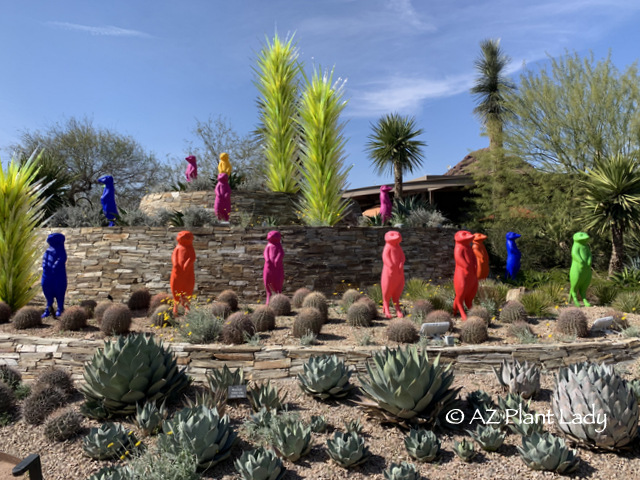
Beyond Blooms: Adding Artistic Flair to the Winter Garden
Of course, blooming plants aren’t the only way to add color to the garden. Garden art can play a vital part in adding interest. The Desert Botanical Garden is host to a traveling art exhibit with various animals made from recycled plastic. This group of meerkats greets visitors to the garden.
I hope that you enjoy this virtual tour of winter garden color in the garden and will add some to your own.
https://www.azplantlady.com/wp-content/uploads/2020/02/Desert_Botanical_Garden_Winter_Flowering_Plants_Arizona_Gardening-Purple-Lilac-Vine-Hardenbergia.jpg563477arizonaplantlady@gmail.comhttps://www.azplantlady.com/wp-content/uploads/2025/08/AZ-Plant-Lady-Logo-small.jpgarizonaplantlady@gmail.com2020-02-19 12:20:292023-10-09 14:54:40A Stroll Through a Flowering Winter’s Garden
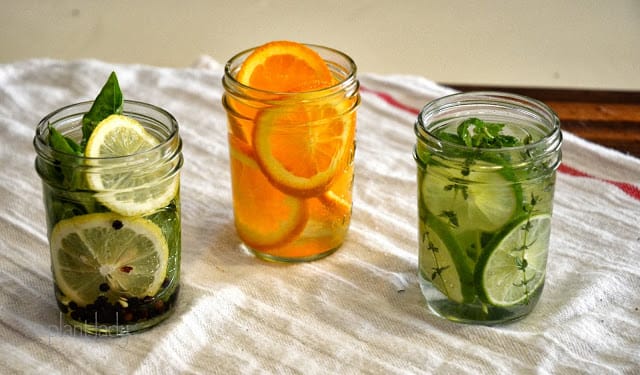
A Breath of Fresh Air: Creating Natural Air Fresheners
Have you ever sprayed air freshener in your home? Does it ever smell like the fragrance described on the can? I must confess that I have used air-fresheners in the past, but I’ve never happy with how my house smelled afterward. To me, the fragrance is so ‘artificial,’ and I also wonder if there are some ingredients in them that maybe aren’t good to inhale.
Discover the Beauty of Natural Fragrances
So, I was intrigued when I heard about ‘natural’ air fresheners made from plants – many of which I have in my garden.
Imagine your home filled with the natural fragrance of citrus paired with your favorite herbs drifting throughout – no overpowering, artificial fragrance, just subtle, refreshing scents.
How to Make Your Own Natural Air Fresheners
The combinations are endless, and the fragrance is released into the air by adding the contents and enough water to fill a small pot at least 1/2 – 3/4 full. Heat to boiling and then turn the heat down to low and allow it to simmer for a couple of hours. That’s it!
So are you as excited about creating your own ‘natural’ air fresheners as I am?
Natural Ingredients for Your Unique Fragrance
Let’s get started with some ingredients that you can use for your unique fragrant combination(s):
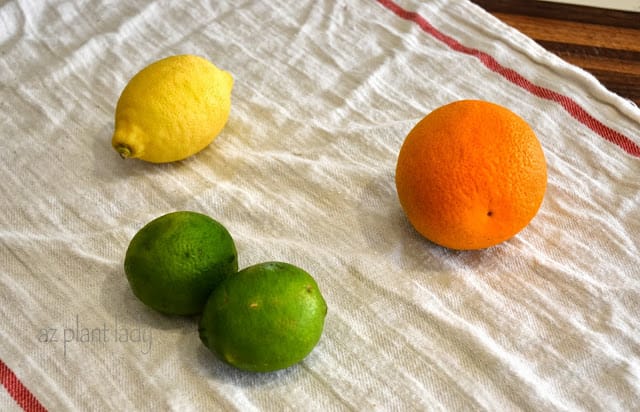
Citrus Delights
All types of citrus are refreshing and can serve as the base of your air freshener. I chose lemons, oranges and limes. But, if you have a grapefruit tree that is overly generous with its fruit, they would work well too!
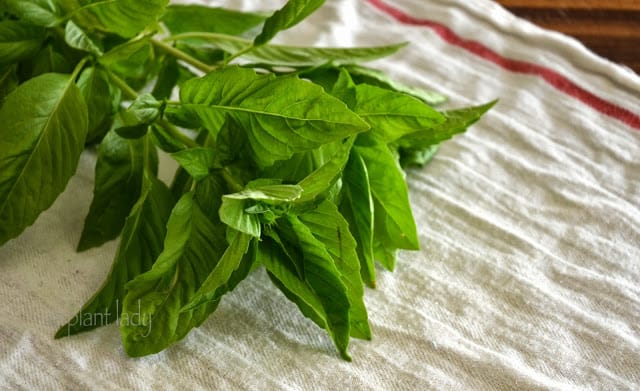
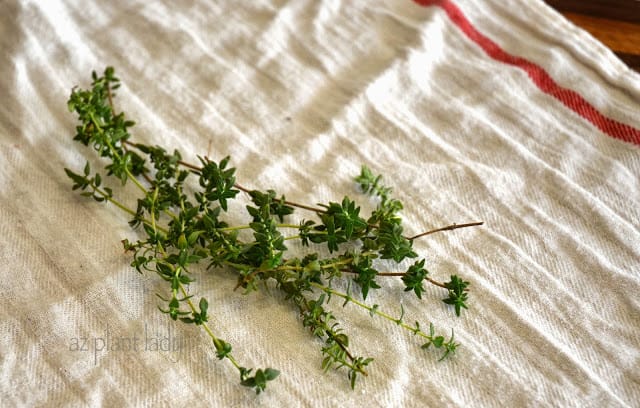
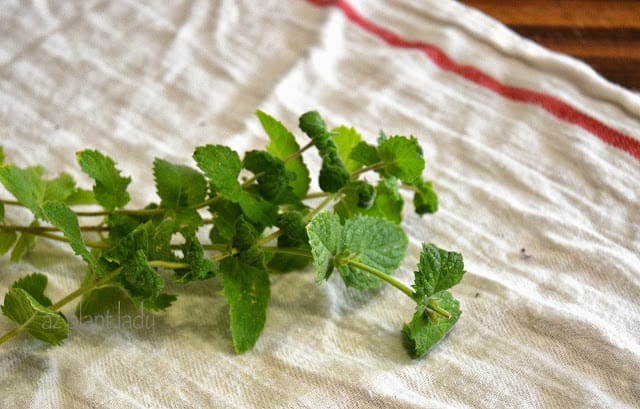
A Touch of Herbs
Now let’s grab some herbs for your natural air fresheners from the garden or the grocery store).
Basil
2. Thyme
3. Mint
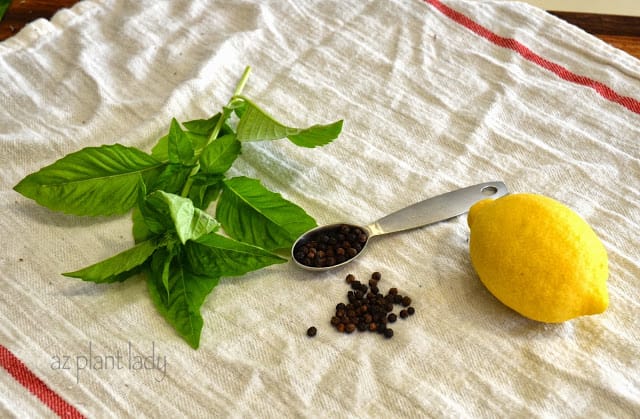
Rosemary and lavender would also work great. I also use vanilla extract and peppercorns in my mixtures.
Crafting Your Natural Air Freshener
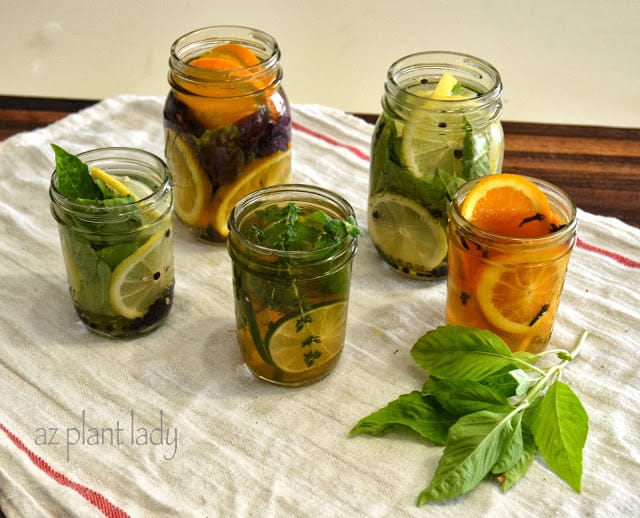
Here are a few that I made.
Cooking (and eating) Italian food is some of my favorite – even though I have no Italian ancestry that I know of.
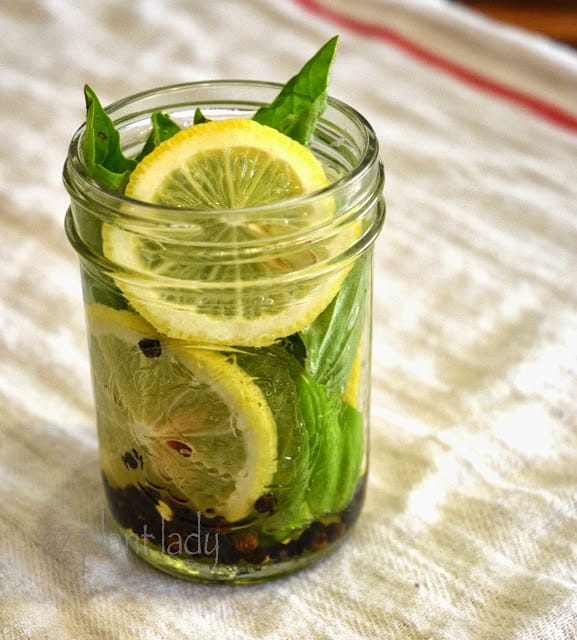
I used 1 sprig of basil, 1 teaspoon of black peppercorns and a few slices of lemon – it makes my home smell fresh as I imagine an Italian kitchen would smell like.
Add these ingredients to jars and fill them with water to the top. For this project, I used Ball mason jars.
I think it looks pretty, don’t you? Of course, if you are going to use use them right away, skip the jar and add directly to a small pot. Pour more water until it reaches 3/4 full, heat to boiling, lower the heat to low and enjoy for a few hours – KEEP an eye on the water level and add more as needed – DON’T let it dry out.
More Natural Fragrance Combinations
Here is another combination that I like.
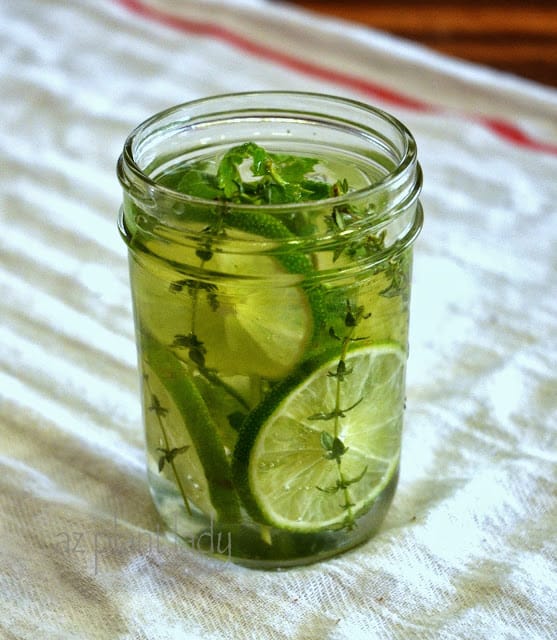
A few slices of lime, 4 – 5 sprigs of thyme, a sprig of mint and a teaspoon of vanilla extract.
You can make one air freshener at a time, or create a few and store them in the refrigerator for a week. You can freeze them for longer until ready to use – just make sure to freeze them in a freezer-safe container such as a wide-mouth jar.
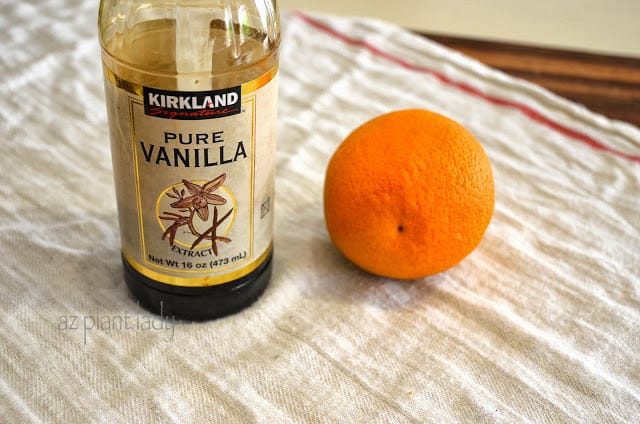
Lastly, this is my favorite combination, and only has two ingredients.
Oranges and vanilla extract.
I sliced half an orange and added 1 teaspoon of vanilla extract.
The fragrance reminds me of orange cream – YUM!
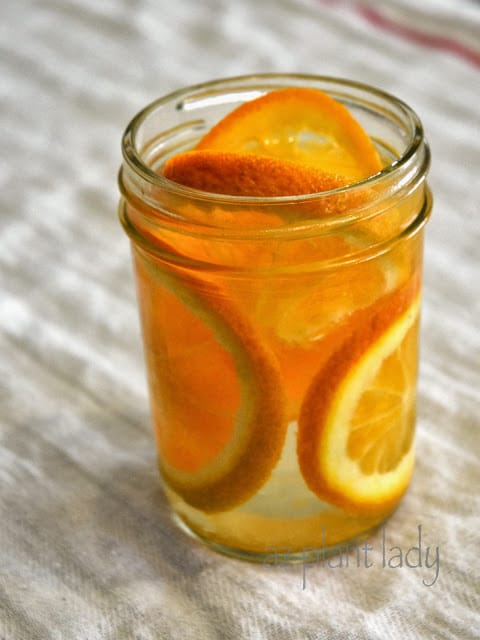
You can also add cinnamon sticks or a few whole cloves to this mixture for a spicier fragrance.
Exploring Natural Fragrance Variations
If you have ever stepped into a Williams & Sonoma store, they have their own natural air freshener recipe:
Lemon slices
Rosemary sprigs
1 teaspoon of vanilla extract
In addition to the ingredients I’ve used, here are some others that you can experiment with to create your own unique natural air freshener.
Citrus or apple peels, almond, coconut, or peppermint extract along with herbs like ginger, nutmeg, ground cinnamon, whole cloves, bay leaves, basil, sage, lavender, oregano, and rosemary.
Freshen Your Home Naturally
So if you want to add a little freshness to your home, don’t waste your time spraying artificial fragrance through your home. You can create wonderful combinations of scents using items from your garden, refrigerator, and pantry.
I hope you enjoy making these natural air fresheners as much as I do!
https://www.azplantlady.com/wp-content/uploads/2013/10/DSC_0898.jpg375640arizonaplantlady@gmail.comhttps://www.azplantlady.com/wp-content/uploads/2025/08/AZ-Plant-Lady-Logo-small.jpgarizonaplantlady@gmail.com2019-10-16 07:15:002023-09-01 15:38:24DIY: Create Natural Air Fresheners From the Garden
Have you ever driven by a newly-planted landscape? If so, you probably noticed that many of the plants were quite small.
I like to joke that sometimes you need a magnifying glass just to see the new plants. But as small as they are, within a short amount of time, those plants start to grow.
Look at the same landscape three years later. The plants are well-established and look great.
Fast forward eight-ten years, and you may start to see signs of some plants becoming overgrown and unattractive.
When this happens to shrubs, we can often push a ‘restart button’ (for most types of shrubs) and prune them back severely in spring using a good pair of loppers, which reduces their size. I use my Corona loppers to do major pruning of my shrubs.
However, there are some plants where this approach doesn’t work.
Let’s identify a few of these plants and how to deal with them once they outgrow their allotted space or become filled with old, woody growth.
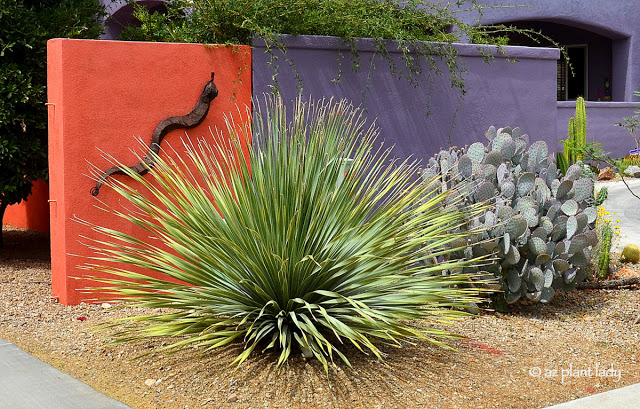
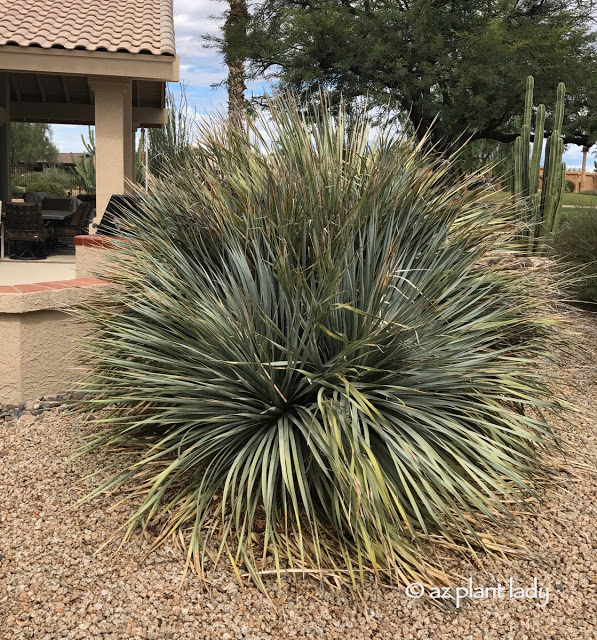
Desert Spoon (Dasylirion wheeleri)
Desert spoon is one of my favorite plants. I love how its blue-gray, spiky leaves add texture to the garden and contrast with plants that have darker green foliage.
After ten years or more in the landscape, desert spoon can start to take on a ragged, rather unattractive appearance, as well as grow quite large.
When this happens, I recommend that they be removed and a new one planted in its place.
Now, some of you may think that may seem wasteful, but I invite you to take another look at your landscape and the plants within it.
Your outdoor space isn’t static and unchanging. Its appearance changes with the seasons with plants blooming at different times. Trees gradually extend the amount of shade they provide and plants change in size.
A newly planted garden doesn’t look the same through the years, it changes.
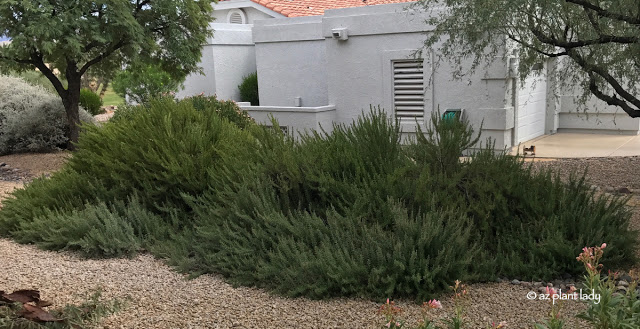
Rosemary is a good choice for those who want rich, dark green color in the garden. Bees love the light blue flowers that appear in late winter and spring, and the aromatic foliage can be used to flavor your favorite dishes.
But, as time passes, it does get bigger, outgrowing its original space.
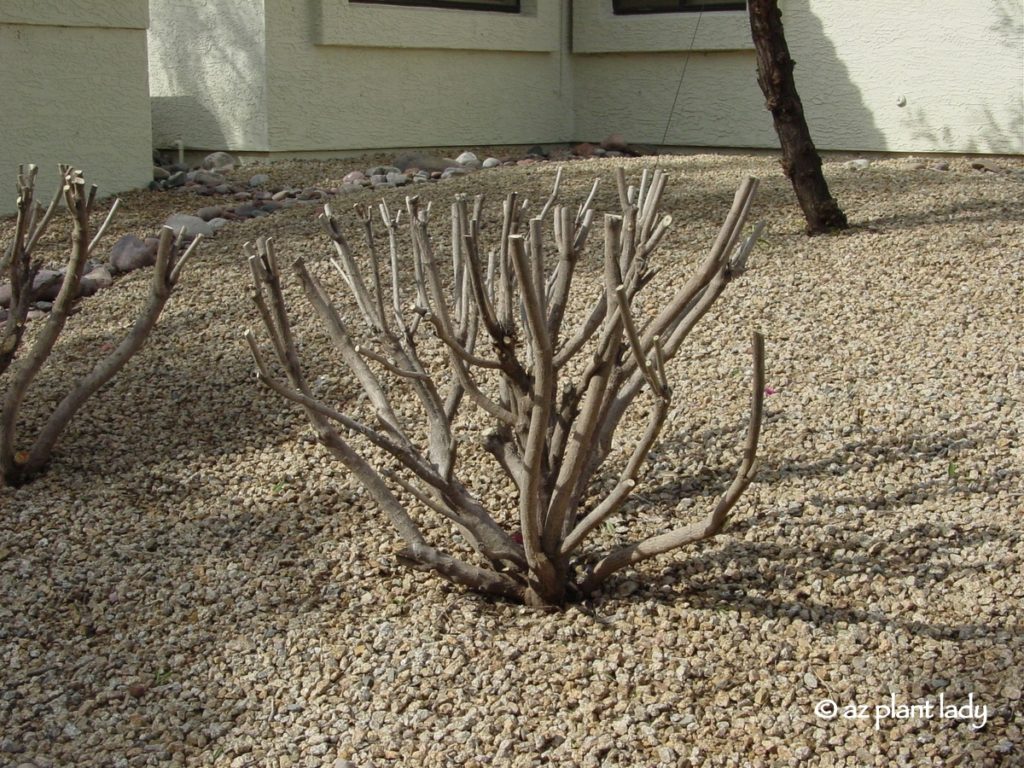
When this happens, people start to shear their rosemary, which is stressful for the plant and contributes to sections of branches dying.
For those who don’t like the formal look, pruning rosemary back severely would be your first impulse. But, the problem with rosemary is that they don’t respond well to severe pruning.
So again, in this case, it’s best to pull out the old rosemary and add a new one, which will provide beauty for several years.
Rosemary hedge
To avoid having to remove and replace rosemary too often, allow them plenty of room to grow to their mature size.
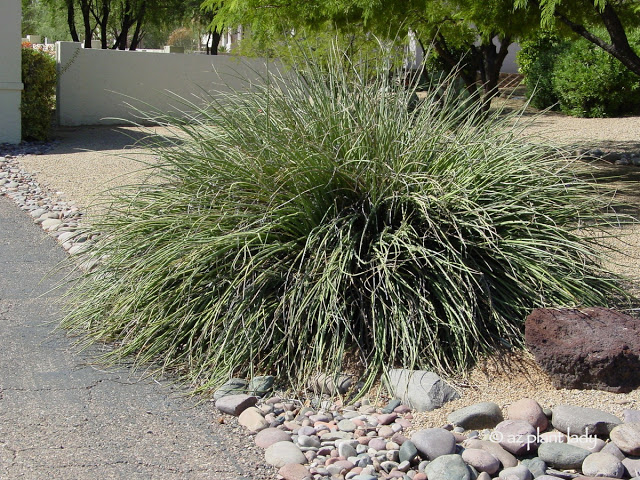
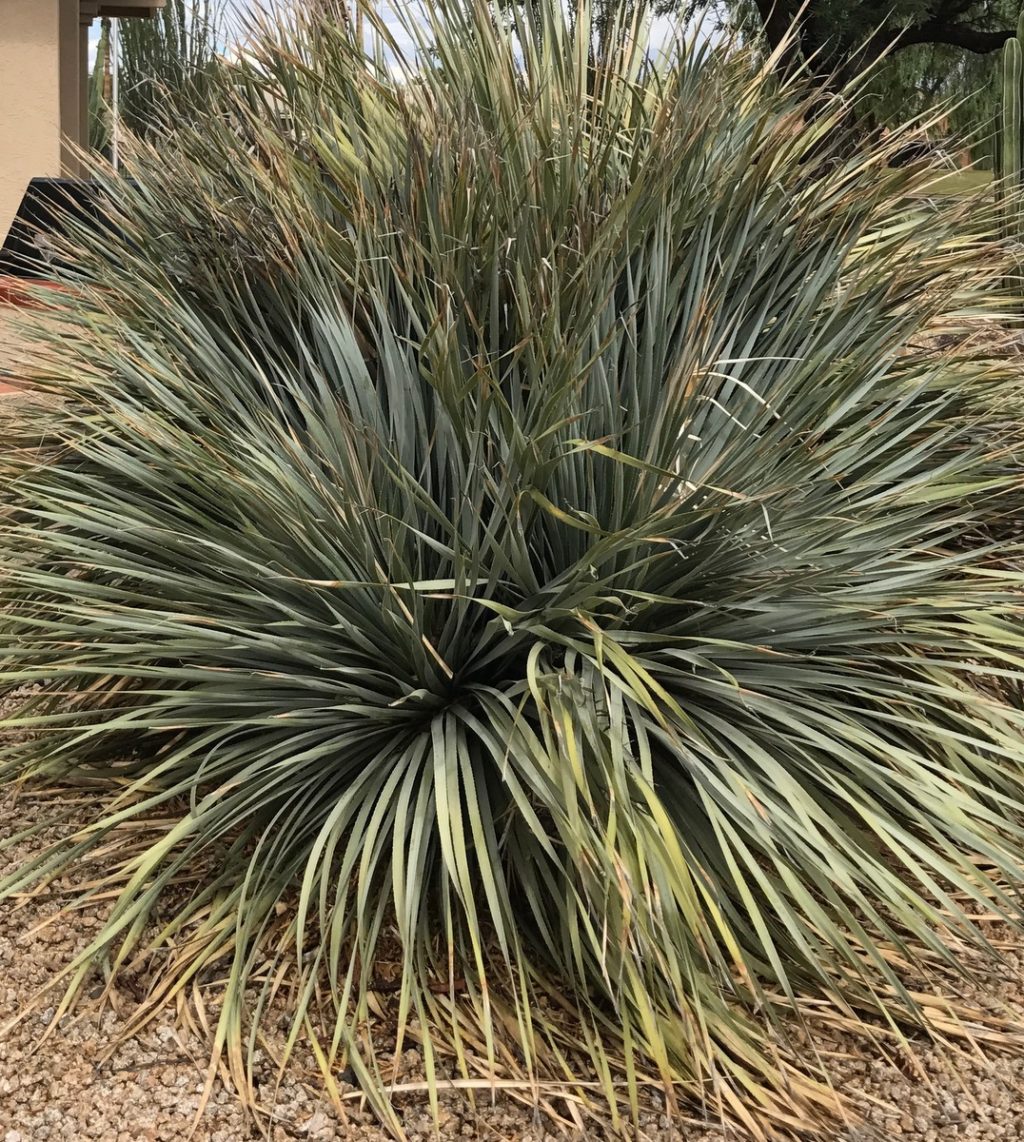
Red Yucca (Hesperaloe parviflora)
Red yucca is prized for its succulent, green leaves that resemble an ornamental grass and its coral flowers, which appear spring through fall.
Once it has been growing seven years or more, red yucca may overwhelm the landscape visually. This is particularly true if the area it’s growing in isn’t very big.
Occasionally, some people will try to remove the outer leaves at the base. However, this is laborious and only serves to stimulate red yucca to grow back faster.
In those situations, I tell people that their plant has had a nice life, but it’s time to start over.
Newly-planted red yucca
You may be thinking, why use plants that you’ll only have to replace after seven to ten years?
Well, all three of these plants add beauty to the landscape and are low-maintenance.
Another way to think of it is to compare your landscape with the interior of your home. Do you make small changes to the decor of your home every few years to keep it looking fresh and attractive? The same should be true of the outside.
Replacing a few plants after seven years or more isn’t expensive. Don’t you think that the beauty these plants offer to your outdoor space makes them worth it?
https://www.azplantlady.com/wp-content/uploads/2016/10/Johnsonfrontyard.jpg353640arizonaplantlady@gmail.comhttps://www.azplantlady.com/wp-content/uploads/2025/08/AZ-Plant-Lady-Logo-small.jpgarizonaplantlady@gmail.com2019-10-09 07:14:002020-12-15 10:36:00Old, Overgrown Plants: Time to Start Over?
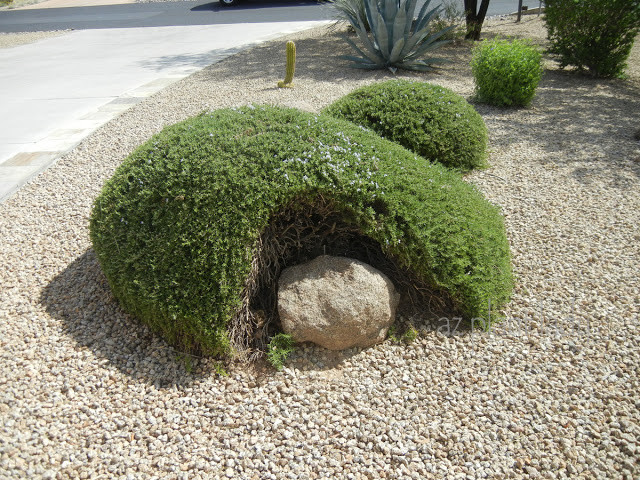
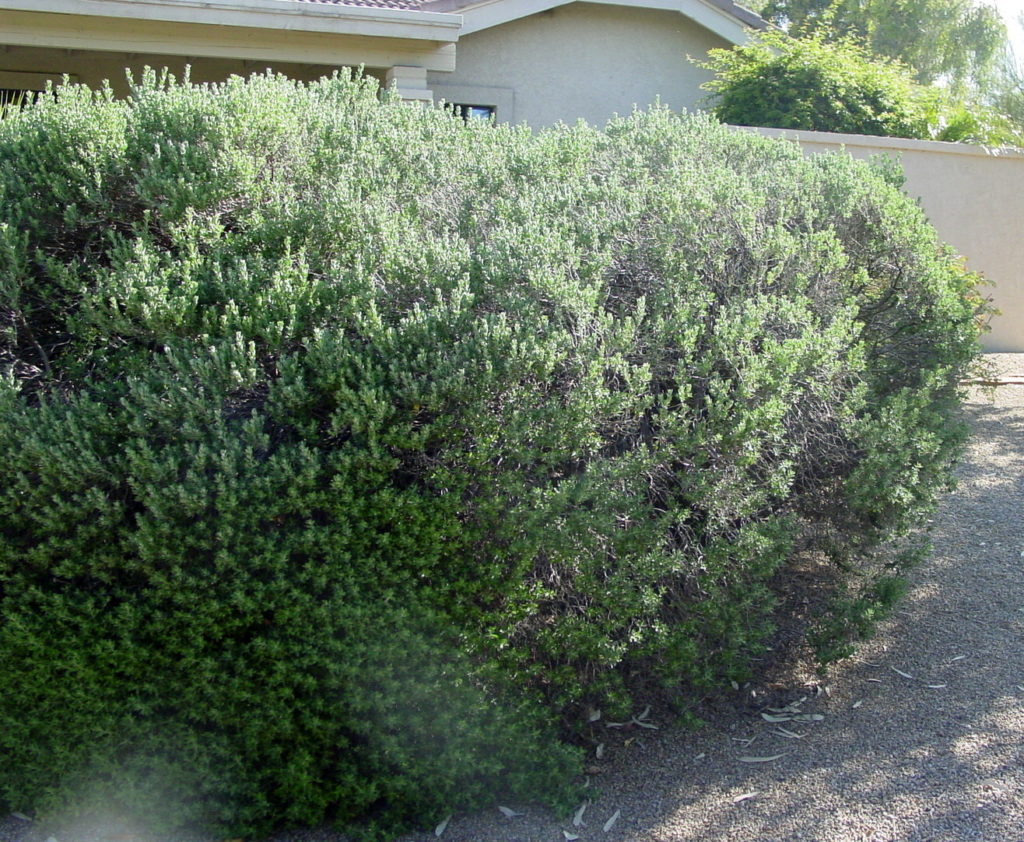
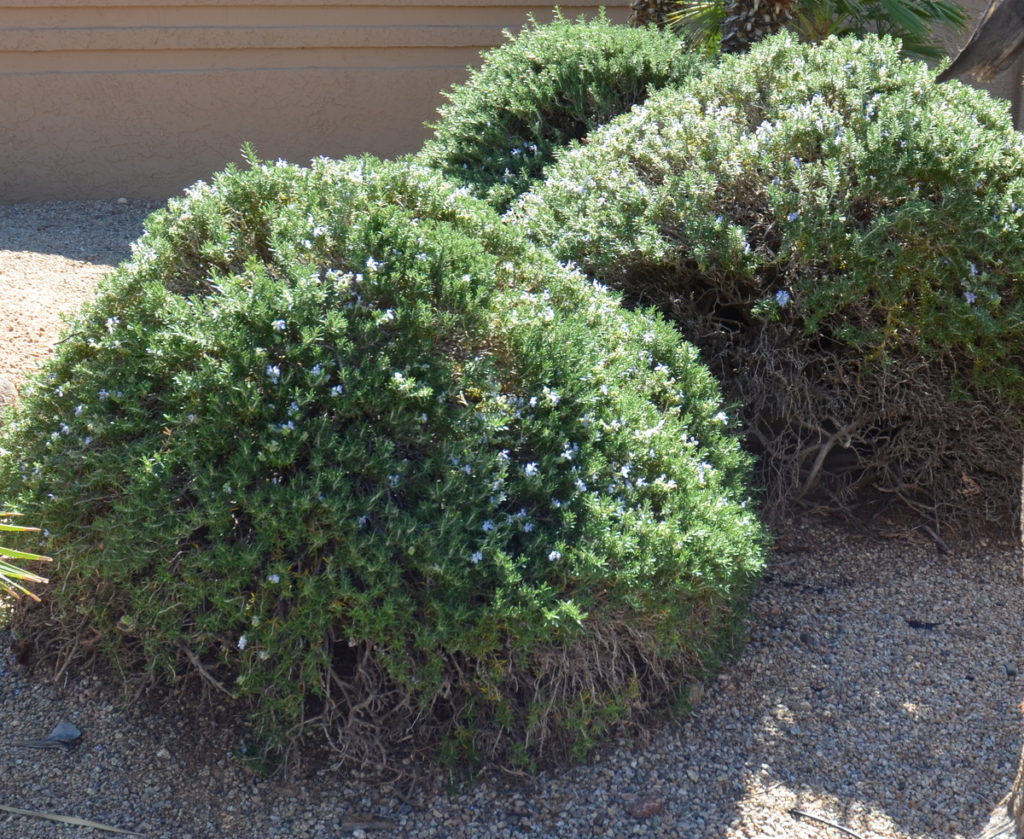
Dealing with the Dilemma of an Overgrown Plant: To Prune or Replace?
Overgrown plant, old Texas sage (Leucophyllum frutescens ‘Green Cloud’)
The Challenge of Aging Plants in the Landscape
You have undoubtedly seen old, overgrown plants filled with mostly leafless branches that rarely flower anymore. Or, perhaps it is an aged succulent that has brown patches. The patches can slowly encroach onto the upper parts of the plant from the base. So, what is the solution for plants that no longer add decorative value to our landscape?
Old rosemary filled with unproductive woody growth
The Power of Severe Renewal Pruning
Dealing with overgrown plants is a common challenge for gardeners and landscapers. Understanding when to prune and when to replace is crucial for maintaining a beautiful landscape.
Not all plants respond well to severe pruning; some are better replaced altogether. Let’s discuss specific Southwestern shrubs and succulents.
Oleander that has undergone severe renewal pruning in spring.
Springtime Rejuvenation
Many shrubs can be rejuvenated by severely pruning them back, which gets rid of old, woody growth and stimulates the production of new branches, which will flower more (in the case of flowering shrubs). It is helpful to think of severe renewal pruning as the “fountain of youth” for many plants.
This type of pruning is best done in spring, once the weather begins to warm up. Shrubs that respond well to this include bougainvillea, jojoba, lantana, oleander, Texas sage, and yellow bells. It’s important to note that not all shrubs will come back from this method, but the pruning didn’t kill the shrub – it only hastened the demise of the plant that was already in progress. If this happens, replace it with another.
Old desert spoon (Dasylirion wheeleri)
Some Plants Do Not Like Renewal Pruning
There are some plants that don’t respond well to renewal pruning or where that isn’t possible to do in the case of succulents. In this case, the solution is simple – take them out and replace them with a younger version of the same plant. Examples of plants that are better removed and replaced include aloe, desert spoon, red yucca (hesperaloe), rosemary, and prickly pear cactus. When you think about it, the cost isn’t very high, when you consider the beauty that these plants added to your landscape for eight years or more.
Heavenly Cloud Texas Sage several weeks after severe pruning.
Weighing the Cost and Beauty
Explore the decision-making process behind removing and replacing old succulents and shrubs in your landscape, considering the cost and the beauty they bring to your garden.
When you think about it, the cost isn’t very high, when you consider the beauty that these plants added to your landscape for eight years or more.
*Have you severely pruned back an old shrub and had it come back beautifully? Or, maybe you recently removed and replaced some old succulents?
https://www.azplantlady.com/wp-content/uploads/2017/11/woody-rosemary.jpg9831200arizonaplantlady@gmail.comhttps://www.azplantlady.com/wp-content/uploads/2025/08/AZ-Plant-Lady-Logo-small.jpgarizonaplantlady@gmail.com2017-11-07 14:24:352023-10-11 12:29:06Got Old, Overgrown Plants? Know When to Prune or Replace
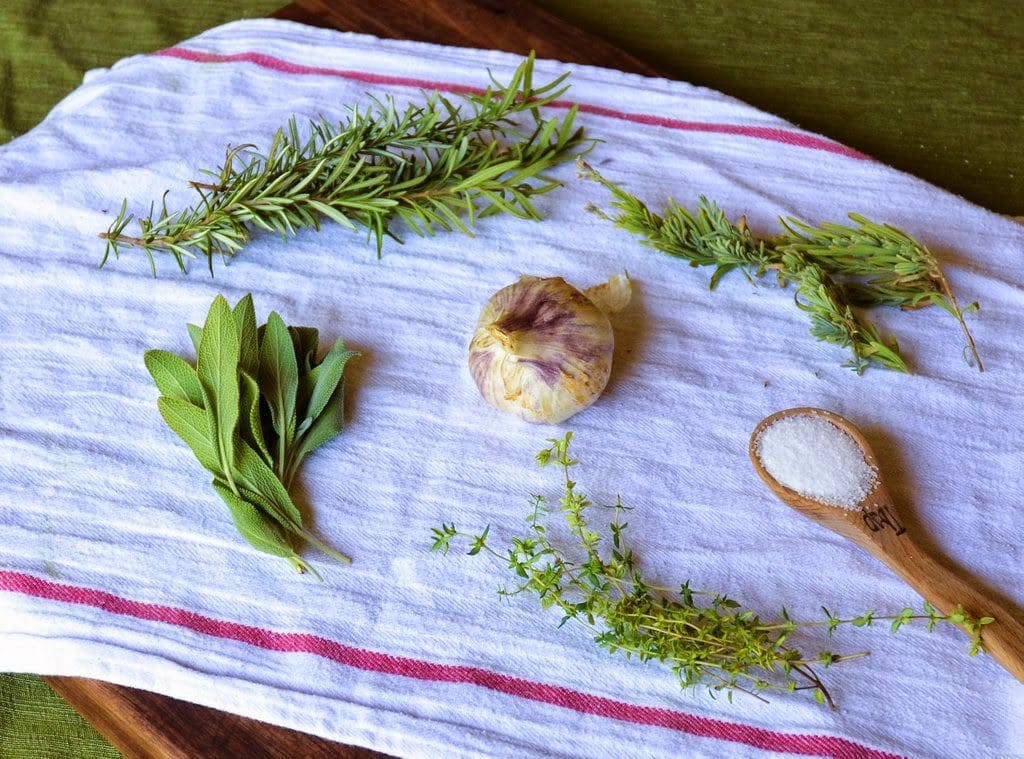
I am always on the lookout for new things to make from the garden.
Recently I learned how to make specially flavored salts using herbs from my garden. ‘Herb salts’ have become a popular flavoring tool in the culinary community and they are very easy to make.
The process of making herb salts starts out looking like this…
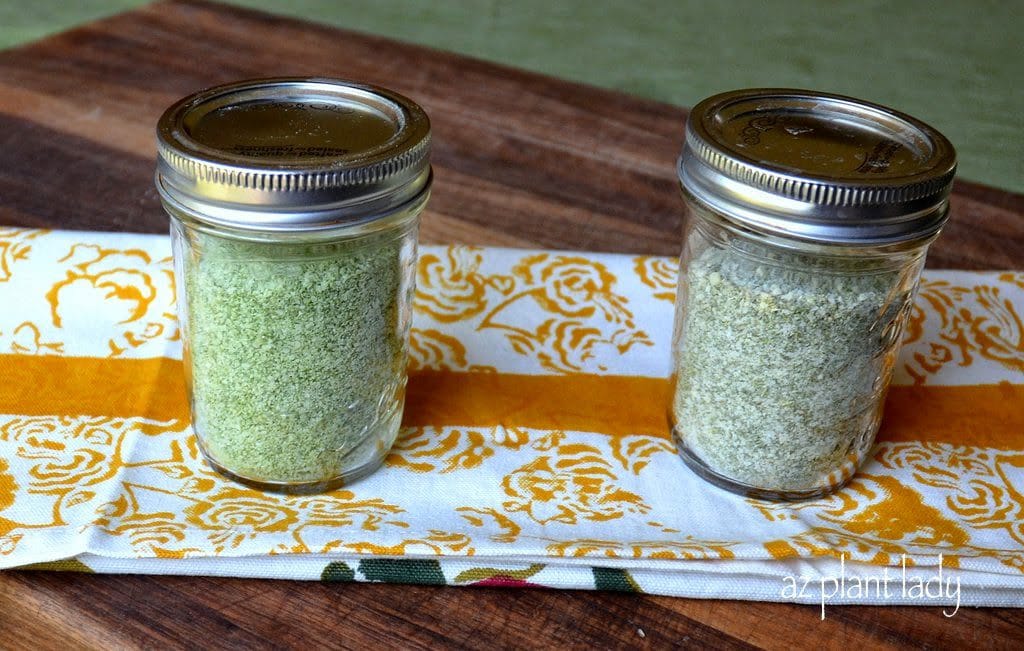
And ends up transformed into this…
Are you interested in making your own herb salts?
Summertime means that many of my herbs are actively growing and I sometimes run of ways to use all of the fragrant leaves of them.
Herb or ‘gourmet’ salts are a great way to preserve herbs while adding a new twist to flavoring my favorite foods.
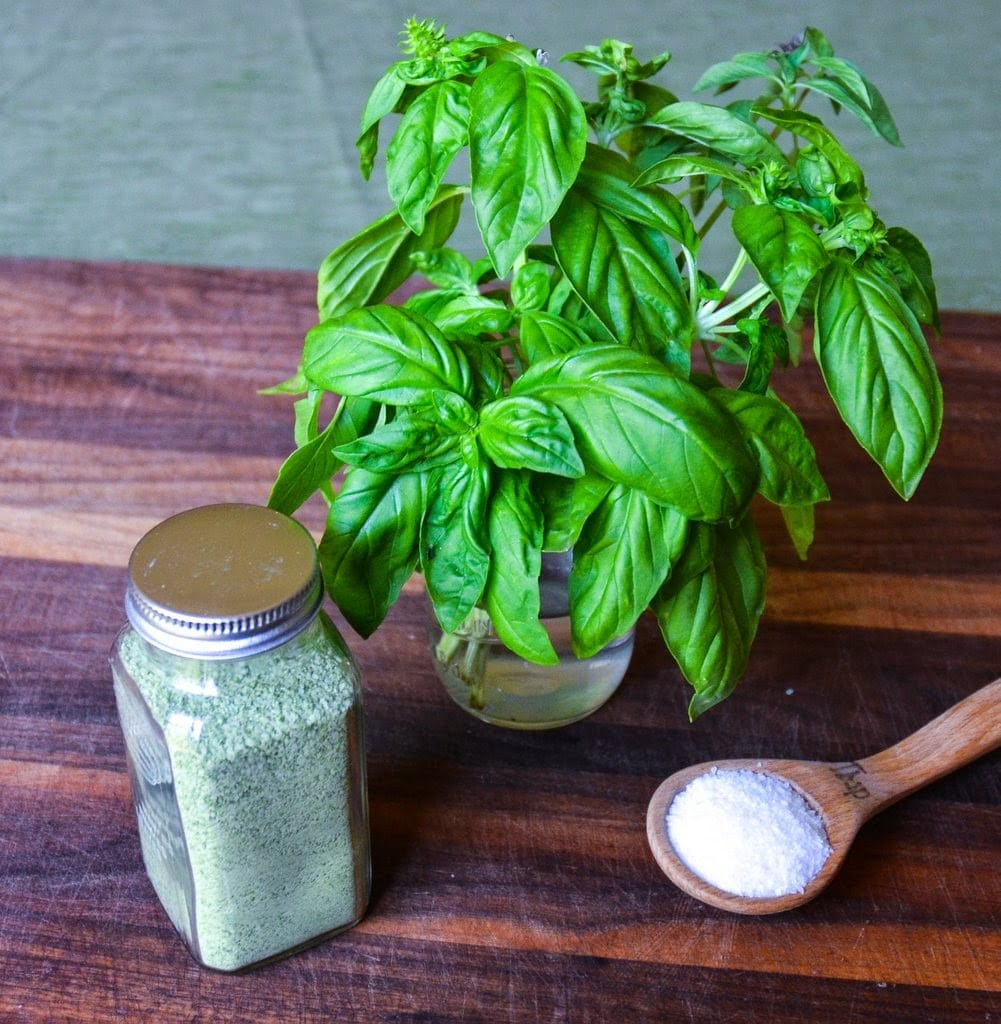
Photo: Basil Salt
In my last post, I shared how to make basil salt using two ingredients – fresh basil leaves and kosher salt.
Today, I’d love to show you how to make your own unique herb salt blend.
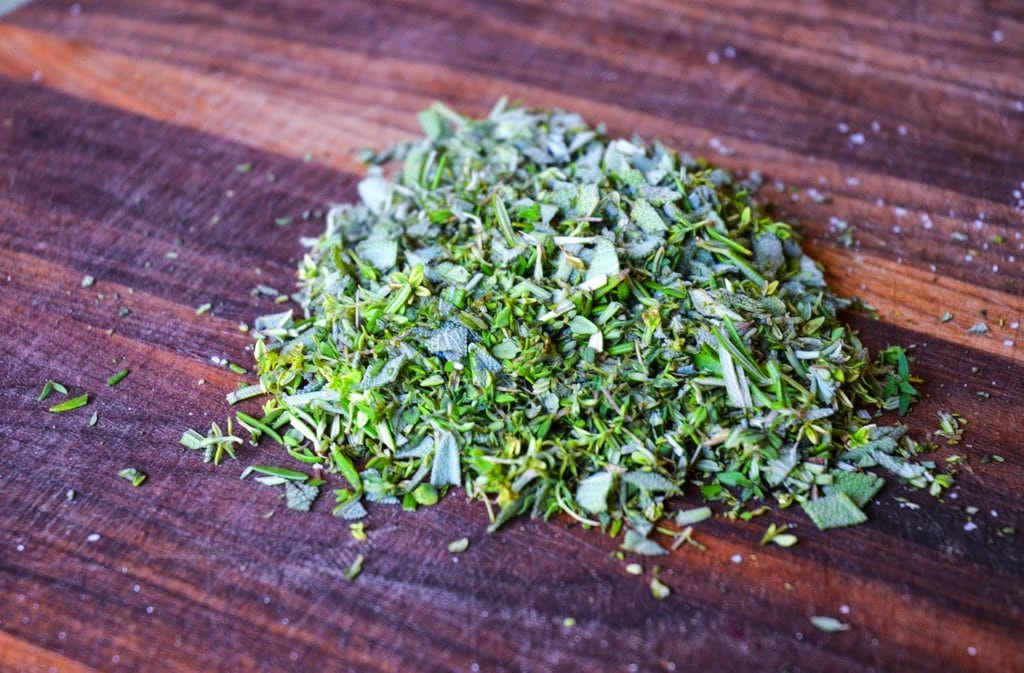
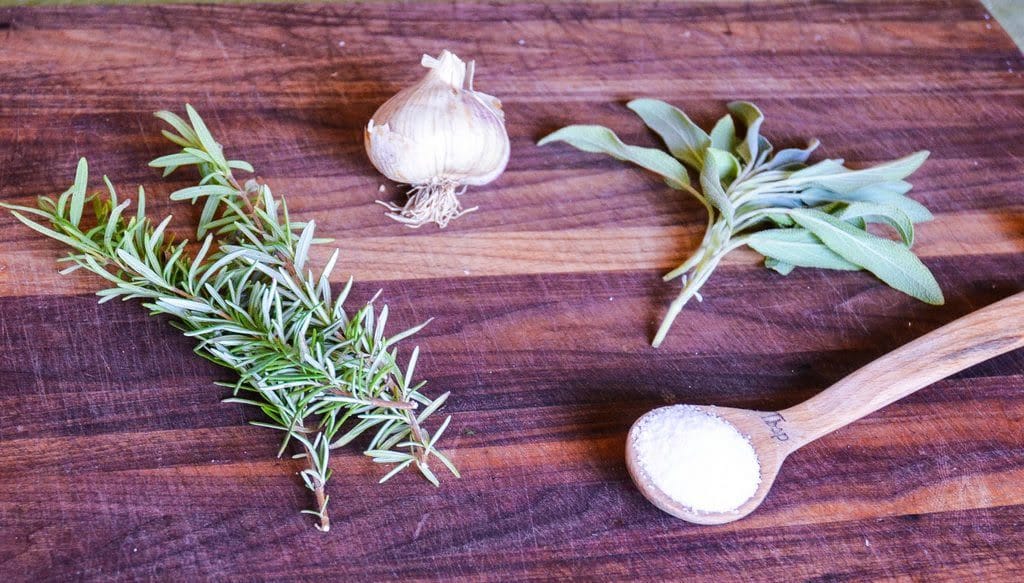
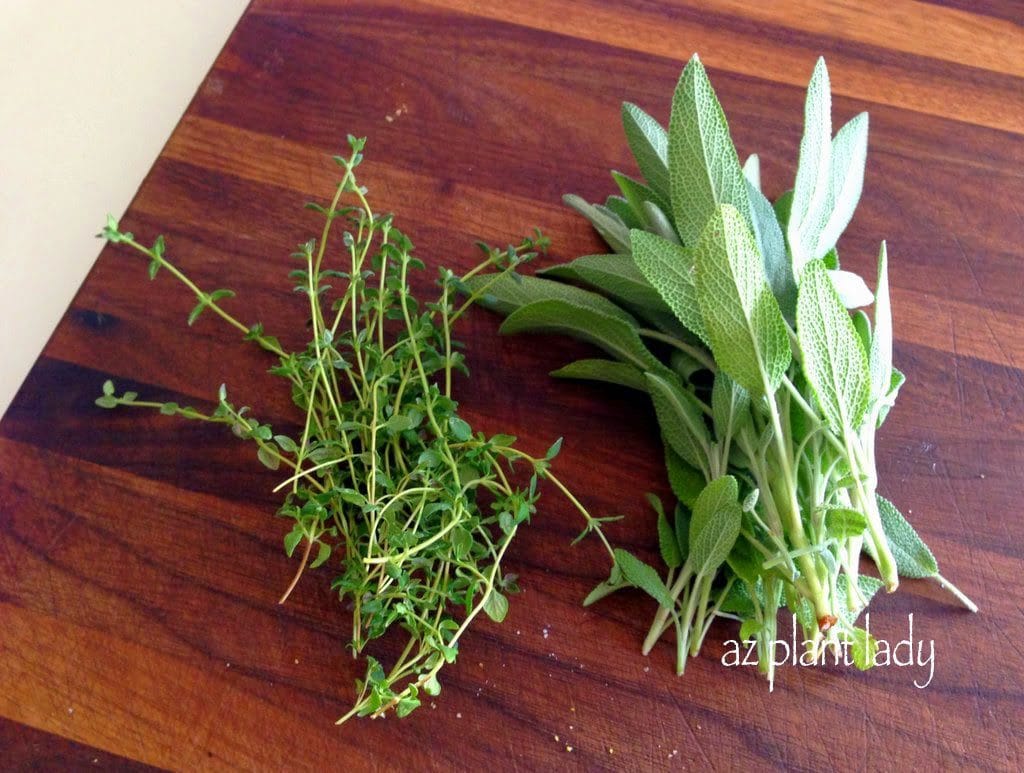
For my herb salt blend, I went out into the garden and looked for a variety of herbs that I love to cook with. I found rosemary, sageand thyme. I then grabbed a head of garlic and kosher salt. I must admit that I was thrilled that I had all these herbs growing in my garden. I grew the garlic too!
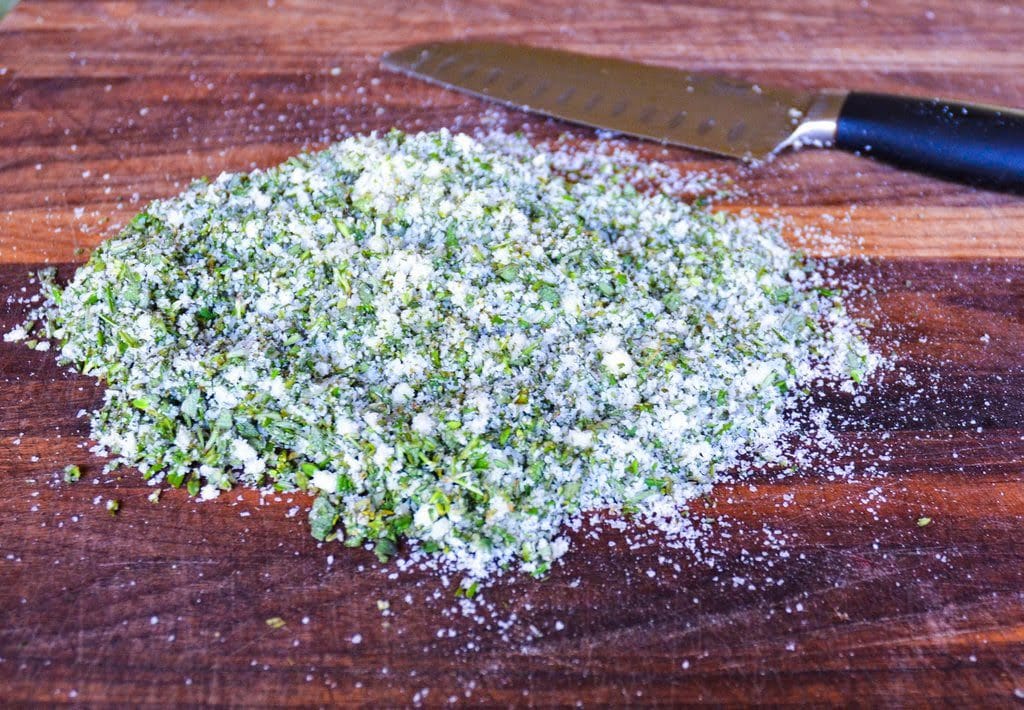
For equipment, you should have a cutting board, a sharp knife for chopping, a baking sheet and a glass jar with a lid.
You can make this recipe using a food processor, but it is optional.
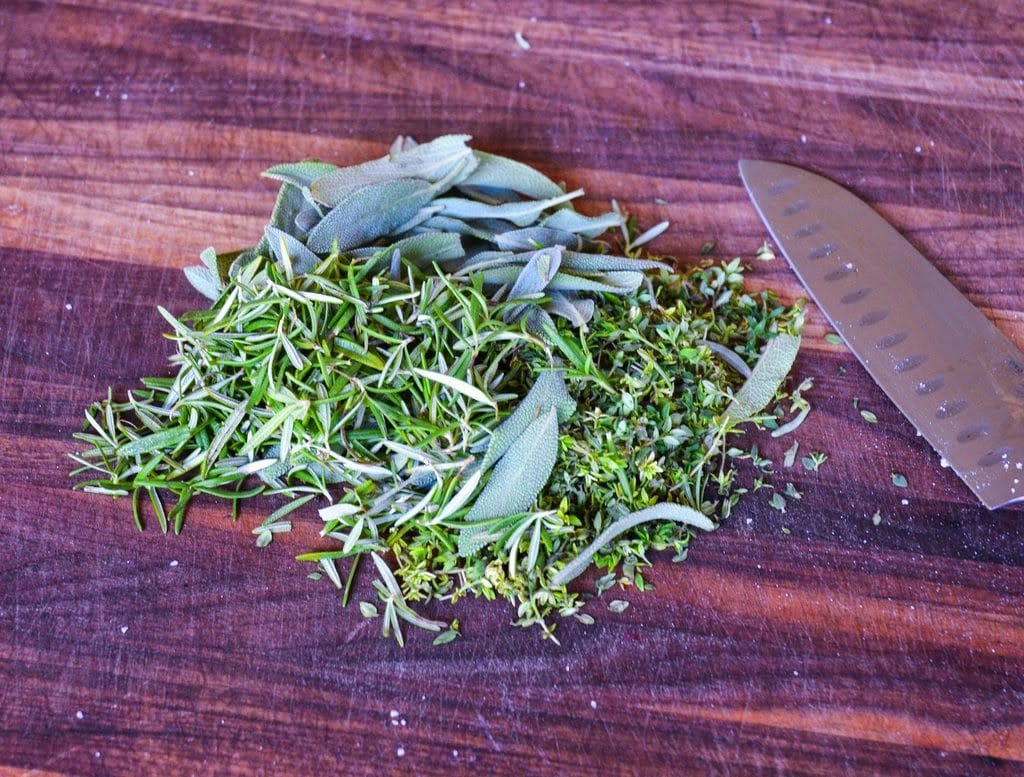
1. You will need 2/3 cup rosemary, 2/3 cup sage and 2/3 cup thyme leaves. These are the amounts I used to get the flavor I liked, but you can play around with the ratio of each herb or choose different herbs to get the flavor you want.
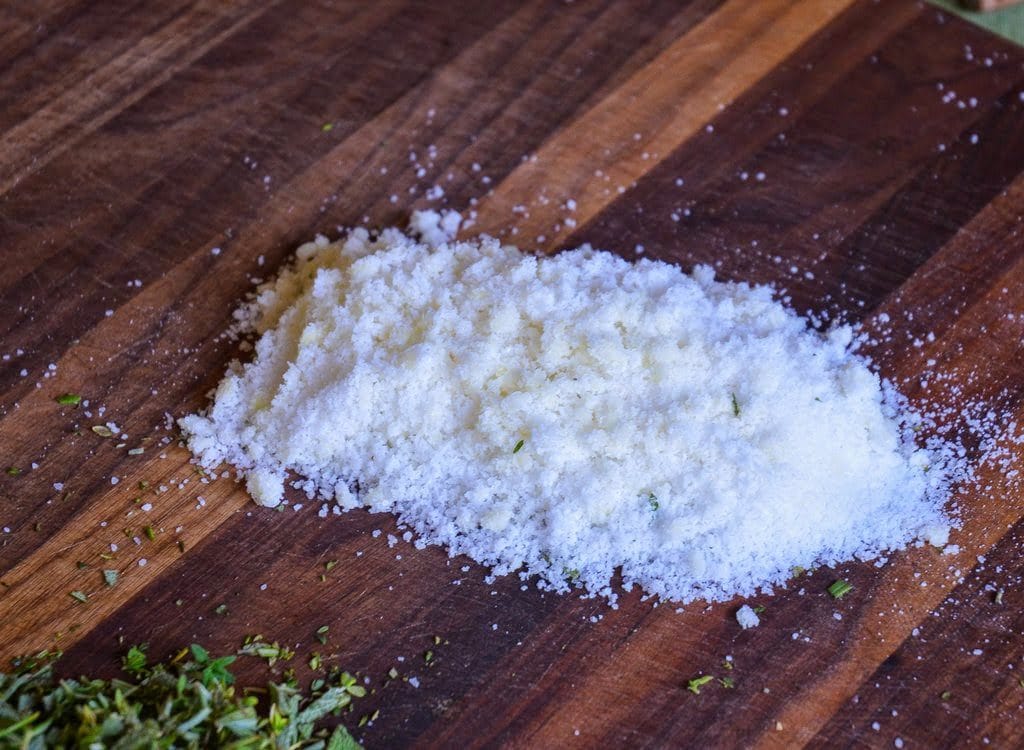
2. Place 1/2 cup kosher salt on your cutting board and add 5 peeled garlic cloves and chop them together. The garlic should be finely minced at this point.
3. Chop all of the herbs together.
4. Combine the salt/garlic and the herbs together and continue chopping until finely chopped.
**You can use a food processor for steps 3 & 4 instead of chopping. Simply put all ingredients in at once and pulse for 30 seconds.
At this point you can use your herb salt to flavor a roast of beef, chicken or pork before cooking or to flavor roasted vegetables. But, if you aren’t using the herb salt right away, continue on…
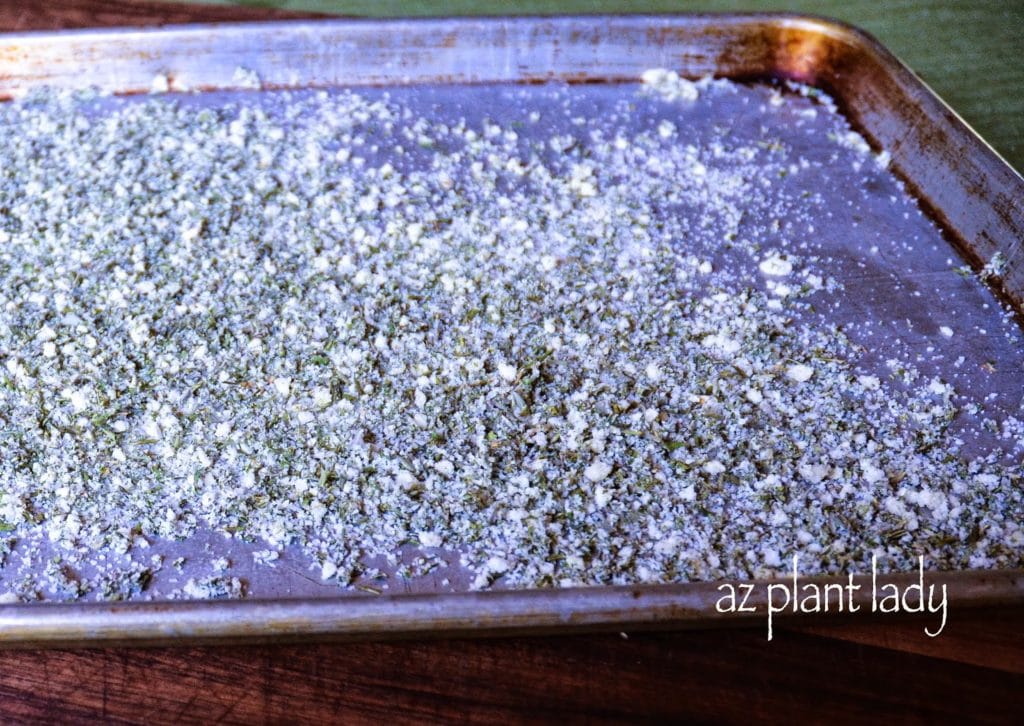
5. Put your herb salt mixture onto a baking sheet in a thin layer and bake in a 200 degree oven for 30 minutes. This step dries out the herb mixture. You can also allow it to air dry over a couple of days instead of putting it into the oven.
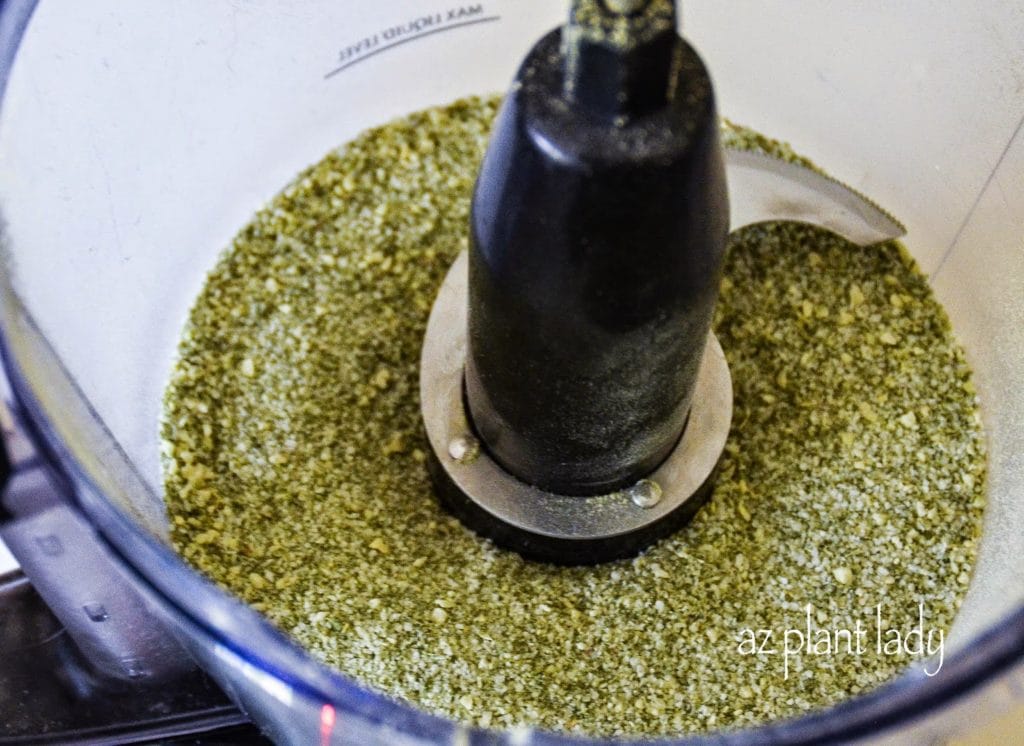
6. Place your dried mixture into a food processor and pulse for 30 seconds to get rid of any lumps.
If you don’t have a food processor, you can put the dried mixture into a Ziploc bag and roll it with a rolling pin until it is finely ground up.
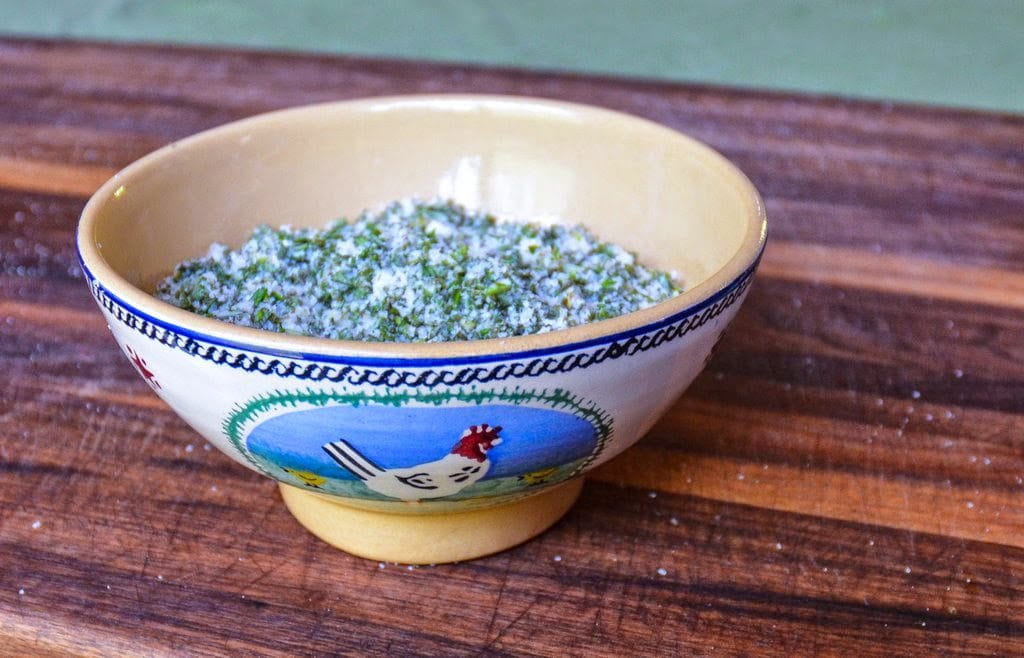
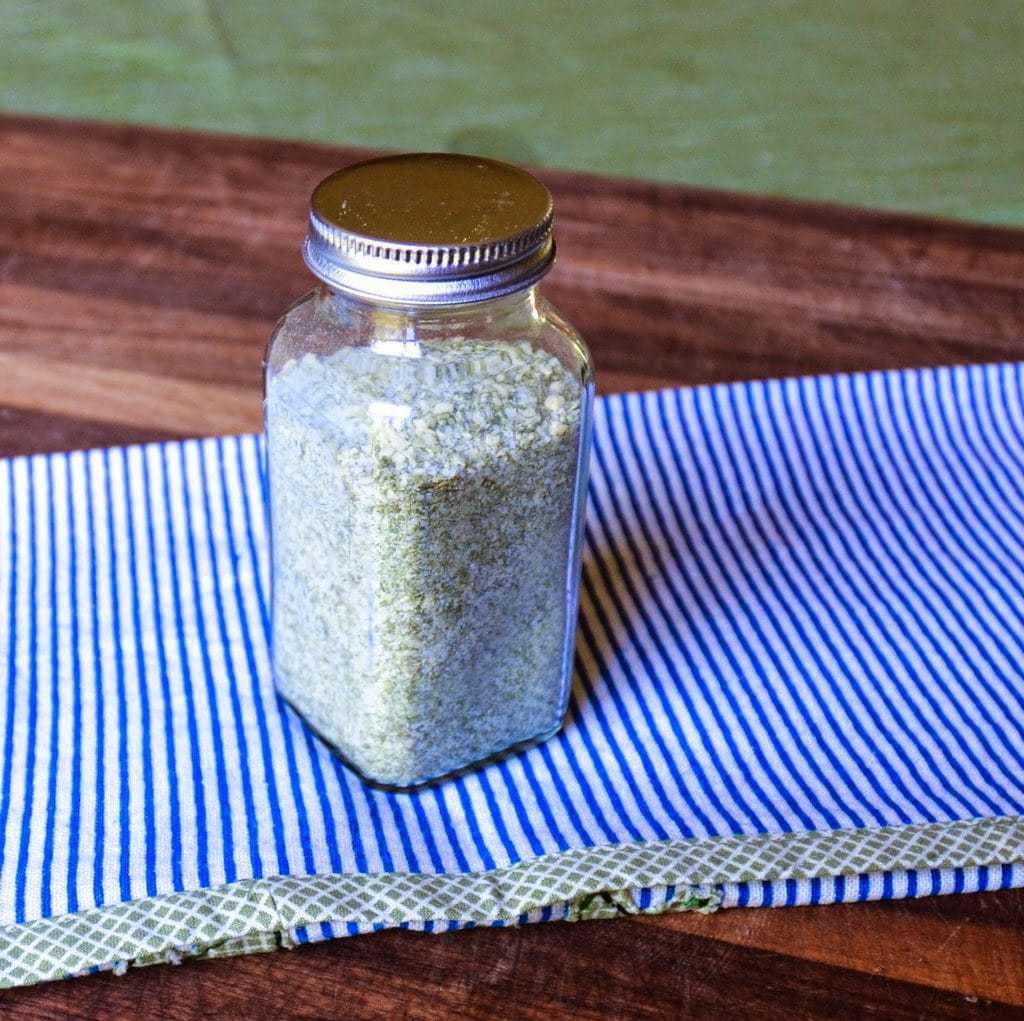
7. Put your herb salt into a glass jar with a tightly-fitted lid. Store in a dark, dry place with your spices and dried herbs to preserve its flavor.
I will use my herb saltblend to flavor a pork loin, baked chicken or even a beef roast. It would also taste great when sprinkled on roasted vegetables or put into soups, don’t you think?
As you can imagine there are a number of different types of herb salts that you can make. Here are a few different combinations that you might want to try:
Photo: Rosemary Sage Garlic Salt
All of these herb salt blends can be made following the same steps as I have done for my herb salt blend – except where noted.
Rosemary Lemon Pepper Salt – 1/3 cup rosemary leaves, 2 tablespoons lemon zest, 1 teaspoon freshly ground black pepper and 1/2 cup kosher salt. *(Increase cooking time to 1 hour)
Rosemary Sage and Garlic Salt – 1/2 cup of rosemary leaves, 1/2 cup sage, 5 peeled garlic cloves and 1/4 cup kosher salt.
Sage Thyme and Garlic Salt – 1/2 cup sage, 1/2 cup thyme, 5 peeled garlic cloves and 1/4 cup kosher salt.
If your garden is filled with herbs, this is a creative way to use them in the kitchen or give them as gifts. Even if you don’t have a garden filled with herbs, you can find fresh herbs at your local grocery store or farmers market.
So, how about you? What would herb(s) would your ideal herb salt contain?
https://www.azplantlady.com/wp-content/uploads/2014/08/DIY-Herb-Salt-1.jpg7591024arizonaplantlady@gmail.comhttps://www.azplantlady.com/wp-content/uploads/2025/08/AZ-Plant-Lady-Logo-small.jpgarizonaplantlady@gmail.com2014-08-12 14:10:002022-11-05 00:53:15DIY Herb Salt Blends From the Garden
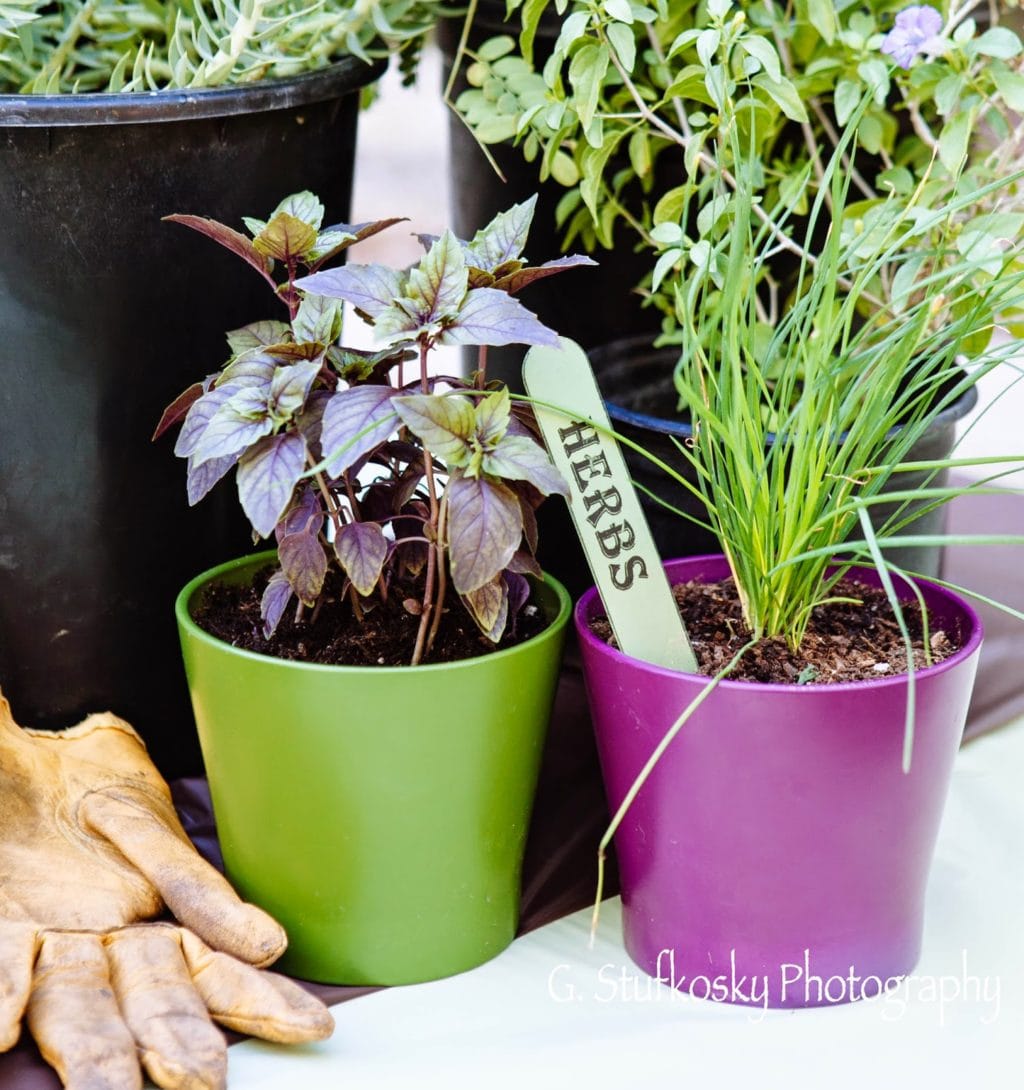
I do. But, I don’t like buying herbs from the store because they can be expensive and often aren’t very fresh looking.
Photo: Purple basil and chives
I enjoy growing herbs outdoors in my garden, but I also grow herbs indoors on my kitchen windowsill.
Whether you have a garden, a balcony or a windowsill, you can grow herbs inside.
Many people grow herbs indoors during the winter time, but you can grow them inside all year long.
So, are you ready to grow your own fresh herbs? Let’s get started…
1. Select a place to put your potted herbs that has a sunny window. – A window that faces south is best, but east facing will also work. West facing windows may be too hot in if you live in the desert, but you can experiment with it. Herbs need at least 4 – 5 hours of sun.
It’s important to note that herbs grown indoors won’t look as compact or lush as those grown outdoors, which is due to the fact that they don’t get as much sun indoors.
2. Choose plastic or glazed containers with holes for drainage.
It’s best to avoid terra-cotta pots, which can dry out – especially during the winter when the air in our homes can be dry from heating.
growing herbs indoors
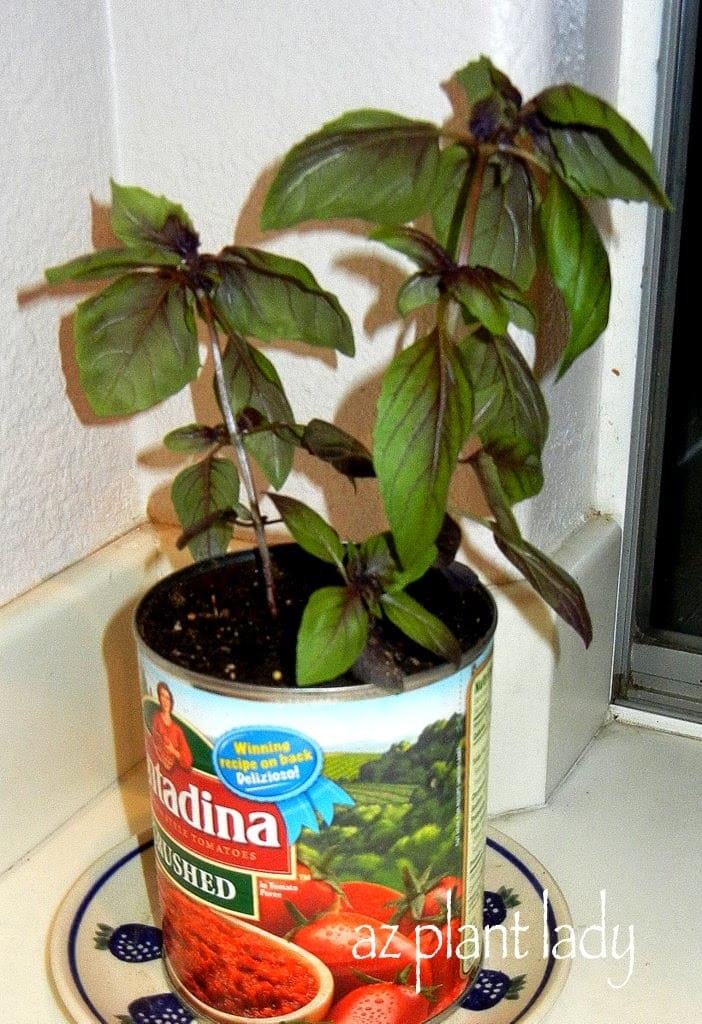
You can also use cans as recycled containers. I have grown herbs in tomato cans as well as coffee cans.
A row of cans with their labels removed, filled with herbs would add a real contemporary look to the kitchen, don’t you think?
3. Use potting or planting mix. Avoid using potting soil, which is not formulated for containers and can become soggy.
4. Select what herbs you want to grow.
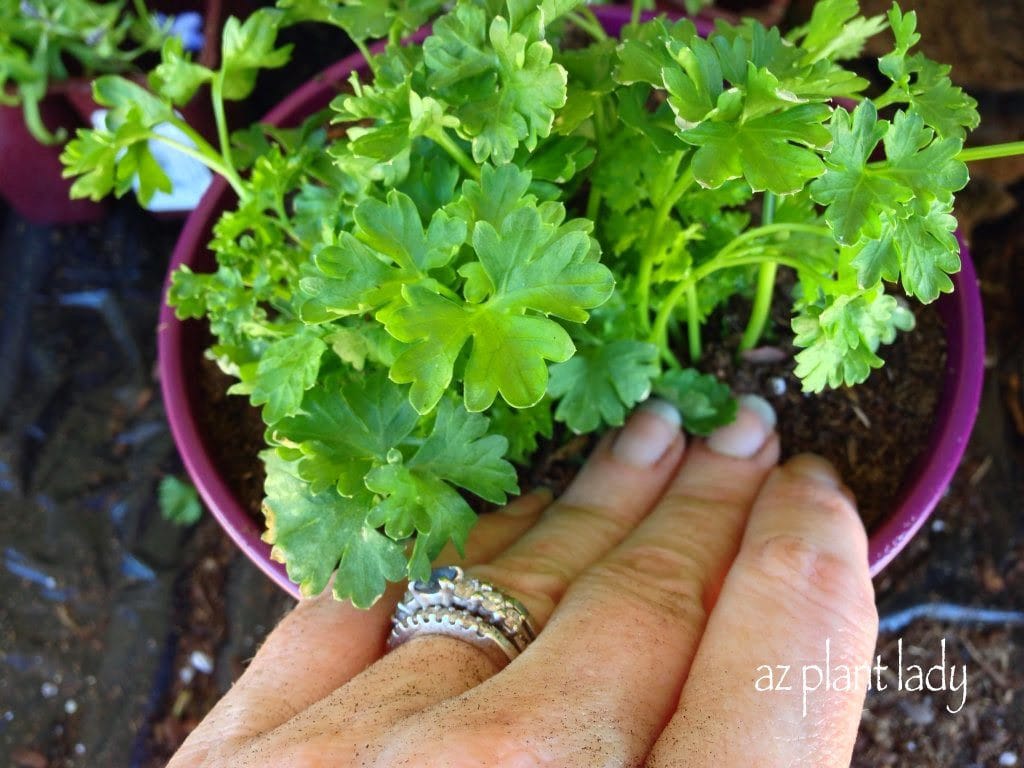
There are many different herbs that will grow well indoors, which include basil, chives, lemon balm, mint, parsley, sage and thyme.
You can buy herb transplants from your favorite nursery or sometimes at the grocery store.
growing herbs indoors
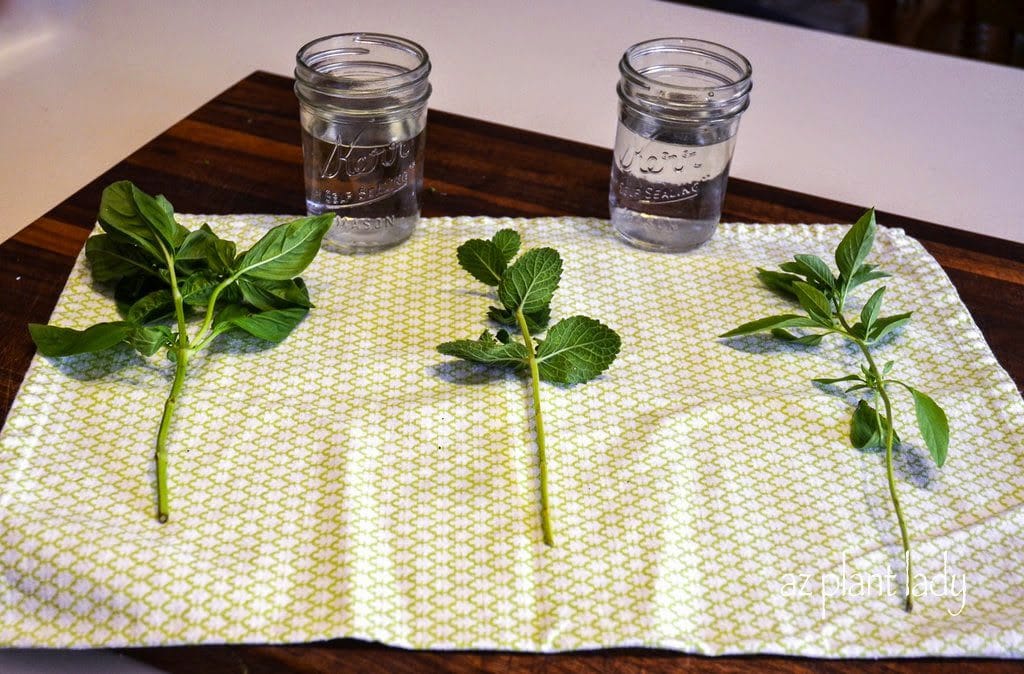
Another way to grow certain herbs is to start them from cuttings.
I ran out to the garden to grab two types of basil and some apple mint to show you how to do this. Basil and mint are both easy to start from cuttings.
Remove the leaves from the bottom as shown, above. Place the cuttings in a glass of water so that most of the stem is submerged in water, but take care that no leaves are in the water.
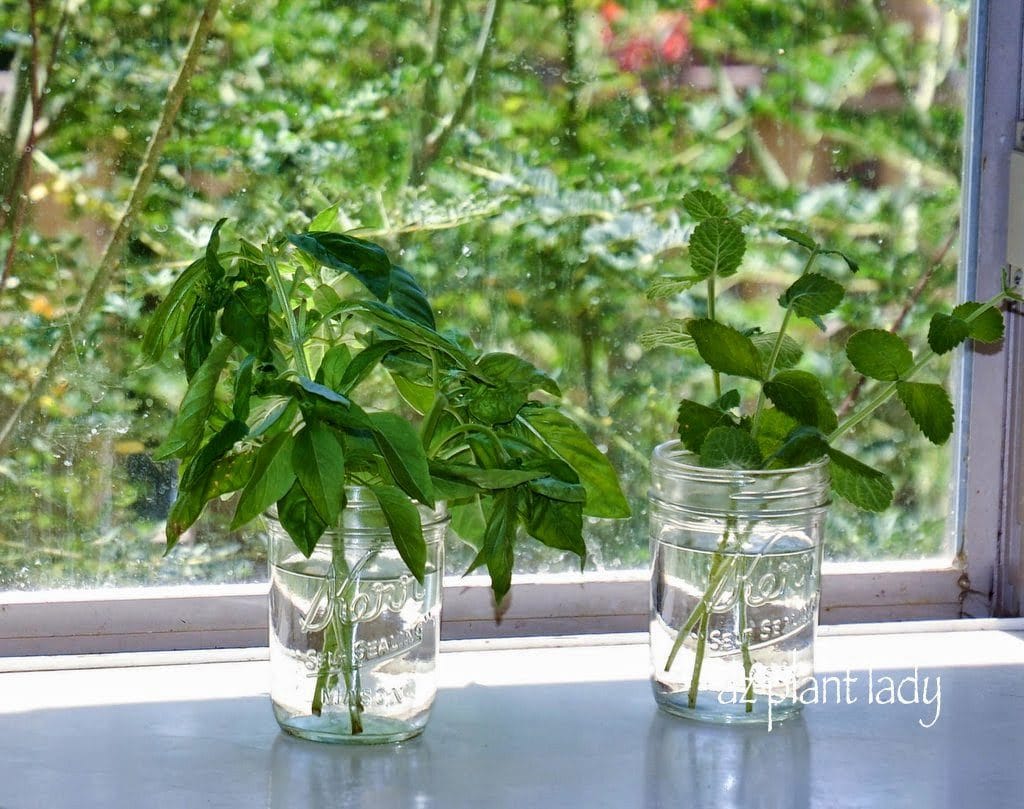
growing herbs indoors
Place in a window with bright, indirect sun. Change the water every other day and watch for roots to develop. Once roots have grown 1/2 – 1 inch, transplant each cutting into a container filled with potting mix and your are done!
I told you it was easy.
5. Water your potted herbs when the top of the soil feels dry.
Herbs don’t like soggy soil, so it’s best to allow the top of the soil to dry out before watering deeply until the water runs out the bottom.
An easy to tell when it’s time to water is to stick your finger into the soil till you reach your first knuckle – slightly less than an inch. If it feels barely moist, then it is time to water again.
6. Fertilize your herbs.
When plants are grown in pots, they need to be fertilized and herbs are no different. You can apply organic fertilizer granules and work into the top inch of soil OR you can use an organic liquid fertilizer such as fish emulsion.
Follow directions on the granular fertilizer package when applying and guidelines for frequency. In general, liquid fertilizer can be applied every 2 weeks.
Soon you will have fresh herbs close at hand and ready to use in your favorite dishes.I recently made herbs salts from my herbs, which is fun and easy to do. The flavor that they add to food is just delicious!
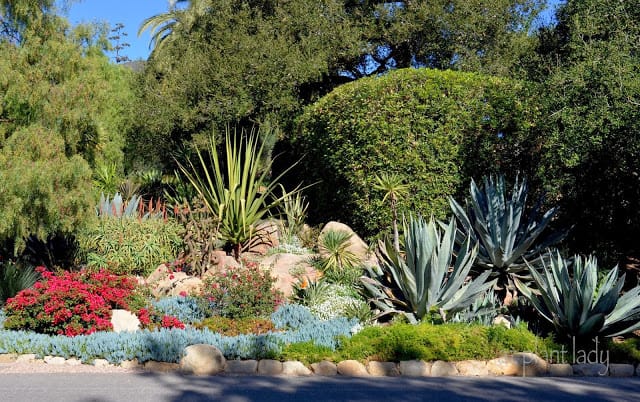
When you envision a drought-tolerant landscape, does a landscape covered in colored gravel with a cactus or two come to mind?
Believe it or not, this type of landscape style was popular back in the 70’s and some people have never moved beyond this outdated trend.
Well, let us fast-forward to present day when a drought-tolerant landscape can look like this…
I drove by this beautiful landscape, filled with succulents and other drought-tolerant plants on a recent trip to Santa Barbara, CA.
I love the magenta-colored brachts of the Bougainvillea, the green spiky Spanish Bayonet Yucca (Yucca Aloifolia) along with the gray/blue of Century Plant (Agave americana).
The orange flowers of Aloe arborescens are also a favorite of mine. I also like how the blue/gray leaves of the ‘Blue Chalk Sticks’ variety of Ice Plant (Senecio mandraliscae) provides a cool color contrast.
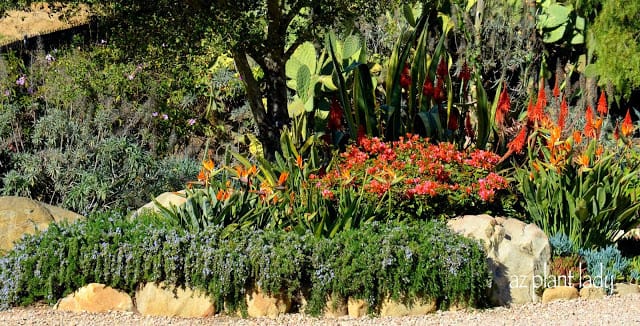
You may be surprised to discover that this beautiful, drought-tolerant landscape is part of an entry to a large estate and that there is another side filled with drought-tolerant plants.
On this side, you can see Trailing Rosemary (Rosmarinus officials ‘Prostratus’) spilling over the front with Tropical Bird-of-Paradise (Strelitzia reginae) right behind.
A low-growing pink Bougainvillea shows off its bright colors along with the spiky orange flowers of the Aloe nearby.
Look closely, and you can see the paddles of a Prickly Pear cactus (not sure what species) and the variegated spikes of Agave americana ‘Variegata’.
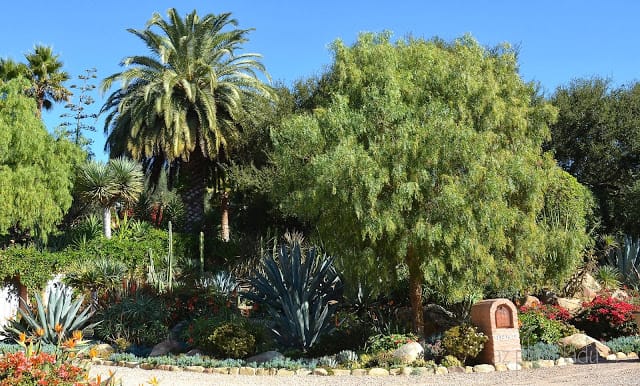
In this last view of this spectacular garden, we see a California Pepper tree (Schinus molle), which is quite familiar to Californians. (We had these trees lining our neighborhood street where I grew up in Southern California.) They are found in the low-desert areas of Arizona, but it is rare to see them.
In the background, you can see two very different types of palm trees. The large one is a Canary Island Date Palm (Phoenix canariensis) while the skinny one is a Mexican Fan Palm (Washingtonia mexicana).
If you look closely, you can see the flowering stalk of an agave as well as the upright columns of a Cereus cactus.
To the left of the mailbox, there is a Jade plant growing, a flowering Crown of Thorns (Euphorbia millii), which I also have growing in my garden.
So, if you think that having a drought-tolerant landscape means looking like this…
It doesn’t!
The majority of plants in the lovely garden in California, can be grown in desert climates.
So, which drought-tolerant landscape would you prefer – a colorful one or one that is boring?
https://www.azplantlady.com/wp-content/uploads/2014/01/Sun-Lakes-Barren-Landscape-2.jpg399640arizonaplantlady@gmail.comhttps://www.azplantlady.com/wp-content/uploads/2025/08/AZ-Plant-Lady-Logo-small.jpgarizonaplantlady@gmail.com2014-01-15 17:56:002021-01-16 06:18:57Drought-Tolerant Landscapes – Colorful or Boring?
If someone asked you what your favorite food was, what would you tell them?
My daughter, Gracie, would answer by saying “anything chocolate”.
My husband would say “pizza”.
But my favorite food is a warm slice of sourdough bread with melted butter. My idea of heaven is being surrounded with loaves of French bread and plenty of Irish butter without the carbs or calories 😉
Because I like to make things using produce from my garden, I decided to try making herb butter using the herbs that I grew and dried earlier this summer.
Just for fun, I decided to make my own butter using some leftover heavy whipping cream (did you know that if you beat heavy whipping cream long enough that you will get butter)?
When we were kids, my mom would teach us how to make butter this way using her antique butter churn. It was a lot of work, but it was fun.
Most of the time, I just use regular butter to make herb butter.
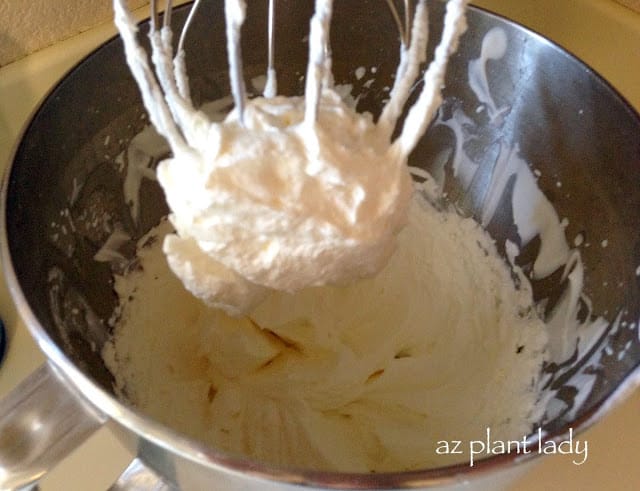
I beat the whip cream until it became thick and continued until it looked like this…
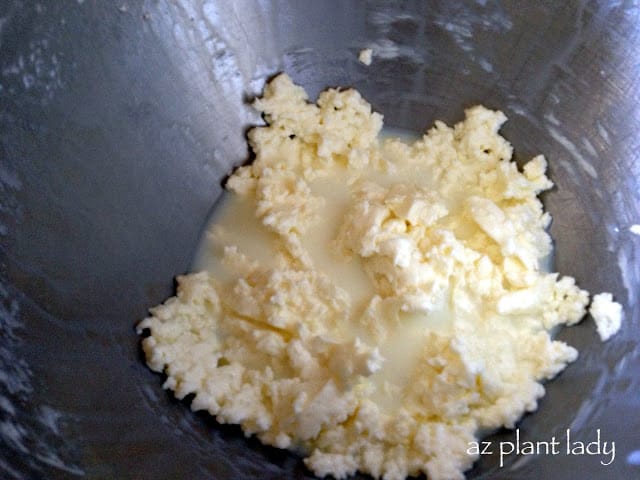
Your butter will start to solidify with a little buttermilk liquid left.
Drain the buttermilk and you are left with butter! You can salt it to your taste at this point.
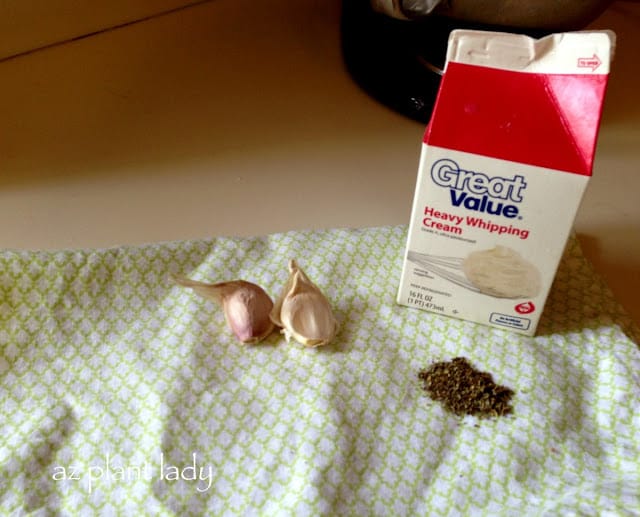
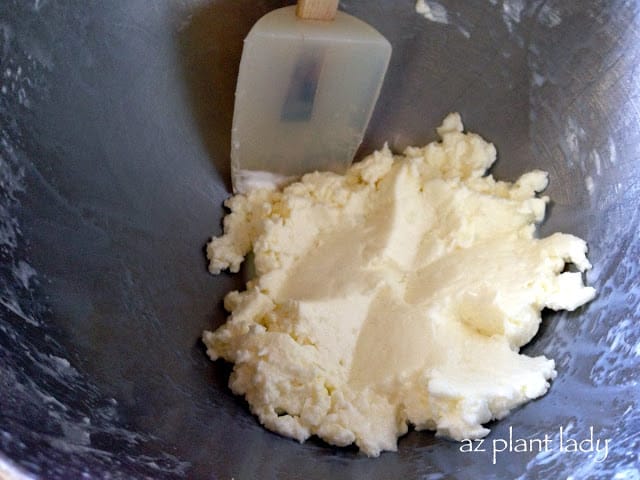
1. You will need a 1/2 cup of softened butter. (Store bought works just as well as butter you made yourself).
2. Add a 1/2 teaspoon of your favorite herb. Dried basil, chives, dill, oregano, rosemary, sage or thyme work well for herb butter. You can also use a 1/2 teaspoon of poultry or Italian seasoning instead if you like.
3. I also added 2 cloves of minced garlic, also from my garden, to the herb butter.
4. Mix it all together using a rubber spatula.
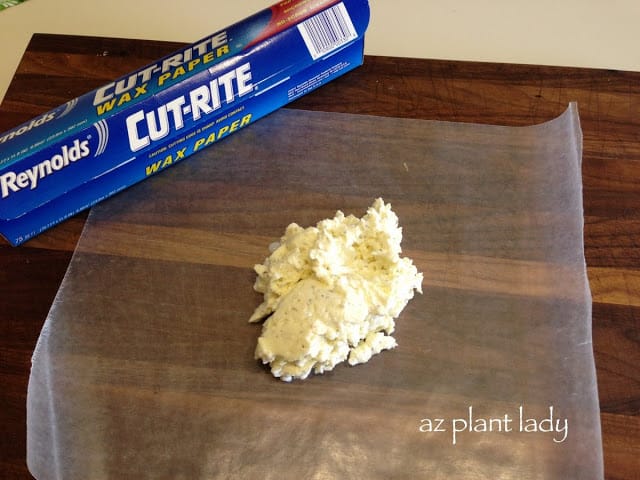
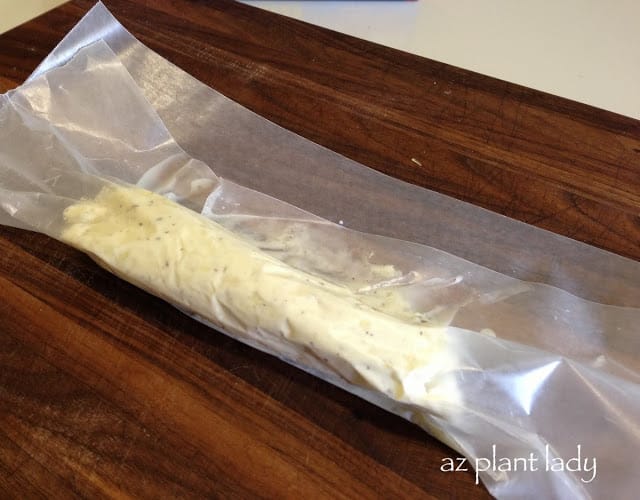
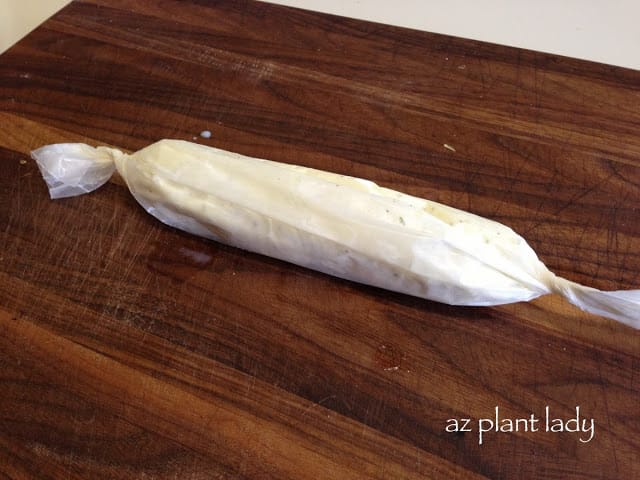
5. Place your butter mixture onto wax paper and begin to form it into a roll by folding over the wax paper and using your hands to mold the herb butter.
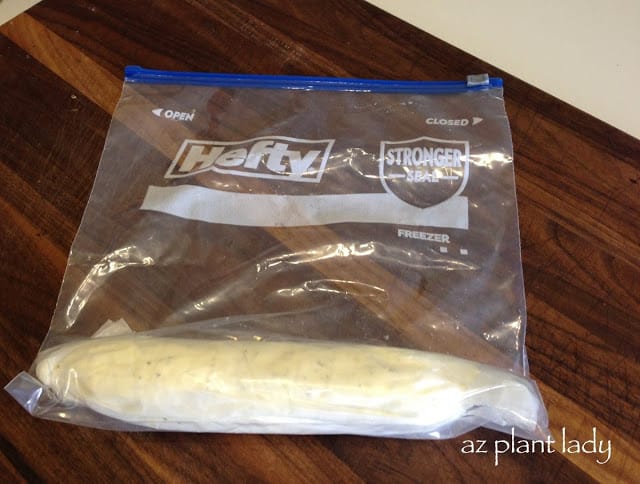
6. Twist the ends of the wax paper and place your herb butter into a plastic freezer bag.
7. Freeze until 2 hours before using. You don’t have to use it all at once. Simply cut off a few sections at a time.
You can freeze herb butter up to 6 months.
So, get started now and preserve the taste of your summer herbs by making your own herb butter.
Make some for yourself and give some away to friends.
I must say, that I was going to take a picture of my herb butter melting over a hot slice of sourdough bread.
But, I ate it before I remembered to take the picture…
**You can use your own herbs that you have dried or you can use herbs from the grocery store.
https://www.azplantlady.com/wp-content/uploads/2013/08/IMG_1674.jpg517640arizonaplantlady@gmail.comhttps://www.azplantlady.com/wp-content/uploads/2025/08/AZ-Plant-Lady-Logo-small.jpgarizonaplantlady@gmail.com2013-08-14 16:38:002021-01-21 02:45:55Got Herbs? Make Your Own Herb Butter
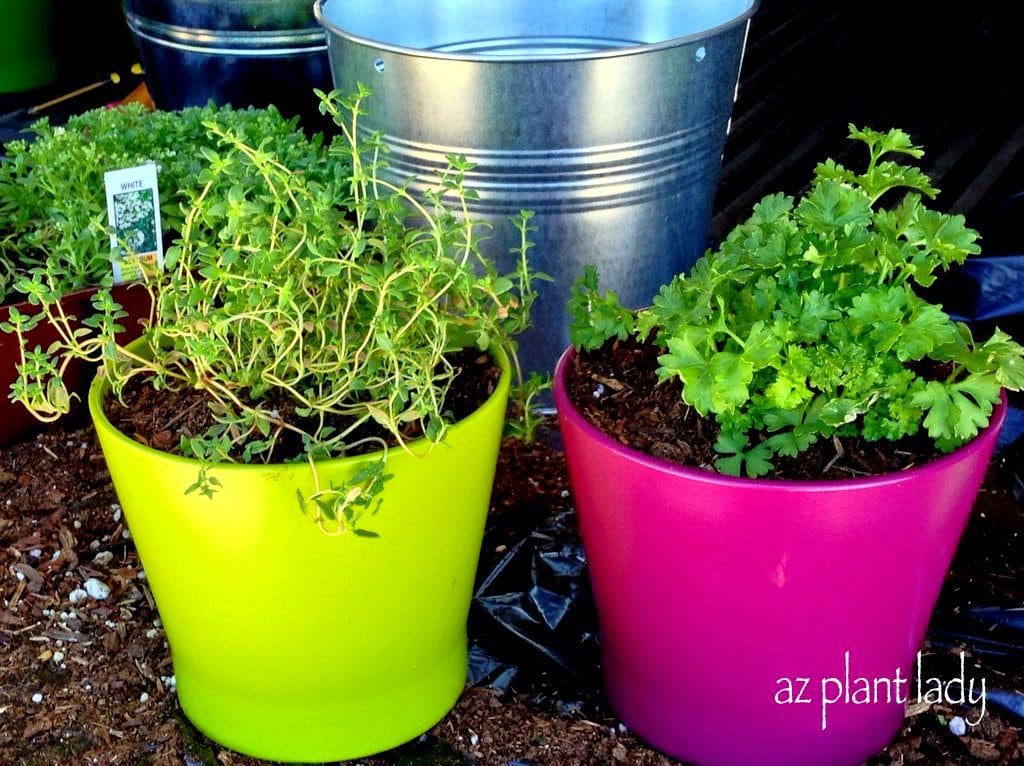
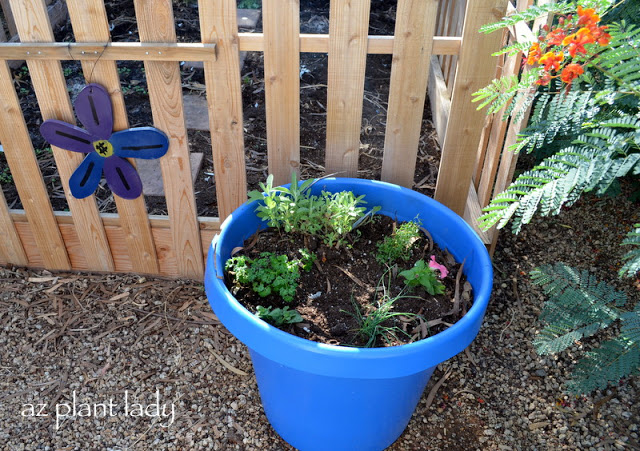
I recently re-planted my herb container for the cool-season.
Last spring, I planted my container with rosemary, green basil, purple basil, sage, thyme and oregano. All of these herbs do well in the warm-season and I enjoyed being able to step outside the kitchen with cut fresh herbs whenever I needed them.
You can read the post here, to see how to grow herbs in containers.I also did a “How-To” video about this too 🙂
Okay, so now that cooler weather is on its way, I wanted to add some different herbs that would do well through the winter in my zone 9 garden.
I planted Dill, Garlic, Lavender, Parsley, another Thyme and kept the Sage the I had originally planted.
My kids added some of their Petunias that their grandma bought them in the container too, which will add some nice color.
Other herbs that can handle cooler weather in USDA zones 9 and above are Cilantro, Chives, Fennel, Lemon Grass and Rosemary.
I highly recommend planting your own herb container. It is very easy and so fun to be able to harvest your own herbs!
https://www.azplantlady.com/wp-content/uploads/2012/10/Warm-Season-Herb-Container.jpg370640arizonaplantlady@gmail.comhttps://www.azplantlady.com/wp-content/uploads/2025/08/AZ-Plant-Lady-Logo-small.jpgarizonaplantlady@gmail.com2012-10-17 13:30:002021-01-31 23:47:20Cool-Season Herb Container
We use cookies on our website to give you the most relevant experience by remembering your preferences and repeat visits. By clicking “Accept All”, you consent to the use of ALL the cookies. However, you may visit "Cookie Settings" to provide a controlled consent.
This website uses cookies to improve your experience while you navigate through the website. Out of these, the cookies that are categorized as necessary are stored on your browser as they are essential for the working of basic functionalities of the website. We also use third-party cookies that help us analyze and understand how you use this website. These cookies will be stored in your browser only with your consent. You also have the option to opt-out of these cookies. But opting out of some of these cookies may affect your browsing experience.
Necessary cookies are absolutely essential for the website to function properly. These cookies ensure basic functionalities and security features of the website, anonymously.
Cookie
Duration
Description
cookielawinfo-checkbox-analytics
11 months
This cookie is set by GDPR Cookie Consent plugin. The cookie is used to store the user consent for the cookies in the category "Analytics".
cookielawinfo-checkbox-functional
11 months
The cookie is set by GDPR cookie consent to record the user consent for the cookies in the category "Functional".
cookielawinfo-checkbox-necessary
11 months
This cookie is set by GDPR Cookie Consent plugin. The cookies is used to store the user consent for the cookies in the category "Necessary".
cookielawinfo-checkbox-others
11 months
This cookie is set by GDPR Cookie Consent plugin. The cookie is used to store the user consent for the cookies in the category "Other.
cookielawinfo-checkbox-performance
11 months
This cookie is set by GDPR Cookie Consent plugin. The cookie is used to store the user consent for the cookies in the category "Performance".
viewed_cookie_policy
11 months
The cookie is set by the GDPR Cookie Consent plugin and is used to store whether or not user has consented to the use of cookies. It does not store any personal data.
Functional cookies help to perform certain functionalities like sharing the content of the website on social media platforms, collect feedbacks, and other third-party features.
Performance cookies are used to understand and analyze the key performance indexes of the website which helps in delivering a better user experience for the visitors.
Analytical cookies are used to understand how visitors interact with the website. These cookies help provide information on metrics the number of visitors, bounce rate, traffic source, etc.
Advertisement cookies are used to provide visitors with relevant ads and marketing campaigns. These cookies track visitors across websites and collect information to provide customized ads.