Every winter, we are the lucky recipients of a bounty of citrus from both family and neighbors.
My fruit bowls and pantry are full of blood oranges, grapefruit, and lemons.
Citrus generally ripens during the winter and the cold snap that we had last week had many people picking the citrus fruit from their trees so that the fruit wouldn’t be damaged by the frost.
The problem arises that either I have too many lemons in winter and none in the summer unless I want to spend a ridiculous amount of money on lemons.
So, what do you do?
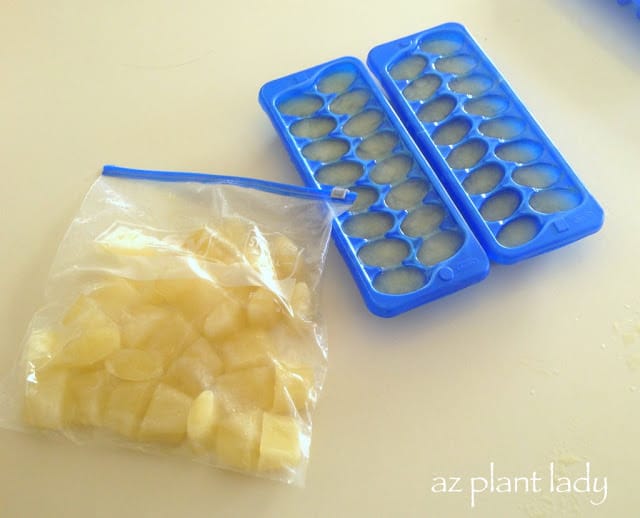
Well, I juiced them a week ago and made “lemon ice-cubes.”
Then, I promptly forgot about them until I was searching in the freezer for the chicken to thaw out for dinner.
So, I took them out and put my lemon ice cubes into freezer bags.
have three freezer bags full of lemon ice cubes, which will last me through the coming year.
What do I use them for? Well, many of my favorite dinner recipes call for a tablespoon or two of lemon juice, and they are great for making ice tea.
You can also save the lemon zest, (just before you juice them), and freeze the zest too.
My kids love grapefruit (I don’t) and have been eating some for both breakfasts and a snack. They have also been taking the blood oranges to school in their lunch boxes.
My friend, Becky, from Tucson, made ‘Orange Peel Vinegar’ which she uses as a cleaner with her extra oranges.
What do you do with an overabundance of citrus?
https://www.azplantlady.com/wp-content/uploads/2013/01/Ripe-Lemons-DSF.jpg640480arizonaplantlady@gmail.comhttps://www.azplantlady.com/wp-content/uploads/2025/08/AZ-Plant-Lady-Logo-small.jpgarizonaplantlady@gmail.com2013-01-19 20:17:002021-01-30 10:13:49Too Many Lemons? Freeze the Juice…
The cold weather has arrived in my neck of the woods with even colder temperatures on their way later this week.
When temperatures dip below 32 degrees, you will find me wearing warm socks, slippers, a sweater, and cardigan when I’m indoors. But, besides me – frost-tender plants are also affected by the cold temperatures.
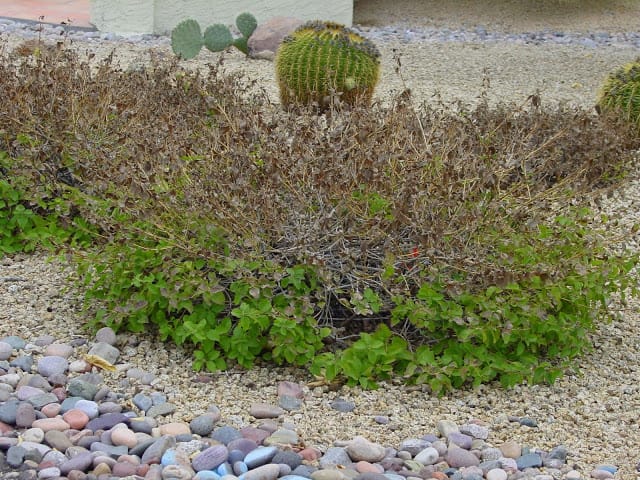
Have you ever wondered why your plant’s leaves turn brown and crispy after a freeze? Well, ice crystals form on the top of the leaves, which ‘sucks’ out the moisture from the leaf, leaving it brown and crispy.
Many plants handle cold weather just fine and have no problems with frost. However, if you have frost-tender plants, such as bougainvillea, lantana, or yellow bells, you face a choice; Do you leave them unprotected from freezing temperatures and live with the unattractive frost-damaged growth? Or do you protect them when temperatures dip below freezing?
Either choice is fine and is a matter of personal preference. Frost-damaged growth can be pruned back once the last frost of the season has passed (early March where I live). But, if you don’t want to live with brown, crispy plants for a few months, then protecting your plants when temps dip below freezing is necessary.
In the daytime, the sun shines on soil, warming it. At night, the soil releases the warmth from the ground. When you cover your plants – the heat is captured keeping your plants warmer.
Plants aren’t fussy about what type of covering you use (with one exception); old sheets and towels are usually on hand and are easy to use. Burlap and newspaper are also useful as coverings. Cover your frost-tender plants in the evening, making sure that there aren’t any gaps where the heat can escape. You can use large rocks or clothespins to secure them in place. In the day, remove the covers once temperatures have risen above freezing, and allow the sun to warm the soil again.
Don’t keep the coverings on your plants for more than two days in a row without removing them in the day since this can cause water to become trapped underneath, leading to fungal diseases and can cause plants to produce new growth that can be easily damaged by cold.
The best type of frost protection is frost cloth, which is a breathable fabric because it can ‘breathe,’ you can leave the frost cloth on your plants for a longer period. But, use it only when there is a threat of frost. After three days, uncover your plants during the day to allow the sun to reach your plants.
My neighbor made things worse by using plastic as a covering for his citrus trees.
One type of covering that you shouldn’t use is plastic, which transfers the cold to your plants and damages leaves when it touches the plant itself.
In my garden, I only protect my frost-tender trailing lantana which is in a high-profile area next to my entry. The rest of my frost-tender plants, I leave alone until it is time to prune back their frost-damaged growth in spring.
So whether you cover your plants or not, the choice is yours 🙂
For more information on frost protection, check out the following link from the University of Arizona: Frost Protection
https://www.azplantlady.com/wp-content/uploads/2013/01/Frost-Damaged-Lantana-1.jpg480640arizonaplantlady@gmail.comhttps://www.azplantlady.com/wp-content/uploads/2025/08/AZ-Plant-Lady-Logo-small.jpgarizonaplantlady@gmail.com2013-01-07 21:25:002021-01-30 10:28:47Frost Protection: To Cover Plants or Not?
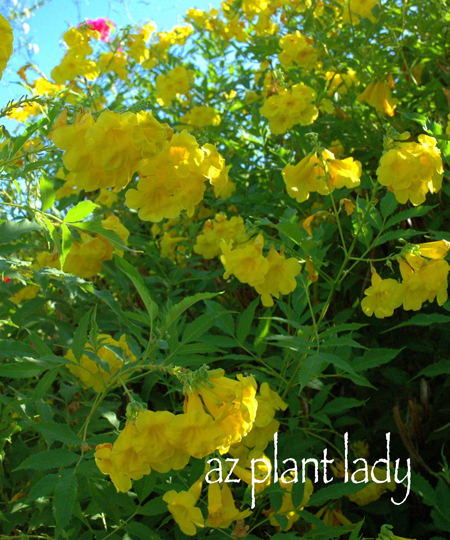
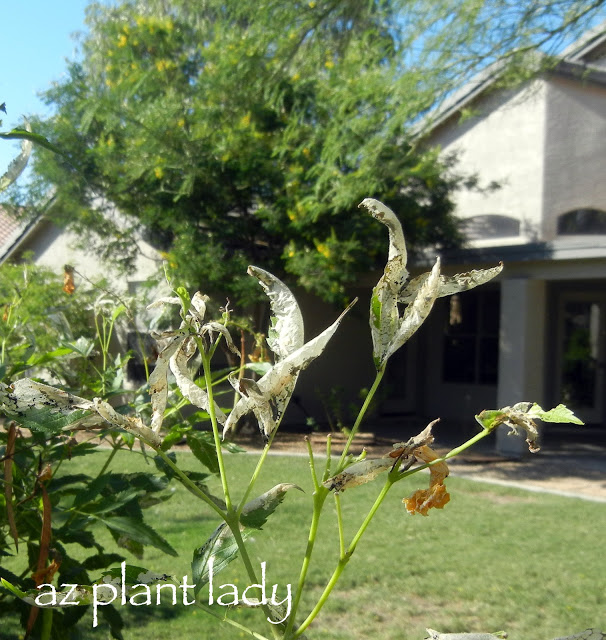
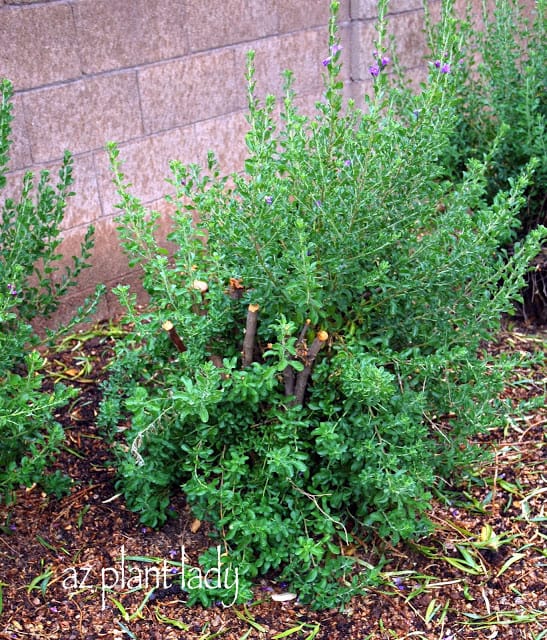
Last week, as I walked out into the back garden, I noticed something that didn’t look right with my a few of my yellow bell shrubs (Tecoma stans stans).
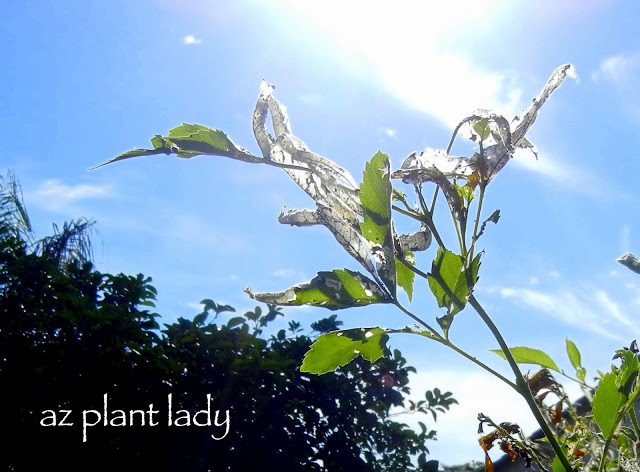
The photo, above, shows how they should normally look, however, last week, they looked like this….
Definitely not normal looking and manyM of the outer leaves were skeletonized, and it got worse. All four of my yellow bell shrubs had the same symptoms. So, did my orange jubilee shrubs, which are closely related.
To be honest, I was a bit stunned to see the damage. You see, I had grown these beautiful shrubs for over 14 years and have never seen this before – not even in landscapes I managed or when consulting.
What was interesting is that other shrubs right next to my yellow bells and orange jubilee weren’t in the least bit affected. So, what is eating my leaves?
I looked at the symptoms – the skeletonized leaves, the fact that many of my leaves were ‘rolled’ and little black dots (insect poop) told me that my shrubs were suffering from ‘looper caterpillars’ which are tiny caterpillars that roll the leaf around them while they eat. It is hard to spot the caterpillars themselves, but the damage they cause, usually makes it easy to diagnose.
If your Tecoma or Bougainvillea shrubs show significant leaf damage, here are a few different options on how to treat it:
1. Prune off the affected growth and dispose of the leave in the trash can (not in your compost pile).
2. Treat your shrub using a biological pesticide that contains BT (Bacillus thuringiensis), which is ingested by the caterpillars. BT basically ‘eats’ its way from the caterpillar’s stomach outward. I use a ready-to-use-product.
**Whenever using any pesticide – follow directions carefully. For my shrubs, I will prune back the damaged growth and not apply pesticides. However, if the caterpillars continue to attack, then I may decide to use a product with BT.
So, if you have yellow bells or orange jubilee shrubs – check them to see if they are being affected by caterpillars.
**If your bougainvillea leaves are showing signs of being chewed – they may have been visited by ‘bougainvillea looper caterpillars.’ For more information on how to recognize and treat these caterpillars, click here.
Thankfully, the rest of my garden is looking healthy 🙂
https://www.azplantlady.com/wp-content/uploads/2012/10/Tecoma_stans_stans.jpg540450arizonaplantlady@gmail.comhttps://www.azplantlady.com/wp-content/uploads/2025/08/AZ-Plant-Lady-Logo-small.jpgarizonaplantlady@gmail.com2012-10-02 04:44:002021-08-11 12:11:41What’s Happened to My Shrubs? Identifying and Treating Caterpillar Damage
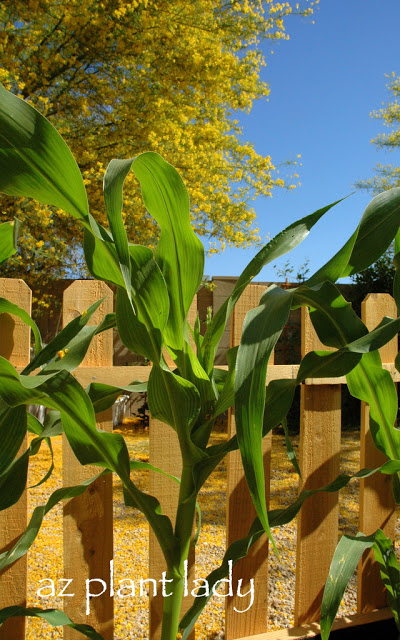
When the sun shines brightly and the aroma of barbecue wafts through the air, you know summer has arrived. But for me, nothing quite captures the essence of this season like the taste of sweet corn. For the past three summers, I’ve reveled in the joy of growing my own sweet corn, and this year promises to be just as delightful.
A Season of Growth and Anticipation
As the days grow longer and the temperatures rise, there’s a remarkable transformation happening in my backyard. It begins with the sprouting of the corn stalks, their vibrant green leaves reaching for the sky. Then, the first delicate appearance of corn silk marks the beginning of a mouthwatering countdown to the ultimate summer treat: fresh-roasted corn on the cob.
Easy Cultivation, Easier Cooking
Growing sweet corn is not only a rewarding experience but also surprisingly easy. However, the real magic happens when you turn those homegrown cobs into a delectable dish. In my quest for a simpler and tastier way to cook corn, I stumbled upon a game-changing roasted corn recipe that eliminates the need for boiling water and shucking corn ahead of time. The best part? It imparts a delicious, roasted flavor that will have your taste buds dancing with joy.
Instructions:
The Roasted Corn Recipe
Let’s dive right into it – here’s how you can effortlessly prepare Oven Roasted Corn on the Cob:
Ingredients:
Fresh ears of corn (with husks still on)
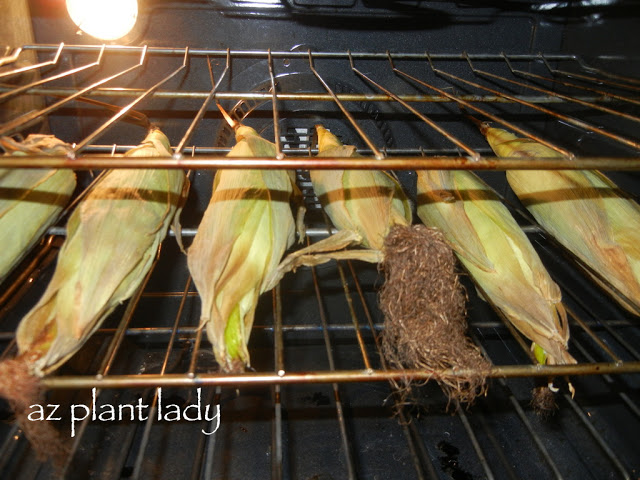
Preheat your oven: Begin by preheating your oven to a toasty 350 degrees Fahrenheit (175 degrees Celsius).
Prepare the corn: Take your whole ears of corn, ensuring that the husks are still on, and place them directly on your oven rack. This step is a game-changer because it allows the corn to roast within its natural protective casing.
Bake to perfection: Slide your corn-laden oven rack into the preheated oven and let them bake for approximately 30 minutes. You’ll be amazed at how this short time span is all it takes to fully cook your corn to perfection.
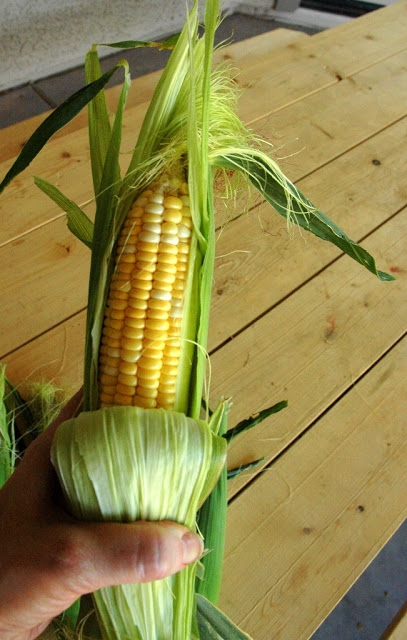
Unveil the golden treasure: Once the timer goes off, carefully remove the corn from the oven. Then, with gentle hands, pull down the husks. As if by magic, the corn silk will come off easily, leaving you with pristine, golden kernels.
Ready to enjoy: To add the final touch of charm to this delightful dish, use the peeled husks as convenient handles for eating your corn. It’s both practical and visually appealing, making every bite a summer sensation.
There you have it – a fuss-free and incredibly satisfying way to prepare fresh-roasted corn on the cob. It doesn’t get much easier or tastier than this!
Roasted Corn Recipe
Summertime Roasted Corn Bliss
As you revel in the simple pleasures of summer, remember that the joy of growing your own sweet corn can be elevated to new heights with the right recipe. This Oven Roasted Corn on the Cob is not only a time-saver but also a flavor enhancer that will make your summer gatherings truly memorable.
So, fire up that oven, embrace the beauty of your homegrown corn, and savor the flavors of the season with this mouthwatering roasted corn recipe.
https://www.azplantlady.com/wp-content/uploads/2012/06/DSC_002209-1.jpg640400arizonaplantlady@gmail.comhttps://www.azplantlady.com/wp-content/uploads/2025/08/AZ-Plant-Lady-Logo-small.jpgarizonaplantlady@gmail.com2012-06-15 19:13:002023-09-18 14:33:00Savoring the Flavors of Summer: A Mouthwatering Roasted Corn Recipe
Usually when I am called to a help out a homeowner with their landscape, it is because they are having a problem with their plants, or sometimes they are new to the desert and want to learn how to garden in our dry climate.
Last week, I visited a homeowner who had some questions about whether or not he was taking good care of his garden.
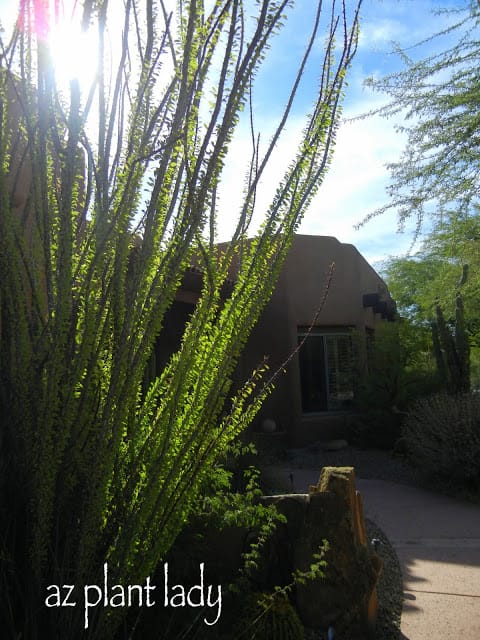
His house is located just northeast of the metro Phoenix area, in the desert. He and his wife had lived there for over 15 years and they designed their garden by themselves.
As I approached the front entry, I was greeted by this beautiful Ocotillo that was back lit by the morning sun…
When approaching a new client’s house, I always look around their front garden, because it gives me an idea of their preferences and maybe problems that they are having. This gives me a ‘heads-up’ before I actually meet the client.
His front garden was just beautiful and I was looking forward to seeing what his back garden looked like…
There was a fireplace with a lovely seating area and you could see the pool surrounded by beautiful desert plants in the distance.
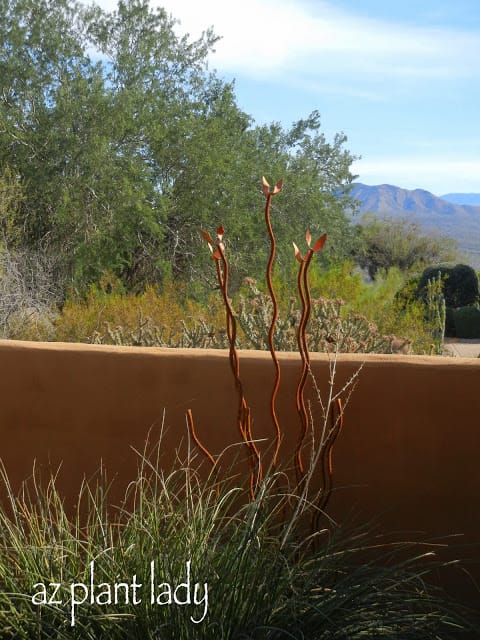
The wall of his back garden backed right onto the desert. He had some beautiful artistic pieces, including this metal Ocotillo.
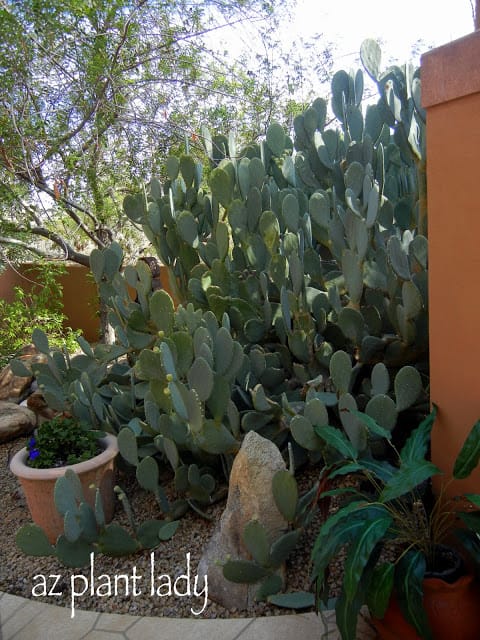
There was a very large Indian Fig cactus. This type of prickly pear is very popular because it is thornless. But it needs a lot of room to grow.
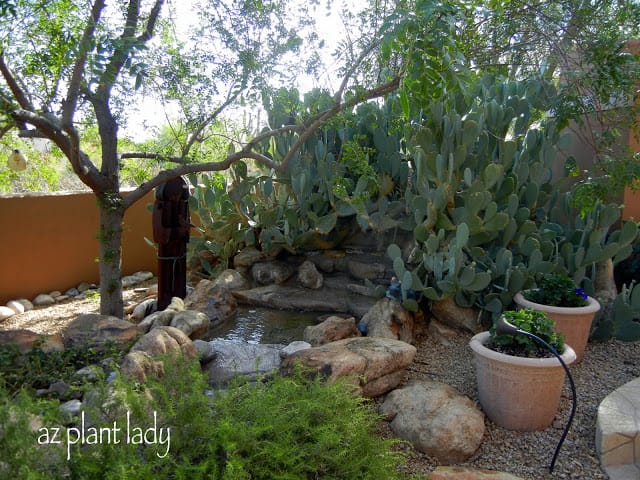
This particular Indian Fig was hiding something….
A beautiful water feature flowed from underneath the Indian Fig.
Rosemary grew along the side as well as potted annuals.
Isn’t this a beautiful area?
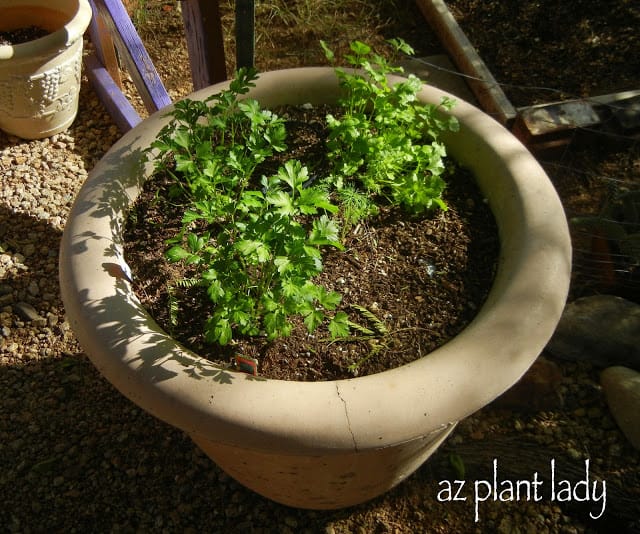
There was also an empty vegetable garden, but the homeowner did have herbs growing in containers….
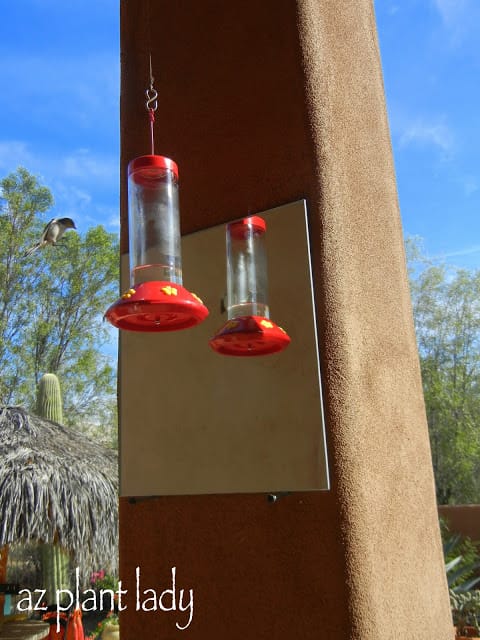
Many people keep their hummingbird feeders up year round because we have hummingbirds 12 months out of the year.
This hummingbird faces a mirror. The mirror serves two purposes, according to the homeowner:
One, it keeps the woodpeckers from making holes and second, it gives them an additional view of visiting hummingbirds.
You can see a little Verdin flying in for a drink of the hummingbird nectar.
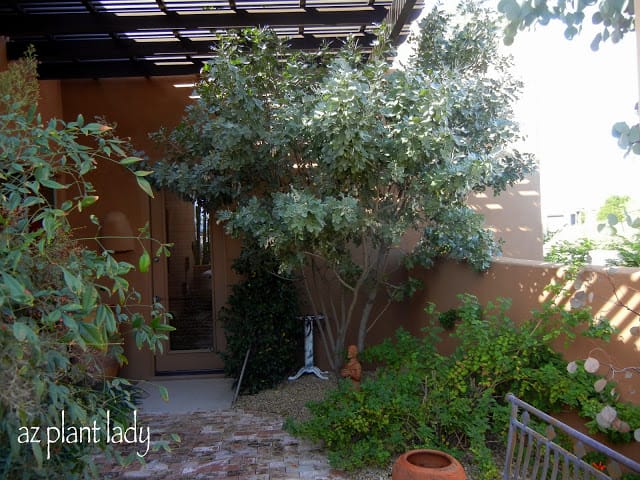
Lastly, we viewed a shady area of his garden.
The plants in this area do very well in light shade.
There was Heavenly Bamboo to the left, Cape Honeysuckle to the right, Star Jasmine vine next to the door and Texas Mountain Laurel ‘Silver Peso’, which is a gray-leafed form.
I had a wonderful time visiting and I did have a few suggestions regarding proper watering and when to prune.
I hope you enjoyed seeing this beautiful desert garden with me.
******************************
Life is quite busy this week for me as I am sure it is for most of you with the upcoming holiday.
https://www.azplantlady.com/wp-content/uploads/2011/11/Backlit-Ocotillo.jpg640480arizonaplantlady@gmail.comhttps://www.azplantlady.com/wp-content/uploads/2025/08/AZ-Plant-Lady-Logo-small.jpgarizonaplantlady@gmail.com2011-11-21 17:09:002021-02-11 05:29:46Visit to a Client’s Desert Garden
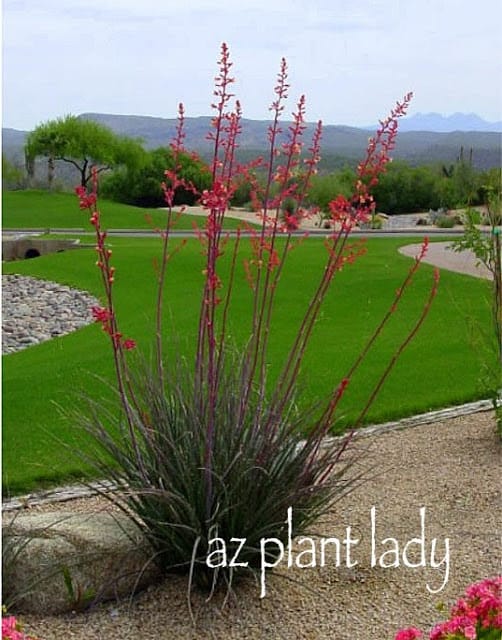
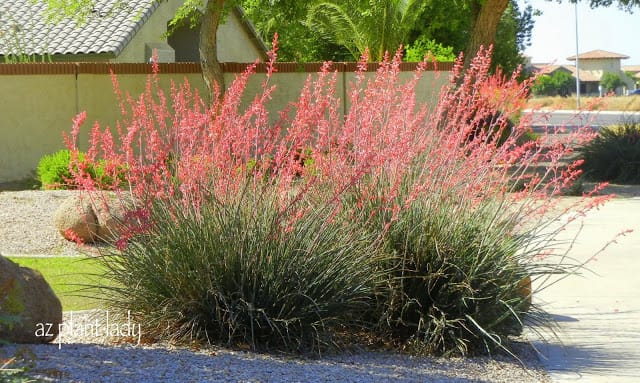
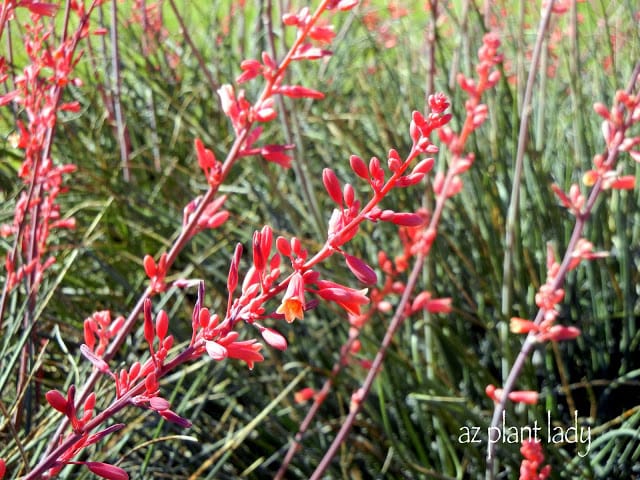
This is what (Hesperaloe parviflora)looks like when its flowering.
Every time I see a Red Yucca (Hesperaloe parviflora) in full bloom, I remember a disastrous pruning incident that still makes me laugh and groan at the same time….
Red Yucca Plant Pruning Disaster
I was working as a horticulturist at a golf course and I was fortunate to have a wonderful crew of landscapers. One of the landscaper’s was Abel. He was in charge of maintaining the clubhouse landscape grounds. One day, he came in to my office with a huge smile on his face and told me that in addition to the work that I had already assigned him, he had pruned some plants around the clubhouse and couldn’t wait to show me what a great job he did.
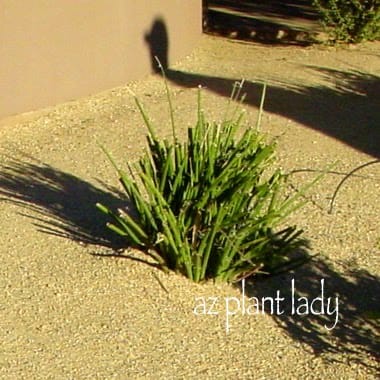
I went with him to see what he had done and when we got there, I just couldn’t believe it….. he had pruned off all the tops of the 30 Red Yucca (Hesperaloe parviflora) plants!!! I was in complete shock and standing beside me was a smiling Abel, whose was so proud of his work and who honestly did not have a clue that he had done something wrong.
This is what was left of one of the (Hesperaloe parviflora) plants.
Well, I didn’t have the heart to tell him that you never should prune the tops of Red Yucca leaves. But, I did tell him that he needed to check with me before he pruned anything else around the clubhouse.
This story has a happy ending…..the Red Yucca eventually grew back and Abel continued to work for me about a year with no further pruning disasters. He then left to go back to Mexico where he became mayor of his small town.
How to Prune a Red Yucca (Hesperaloe parviflora) Plant
Season for Red Yucca Pruning:
Prune the Red Yucca plant after the flowers have faded, typically in late summer or early fall.
Flowering Stalks:
Trim back the flowering stalks to the base of the plant using clean and sharp pruning shears. This helps maintain a tidy appearance and encourages new growth.
Simple Approach to Yucca Pruning:
Pruning Red Yucca is straightforward. Just focus on removing the faded flowering stalks and any dead or damaged leaves.
Avoid Cutting the Top:
Be cautious not to prune the top of the plant, as this can make it look unattractive and slow down its growth recovery. The crown of the plant should be left intact.
Red Yucca Minimal Maintenance:
Red Yucca is known for being a low-maintenance plant, and its pruning requirements are minimal. This makes it an ideal choice for a southwestern garden.
Pruning Tools:
Use clean and sharp pruning shears to make precise cuts, which promote quicker healing and reduce the risk of disease transmission.
Protective Gear in the Desert Garden:
Wear gloves and protective eyewear while pruning to shield yourself from the plant’s sharp leaves and any debris.
Sanitize Your Tools:
Before and after pruning, disinfect your pruning tools to prevent the spread of any potential diseases between plants.
Observe and Improve Structure and Plant Shape:
Take a moment to observe the plant’s overall structure and health before pruning. Remove only what is necessary for the plant’s well-being and aesthetics.
Careful Pruning:
If you’re unsure about pruning, start conservatively by trimming a little at a time. You can always prune more if needed, but you can’t undo an overly aggressive trim
Remember, Red Yucca is quite resilient, and with proper pruning, you can enhance its appearance and ensure its continued health in your southwestern garden.
So, have you seen any pruning disasters lately? I seem to be seeing quite a few….
https://www.azplantlady.com/wp-content/uploads/2017/07/red_yucca_Hesperaloe_parvifolia.jpg8231024arizonaplantlady@gmail.comhttps://www.azplantlady.com/wp-content/uploads/2025/08/AZ-Plant-Lady-Logo-small.jpgarizonaplantlady@gmail.com2011-08-11 13:19:002023-08-30 15:02:10Do This….NOT That for the Red Yucca Plant!
Many people tell me that they are tired of their boring, round green shrubs. Often, they are surprised when I tell them that those ‘boring’ green balls would actually flower if given a chance.
So, how do you take those boring green balls and turn them into beautiful, flowering shrubs?
‘Green Cloud’ Texas Sage shrubs
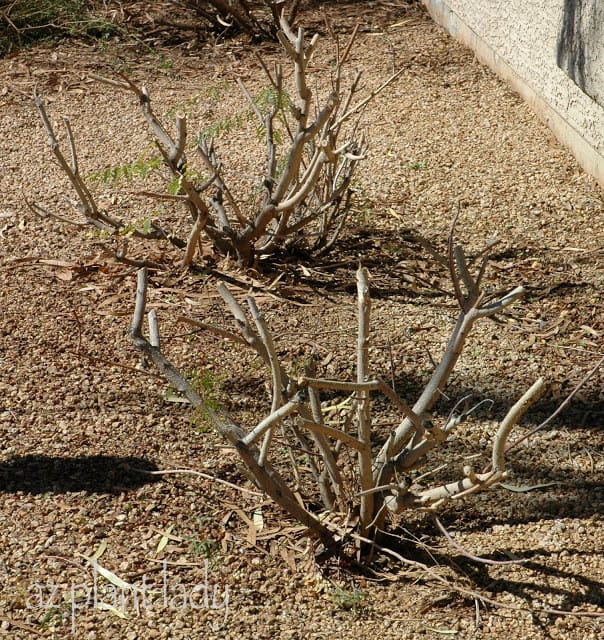
The first step is to rejuvenate your green ‘balls’ by severely pruning them back.
Now I warn you, this is an ugly stage. Your shrubs will look like a bunch of sticks poking out of the ground.
Red Bird-of-Paradise shrubs, newly pruned.
This is best done at certain times of the year, depending on what type of flowering shrub you have. For example, if you severely prune summer-flowering shrubs back in December, you will have to wait a long time for them to leaf out, once the weather warms.
I pruned the ‘Rio Bravo’ Sage (Leucophyllum langmaniae ‘Rio Bravo’) shrub below in March and by early April, it had already begun to produce new branches.
‘Rio Bravo’ Sage, 1 month after severely pruning.
So, when should you prune your shrubs?
Here is a list of some of the most common shrubs in the low desert and when they should be pruned. (If you live in the high desert, you can adjust the timing by a month or so later.)
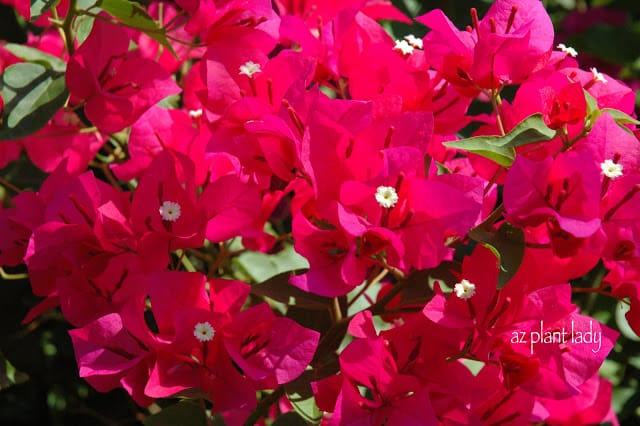
Bougainvillea
Bougainvillea (Bougainvillea species) – March
Red Bird-of-Paradise (Caesalpinia pulcherrima) – March
Baja Fairy Duster (Calliandra californica) – March
Cassia species (Senna species) – May (once flowering is finished)
Brittlebush (Encelia farinosa) – June
Valentine Bush (Eremophila maculata ‘Valentine’) – May
Texas Sage (Leucophyllum species) – March
Oleander (Nerium oleander) – May or June
Yellow Bells (Tecoma stans) – March
Cape Honeysuckle (Tecomaria capensis) – March or April
If you look closely at the list above, you can see that in most cases these shrubs are either pruned once they have finished flowering OR just after the danger of frost is over in the spring.
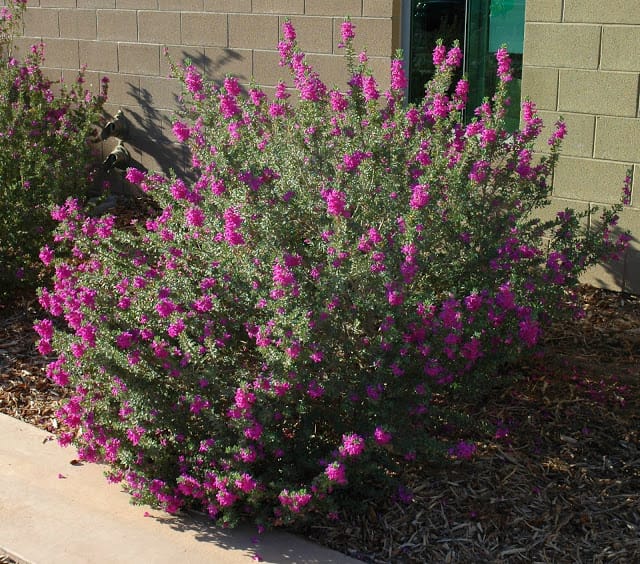
The reward for your efforts is a beautiful, flowering shrub like the ‘Green Cloud’ Texas Sage, below.
‘Green Cloud’ Texas Sage
If your shrub is getting a bit large later in the year, you can prune it using hand pruners and removing no more then 1/3 of the growth. Just be careful not to use hedge-trimmers.
So, do you have to prune your flowering shrubs severely every year?
Absolutely not.
As long as your shrub is attractive and not outgrowing its space, you can save severe pruning for every 3 years or so, which will remove older branches and cause new ones to grow in their place. This is what I do in my own garden.
Want to learn about pruning flowering shrubs the right way? I invite you to check out my popular online pruning workshop. I’ll teach you how to maintain beautiful flowering shrubs by pruning twice a year or less.
https://www.azplantlady.com/wp-content/uploads/2011/08/Boring-shrubs.jpg320640arizonaplantlady@gmail.comhttps://www.azplantlady.com/wp-content/uploads/2025/08/AZ-Plant-Lady-Logo-small.jpgarizonaplantlady@gmail.com2011-08-05 11:28:002021-02-13 10:11:18Turn Your Boring Green ‘Ball’ Into a Beautiful, Flowering Shrub
One of the things that I love about gardening in the desert is how many beautiful plants that can not just survive our arid climate, but thrive in it.
Besides our native desert plants, many tropical plants also do very well here due to our relatively mild winter in our semi-tropical climate. Quite a few of these plants are native to Mexico.
So far in our lesser-known plant spotlight, we have highlighted two flowering shrubs that will add interest to your garden…..Valentine and Chaparral Sage.
So now for our next featured plant.
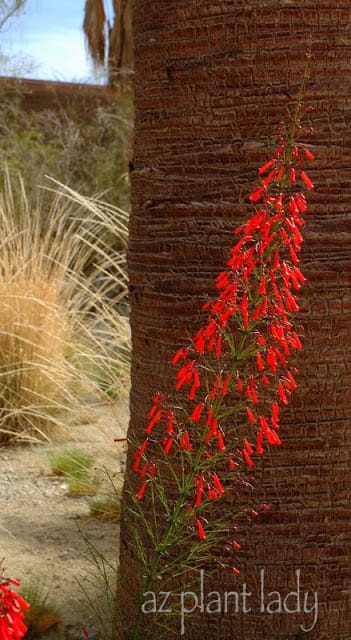
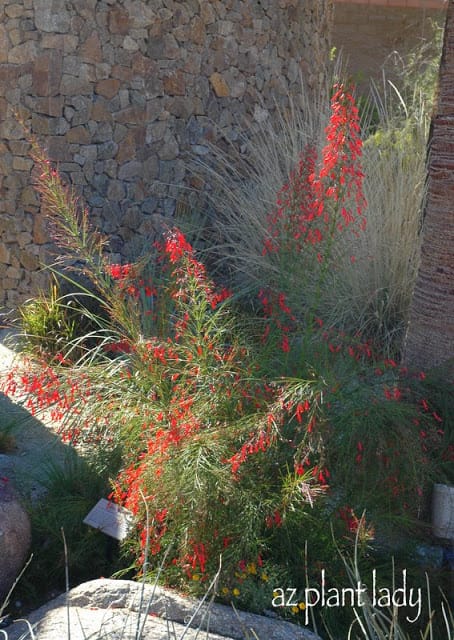
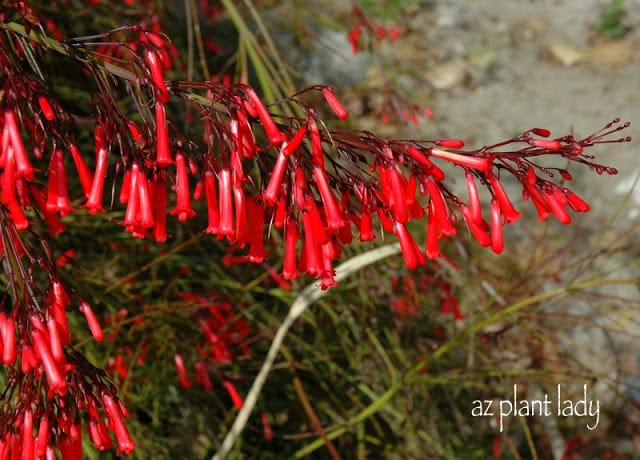
If you love the shape of water as it cascades from a fountain and the bright colors of coral, then you definitely want to include coral fountain(Russelia equisetiformis) in your garden.
Aren’t the flowers just so beautiful?
Although this beautiful plant is native to Mexico, it does exceptionally well in our arid climate – in fact, the coral fountain in the photos is planted in sandy soil. The leaves are hard to see and are small and scale-like in appearance.
Here are some reasons that you should definitely try coral fountain out in your garden:
– Striking coral colored flowers continually grace this shrub during the warm months of the year.
– It can reach a mature size of 4 ft. high and 4 – 6 ft. wide.
– Hummingbirds will be in heaven if you plant this pretty flowering shrub.
– Coral fountain is tolerant of a variety of conditions. Well-drained soils or wet soils, arid climates or tropical climates and handles full sun or filtered shade.
– It grows quickly, so you do not have to wait a long time for its showy display of flowers.
– Because of its tropical origins, it is not cold hardy. It does suffer frost damage when temperatures dip below 32 degrees F. You can help to protect coral fountain from frost by covering it when temperatures fall.
Because our soils have so little organic matter, coral fountain does best when given some fertilizer. I would recommend using a slow-release fertilizer and apply in the spring and fall months.
Try planting it alongside yellow or purple flowering plants for great color contrast.
The cascading form of coral fountain looks beautiful when used next to a water feature or in a container. You could also use it a raised bed where the flower plumes will gracefully fall over the wall.
Why didn’t I take a picture of my own coral fountain? Well, I must admit that I do not have one in my garden.
Okay, so you may well be asking why do I not have a plant that I highly recommend in my garden? Well, that is an excellent question, and I must confess that I do not have a really great answer for you.
I could say that my garden is over 11 years old and already full of plants.
I could then add that if I planted every kind of plant that I loved, that all sense of design in my garden would go out the door because I would have a mish-mash of too many different plants, which is not pleasing to the eye from a design standpoint.
But, those excuses sound kind of pitiful to my own ears. Every time that I drive to Double S Farms (my mother and sister’s home), I pass by a beautifully designed garden which features a coral fountain shrub on the corner. I always look for this plant, and I am still admiring it.
And so, I must admit the truth to myself…… I would love to have this plant in my own garden and will be on the lookout for one the next time I visit the nursery. UPDATE: I now have three of the beautiful plants, growing underneath the filtered shade of my palo verde tree.
https://www.azplantlady.com/wp-content/uploads/2011/02/DSC_0526.jpg640351arizonaplantlady@gmail.comhttps://www.azplantlady.com/wp-content/uploads/2025/08/AZ-Plant-Lady-Logo-small.jpgarizonaplantlady@gmail.com2011-02-13 16:03:002021-02-16 07:49:43Lesser Known Tropical Beauty for the Desert Garden
I am faced with a wonderful dilemma of selecting a desert tree…
My last post dealt with the loss of one of our beautiful ‘Desert Museum’ palo verde trees. So now we are faced with the question of which type of tree should we choose to replace the one that I lost? We worked hard the past couple of days to remove the fallen tree and now have a bare space to fill.
I have lived in my home (and garden) for over ten years. As our house was being built, we designed the surrounding garden. I enjoyed deciding which trees I would choose to grace our desert garden with not only beauty but shade in the summer months. I honestly do not understand people who don’t plant trees in the garden – especially in desert climates. They not only provide wonderful shade in the summer months but also add a lot of value to your property.
*This blog contains affiliate links. If you click on a link and make a purchase, I may earn a small commission with no additional cost to you.
Considering Options for Selecting a Desert Tree
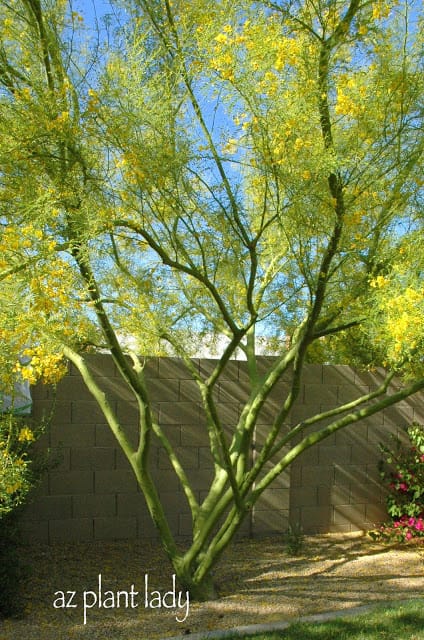
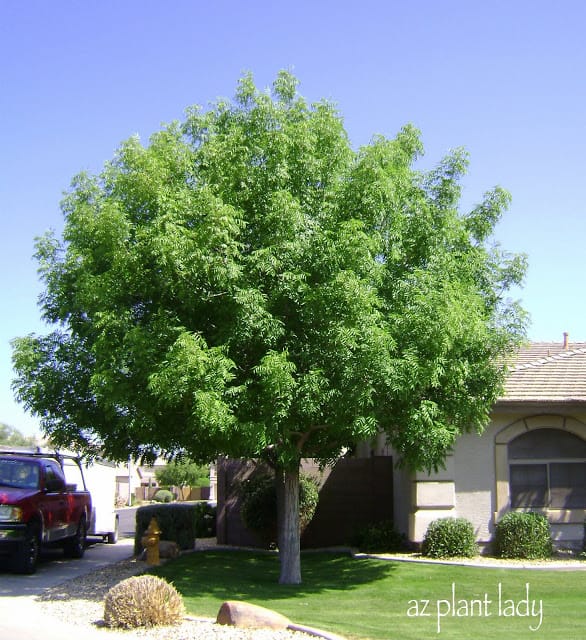
I loved my palo verde tree that fell…..I have two others just like it, including the one pictured above. There is much to like about these trees beside the beautiful green trunks – they are fast growing, thornless, evergreen and yellow flowers in the spring. The only drawbacks are that there is litter from the fallen flowers in spring, which means that it should not be planted by a pool. The fallen flowers do not bother me at all – I rather enjoy the carpet of yellow.
But, even with all of the wonderful attributes of this tree, I have decided to select another type of tree as it’s the replacement. Why may you ask? Well, because they grow quickly, I do have to prune them quite a bit. I do not mind pruning, but pruning three of these trees each year was becoming much more of a chore.
Another reason is that in addition to being a horticulturist, I am also a certified arborist and I do love trees and have grown many different kinds in the landscapes that I managed. Right now, I have 14 trees (8 different types) growing in my front, back and side gardens. I would enjoy adding another kind of tree to my plant palette.
So, here comes the fun part…which one to choose?
Selecting a Desert Tree Variety:
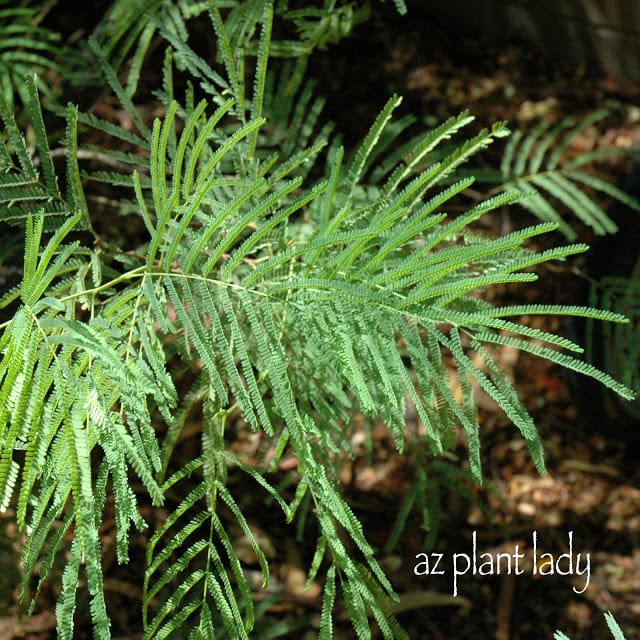
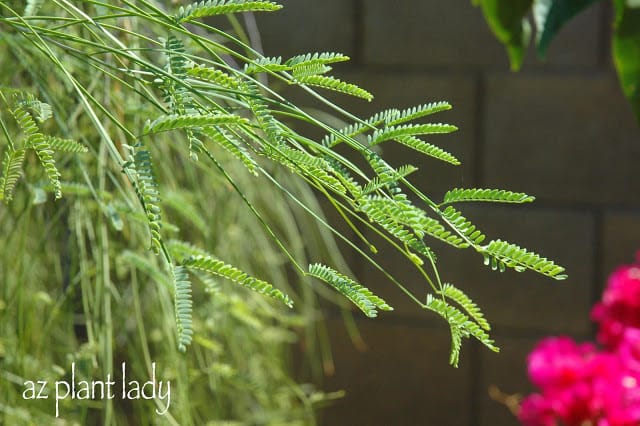
Desert Fern (Lysiloma thornberi)
Desert Fern (Lysiloma thornberi, Lysiloma watsonii var. thornberi, Lysiloma microphylla var. thornberi)
One of my favorite things about the desert fern is the beautiful, fern-like leaves – hence its common name.
Another plus is that is a native, desert tree and is thornless. The leaves turn a slight maroon color in the winter in our zone 8b climate. In colder winters the leaves may drop altogether. Although what I would call a medium sized tree, it typically grows from 15 – 45 feet high and wide.
One drawback is that it does produce brown seed pods, which some people do not like, but I have no problem with them at all.
*I do have a desert fern tree already, and although another one would look great in my newly bare area, I think I will try to choose a different type of tree.
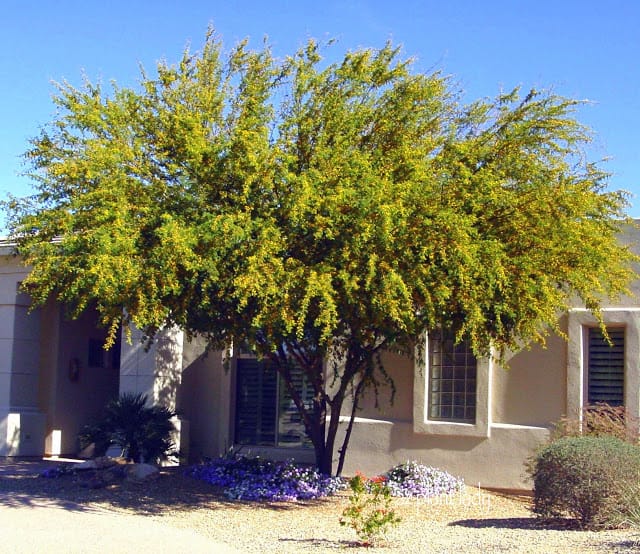
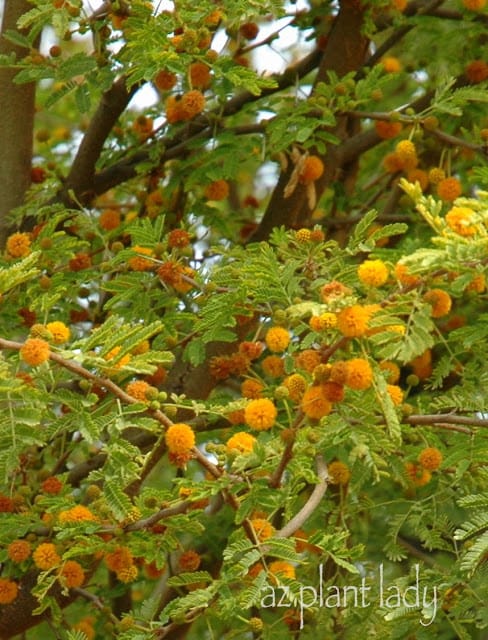
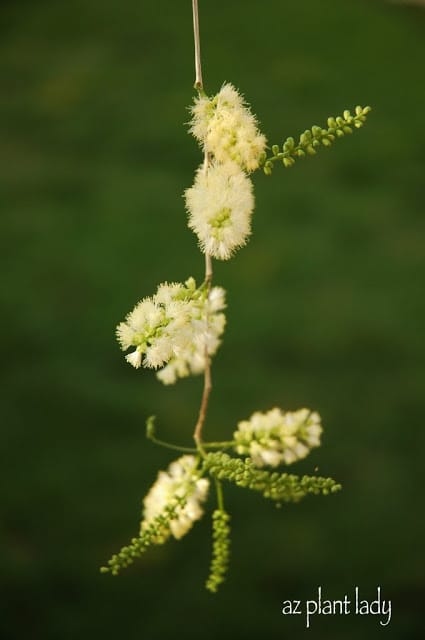
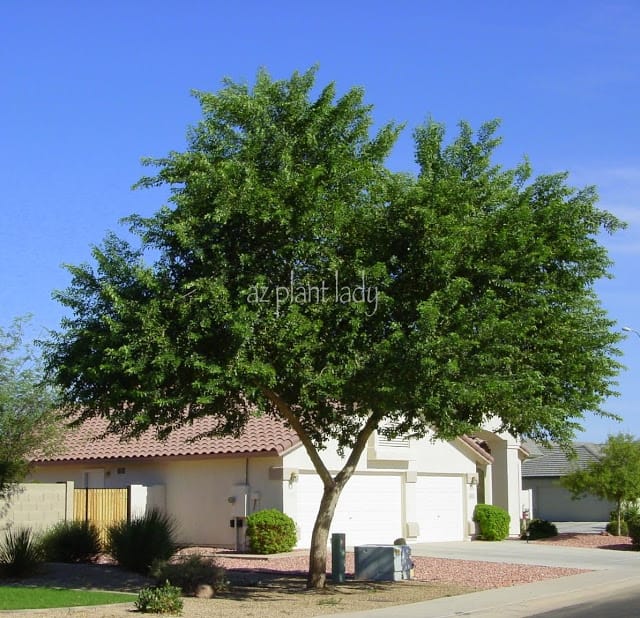
Sweet Acacia (Acacia farnesiana, Acacia smallii)
Sweet Acacia(Acacia farnesiana, Acacia smallii)
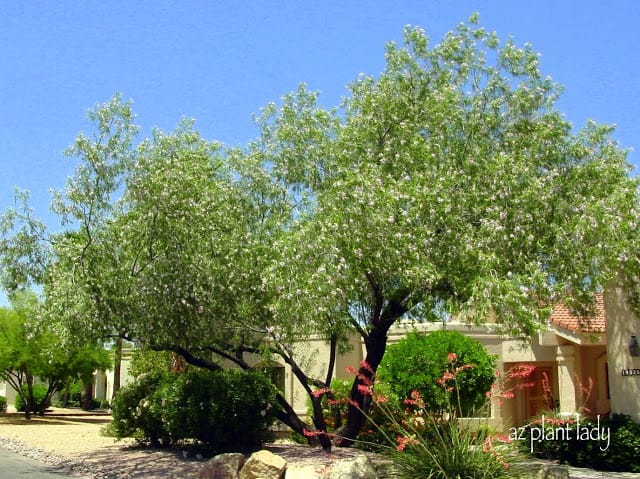
In the springtime, air is perfumed with the fragrance of the bright yellow puffball flowers of the sweet acacia. When not in flower, the tiny, dark green leaves are easier to see.
Although found in other areas of the United States, it is also native to the southwest. The mature size is approximately 25 feet high and wide. In areas with mild winters, the leaves will remain on the tree. Dark brown seedpods are produced once flowering has finished.
Some drawbacks to consider are the thorns having to be careful when pruning is necessary (requiring gloves and long sleeves). Now, I am more of a “Do as I say” person rather than a “Do as I do” person. I always wear gloves when I prune, but I rarely wear long sleeves in the summer months. As a result, I have some small scratch scars on my forearms from pruning sweet acacia in the past.
Although I love the beauty, size and the springtime fragrance of this tree, I don’t think I want to accrue any more scars on my arms 😉
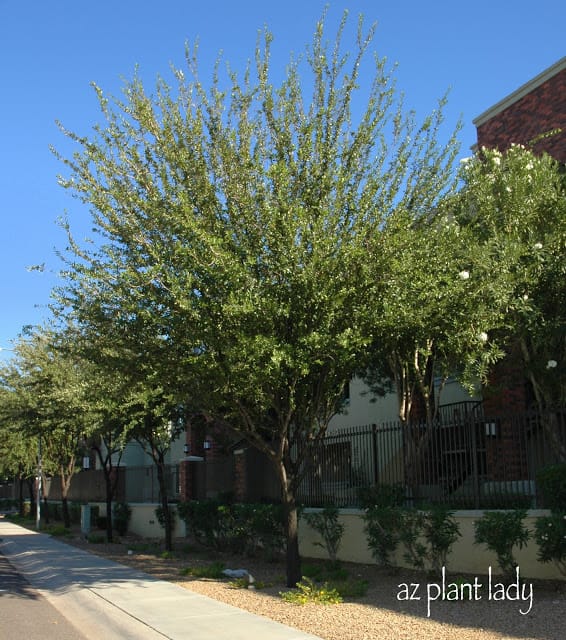
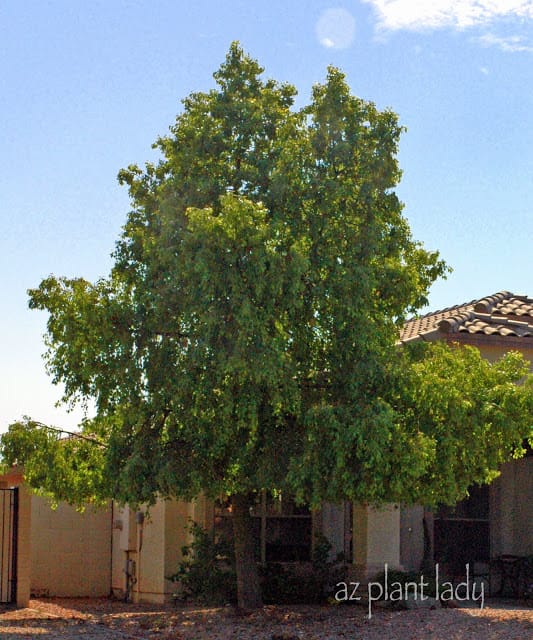
Southern Live Oak (Quercus virginiana)
Southern Live Oak (Quercus virginiana)
Believe it or not, oak trees do very well in our desert climate. Southern live oak, cork oak, and holly oak are all found in the suburban landscape. Southern live oak is the most prevalent, however.
There is little not to love about these trees – they are thornless, have evergreen foliage, are tolerant of full and reflected sun making this tree very low-maintenance. In non-desert climates, they can reach heights of up to 40 – 60 ft., but will not grow that large in the desert. In the landscape areas that I managed, they were a favorite because there was so little maintenance required.
Tired of struggling in the desert garden? Sign up for my online course, DESERT GARDENING 101.
I may be crazy, but this tree seems a little boring to me. Not sure exactly what it is. I spent my teenage years growing up in the town of Thousand Oaks, California and the hillsides are dotted with large, specimen oak trees. The oak trees that I see growing in our area do not resemble the ones from my childhood, so maybe that is the reason that I do not have any in my garden. But, I would wholeheartedly recommend this tree to anyone who wants a lovely, low-maintenance tree.
Bottle Tree (Brachychiton populneus)
Bottle Tree (Brachychiton populneus)
Some of you may be surprised to know that many of our trees and shrubs are grown in our arid climate are native to Australia. The bottle tree is one of them. First of all, I love the shape of the leaves and how the sun reflects off of them in a gentle breeze. I also like the slightly pendulous way that the branches hang down. Evergreen in areas with mild winters and a smooth trunk make it an asset in the garden. Its mature size of 30 – 45 feet high and 30 feet wide, makes it suitable for narrower spaces.
As a child, growing up in Los Angeles, we had one in our front garden. My sister and I used to pretend that the little flowers were ‘fairy caps’ and the flowers were soon followed by large, brown seedpods.
The pods themselves are quite cool looking, and my mother would use them in making wreaths out of seedpods. But what I most remember about the seedpods is getting some of the ‘fuzz’ from the inside stuck on my bare feet, and it hurt. I think that is maybe why I do not have this tree in my garden. But, many people I know who have a bottle tree love them.
**One note of caution, this tree is quite susceptible to Texas (Cotton) root rot (a fungal disease that infects the roots). So if you know of cases of Texas root rot in your neighborhood, I would advise growing another type of tree.
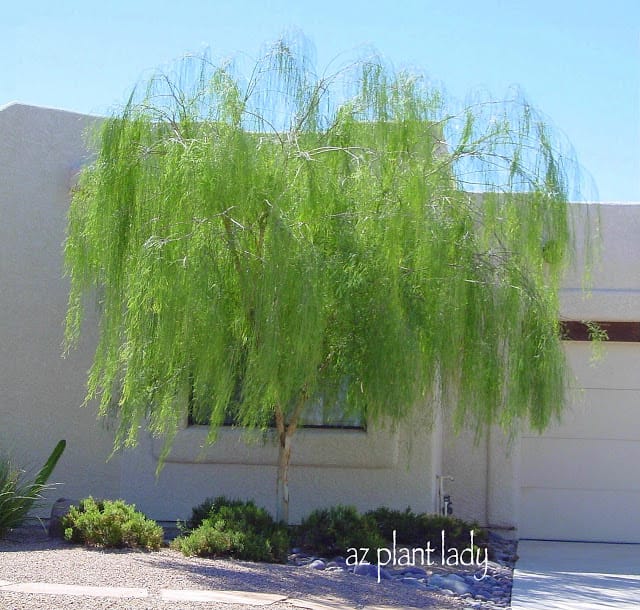
Palo Blanco (Acacia willardiana)
Palo Blanco (Acacia willardiana)
If you have not already noticed already, I am somewhat biased about certain types of trees. This one is one of my favorite smaller trees. The word ‘palo blanco; means “white stick” in Spanish and refers to the white trunk of this tree – considered to be one of its most attractive assets.
The bark peels off in papery sheets. Palo blanco trees look great when planted near each other in groups of 3 or 5 where their distinctive tree trunks can be shown off.
I also like the bright green foliage of the trees and their tiny leaflets. In winter, the leaves do fall from the desert native, but they are so small and do not create much litter.
When mature, it reaches a height of 15 – 20 feet and spreads to 10 feet wide which makes it suitable for a patio tree or other small area. Maintenance is minimal, only requiring a small amount of pruning.
Tiny flowers grace the tree in spring, followed by decorative seed pods.
I like these trees so much that I have three of them. They are growing against my west-facing garden wall and do great in the reflected sun. But, I will probably choose something else for my bare area since I would like a tree that is a little larger for that area.
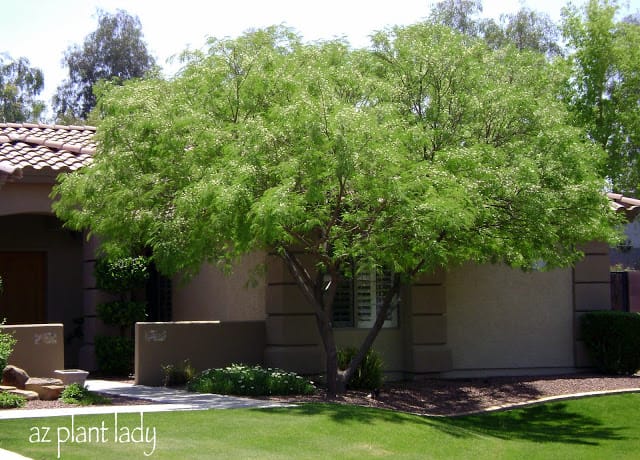
Indian Rosewood / Sissoo (Dalbergia sissoo)
Indian Rosewood / Sissoo (Dalbergia sissoo)
It’s hard to beat the sissoo tree for fast growth and shade. However, they ARE NOT recommended for average size residential landscapes. The photo of the tree above was taken four years after it was planted from a 15-gallon container and it rapidly grew even larger – soon, it had to be removed due to its invasive roots. This tree made its debut in the Phoenix area about 15 years ago and rapidly became quite popular for its lush green beauty.
As sissoo trees have been grown in the southwest landscape for several years, problems have begun to crop up. They have invasive root systems that cause problems with sidewalks, patio decks, pools, and block walls. Also, their mature size is so big that they dwarf the landscapes they have been planted in. Shallow watering often causes the roots to grow along the surface.
Sissoo trees are best used in large outdoor areas such as parks.
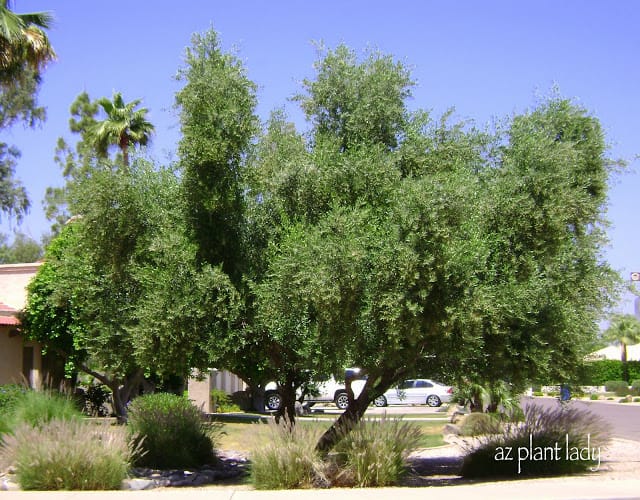
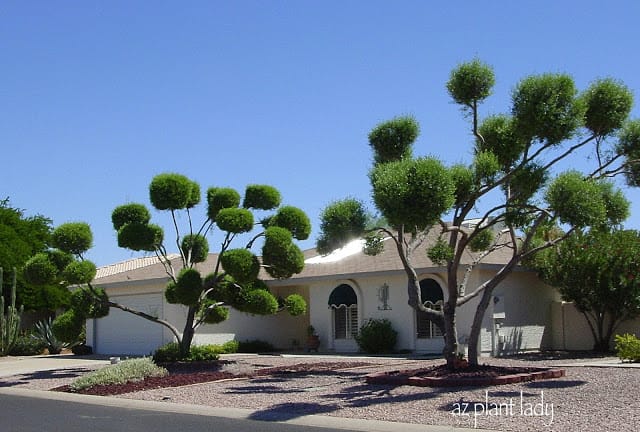
Olive (Olea europaea)
Olive (Olea europaea)
As an option, olive trees work well. Most are multi-trunk with beautiful olive green leaves. They are evergreen and thornless. Regular fruiting olives are no longer sold in many cities due to their highly allergenic pollen. Thankfully, there is a non-fruiting cultivar called ‘Swan Hill Olives’® which is available.
Reaching a mature size of 20 – 30 feet high and wide, olive trees make excellent shade trees and are slow-growing. Some olive trees have fallen prey to some creative pruning (see photo below).
Definitely memorable, but not quite my taste. I would like a tree that will not take too long to grow, so let’s press on to other trees.
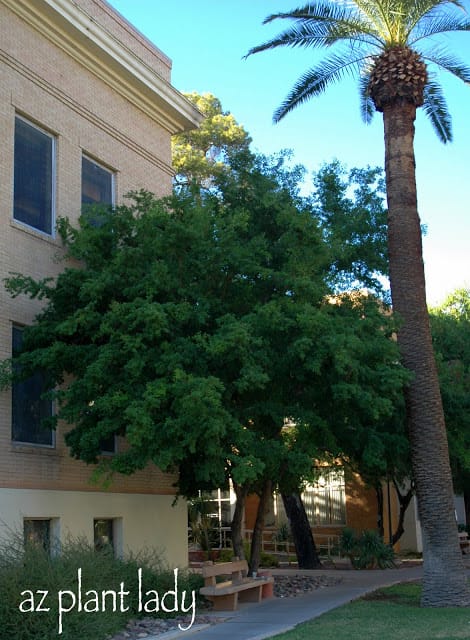
An excellent choice is Texas ebony. Particularly for those who like a dense, dark green canopy of leaves. Native to both Texas and Mexico, this tree does very well in the Arizona desert. Everything about this tree is dark – the green leaves the dark brown trunk.
This evergreen tree, has thorns and large brown seedpods. Texas ebony grows slowly to about 15 – 30 feet high and 15 – 20 feet wide.
This is a favorite tree with my clients, but again, I am looking for a tree that grows more quickly.
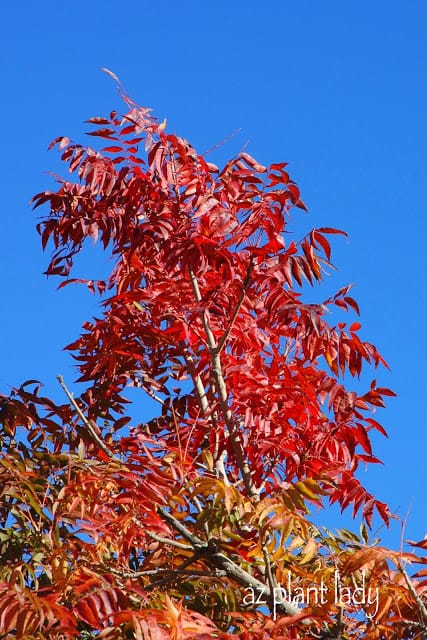
Chinese Pistache (Pistacia chinensis)
Chinese Pistache (Pistacia chinensis)
An excellent tree for those who like lush, green trees that lose their leaves in winter. Chinese pistache grows to 25 – 25 feet high and wide and has some welcome surprises. It is a deciduous tree known for its stunning fall foliage. Native to China, this tree has become popular in various regions due to its vibrant red, orange, and yellow leaves during autumn. Its small, round fruits are enjoyed by birds.
Chinese Pistache trees are also valued for their drought tolerance and adaptability to different soil types, making them a favored choice for landscaping and urban environments.
It is one of the few trees in our area that produces a rich fall color. Female trees produce clusters of little berries in the fall.
I like this tree, but I want to see more trees before I decide…..
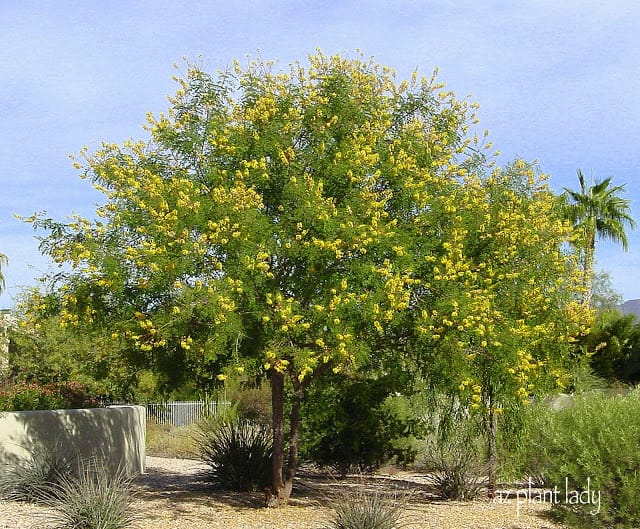
Cascalote (Caesalpinia cacalaco)
Cascalote (Caesalpinia cacalaco)
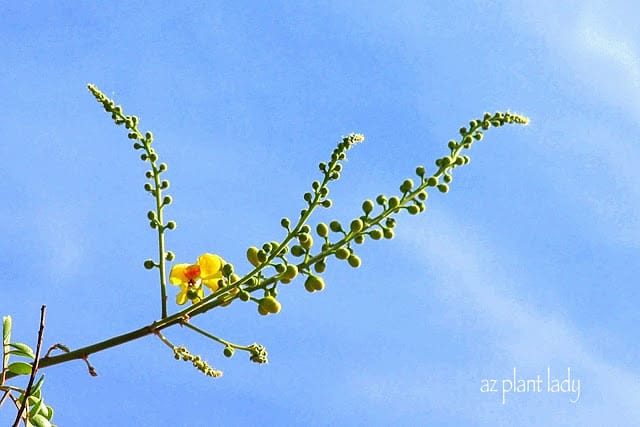
Another tree that also provides beautiful color in fall and winter is the cascalote. Plumes of yellow flowers start to appear in November and stay through December. At maturity, they reach approximately 15 feet tall and wide.
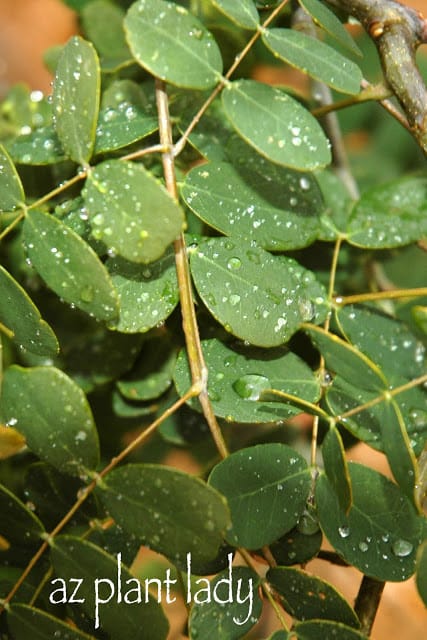
I love the clusters of small round leaves that are evergreen.
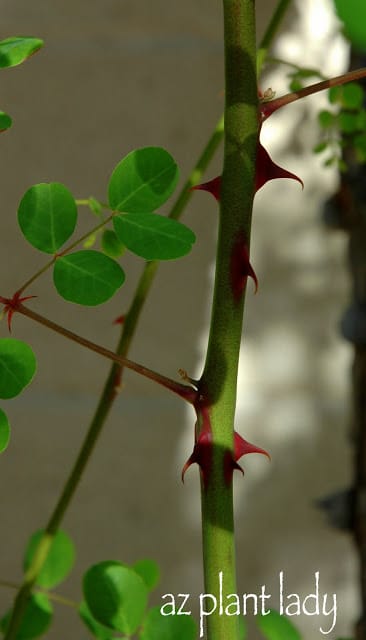
Now I am not a fan of thorns, but the thorns on this tree are almost pretty. You need to plant this tree away from pedestrian areas due to the thorns. You can remove the thorns if you like, which is what I have done in the past. However, there is now a thornless variety, called ‘Smoothie.’
The first flowers of the season begin to open. I bought my first one on a field trip with my Plant Identification college class to the Boyce Thompson Arboretum. I brought it home and planted it in a container because we were renting a house at the time, waiting for our new home to be built. Later, I planted it in our front garden, and I look forward to the beautiful yellow flowers in the fall.
Aleppo Pine (Pinus halepensis)
Aleppo Pine (Pinus halepensis)
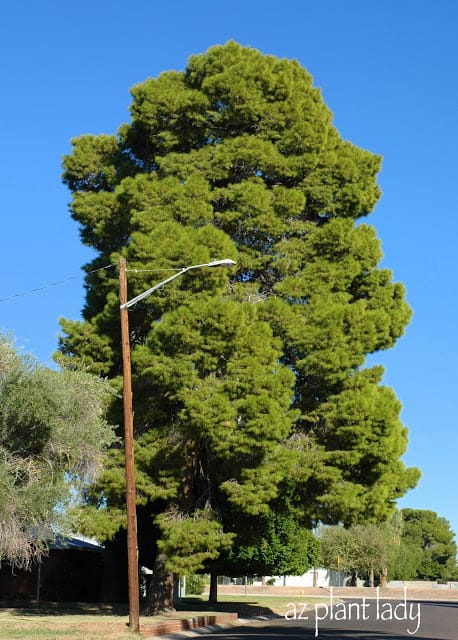
Believe it or not, some pine trees also do well in the desert. I love the sound of the wind as it blows through pine trees. Aleppo, Canary Island (Pinus canariensis) and mondel pines (Pinus eldarica) are all found in suburban areas of the lower desert areas of the southwest.
Depending on the species, they grow anywhere from 30 – 60 feet tall and most should not be planted in a residential landscape unless there is ample room for growth. They can suffer from soils and water with high amounts of salts.
Pine trees offer heavy shade that will prevent most grasses from growing underneath. Pine needles litter the ground as well. But did you know that pine needles make an excellent mulch? As they break down, they help to acidify our alkaline soils. And so, if you have a neighbor with pine trees, offer to rake some pine needles up to put in your garden. Your neighbor will be so happy 🙂
I am pretty sure that I will not plant a pine tree because I have memories of many hours spent nursing along many pine trees growing on golf courses that were irrigated with reclaimed water. Most of the pine trees did not do well with the high level of salts in the effluent water.
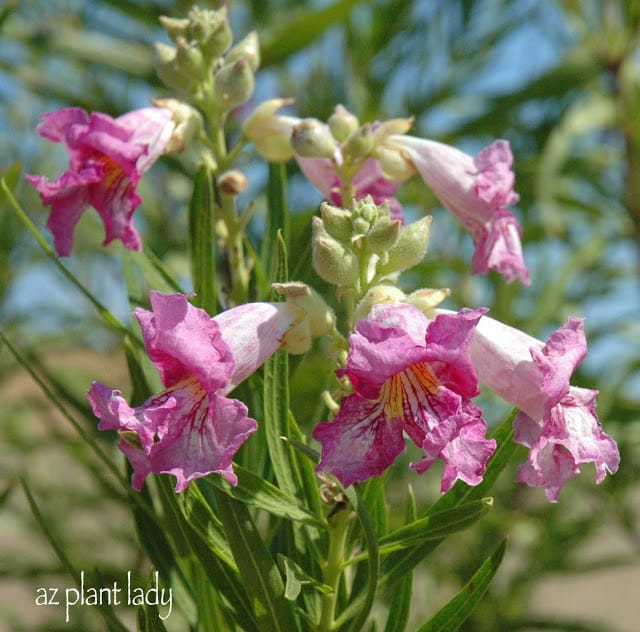
Desert Willow (Chilopsis linearis)
Desert Willow (Chilopsis linearis)
A summer favorite is the desert willow tree. Beautiful, willow-shaped leaves and flowers brighten up the summer garden. It can grow anywhere from 8 – 30 feet high and wide. Available in both single and multi-trunk, I prefer the beauty of the multi-trunk shape.
You will find this tree growing in parks, roadside plantings as well as in residential landscapes. Its small-medium size makes it suitable for smaller areas. It does lose its leaves in winter and forms narrow seed capsules. While not the prettiest tree in winter, the flowers produced spring through fall make it more than worth it and there are new (almost seedless) varieties such as ‘Bubba’ and ‘Timeless Beauty’ that produce little to no seedpods.
That is why I have four currently growing in my garden. They are simply lovely.
I would still like to find something different, that I do not currently have growing in my garden.
I need to continue looking at possible tree choices. (You can check out my second post of possible tree selections, here 🙂
P.S. Do you have more questions about choosing a tree for your landscape? I share my experience as a horticulturist and certified arborist and profile my top 20 along with all of their characteristics in my mini-course “How to Select the Right Tree for Your Desert Garden”.
https://www.azplantlady.com/wp-content/uploads/2010/09/PV-8.jpg640424arizonaplantlady@gmail.comhttps://www.azplantlady.com/wp-content/uploads/2025/08/AZ-Plant-Lady-Logo-small.jpgarizonaplantlady@gmail.com2010-09-02 23:52:002024-03-01 11:55:16How to Select A Desert Tree
Who doesn’t like Queen’s Wreath Vine? I have a renewed appreciation for my Queen’s Wreath Vine, also known as Antigonon leptopus. In the garden during the summer months it is fabulous. Now, I realize that there are some who do enjoy the satisfaction of working hard with their plants. The last thing I want to do is have to fuss over a plant in the middle of the summer heat so that it will look beautiful for me. I would much rather enjoy the ‘natural beauty’ of my summer plants looking through the windows from the comfort of my air-conditioned home.
Embracing the Beauty of Queen’s Wreath Vine
Earlier this summer, I wrote about one of my favorite ‘natural beauties’ in the garden, Yellow Bells. Today, I would like to introduce you to one of my favorite summer vines. It is a wonderful example of fabulous vine that is a ‘natural beauty.’
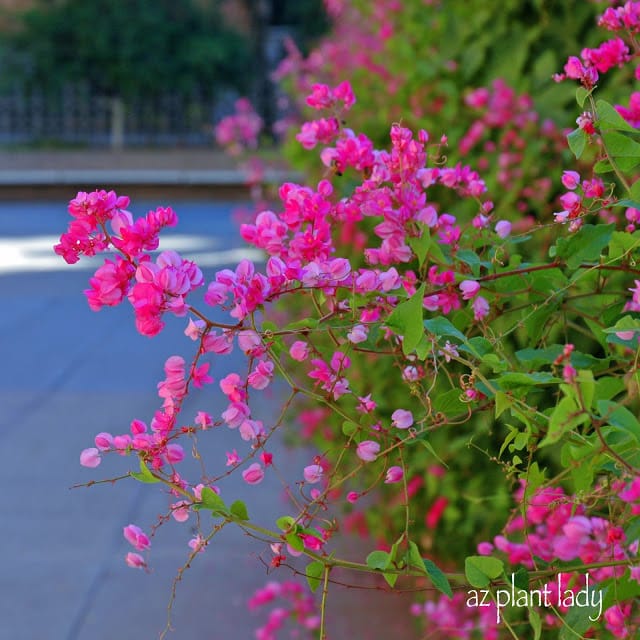
Queen’s Wreath vines grace the Arizona State University campus.
The Natural Charm of Queen’s Wreath Vine
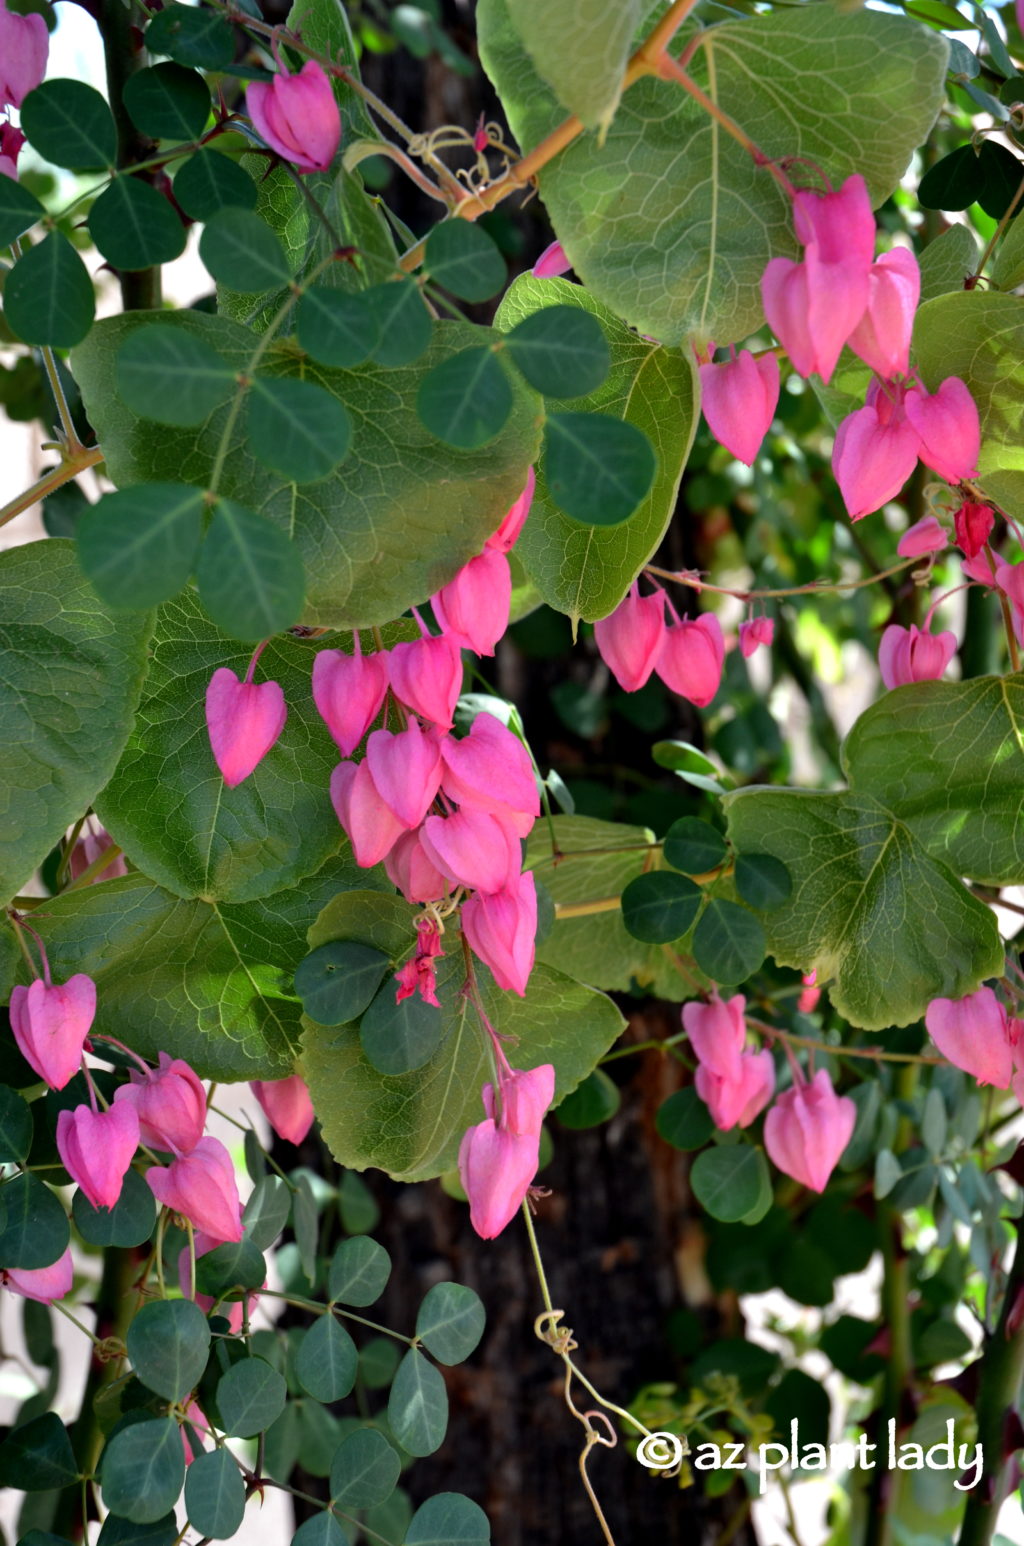
Queen Wreath Vine (Antigonon leptopus) is a colorful asset to my garden. This ‘natural beauty’ is a vine that is native to Mexico and Central America. The vibrant vine graces your garden with stunning pink sprays of flowers that last from spring until the first frost. While it can be invasive in tropical areas, it’s easily managed in the desert climate.
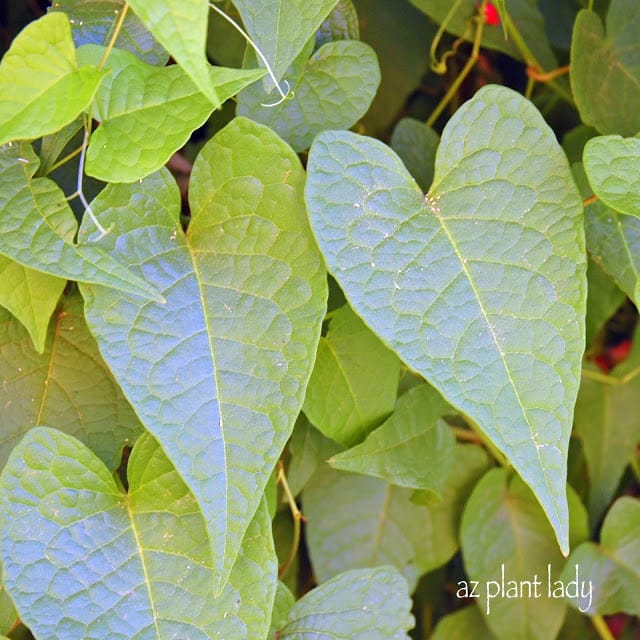
In our desert climate, they do require supplemental water, but no fertilizer is needed. Bees are attracted to the beautiful flowers, and I love the pretty heart-shaped leaves.
Queen’s Wreath is a robust vine. It can endure in full sun including areas of reflected heat. It will also grow in light shade although flowering will be reduced. The only maintenance required in my garden is pruning it back in winter once it dies back after the first frost. The roots are hardy to 20 degrees F, and in the spring, it quickly grows back with a trellis, fence or an arbor for support.
A wall of Queen’s Wreath Vine at ASU
The only consistent maintenance required in my garden is pruning it back in winter once it dies back after the first frost. However the roots are hardy to 20 degrees F, and in the spring, it quickly grows back with a trellis, fence or an arbor for support. See more in the mini-guide below
HOW TO GROW QUEEN’S WREATH VINE: A Mini-Guide
Step 1: Choosing the Ideal Location
To successfully cultivate Queen’s Wreath Vine, select a sunny spot in your garden where it can bask in plenty of sunlight. While it can tolerate light shade, it thrives when exposed to full sun, making it an ideal choice for areas with reflected heat.
Step 2: Preparing the Soil
Ensure the soil is well-draining to prevent waterlogged roots. Queen’s Wreath Vine thrives in various soil types but benefits from enriched soil containing organic matter.
Step 3: Planting the Vine
Plant your Queen’s Wreath Vine near a trellis, fence, or arbor to provide the necessary support for its growth. Dig a hole deep enough to comfortably accommodate its root system.
Step 4: Proper Watering
While Queen’s Wreath Vine becomes drought-tolerant once established, it appreciates supplemental watering, especially during dry spells. Water deeply to encourage robust root development, but make sure the plant has good drainage.
Step 5: Pruning and Maintenance
In winter, after the first frost, prune any dead or overgrown branches to promote vigorous spring growth. Minimal maintenance will keep your Queen’s Wreath Vine flourishing year after year.
By following these steps, you can enjoy the ‘natural beauty’ of Queen’s Wreath Vine in your own garden without the fuss, and revel in its stunning pink displays throughout the year.
My first experience with queen’s wreath was in our first home in Phoenix, where there was a support made up of twine tied between two palm trees. We had no idea why it was there, but it sure looked ugly. Well, before we had time to remove the twine, beautiful, light green, heart-shaped leaves began climbing up the support and quickly covered it. Gorgeous sprays of pink flowers rapidly followed, which was a pleasant surprise.
What natural beauties are enjoying in your garden this month?
I will be sharing another favorite ‘natural beauty’ from my garden soon.
https://www.azplantlady.com/wp-content/uploads/2010/07/Antigonon-leptopus-flowers-6.jpg640640arizonaplantlady@gmail.comhttps://www.azplantlady.com/wp-content/uploads/2025/08/AZ-Plant-Lady-Logo-small.jpgarizonaplantlady@gmail.com2010-07-12 19:27:002023-09-05 15:33:36Natural Beauty Without The Fuss – Queen’s Wreath
We use cookies on our website to give you the most relevant experience by remembering your preferences and repeat visits. By clicking “Accept All”, you consent to the use of ALL the cookies. However, you may visit "Cookie Settings" to provide a controlled consent.
This website uses cookies to improve your experience while you navigate through the website. Out of these, the cookies that are categorized as necessary are stored on your browser as they are essential for the working of basic functionalities of the website. We also use third-party cookies that help us analyze and understand how you use this website. These cookies will be stored in your browser only with your consent. You also have the option to opt-out of these cookies. But opting out of some of these cookies may affect your browsing experience.
Necessary cookies are absolutely essential for the website to function properly. These cookies ensure basic functionalities and security features of the website, anonymously.
Cookie
Duration
Description
cookielawinfo-checkbox-analytics
11 months
This cookie is set by GDPR Cookie Consent plugin. The cookie is used to store the user consent for the cookies in the category "Analytics".
cookielawinfo-checkbox-functional
11 months
The cookie is set by GDPR cookie consent to record the user consent for the cookies in the category "Functional".
cookielawinfo-checkbox-necessary
11 months
This cookie is set by GDPR Cookie Consent plugin. The cookies is used to store the user consent for the cookies in the category "Necessary".
cookielawinfo-checkbox-others
11 months
This cookie is set by GDPR Cookie Consent plugin. The cookie is used to store the user consent for the cookies in the category "Other.
cookielawinfo-checkbox-performance
11 months
This cookie is set by GDPR Cookie Consent plugin. The cookie is used to store the user consent for the cookies in the category "Performance".
viewed_cookie_policy
11 months
The cookie is set by the GDPR Cookie Consent plugin and is used to store whether or not user has consented to the use of cookies. It does not store any personal data.
Functional cookies help to perform certain functionalities like sharing the content of the website on social media platforms, collect feedbacks, and other third-party features.
Performance cookies are used to understand and analyze the key performance indexes of the website which helps in delivering a better user experience for the visitors.
Analytical cookies are used to understand how visitors interact with the website. These cookies help provide information on metrics the number of visitors, bounce rate, traffic source, etc.
Advertisement cookies are used to provide visitors with relevant ads and marketing campaigns. These cookies track visitors across websites and collect information to provide customized ads.