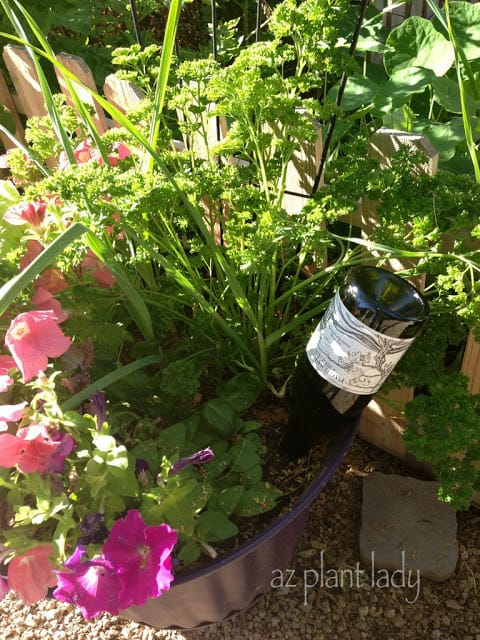
I enjoy DIY projects – particularly when they involve things that I have grown in my garden.

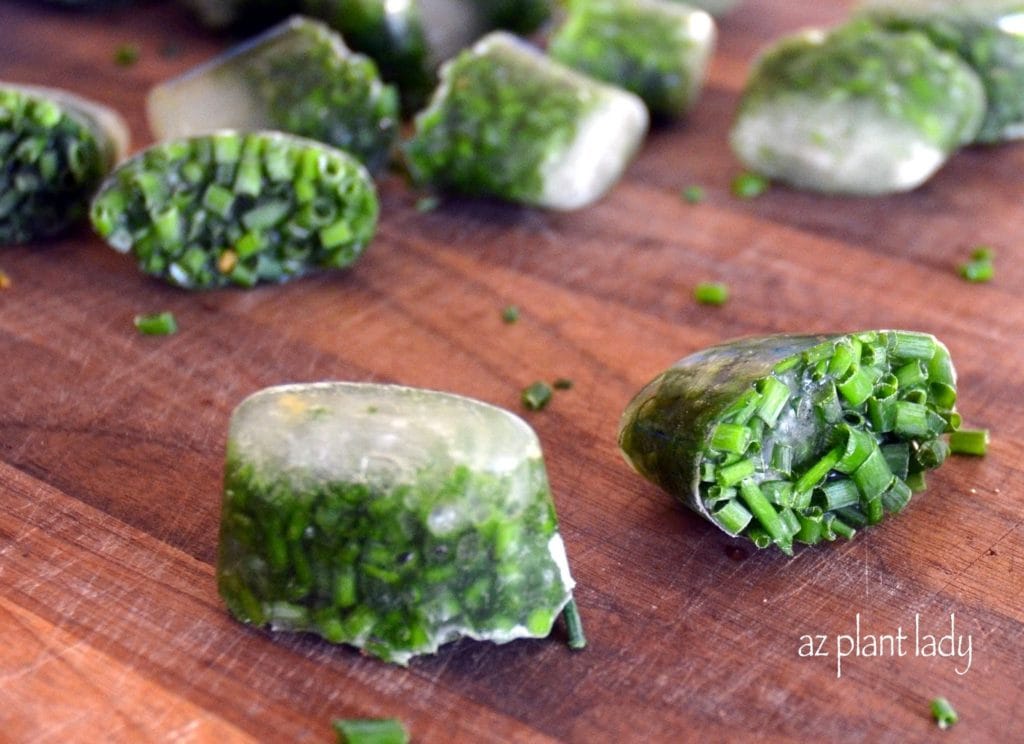
It seems that a lot of the things that I make from the garden include herbs.  I have dried herbs, frozen them into ice cubes and have done homemade herb butter.

Using herbs from my garden when I cook always gives me a special satisfaction, and my food tastes great too!

Basil herb Salt

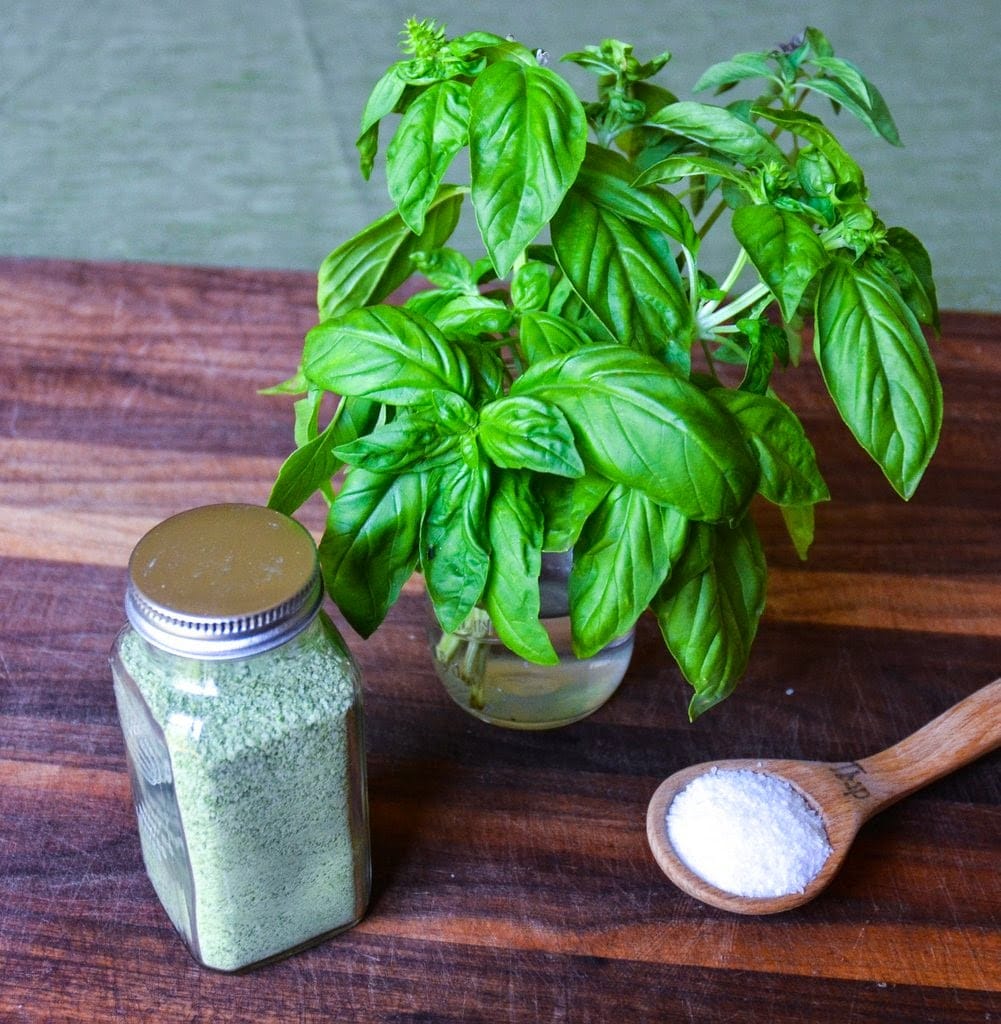
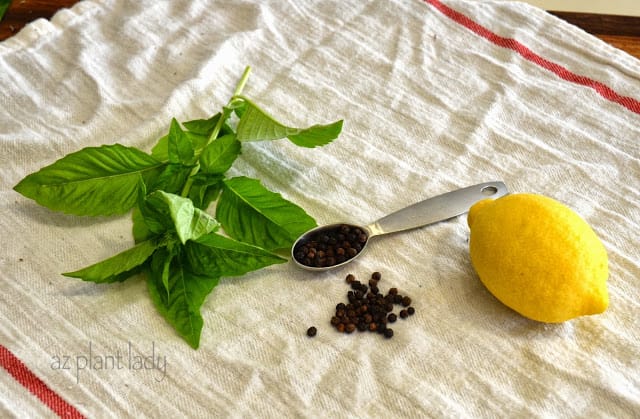
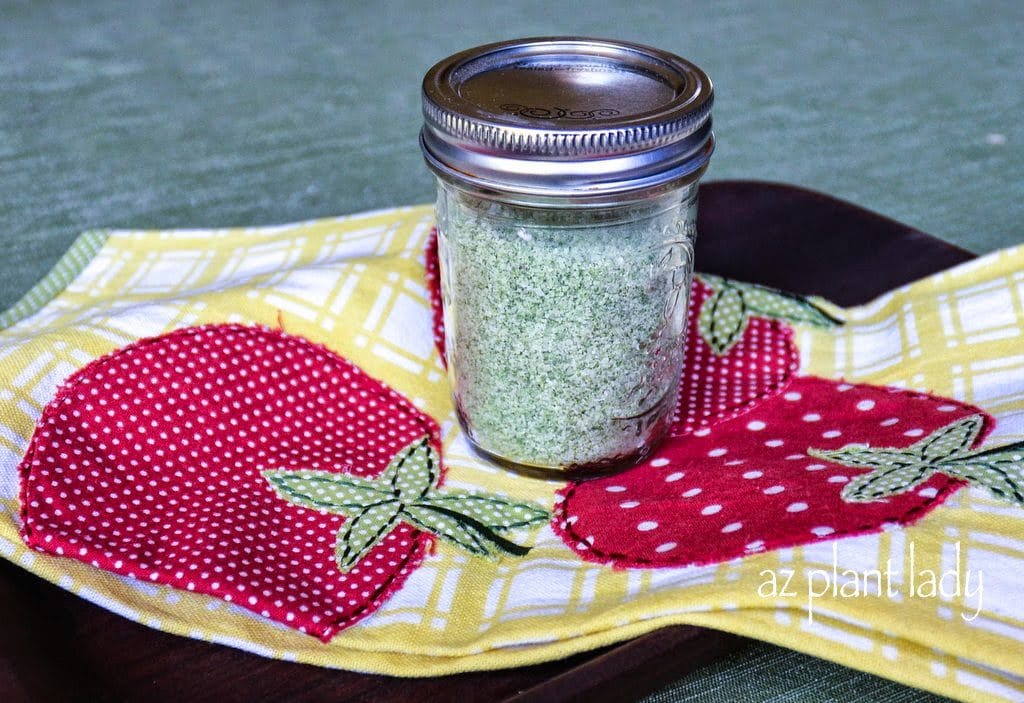
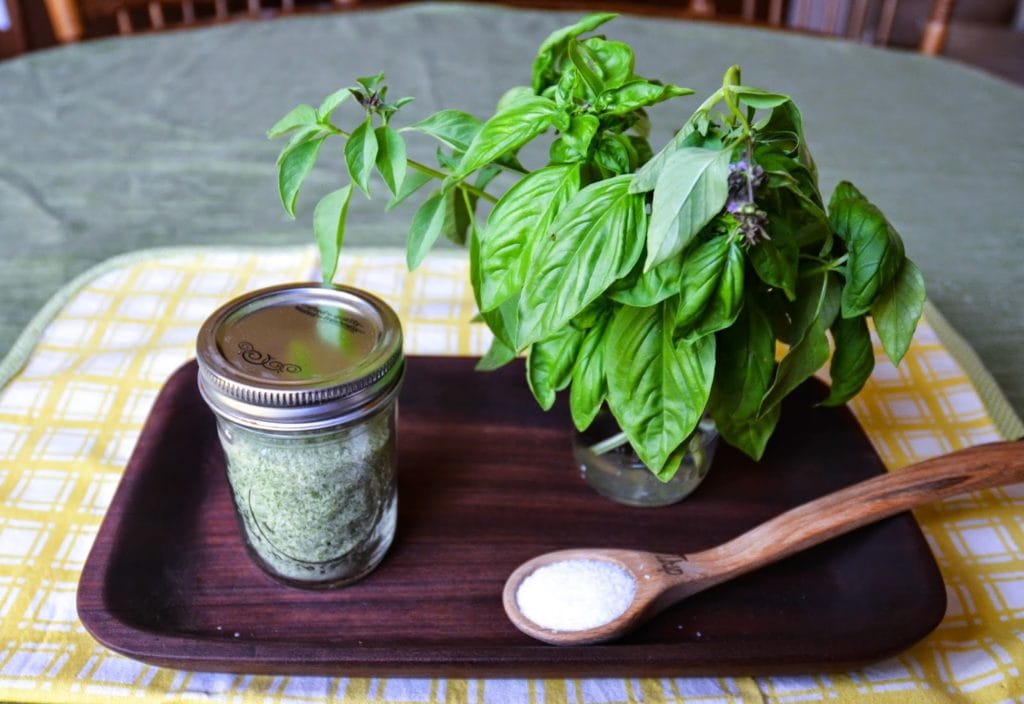
Photo: Basil herb Salt

Today, I am excited to share with you how to make basil herb salt.  If you haven’t heard of herb salts before, they are referred to as ‘gourmet salts,’ which are very popular in the foodie community.  

Herb salts are easy to make – especially if you have a food processor.  The salt helps to preserve the fresh flavor of your favorite herbs, and they add fabulous flavor to your favorite dishes.  

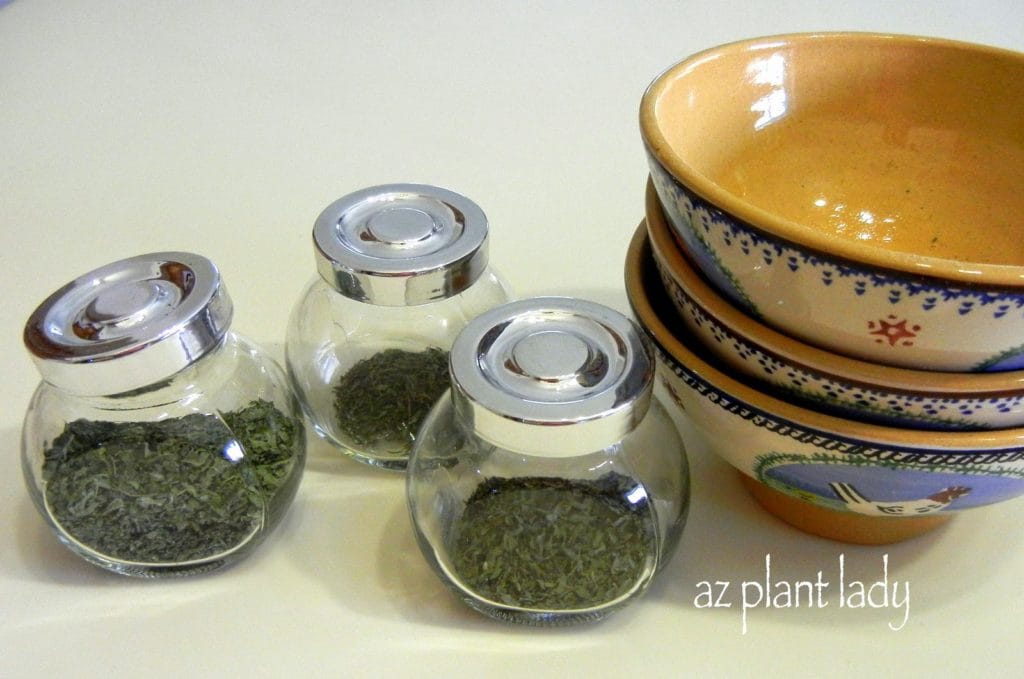
Gourmet salts also make great gifts.

Basil herb Salt

It is hard to find anyone who doesn’t love basil and the flavor it adds to so many different dishes.  I enjoy making Italian food and am often using basil.  Usually, I tear or chop some fresh basil leaves and add them as flavoring.  

Basil salt can be used in a variety of ways including sprinkling into your favorite tomato sauce, on top of a fresh-baked pizza, adding to bruschetta or simply sprinkling some on the top of fresh tomatoes.   Are you ready to get started?    

You will need fresh basil (either from your garden or the store) and kosher salt – pretty simple!  

Grab your food processor, a baking sheet and a glass jar with a lid.

kosher salt and basil leaves

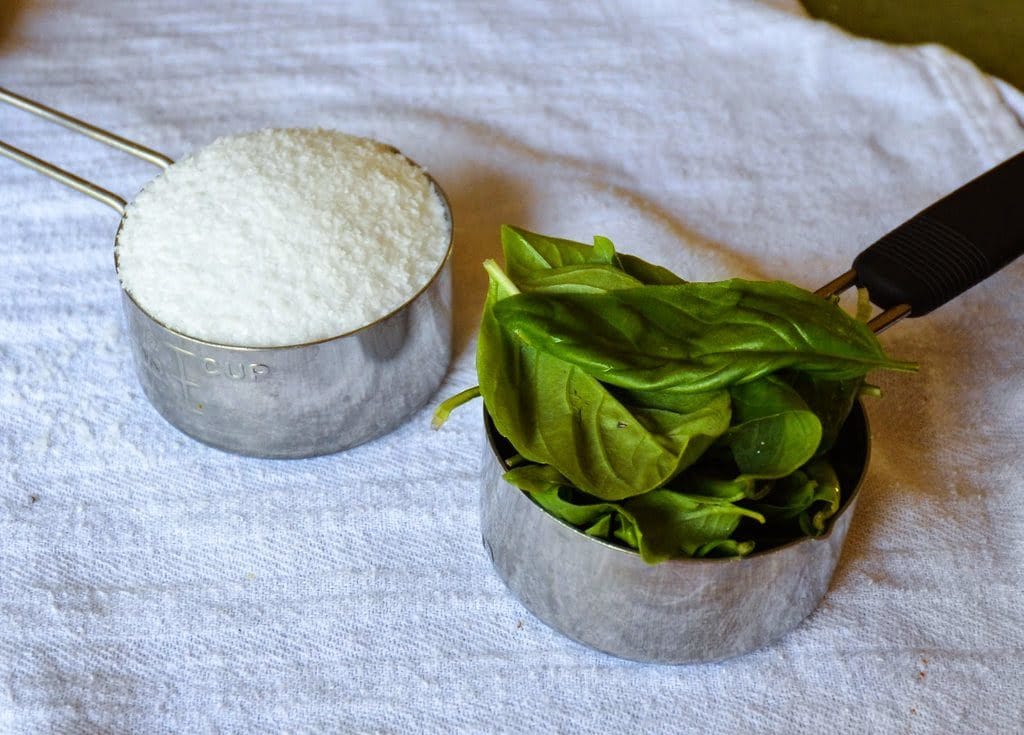
1. You will need 1/2 cup each of kosher salt and basil leaves.  

basil and kosher salt

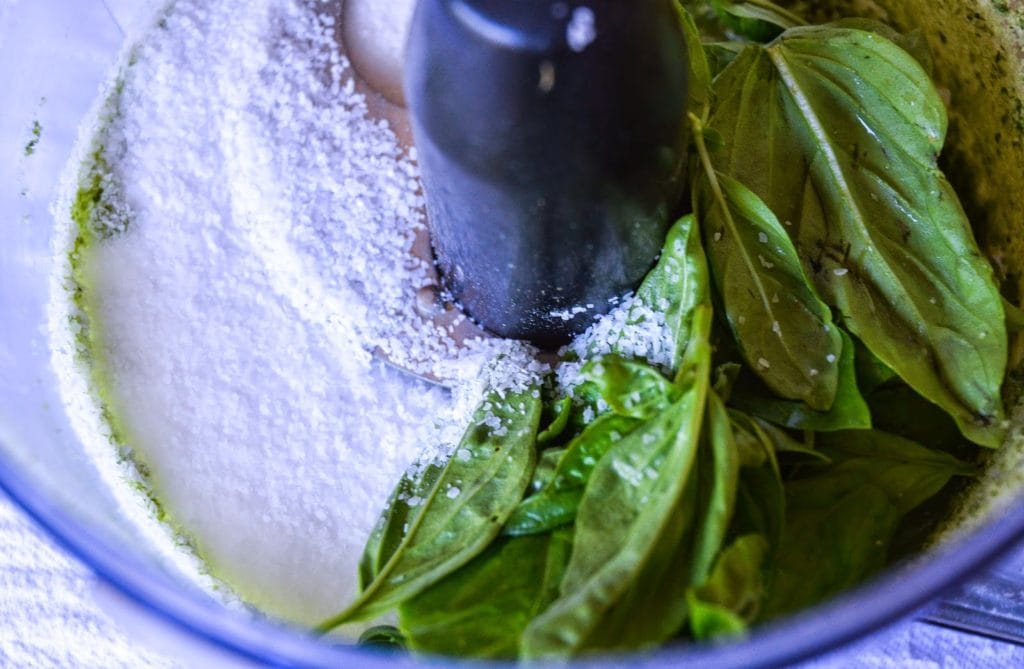
2. Add the basil and kosher salt to your food processor and pulse for 30 seconds.

Got Basil? Create Delicious Herb Salt

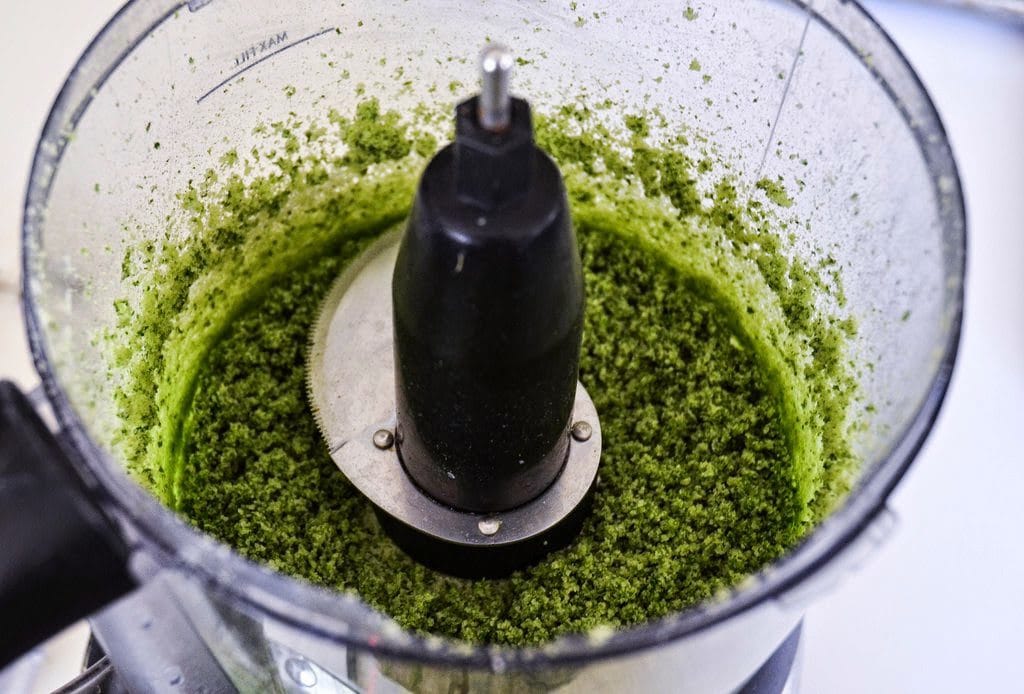
The finished mixture should look like this.

Got Basil? Create Delicious Herb Salt

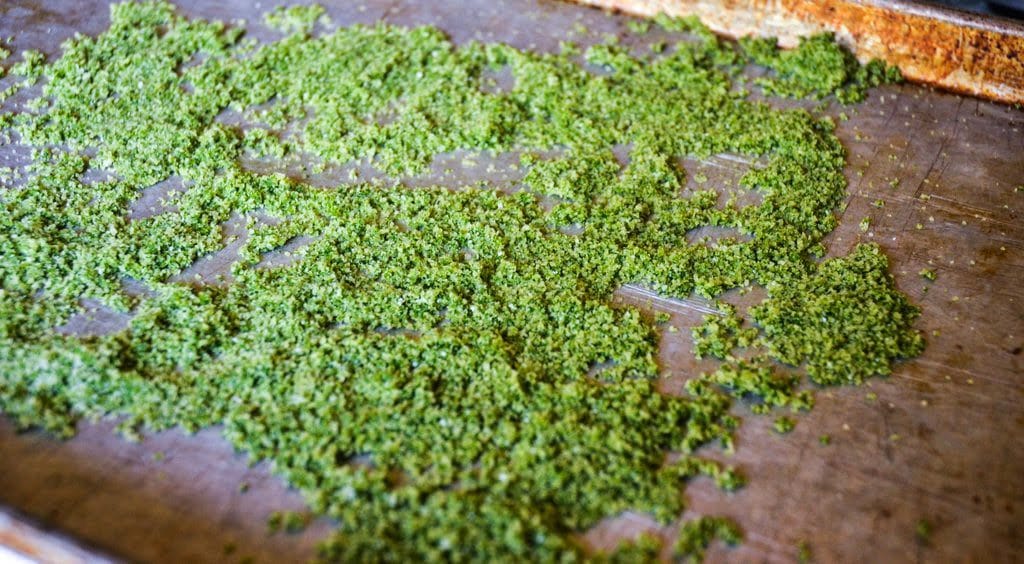
3. Pour the mixture out onto a baking sheet in a thin layer.  The mixture will be somewhat moist.

Got Basil? Create Delicious Herb Salt

4. Bake for 20 minutes in a preheated 225-degree oven.  After the first 10 minutes, lightly mix the basil salt mixture and bake for another 10 minutes – this helps it to dry out completely.

basil salt mixture

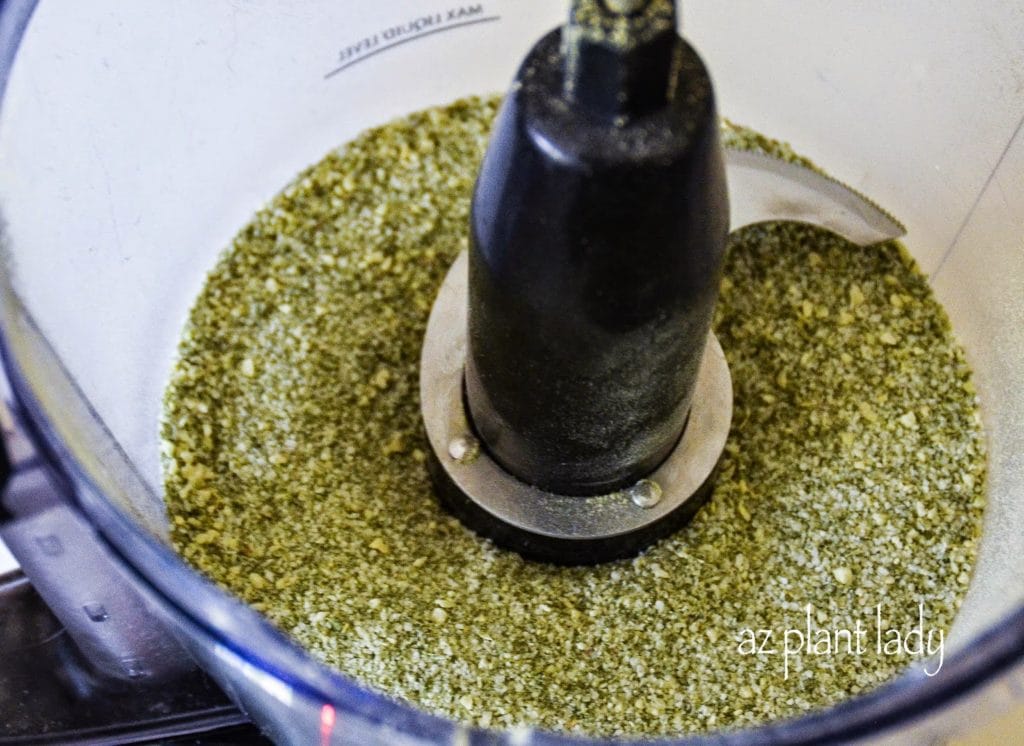
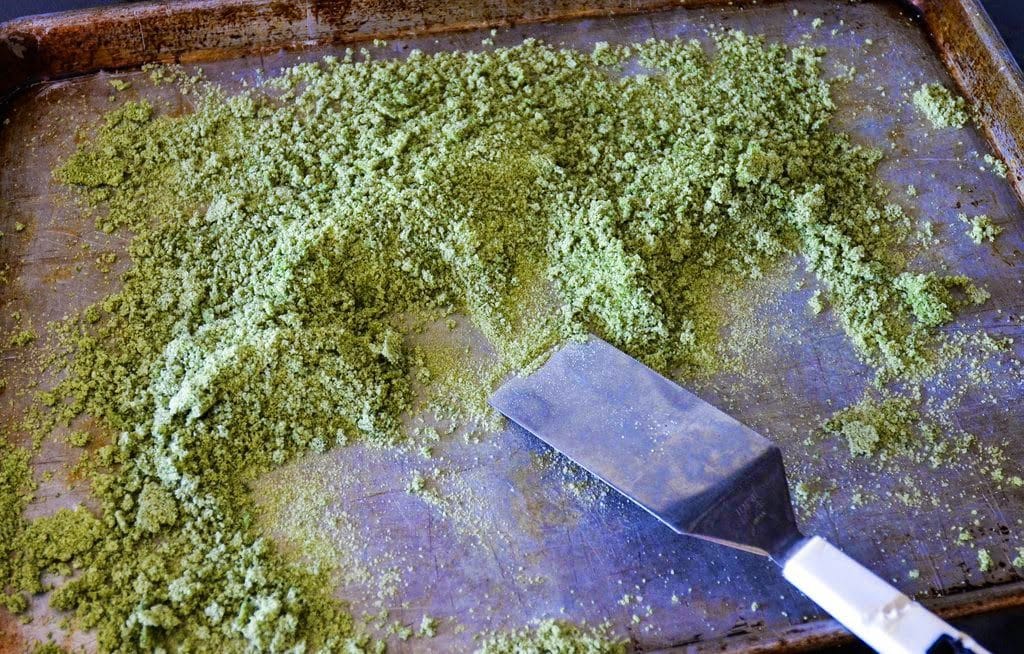
5. Put the dried basil salt mixture back into the food processor and blend to remove any remaining lumps.  *Make sure that the food processor is dry beforehand.

basil salt into a glass container

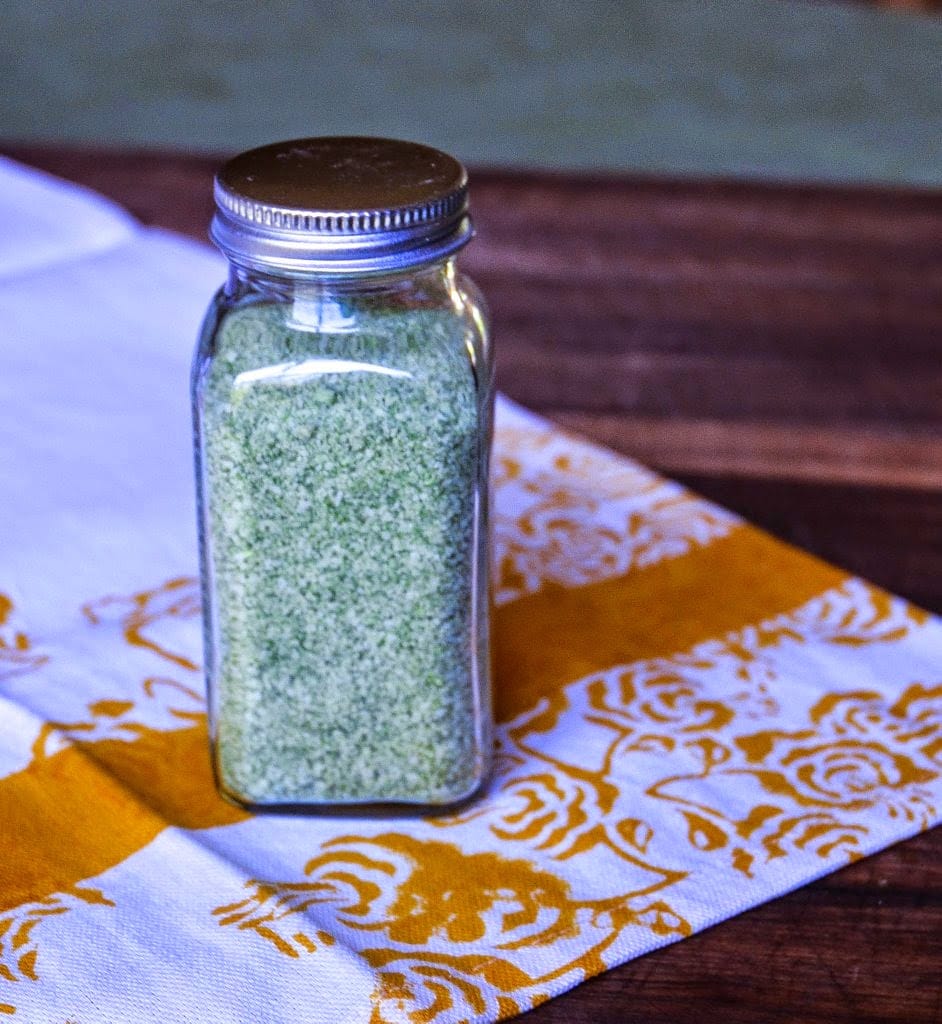
6. Put your basil salt into a glass container with a tight-fitting lid.

That’s it – you are done!

I must admit that this is a pretty easy project and the food processor does most of the work.    

Keep your basil salt in a dark, cool space where you keep your other herbs/spices to help preserve its flavor.  Use it within a few months for the best flavor.  

*******************************  

This is one of the rare times that I didn’t have to spend any extra money on a DIY project – I had the basil growing in my garden, the kosher salt was in the pantry, and I used a mason jar that I had on hand.

Basil Salt

I made three batches of basil salt and will keep one for myself and start using it right away.  The rest I plan on giving away as gifts.    

Gifts from the garden and kitchen are personal and much appreciated by others.  Last year, I gave away homemade jam from my peach tree.  This year it will be basil salt.  

I can’t wait for my basil plant to grow more leaves so I can make more!

Herbes de Provence

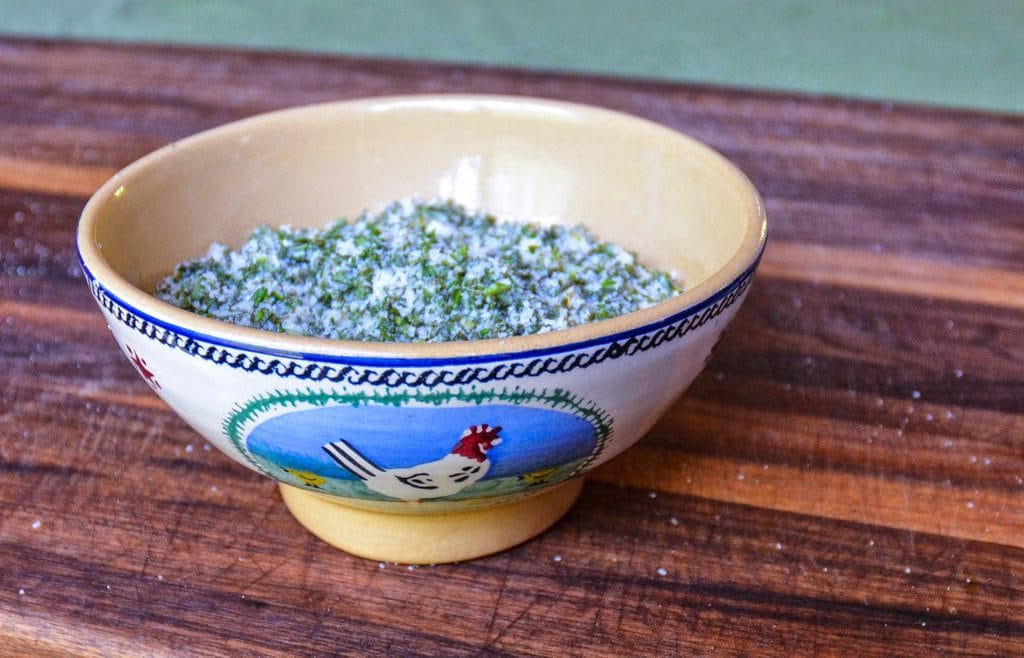
Photo: ‘Herbes de Provence’ salt

**Basil salt is just the beginning of different types of herb salts you can make.  In my next post, I will show you how to make a customized herb salt blend as well as some ideas of other herb salts you can make.    

What would you use basil salt to flavor?

Have you ever had to leave town for a few days and wanted to ensure that your potted plants don’t dry out?

Look no further than your wine cabinet…

water your potted plants

Glass bottles, like this empty wine bottle, can help water your potted plants for a couple of days.

water your potted plants

Create your own self-watering bottle

All you need is a clean glass bottle and water to create your own self-watering bottle.

water your potted plants

Create your own self-watering bottle

1. Water your potted plants well.

2.  Fill an empty glass bottle with water and cover the top with your thumb to keep the water from dripping out as you turn it upside down.

wine bottle into the soil

Create your own self-watering bottle

3. Insert the mouth of the wine bottle into the soil, about 2 inches deep.

That’s all there is to it!

wine bottle into the soil

As the soil dries, water will slowly seep into the soil from the bottle, essentially watering your potted plants for a couple of days.

*This can also be done to plants in the ground as well.

So, the next time you find yourself putting empty glass bottles in the recycle bin, keep out one or two to use to water your plants while you are away.  

Grow Vegetables in Pots!

I enjoy growing herbs for two reasons.  First, they are easy to grow and second, I love to use them when I cook.

dried herbs

In addition to fresh herbs, I also use dried herbs from time to time, especially in winter when some of my favorite herbs (basil) aren’t growing.

While drying herbs is rather simple, there are some guidelines to follow, which I wrote a blog post about…

“How to Grow and Dry Your Own Herbs”

Do you have a favorite herb that you like to use when you cook?

Do you grow your own herbs?

Did you know that you can preserve them by freezing them?

Freeze Herbs Into Ice Cubes

I frequently freeze my freshly-harvested herbs into ice cubes so that they are easily on hand, even when they are out of season.

“Freeze Herbs Into Ice Cubes”

Whenever I need them in my favorite dish, I simply pop out an ice cube from the freezer.

Do you have a border in your garden? 

How about a decorative garden that you made yourself?

decorative garden

Last year, I visited a garden that had a beautiful border that the owner made herself using concrete mix, broken dishes and glass beads.

decorative garden

There were also lovely step stones as well.

The creator of this functional garden art was kind enough to show me how she made them.

“DIY Stepping Stones and Border”

Have you ever made a piece of art that you display in your garden?

What kind of household cleaner do you use?

Earlier this year, I had heard of DIY natural cleaners made from grapefruit and decided to try it out myself.

Natural Grapefruit Cleaner

The cleaner was very easy to make and I used grapefruit from my mother’s tree, although you can get yours from the grocery store.

I was pleasantly surprised at how well it worked.

“DIY Natural Household Cleaner”

Did you know that certain flowers are edible?

It’s true.

Last week, I mentioned on my Facebook page that I was “channeling my inner Martha Stewart”, preparing for a future diy blog post.


Here are the ingredients I used…

edible flowers

Distilled water, ice-cube trays and edible flowers such as violas.

Here is what I ended up with…

 floral ice cubes

Wouldn’t these look great on your Easter table?

It was very easy to do, but there are some tricks to doing it just right.

*Not all flowers are edible and you must be sure to use flowers that have not been treated with chemicals or pesticides.

I wrote about how to make your own floral ice cubes along with a list of edible flowers, in my latest blog post for Birds & Blooms, which you can access here.

This past week, I was blessed with harvesting produce from two different gardens.

One was from one of my vegetable gardens…

Harvesting produce

Harvesting produce

About a 1/4 of my side vegetable garden is planted with cauliflower.

Over the weekend, I was able to harvest my first cauliflower of the season.  

Harvesting produce

Now, I am aware that some of you may not care for cauliflower.  Personally, I like it raw but NOT when it is cooked.

I’ll share with you a little secret that I have used to get my kids to eat cauliflower…

Harvesting produce

I cut the tops of the florets off, dice it and then sprinkle it on top of our dinner salads.  It looks like grated cheese.  I also slice carrots, celery and cucumbers to add to our salads, which not only add great flavor to salads – they are also a great way to get more vegetables into my kids 😉

The cauliflower was so delicious – it tasted like butter – seriously.

The next harvest was of another kind and from a different garden…    

grapefruit tree

On the family farm, my mother has a large grapefruit tree.

Now, as anyone who has ever had a grapefruit tree can tell you – these trees are overly generous in the amount of fruit that they produce.  

grapefruit harvesting

Luckily, my mother has 4 kids who are more then happy to help share with her bounty.

With my husband standing ready holding grocery bags, we picked some delicious fruit from the tree.

*While all the grapefruit looked ripe, some were not quite ready to be picked.  If they did not come off fairly easily when lightly pulled/twisted, then we left them alone.

If I am going to be perfectly honest with you, I do not like to eat grapefruit – at all.

But, I have another purpose in mind for my newly picked grapefruit – I am going to make a natural cleaner from it using vinegar.

I promise to blog about it soon, so hold onto some of your excess grapefruit or maybe offer to take some off of your neighbor’s grapefruit tree 🙂

edible items

What can you do with a sprig of basil, a teaspoon of peppercorns and a lemon?

Hint: The answer doesn’t involve eating them.

I can’t wait for you to see what I do with these 3 items as well as some other interesting combinations.

I’ll post what wonderful things you can do with some simple, edible items on Monday.

**Sorry for the teaser, but it will be worth the wait  – I promise 🙂

An Old-Fashioned Watering Method Becomes 'Hip' Again

I posted a photo of the uniquely-shaped pottery that I came across at a local nursery, yesterday on facebook and asked you to guess what they were used for.

This unglazed pottery was commonly used in arid regions long ago to store both food and water.  They are called ollas.

Ollas are making a comeback in the garden – particularly in arid regions.

Why?

uniquely-shaped pottery

Ollas are a great way to deep water plants.

They are buried so that only the top is exposed.  Water is added and slowly seeps through the walls of the olla, providing uniform moisture to plant’s roots.

The top of the soil remains dry, so that evaporation is limited and decreases problems with weeds because their roots can’t reach the moist soil underneath.

Ollas can be used in vegetable gardens, containers and among other plants in your garden that may not be attached to an irrigation system.

To use, simply take the lid off, and fill with water. Every few days, refill and then let the water slowly percolate into the soil.

uniquely-shaped pottery

There are companies now making ollas for the home gardener.  They are not cheap.  The ones above were going for $35.

I would love to buy one, but they are not in my budget right now.  Maybe I can add one to my Christmas list?

You can make your own inexpensive olla using a plastic milk jug or 2-liter soda bottle, with small holes punched all around and then bury it.

OR, you can take two unglazed tera-cota pots and glue them together with silicone.  *Learn how to make both types of homemade versions, here.

I really like when the old-fashioned ways of doing things come back into style.  Technology is a wonderful thing, but it doesn’t mean that the older ways of doing things is obsolete.

**For those of you who would like to purchase an olla, like the ones pictured above – they are available at local Summerwinds nurseries throughout the Phoenix area.

For those of you who live elsewhere, here is a link to the company who created the ollas in the photos above.