Tag Archive for: how to

Fall is definitely in the air.  I can stand outside and feel a slight coolness to the breeze, which I love.

This is my favorite time of year.  One of the many reasons is that it is time to get ready to plant my fall vegetable garden.

lettuce

One of my favorite vegetables to grow is lettuce.  It is so nice to be able to step out into the garden and snip off fresh, delicious lettuce leaves for our dinner salad.

To get a head start on my lettuce, I planted the seeds indoors.  The reason is, is that lettuce seeds need temperatures below 80 degrees in order to germinate.

my fall vegetable garden

After a few weeks growing indoors, I will be able to transplant them out into my garden.

Growing lettuce is very easy and you don’t need many supplies to start them indoors.  I used plastic food containers that I had been saving.

Why don’t you join me and grow your own lettuce too?  You don’t have to have a vegetable plot.  Lettuce grows just fine in containers or even in a recyclable grocery bag.

my fall vegetable garden

Fall vegetable garden

For how to start lettuce seeds indoors, check out my latest Birds & Blooms blog post – “Grow Your Own Lettuce in Recycled Containers”.

I hope you will grow some lettuce with me!

Bougainvillea

**Disclosure: This post contains an affiliate link of a product that I use in my garden and I recommend to those who are experiencing similar problems.

A week ago, I was called to see one of my regular clients to see how her landscape was progressing since she had installed a lot of new plants at the beginning of summer.

The majority of her plants looked great considering she had planted them at a particularly tough time of the year.

BUT, what caught my attention was her bougainvillea shrub.

Bougainvillea

The leaves were quite ragged and looked like something had been chewing them.

In addition, there were some small black droppings scattered among the leaves.

The diagnosis was relatively simple…

The culprit was bougainvillea looper caterpillars.

Now, you rarely ever see the caterpillar itself.  It is rather small and looks like a yellow-green to brown colored inch-worm.

The signs are ragged leaves that appear to have been chewed along with the black droppings.

My bougainvillea growing in the back garden.  I haven't seen any signs of caterpillar damage yet.

My bougainvillea growing in the back garden.  I haven’t seen any signs of caterpillar damage yet.

If you see similar damage to your Bougainvillea, don’t panic.  Most Bougainvillea can handle the damage from the chewed leaves.

However, if your Bougainvillea is young, or if the infestation is severe, you can help to get rid of the caterpillars by spraying your bougainvillea with a product containing BT (bacillus thuringiensis), which is an organic pesticide.  I use Safer Brand 5163 Caterpillar Killer II Concentrate, 16 oz in my own garden.

In the case of my client’s bougainvillea, I told her that the damage was not severe enough to warrant any treatment.

Some of you may see similar damage to your yellow bells or orange jubilee shrubs, which I wrote about in a previous post, “Oh No, What’s Happened to My Shrubs”.

**In the future, I will be sharing some gardening problems or design challenges that I encounter during some of my consults and their solutions.

My hope is that they can help you in your own landscape 🙂

**********************

I hope you have a great weekend.  We will be celebrating my 3-year old twin nephews birthday at our house tomorrow morning.  I’ll may post a picture or two next week from the party.

My daughter, Rachele, is doing well after the first week of her combat training in Mississippi.  But, she did share some funny stories that I will share with you next week too!

Do you like mint?  I love using it in my iced tea.

I have a beautiful apple mint growing in my garden, but winter is not its best season.  Because I want to enjoy fresh mint in the winter, I decided to freeze some mint leaves in ice cubes.

Fresh Mint

My granddaughter, Lily helped me pick some mint from the garden.

Fresh Mint

Preserving mint is easy to do and I have enough to last me through the winter, ready for my favorite beverage.

To learn how to preserve mint, check out my latest blog post for Birds & Blooms – “Preserve the Taste of Summer With Mint Ice Cubes”.

Earlier this week, I was stopped at an intersection when I noticed the sad plants on the corner.

sad plants

I apologize for the poor-quality photo, but I only had a few seconds to take a picture with my phone through the window.

What was so sad about these plants was that they were mere shadows of themselves.

Many people would be hard pressed to recognize the over-pruned specimens above to what they look like when allowed to grow into their more natural shapes.

Here are photos of the same type of tree, taller shrub and cupcake shape shrub growing in happier  circumstances…

Palo Brea tree (Parkinsonia praecox)

The small mushroom-topped tree is actually a Palo Brea tree (Parkinsonia praecox), which has a beautiful shape.  The trunk is beautiful as it twists upward.

Unfortunately, the flowering shrubs underneath it have fallen victim to over-pruning.

Yellow (Mexican) Bird-of-Paradise (Caesalpinia mexicana).

The taller shrub from the ‘sad’ plant photo is a Yellow (Mexican) Bird-of-Paradise (Caesalpinia mexicana).

It can be grown as a small tree or tall shrub.    

over-pruned

Yellow flowers appear off and on throughout the year.  However, I doubt that the over-pruned Yellow Bird-of-Paradise is ever able to produce a single flower before it is pruned off.

over-pruned

Can you believe that the cupcake-shaped shrub in the first photo is actually the same kind as this gorgeous flowering shrub?

Perhaps more then any other type of desert shrub, those that belong to the family Leucophyllum (often referred to as Texas Ranger or Sage) are pruned into balls, squares, cupcakes and even disks.  

over-pruned

Unfortunately, due to a badly designed landscape, the lower shrubs don’t have enough room to grow. A single tree would have plenty of room to be able to grow, but not two.

A better plan would have been for there to be a single Palo Brea tree with 3 Texas Sage shrubs along the wall.  The groundcover, Bush Morning Glory (Convolvulus cneorum) works okay in this area.

**You know what is interesting about this small piece of landscape and countless others?  It would cost so much less if people would allow enough room for plants to grow to their full size, not to mention much more attractive.

There would be FEWER PLANTS to purchase, LESS WATER needed and far LESS MAINTENANCE required.

It makes you think about why people over-plant and over-prune, doesn’t it?

For more information on how to properly prune shrubs, check out my previous post, “The Good, The Bad and The Ugly”.

If you would like to see more badly pruned trees along with a link to how to properly prune trees, check out “Scary Pruning Practices and the Unfortunate Results.”

decorative garden

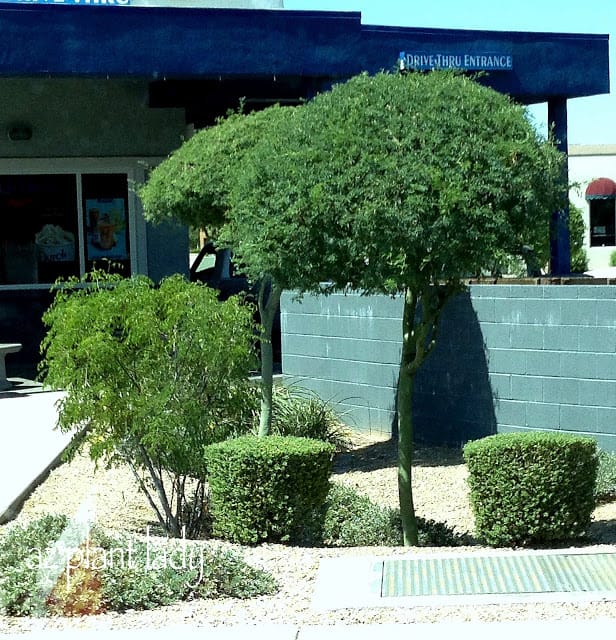
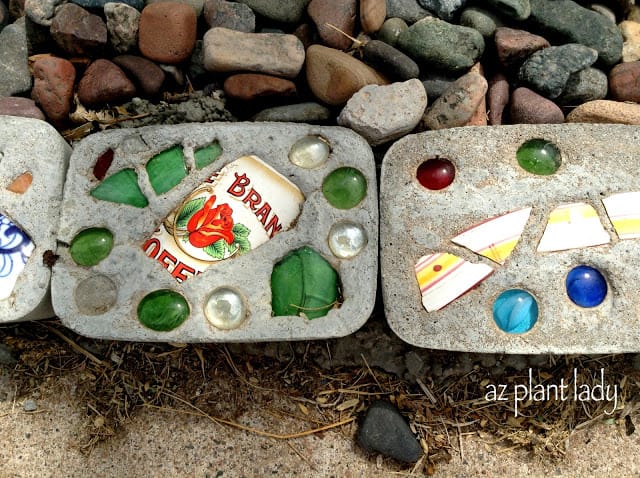
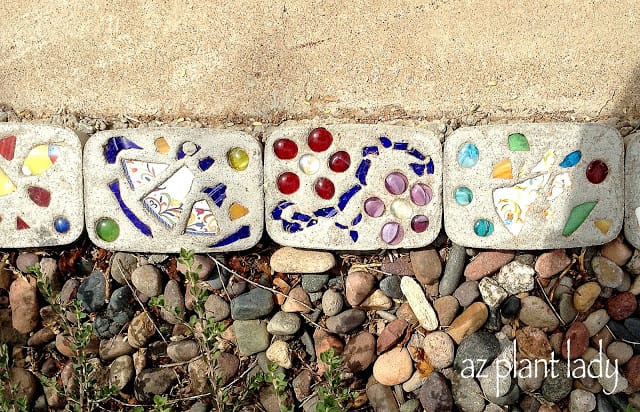
Earlier this month, I was visiting the garden of a homeowner while doing a consultation.  The landscape was in great shape with healthy shrubs and trees.  But, what kept catching my attention were the beautifully decorated blocks that made up the border.

decorative garden

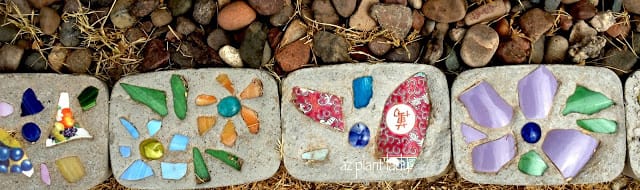
The entire front landscape was bordered with uniquely decorated cement block, decorated with pieces of dishes, glass beads and more.

Every block was a unique creation.

While admiring the border, the homeowner told me that his wife had made this beautiful border using everyday items such as plastic food containers and cooking spray.

He offered to introduce her to me, so we headed into the house where I was greeted by more of her beautiful creations.

decorative garden

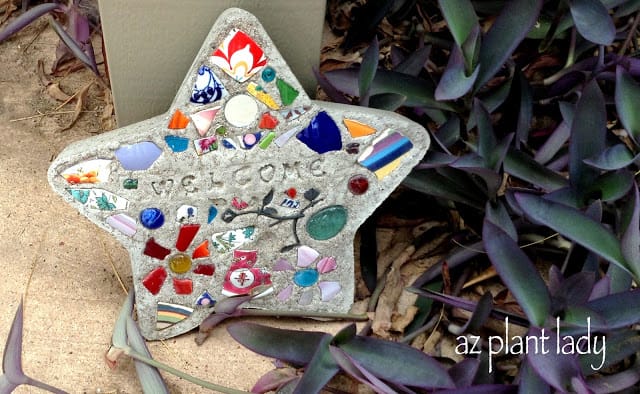
I love this welcome stone, don’t you?

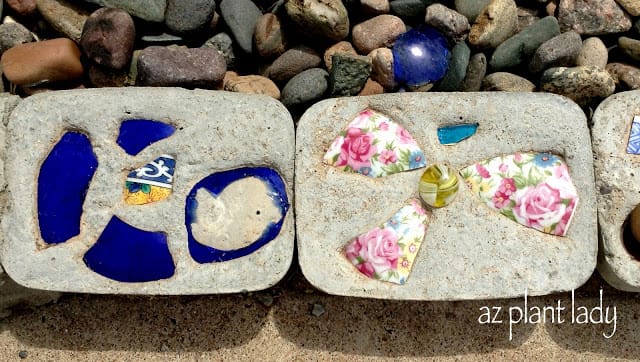
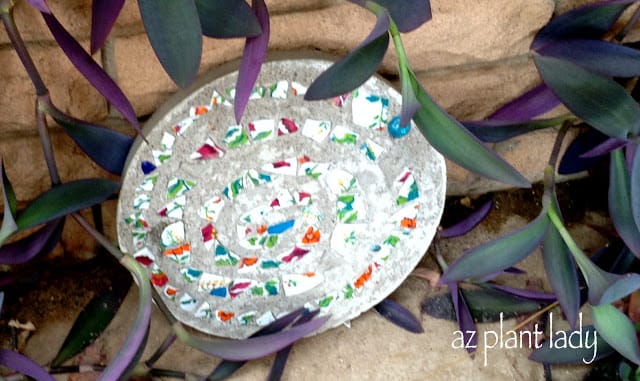
Here is another decorated step stone…

decorative garden

I love the spiral pattern.

workshop

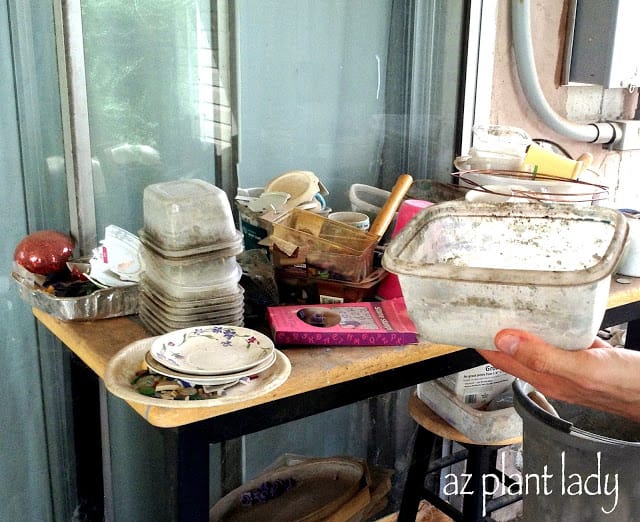
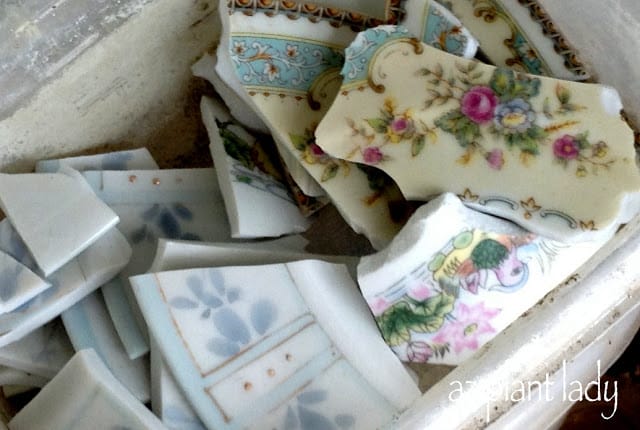
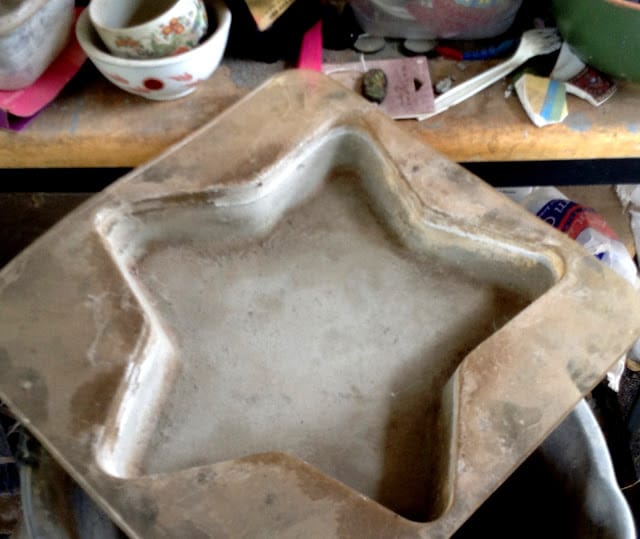
I was shown her workshop where she creates her works of art.  You can see the plastic food containers and some dishes ready to be broken into small pieces.

glass beads

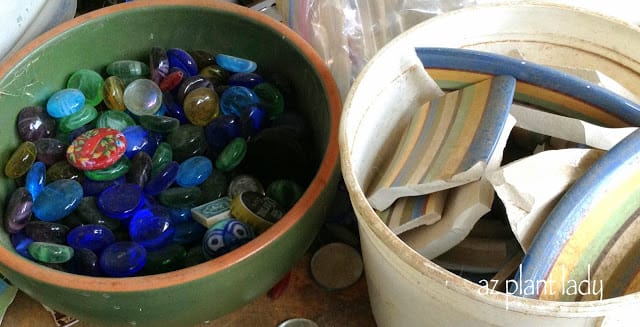
The dishes were purchased at the local dollar store and the glass beads came from the craft store.

I asked her how she made them, so that I could share it with you.

DIY Stepping Stones and Border

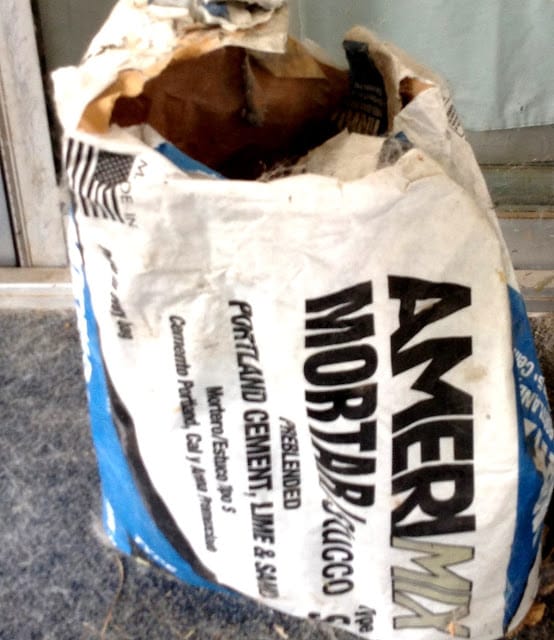
Supplies: Mortar mix, a bucket, a trowel, plastic food container in desired size, cooking spray, broken pieces of dishes and glass beads.

DIY Stepping Stones and Border

1. Mix the mortar mix in a bucket with water until you have the consistency of brownie batter.

2. Spray the food container with cooking spray.

3. Add the cement mixture to the container to the top and smooth out with the trowel.

DIY Stepping Stones and Border

4. Now for the fun part – add pieces of dishes and/or beads to create your design.  You could even use small pieces to spell out words.

5. Allow to dry for 48 hours.

6. Pop out and place in your garden!

DIY Stepping Stones and Border

You can buy plastic forms at your local craft store to create stepping stones, following the same steps above.

I thought it would be a fun way to create plant markers for the garden by using small food containers as forms.

DIY Stepping Stones and Border

I will undoubtedly be trying this in my own garden.

How about you?  Have you ever created your own step stones or border?

**************************

I have two exciting new items to share with you…

The first is that my daughter, Rachele, graduated from her Navy Seabee school today.

She texted me a photo of her wearing her “Seabee Greens” for the first time.  The Navy camouflage uniform is gray and blue, but when you are a “Seabee” you get to wear green.

I shared it on my facebook page if you would like to see it.

Rachele is coming home this weekend after 5 months away of training.  Then she will be off to Mississippi for a month for more schooling (Expeditionary Combat Skills).

The best news is that she is going to be stationed in CA, just a 1/2 hour away from where I grew up!

For my second bit of news, I will share with you next time, but I’ll give you a hint – it involves television cameras…  

Favorite DIY Posts – Day 3: Stepping Stones and Border

If someone asked you what your favorite food was, what would you tell them?

My daughter, Gracie, would answer by saying “anything chocolate”.

My husband would say “pizza”.

But my favorite food is a warm slice of sourdough bread with melted butter.  My idea of heaven is being surrounded with loaves of French bread and plenty of Irish butter without the carbs or calories 😉

Because I like to make things using produce from my garden, I decided to try making herb butter using the herbs that I grew and dried earlier this summer.

heavy whipping cream

Just for fun, I decided to make my own butter using some leftover heavy whipping cream (did you know that if you beat heavy whipping cream long enough that you will get butter)?

When we were kids, my mom would teach us how to make butter this way using her antique butter churn.  It was a lot of work, but it was fun.

Most of the time, I just use regular butter to make herb butter.

making your own herb butter

I beat the whip cream until it became thick and continued until it looked like this…

making your own herb butter

Your butter will start to solidify with a little buttermilk liquid left.

making your own herb butter

Drain the buttermilk and you are left with butter!  You can salt it to your taste at this point.

1. You will need a 1/2 cup of softened butter. (Store bought works just as well as butter you made yourself).

2. Add a 1/2 teaspoon of your favorite herb.  Dried basil, chives, dill, oregano, rosemary, sage or thyme work well for herb butter.  You can also use a 1/2 teaspoon of poultry or Italian seasoning instead if you like.

3. I also added 2 cloves of minced garlic, also from my garden, to the herb butter.

4. Mix it all together using a rubber spatula.

making your own herb butter

5. Place your butter mixture onto wax paper and begin to form it into a roll by folding over the wax paper and using your hands to mold the herb butter.

making your own herb butter

6. Twist the ends of the wax paper and place your herb butter into a plastic freezer bag.

preserve

7. Freeze until 2 hours before using.  You don’t have to use it all at once.  Simply cut off a few sections at a time.

You can freeze herb butter up to 6 months.

So, get started now and preserve the taste of your summer herbs by making your own herb butter.

Make some for yourself and give some away to friends.

I must say, that I was going to take a picture of my herb butter melting over a hot slice of sourdough bread.

But, I ate it before I remembered to take the picture…

**You can use your own herbs that you have dried or you can use herbs from the grocery store.

To learn how to dry herbs, check out my earlier post – “How to Grow and Dry Your Own Herbs”

What herb(s) would you add to herb butter?

For those of you who have read my blog for a while, you have probably heard me talk about the epidemic of over-pruning. But, that doesn’t mean that you should never prune. The other day, I was driving down a street in our neighborhood when I saw one of my favorite perennials, Angelita Daisies.

The problem was, that they didn’t look very attractive…

Angelita Daisies

They looked like tufts of green grass with dead sticks.

This is what Angelita Daisies should look like…

Angelita Daisies

So, what went wrong with my neighbor’s Angelitas?

They didn’t remove the dead flowers.

Dead-heading doesn’t have to be done to them all the time, but once every 4 – 8 weeks will make a huge difference in their appearance.

In general, dead-heading spent flowers stimulates the plant to produce more flowers.  The reason for this is that the goal of flowers is to produce seed.  So, if dead flowers are allowed to remain on your plants, they figure that they have done their job and will stop flowering.

Of course, if you want to collect seeds from some of your favorite plants, then allow the flowers to dry and then collect the seeds (this doesn’t work that well with hybrids).

But, if you want colorful flowers – then take a couple of minutes a month and clip off the dead flowers.

Would you like to know why Angelita Daisies are one of my favorite perennials?  Check out my post about this wonderful plant…

“A Bright, Sunny, Lesser-Known Plant”

*This blog post contains affiliate links. If you click through and make a purchase, I may receive a commission (at no additional cost to you). Thanks for your support in this way.*

Have you ever seen a miniature garden?  They are becoming very popular and are sometimes called ‘fairy gardens’. I must admit that I’ve been quite intrigued by them and so I was very excited with the publishers of “Gardening in Miniature” sent me a book, free of charge, for my honest review.

If you aren’t familiar with miniature gardens, it is helpful to think of them as large gardens shrunk down in size into a tiny world that fits into a single container.

If you like to peruse Pinterest, you have undoubtedly seen some great examples of miniature or fairy gardens.

I came upon a collection of miniature gardens for sale at an antique shop in upstate New York a couple of years ago.

miniature garden

They were planted in old enamelware pots and bowls.

As you can see, there is a pathway delineated by the larger pebbles, small fiber optic grasses, and a yellow viola in this garden.

This garden has a tiny shovel and watering can in it.

For some people, the accessories are the most enjoyable part of creating a miniature garden.  I would probably be stuck in my local Michael’s or Hobby Lobby trying to decide what small accessories to include in my little garden.

I must admit that I have been thinking of creating my own miniature garden.  Imagine a tiny world neatly contained inside of a pot.  For those of you who experience cold winters, you can enjoy having a little garden indoors all winter long.

Have you considered trying to create a miniature garden?

Well, if you have – then I have a great book for you to read…

miniature garden

Gardening in Miniature by Janit Calvo is a visual feast of beautiful and unique little gardens.

Of course, there is much more than miniature garden photos.  The book has all the information you will need to create your own tiny garden.  From container selection, a list of plants, soil type and how to care for your little garden – this book covers it all.

A beautiful garden is well-designed and small gardens are no different.  Gardening in Miniature offers helpful advice on how to design your tiny garden using plants, pebbles, water features and adding small furniture or figurines. Have you ever created your own miniature garden?


*I was given this book, free of charge, for my honest review.

Last week, I hinted at the garden video that I created for the folks at Troybilt as part of my paid partnership with the ‘Saturday 6’.

In the past, I have been in gardening videos, but I had a film crew who did all the filming and editing for the videos for their website.

This time, there was no film crew.  I was asked to create a homemade ‘how-to’ video for Troybilt on a gardening subject that I selected.

I decided to create a video on one of my favorite subjects…

“How to grow vegetables with ornamental plants in containers.”


The video is supposed to be amateurish and not polished.  I can assure you that I fulfilled their requirements.  There is no way that anyone can mistake my video as professionally done.

But, I had fun and I hope you like it.


If you like to grow tomatoes AND you live in the desert, then you know how important it is to shade your tomato plants during the summer months.

Most vegetable gardeners haul out 50% shade cloth, which does a great job at shading tomatoes and protecting them from the intense desert sun.  

Personally, I don’t particularly like how shade cloth looks.  As a horticulturist and landscape designer – I like gardens to look beautiful and that extends to vegetable gardens.

So instead of putting up shade cloth over my tomato plants this year, I decided to create natural shade for them.

shade tomato plants

My tomatoes are surrounded by giant sunflowers on their east, west and southern sides.  If you can only add sunflowers to one side, then choose the west side to protect them from the intense afternoon sun.

shade tomato plants

Throughout the day, they experience filtered shade.  My tomatoes look great without any signs of sunburn.

Sunflowers are easy to grow from seed and you can start planting them in March and continue throughout the summer.

sunflowers

Because sunflowers only live a few months, I have planted a second crop of sunflowers in between my existing sunflowers.  I will soon plant a third crop in order to provide shade all summer and into early fall for my tomatoes.

An added bonus to planting sunflowers is that they provide food and shelter for birds and you can enjoy their delicious sunflower seeds.

sunflowers

Another reason to use sunflowers instead of shade cloth for tomatoes is that sunflowers are a lot less expensive then shade cloth and are an inexpensive and sustainable solution.

How about you?  What do you use to shade your tomatoes?