Tag Archive for: how to

box full of sweet

Last Friday, my mother came over for dinner and brought with a box full of sweet, tart goodness…

Plums harvest

Plums harvest

Don’t these plums look delicious?

There is a single plum tree on the family farm that is incredibly prolific.

Plums harvest

Plums harvest

Every year, I look forward to making jam ever since my mother taught me how 3 years ago.

I usually have enough jam to last our family an entire year plus more to give as gifts to teachers and friends over the Christmas holiday.

plum jam

After my mother left that evening, I got right to work and made my first batch of plum jam.

This time, I left the peels on the plums, which dissolve during the cooking process and create the beautiful ‘plum’ color.

Other years, I have peeled the plums by boiling them first for 40 seconds.  It is a rather tedious process, but some people prefer plum jam without the peels.

For me, I like to make things simple – so the peels stayed.

Every summer brings a wonderful fruit harvest.  First are the peaches followed by the plums.  In a couple of weeks, I will be busy with the apple harvest.  I got a new recipe for apple caramel jam that I can’t wait to try out.

For more information on how to make your own jam, check out my post “A Harvest of Peaches and Jam”.

**It may be hot outside, but there a lot growing in the garden.  Join me every day this week as I post what is happening in my garden.

Can you tell what is wrong with this Mesquite tree?

Recovery Update

This tree has mistletoe growing in it.

Can you see it?

It is hard to spot mistletoe when it first infects a tree.  I can spot it right away, but it takes some time to recognize it when it is small.

Here is a closer look…

Recovery Update

Look for green growth that has a slightly different shape and texture then the tree leaves.

Here is a close up photo…

Recovery Update

You can see where the mistletoe has attached to the tree branch.

Mistletoe is easier to spot in the winter, when many of the trees are leafless.

The types of trees that I see with mistletoe are mesquite, palo verde and sweet acacia.

Because mistletoe is a natural part of the desert ecosystem, there is debate about whether or not to remove it from trees.

Mistletoe does not kill your tree, but it can stress them because it steals nutrients from the tree.  This can leave the tree open to additional stresses that can kill it.

Mesquite tree heavily infested with mistletoe.

Mesquite tree heavily infested with mistletoe.

As a Certified Arborist, I recommend removing mistletoe infestations from trees in landscape settings.  You may not mind the mistletoe, but it is spread by birds and your neighbors may not be too happy when their trees start sprouting mistletoe.

In the natural desert, I would leave mistletoe alone because it is part of the natural ecosystem and its berries are a food source for birds.

mistletoe

This small mistletoe growing on a palo verde tree trunk cannot be completely removed.  But, you can break off the mistletoe easily and keep it from becoming more established as long as you remove any new growth as it occurs.

For more information on when it is possible to remove mistletoe completely, you can read my previous post – “Got Mistletoe?”

*********************

Thank you all for your supportive comments regarding my son Kai and his recovery from his sixth hip surgery.

His recovery has been harder this time with the pain.  Also, he is a lot heavier then he was the last time.  We have to carry him from his bed to his wheelchair to the toilet.

Kai is know finished with his prescription meds which has helped ‘clear his head’ a little bit.  Ibuprofen is not as effective with the pain, but it is manageable.

This week, instead of our weekly dinner at the family farm – they came over to our house because it is hard to transport Kai.

Kai

It was fun seeing his young cousins play army men with Kai using his wheelchair as a battlefield.

Kai is enclosed in a ‘cloverleaf’ brace that covers his torso and both legs, which helps to immobilize his hip.  The blue braces on his lower legs are his AFO’s which he has to wear all the time.  They add strength to his lower legs and keep his feet straight (he has had surgeries on these areas as well in the past).

We are slowly settling into our new routine with caring for Kai while getting our other tasks done, like blogging 😉

I stepped outside, early this morning, and did a little pruning to our palo verde tree that was hanging too far over our front entry pathway.  It felt great just doing something normal.

I hope your summer is off to a good start and you are finding ways to keep cool 🙂

This past Memorial Day, my mother had the entire family (minus my daughter, Rachele, who is in the Navy) over for brunch to celebrate the beginning of summer.

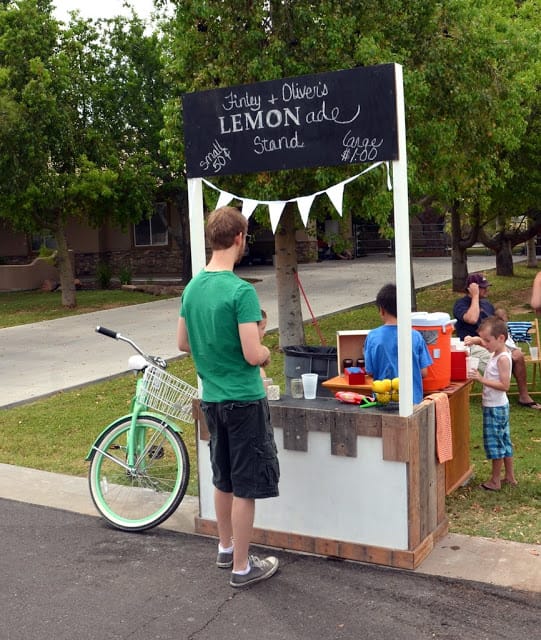
As we drove up to the farm, we were greeted by the following sight…

Memorial Day at Family Fsrm

My nephews along with my son, Kai, were selling lemonade made from the lemons from the backyard tree.

Memorial Day at Family Fsrm

They had quite a few people buying a refreshing cup of lemonade, including my son-in-law, Jeff.

Memorial Day at Family Fsrm

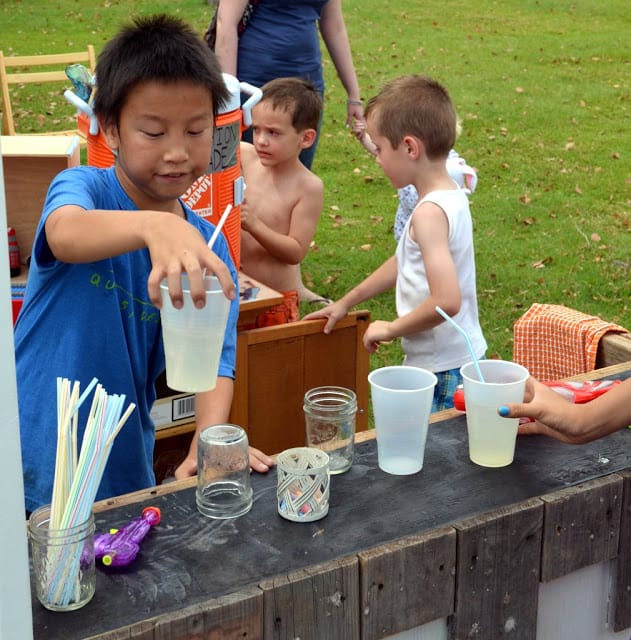
Kai and the boys were kept busy filling cups with lemonade.  In addition, they also sold homemade jam made from the peach trees.

Memorial Day at Family Fsrm

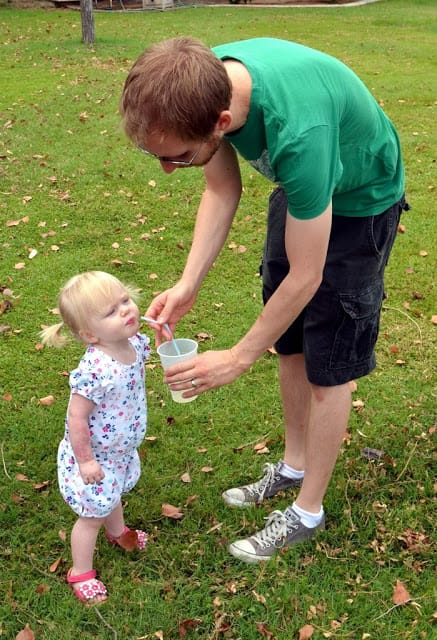
My daughter, Brittney and Lily (my granddaughter) came over too and Lily got her first taste of lemonade.

Memorial Day at Family Fsrm

As we entered the house, we were greeted by delicious smells of eggs, sausage, fruit and cinnamon rolls.

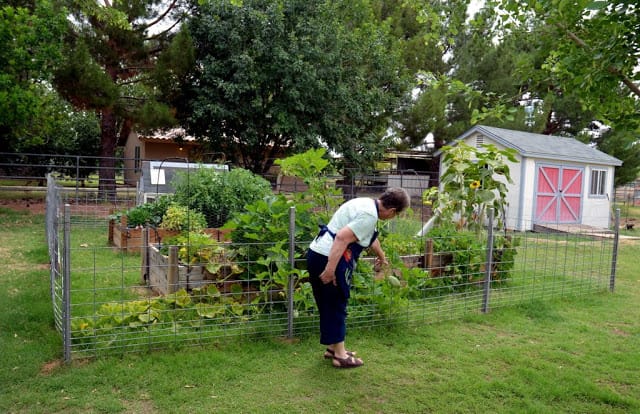
I couldn’t wait to finish eating so that I could go outside with my mother to see what was growing in her vegetable garden.

Russian gourds

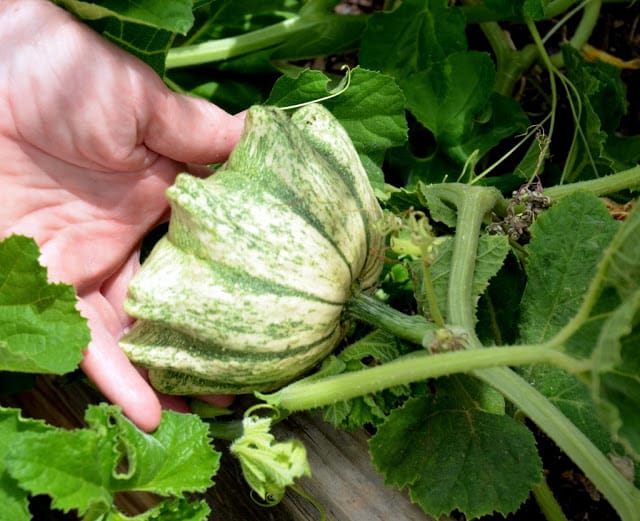
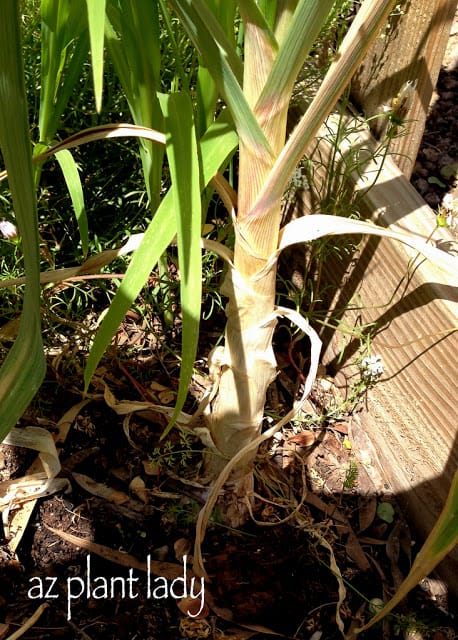
She was most proud of her Russian gourds.

Russian gourds

Okay, they really aren’t Russian, but my sister-in-law brought the seeds in Russia for my mother.  You can buy the same gourd seed in the US.

But, we like calling them Russian gourds because it sounds more fun and exotic.

Russian gourds
Russian gourds

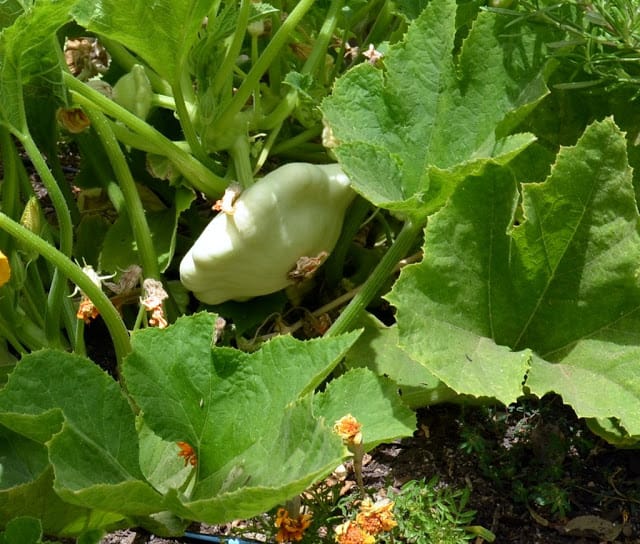
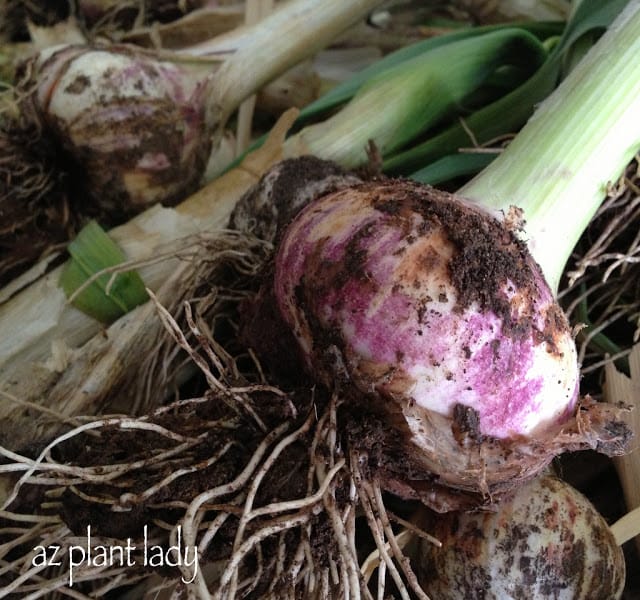
Her pattypan squash is also growing well, above.  This summer squash is a lot like zucchini.  My mom plans on cutting it into small pieces and adding to salads, much like you would cucumbers.

sunflowers

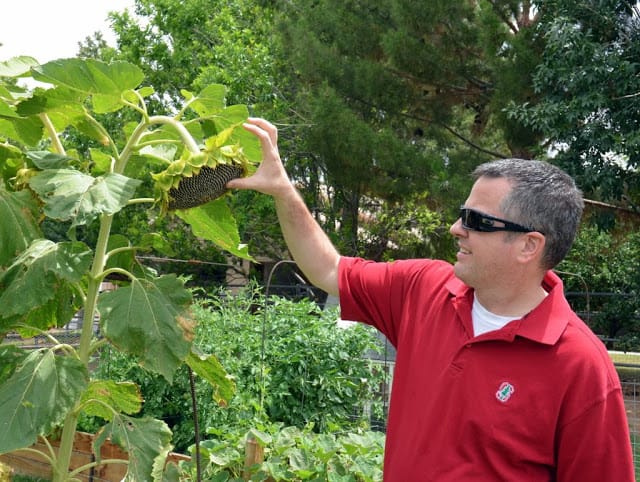
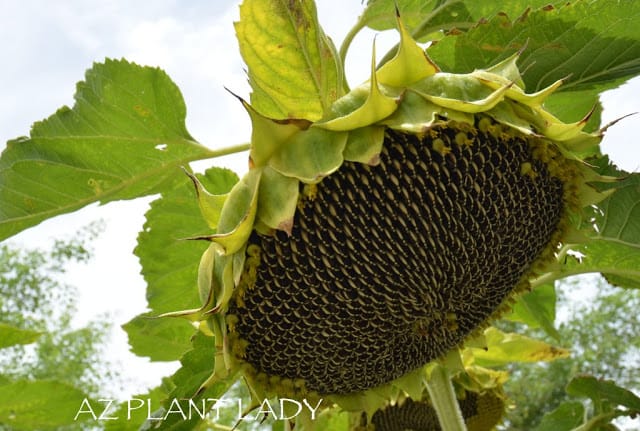
Her sunflowers provided much appreciated shade for the garden as well as seeds for the birds.  My brother considered trying some of the seeds.

sunflowers

If you want to keep the birds from eating the seeds, you can place a paper grocery bag on top of the flowers.

zucchini

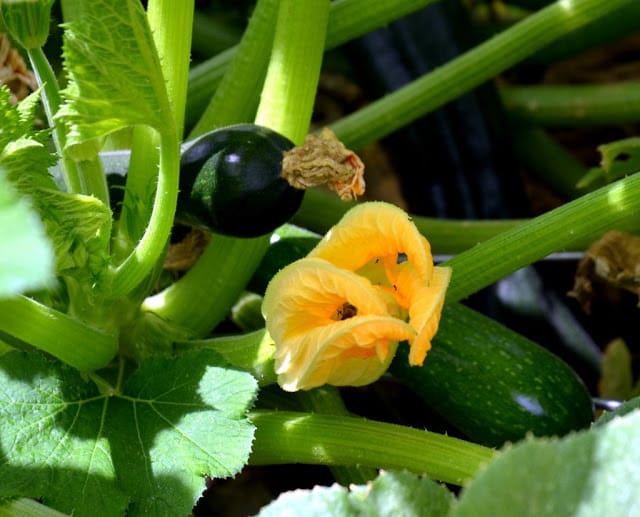
Lots of zucchini were beginning to form.  If you are relatively new to vegetable gardening, then zucchini is a great vegetable to get started with in the summer.  They are easy to grow and there is something so satisfying when you bring a large one inside.

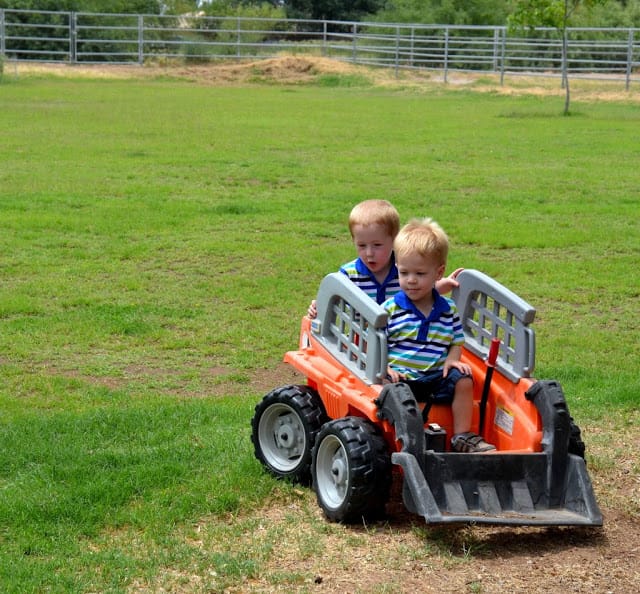
My 2-year old twin nephews took some time to play in the toy front end loader…

Memorial Day at the Family Farm

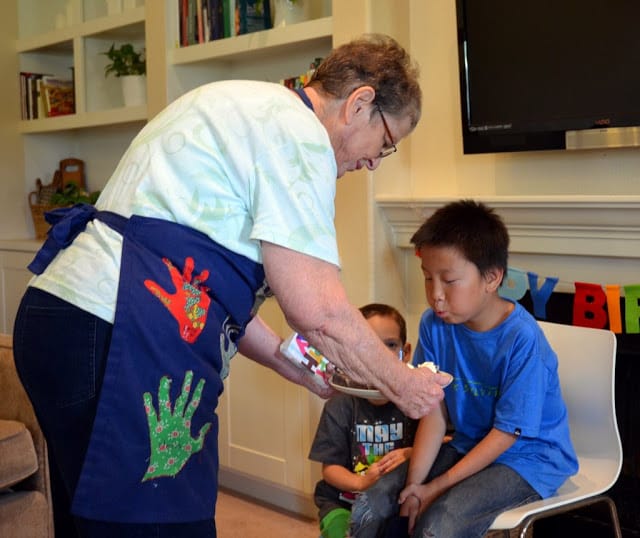
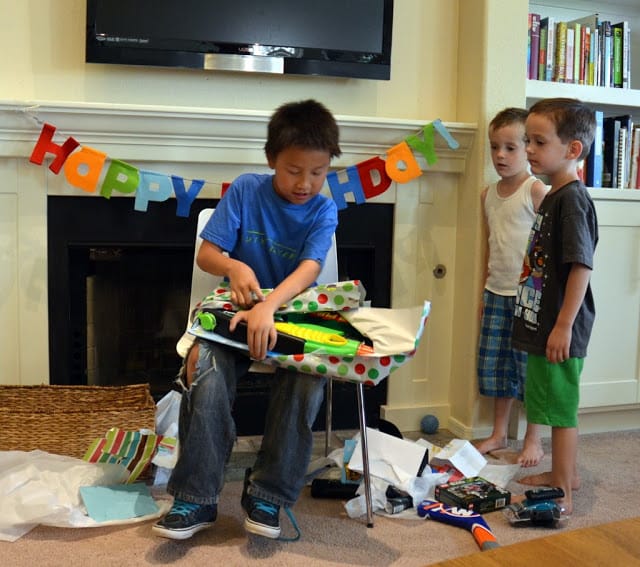
Then it was time to celebrate Kai’s birthday.  He is now 11 years old.

Memorial Day at the Family Farm

His favorite gift was a ‘Navy’ hat from his big sister, which we bought at the Naval base after we saw our daughter graduate.

Memorial Day at the Family Farm

His second-favorite gift was a huge squirt gun from his grandma.

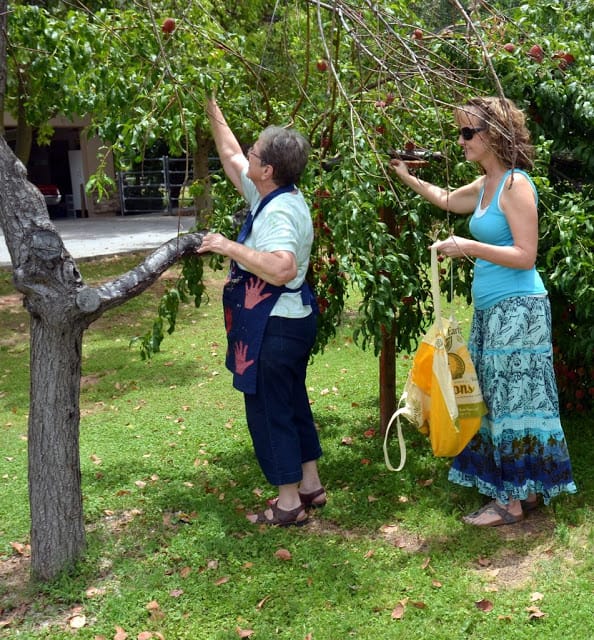
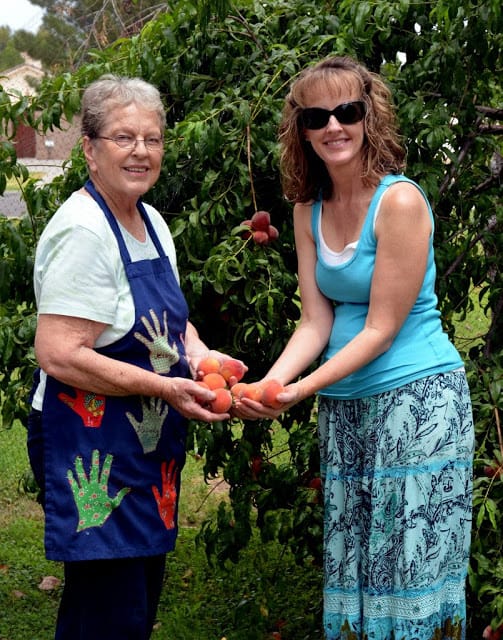
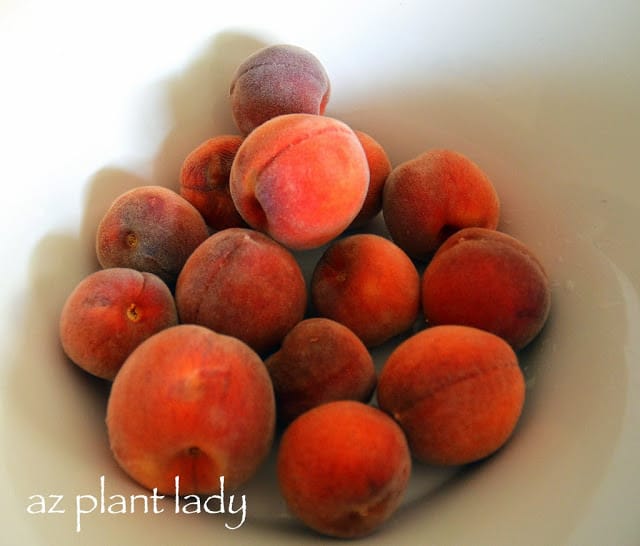
Late May is also the time that we pick peaches from the trees.  

pick some peaches

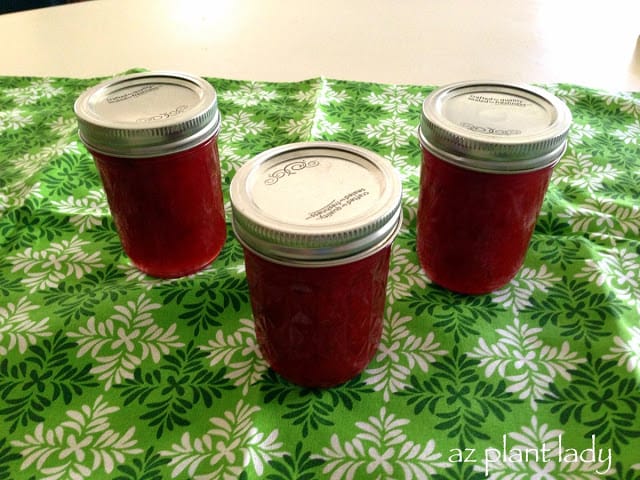
So my mother and I headed out to pick some peaches for me to take home so that I could make peach jam.

pick some peaches
pick some peaches

I love making peach jam and enjoying it throughout the year.

own peach tree.

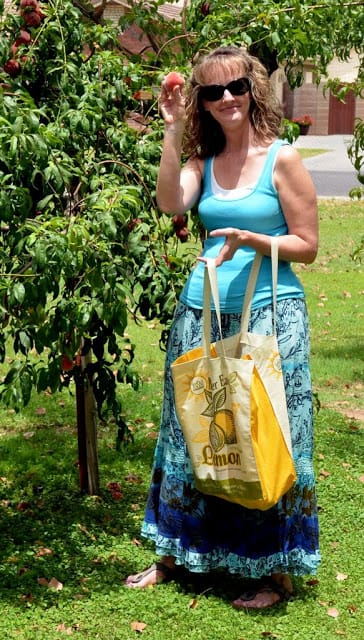
The peaches, above, were picked from my own peach tree.  We planted it in January and I was quite surprised when it produced so many peaches.  But, I certainly wasn’t complaining 😉

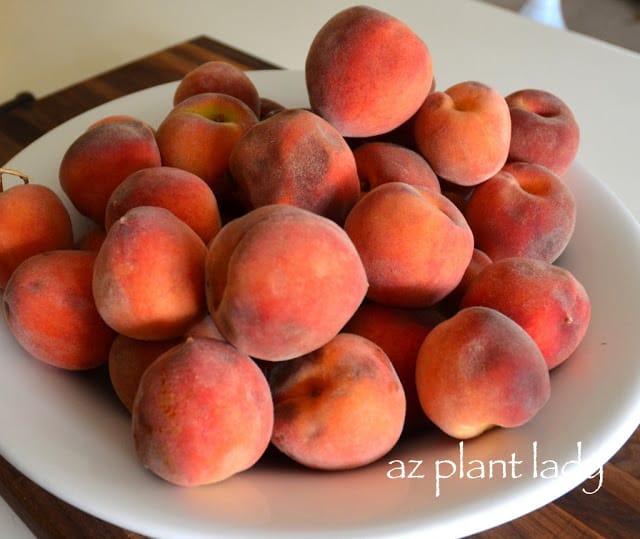
Of course, I didn’t have enough peaches from my own tree, so I used those that I picked from my mother’s trees to supplement my own.

own peach tree.

When you pick peaches, use them the same day if possible because they are so soft and bruise so easily.  I waited only one day and already had some soft spots on my peaches.

My mother taught me how to make peach jam a few summers ago.  I blogged about it back then in “A Harvest Of Peaches and Jam”

***************************

I wanted to thank those of you who left such kind comments regarding my last post about my daughter Rachele’s graduation from Navy basic training.

As you know, I enjoy growing my own vegetables.  Many people ask me what the secret is to a healthy vegetable garden.

Well, what if I told you that the secret ingredient is a natural fertilizer that improves your soil, is plentiful and very cheap.

Would you want to try it in your garden?  Chances are that you are already familiar with this secret ingredient and farmers have been using it for centuries.

What is it?

MANURE

secret of healthy vegetable garden

Secret of healthy vegetable garden, Manure along with compost are the backbone of my soil in my vegetable gardens.

Manure along with compost are the backbone of my soil in my vegetable gardens.

I blogged about using manure when creating my newest vegetable garden early last year.

I recently wrote an article “The Poop Scoop: Enrich Your Soil With Good Old Manure” for Houzz.com

I hope you enjoy it!

*******************************

The most recent update on our daughter, Rachele, who is in basic training for the Navy is that she has to pass her last running test in order to graduate.

She is quite nervous about passing because she still hasn’t recovered from her twisted ankle and also has shin splints.

I would appreciate your prayers that she will be able to pass 🙂

I love getting a great deal, don’t you?

Back in October, I spent $2.40 for eight heads of garlic, from my local grocery store.

I planted them and 7 months later, it was time to harvest them.

vegetable garden

As I stepped into the side vegetable garden, I took a good look at my garlic.  It was a lot bigger then in previous years.

vegetable garden

I started pulling and realized that it was a lot harder to pull out then last year.

It was the biggest garlic that I had ever seen in my garden and I was thrilled.

Until I realized that I had planted twice as much garlic as last year and still had to pull out all of the remaining garlic.

A couple of hours later, I hauled in my garlic harvest…

garlic harvest

All this for an initial investment of $2.40!

I had so much garlic that I couldn’t carry it in one load.

harvest garlic

harvest garlic

The larger heads were almost 4 inches wide.  However, the garlic that I grew in containers was quite a bit smaller – more like the size you find in the grocery store, which was fine with me.

Now all I have to do is to let my garlic ‘cure’ for a month in a dark, dry spot.  That usually means that I put them on top of my large freezer in the laundry room.

Garlic will last about 8 months if kept in a dark, dry spot out of the heat.  I don’t think we will be able to use all our garlic.  Thankfully, I have plenty of people to share it with.

For more info on how to grow and ‘cure’ garlic, you can check out my earlier post “Got Garlic?”.

beautiful pink rose

I love roses, don’t you?

Believe it or not, I used to have 40 different varieties of hybrid tea roses in my garden when I lived in Phoenix.

Now, I am perfectly happy with my 3 David Austin shrub roses.

beautiful pink rose

Technically, they aren’t my roses.

They belong to my kids.

The beautiful pink rose, above, is Abraham Darby, which belongs to my daughter, Ruthie.

We planted these roses 3 years ago.

You can read about our planting adventure here, “Three Little Roses – Ready for a New Home” and “Three Little Roses -Time to Plant” complete with rose planting guidelines and pictures of my kids when they were much younger – where does the time go?

****************************

Hope your week is off to a good start!

I must admit that I am really missing my daughter, Rachele, who is entering her second week of basic training in the Navy.

Last week, I decided to get rid my older pots that I have in my front entry.

Years ago, I received these plants from a client who decided that she wanted fancier pots.  So, I took them home, painted them bright colors and installed them by my front entry.

While they have served me well for the past 13 years, they weren’t very big, which limited what I could plant in them.

For quite some time, I have wanted to get some nice, large glazed pots.  I realized that it was finally time to practice what I preach to my clients…

“Choosing colorful, glazed pots is a great way to add color to the landscape.”

So, my husband and I went out searching for three pots for our front entry.

I was thrilled to find all three at our first stop – Home Depot.  The price was good and they even gave us 10% off for a small chip we noticed.  No one will see the chip since it will be on the back side.

I had my plants all selected and was ready to go.

My son, Kai, offered to help.  So I told him to raid the recycle trash can and get an empty milk carton,  soda/water bottles and empty jars.

Kai looked at me like I was a little crazy, but he did as I asked.

He then put them into my new containers…

plastic containers

plastic containers

Can you guess why I had my containers filled with ‘trash’?

I’ll let you know why you’ll want to start collecting plastic containers for your next potting project in my next post…

*****************************

Today, my daughter, Rachele, is on a plane to Chicago.  She has joined the Navy.

I am so proud and happy for her!

But, I must admit that part of my heart has left with her. 

Rachele

I remember being sad when I held her by the hand and took her to her first day of preschool.  She had her pretty dress on and her curly hair was short and cute.  I stood outside her classroom for over a half hour, just watching her through the window.  

Then I went home and cried.

I have done my best as her mom and it’s time for her to stretch her wings and make her way into the world. 

This family photo was taken yesterday, just before Rachele left

This family photo was taken yesterday, just before Rachele left.

I just wish it didn’t have to hurt to let her go…

Why Adding Trash to Pots is a Good Idea

My inbox has been filled lately with pruning questions.  Specifically, how to prune back overgrown flowering shrubs.

Chihuahuan Sage (Leucophyllum laevigatum)

Chihuahuan Sage (Leucophyllum laevigatum)

You may be wondering why you need to severely prune back overgrown shrubs?

Well, as you can see from the photo, above – as a shrub’s branches age, they produce fewer leaves and flowers.  As time passes – these branches die, which leave ugly, bare areas.

Here are a few more examples of overgrown shrubs that need to be severely pruned back…

'White Cloud' Texas Sage (Leucophyllum frutescens 'White Cloud')

‘White Cloud’ Texas Sage (Leucophyllum frutescens ‘White Cloud’)

You may think the formally pruned sage shrubs in the photo above, look okay besides being a bit on the large side.

But, what you don’t see is a large amount of dead branches inside.  In reality, these shrubs are covered in a very thin layer of growth.

overgrown shrubs

Here is an example of old Cassia (Senna nemophila) shrubs that have only been pruned formally.  You can see that there are more dead areas than live growth.

So, how do you go about severely pruning old, overgrown shrubs back?

First of all – don’t do this during cooler months because it will take your shrubs a very long time to grow back. In addition, it can make frost-tender shrubs more susceptible to frost damage.  Wait until spring for pruning back summer-flowering shrubs such as bougainvillea, sage, oleanders, etc.

You need a good pair of loppers and sometimes a pruning saw and you are ready to go. Simply prune your shrub back until there is only about 1 – 2 ft left.

Hedge trimmers can help if you use them to remove the outer part of the shrub and then you can get your loppers inside to prune off larger branches toward the base.

Below, are photos of ‘Rio Bravo’ Sage (Leucophyllum langmaniae ‘Rio Bravo’) shrubs that started out overgrown, were pruned back severely, and grew back.

overgrown shrubs

Overgrown shrubs.

overgrown shrubs

Pruned back to 1 ft.

This is the ugly stage.  But you need to go through this ‘awkward’ stage to achieve beautiful, healthy shrubs.

I promise that it doesn’t last long…

overgrown shrubs

New growth appears 3 weeks later

8 weeks after pruning

8 weeks after pruning.

12 weeks after severe pruning.

12 weeks after severe pruning.

You can see that the severe pruning caused the shrub to grow young, new branches that produce beautiful green growth and flowers.

overgrown shrubs

**Although severe renewal pruning keeps your shrubs healthy and attractive – there are a few cases when an old, overgrown shrub won’t grow back. It is doubtful that the Cassia shrubs, above, will survive for long either with or without severe pruning).

This usually indicates that the shrub has declined too much and would not have survived for long even without pruning.  If this happens, you are better off replacing your shrub.**  

Hand pruners, pruning saw and loppers

Hand pruners, pruning saw and loppers

A good guideline for severely pruning your shrubs is to do this every 3 years or so. Of course, you can do this every year if you like to help keep your shrubs from outgrowing their space.

I hope that this helps to answer some of your questions.

If you would like to learn more about how to prune shrubs the right way, I invite you to learn more about my popular online shrub pruning workshop.   

The other evening, my husband and I got away for a few hours to go and see a movie.  On our way, we stopped by for dinner at El Pollo Loco.

As we were leaving, I looked toward the drive-thru and saw numerous Valentine shrubs.

Valentine shrubs

As you can see, the shrubs are planted very closely together, so they do not have room to grow to their natural size.

So, landscapers come in and prune away the attractive natural shape of these shrubs along with their colorful, winter flowers.

The problem with this area is over planting.

Valentine shrubs

You can really see it on the other side of the drive-thru lane.

Often, landscape architects and designers add more plants then needed because when first planted, plants look scrawny and small.  Not necessarily something their client wants to see.  They want immediate impact from plants.

But, just 2 years later, you have unattractive green blobs because there just isn’t enough room for them to grow and they require frequent visits from the landscaper.

So, what can be done?  Well, if I were managing this property – I would pull out every other shrub in order to allow the remaining shrubs more room to grow.

Valentine shrubs

This not only will create a more attractive landscape, but one that requires less maintenance, thereby saving money.

Valentine shrubs need to be pruned once a year in May.

That’s it!

Prune them back to 1 – 2 ft. wide and tall and you are done for the year.

Valentine shrubs

For more information on Valentine shrubs and why they are one of my favorite plants read:

“Flowers for Christmas and Valentine’s Day”

houseplants

houseplants

Who knew that you could grow ‘houseplants’ using kitchen scraps?

I was inspired to find gardening projects that could be done indoors, for those gardeners who are stuck inside during cold winters.

The photos below were taken over a 14 day period from planting, to what they look like just 2 weeks later.  I must admit that I am quite impressed.

I started with growing a radish…

houseplants

I am hoping that my radish plant will flower at some point because I have heard that radish flowers are quite pretty.

houseplants

My garlic cloves grew quickly and I will use the greens as a garnish, much like I would use green onions.  Garlic greens have a mild garlic flavor.

Kitchen Scraps

My lentils are quite pretty and delicate looking.  I am waiting for them to flower, which will make them even prettier.

Kitchen Scraps

I realize that many people have grown a vine from a sweet potato – but I hadn’t tried it.  After it grows, the vine will be a pretty addition to my kitchen windowsill garden.  Now that the roots are growing, I will hopefully see some green sprouting on top.

Kitchen Scraps

I did have one plant that didn’t come up.  The book that I was inspired by said that you could plant fresh green beans, but mine didn’t grow.

**You can also plant dried beans after soaking them overnight and they should come up.

The goal of this project wasn’t to grow ‘food’, but to enjoy the foliage of the plants themselves and brighten up a dreary winter for those who live in cold climates.

I really had fun with this project.  I think it would be a great activity to do with kids, don’t you?