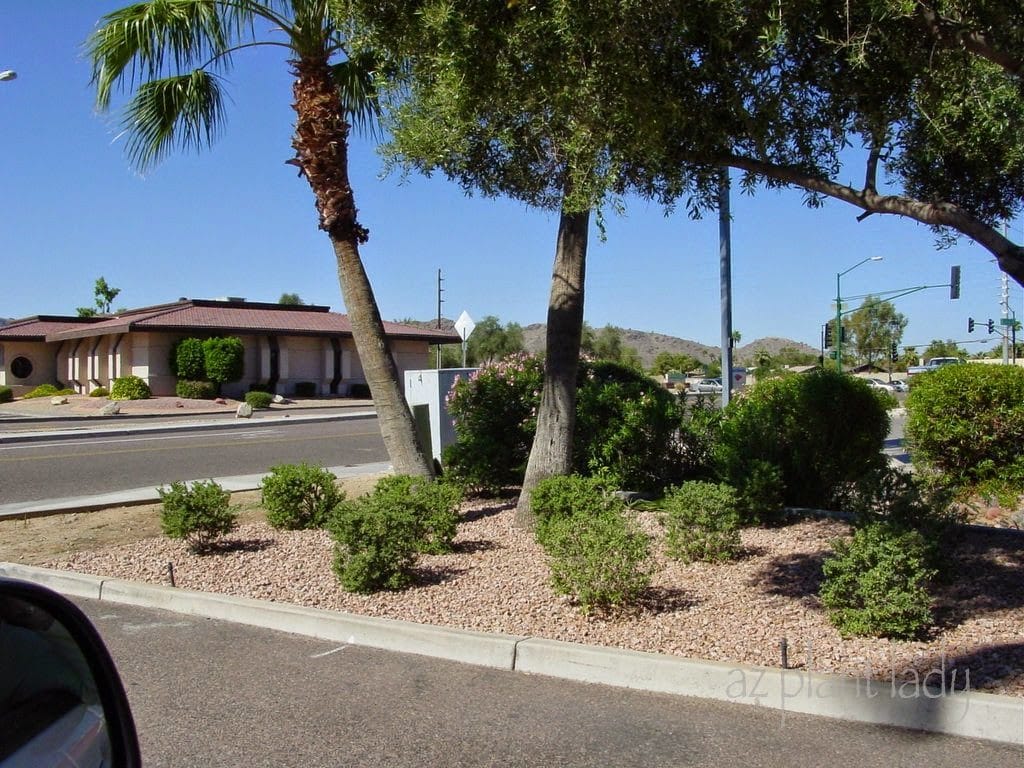
Have you ever seen shrubs that have been planted too closely together?
At first glance, it looks like the new plants in the landscape above fit just fine into this area.
But, what if I told you that those small shrubs grow 6 feet high and wide at maturity?
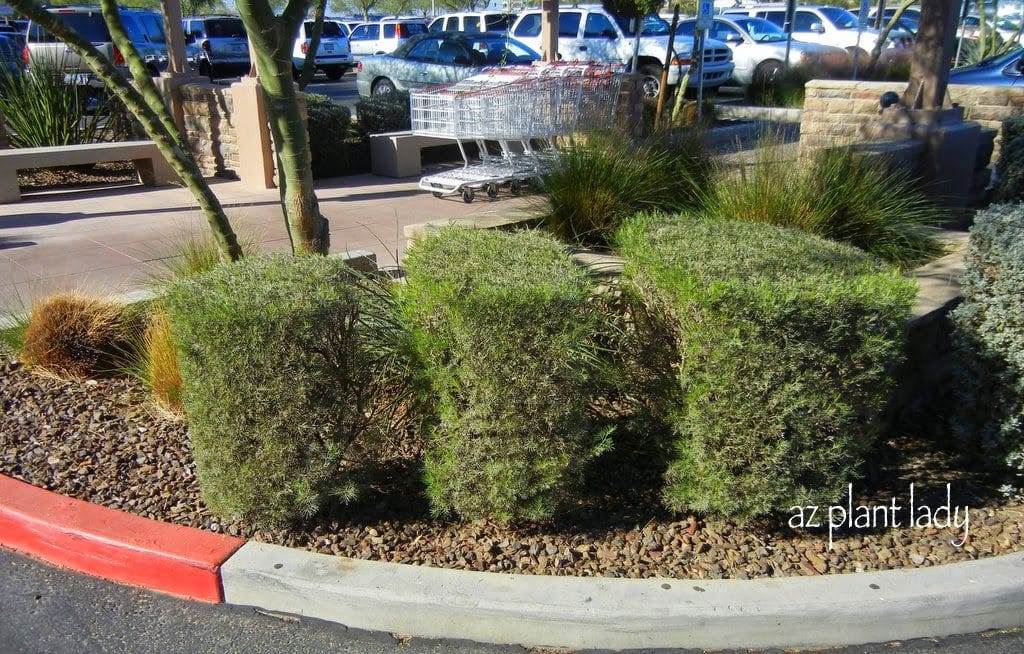
As they grow, out come the hedge trimmers, and over-pruned, ugly shrubs are the result.
Unfortunately, this is a problem that has reached almost epidemic proportions in areas throughout the Southwest.
Why else would people prune beautiful flowering shrubs into something that resembles anonymous, green blobs?
The good news is that you can avoid this from happening in your landscape. Even if you currently have overcrowded shrubs, you can solve the problem by choosing the right size of flowering shrubs for the space available.
I recently wrote an article for Houzz.com on how to avoid overcrowded and the resulting over-pruning…
I hope that you find this article helpful – I’d love to hear your thoughts.
https://www.azplantlady.com/wp-content/uploads/2014/08/Over-planted-shrubs-2.jpg7681024arizonaplantlady@gmail.comhttps://www.azplantlady.com/wp-content/uploads/2025/08/AZ-Plant-Lady-Logo-small.jpgarizonaplantlady@gmail.com2014-08-01 13:00:002025-08-20 00:51:06Overcrowded, Overpruned Shrubs and How to Avoid Them
This is my last post on unique containers. To date, we have looked at containers on four, two and one wheels, one that fits on your feet as well as some ‘trashy’ ones as well.
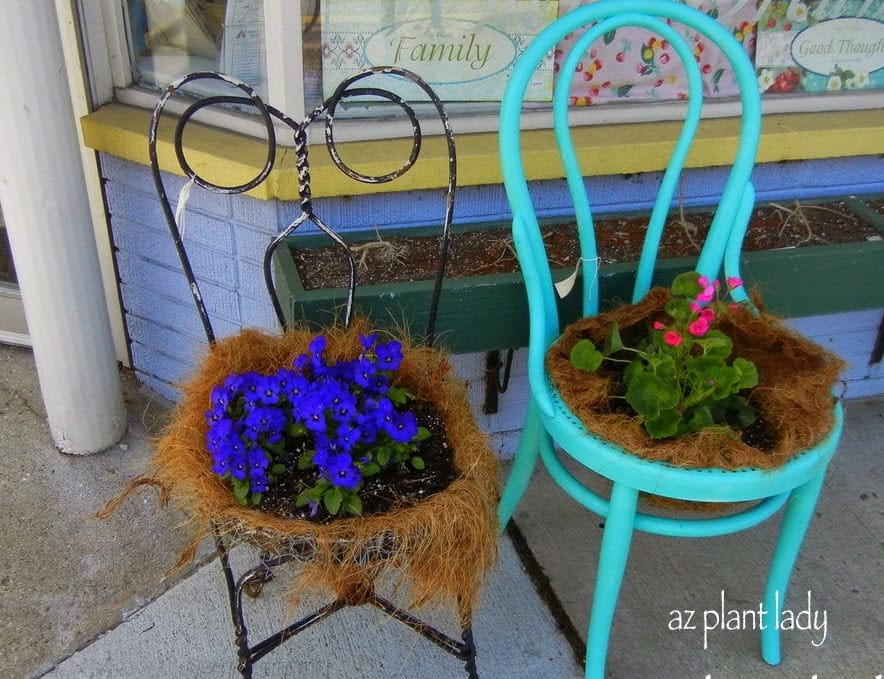
Today, I’d like to show you two containers that you shouldn’t sit on.
Chair planter in Downtown Noblesville, Indiana.
I saw these two chair planters sitting in front of a gift shop in downtown Noblesville, Indiana.
The seat of these old chairs have been taken out and a planter, much like those you would use for hanging baskets were inserted into each empty seat.
This type of whimsical planting is fun and hopefully people won’t make the mistake of sitting them.
Note that in dry climates, like Arizona and other desert climates – you can do this in the cooler months of winter and spring, but not in the summer. The roots would literally ‘cook’ in the hot temperatures.
I hope you have enjoyed seeing some of my favorite unique containers that I have encountered on my travels.
I have found a unique container of my own on a recent trip to Minnesota that I can’t wait to plant in fall once the temperatures cool. I’ll be sure to share it with you!
https://www.azplantlady.com/wp-content/uploads/2014/07/Chair-containers.jpg679884arizonaplantlady@gmail.comhttps://www.azplantlady.com/wp-content/uploads/2025/08/AZ-Plant-Lady-Logo-small.jpgarizonaplantlady@gmail.com2014-07-31 13:00:002021-01-07 09:47:56Unique Containers: Day 7 – Don’t Sit on These Planters!
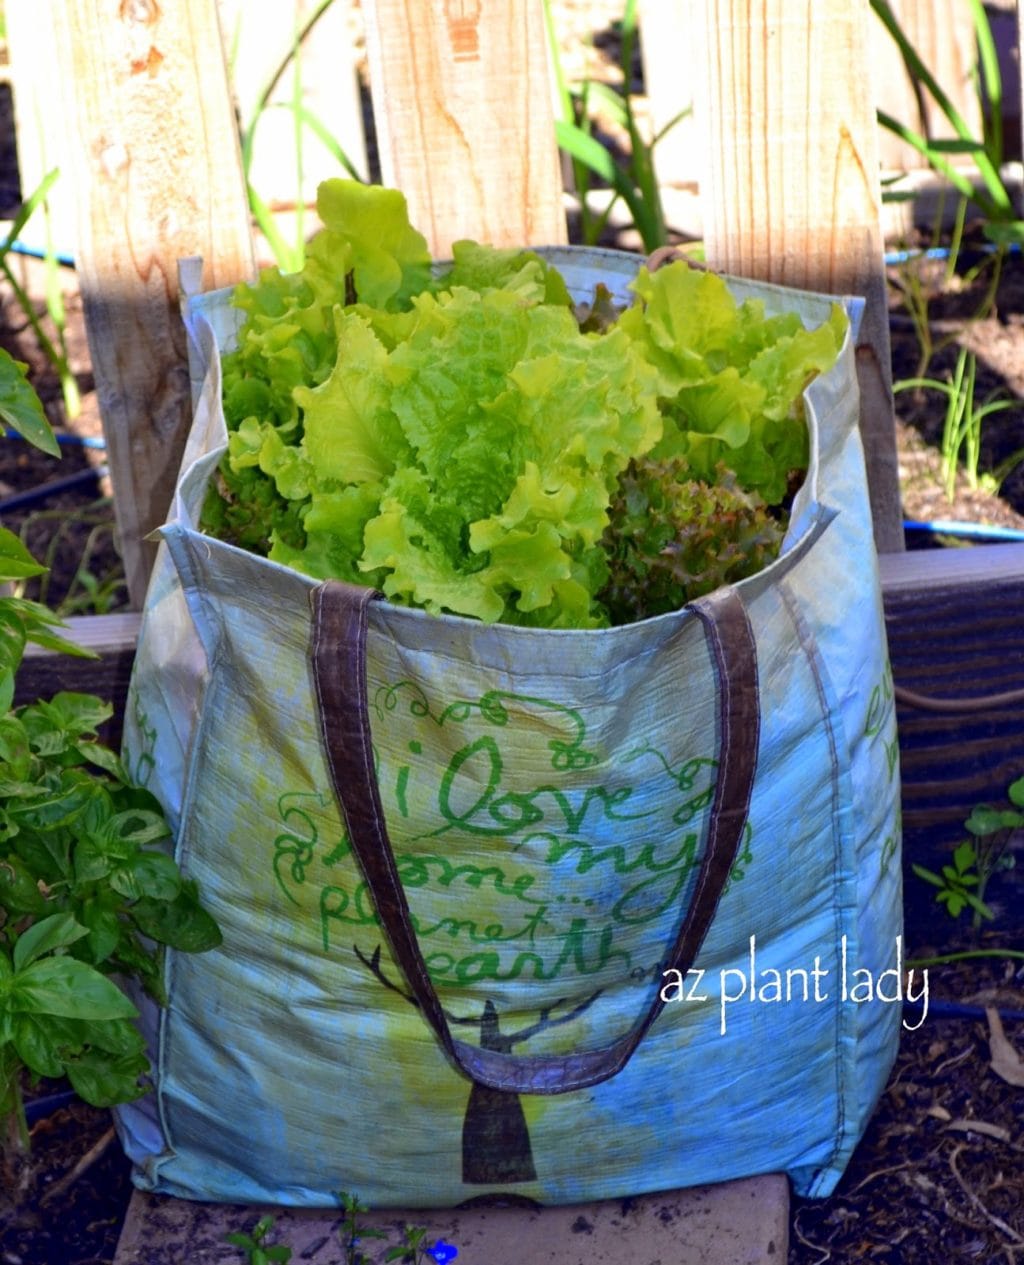
You can grow many different types of vegetables in a grocery bag. Would you consider doing this in your own garden?
https://www.azplantlady.com/wp-content/uploads/2014/07/grocery-bag-vegetable-container.jpg16001295arizonaplantlady@gmail.comhttps://www.azplantlady.com/wp-content/uploads/2025/08/AZ-Plant-Lady-Logo-small.jpgarizonaplantlady@gmail.com2014-07-22 12:00:002025-08-12 01:16:33Favorite DIY Posts – Day 6: Growing Vegetables in a Grocery Bag
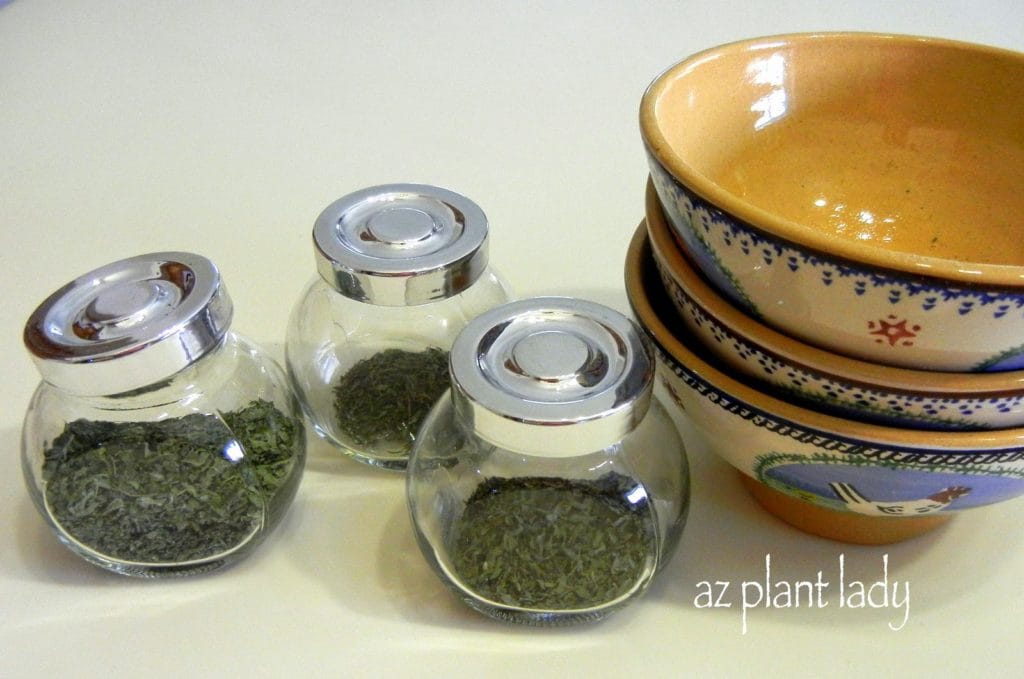
Do you have a favorite herb that you like to use when you cook?
https://www.azplantlady.com/wp-content/uploads/2014/07/how-to-dry-and-store-herbs.jpg10611600arizonaplantlady@gmail.comhttps://www.azplantlady.com/wp-content/uploads/2025/08/AZ-Plant-Lady-Logo-small.jpgarizonaplantlady@gmail.com2014-07-21 12:00:002025-07-13 04:53:54Favorite DIY Posts – Day 5: How to Dry Herbs
I have spent the past few weeks indoors whenever possible avoiding the desert heat. While I do venture outdoors occasionally to do consults and take a weekly tour of the garden to make sure everything is okay.
We did lose a small tree and some branches during a fierce monsoon storm over the weekend, but I was grateful for the rain and the cool temperatures that followed.
Last week, I showed you some of my favorite plant photos. This week, I would like to share with you some of my favorite DIY blog posts, most of which you can do inside.
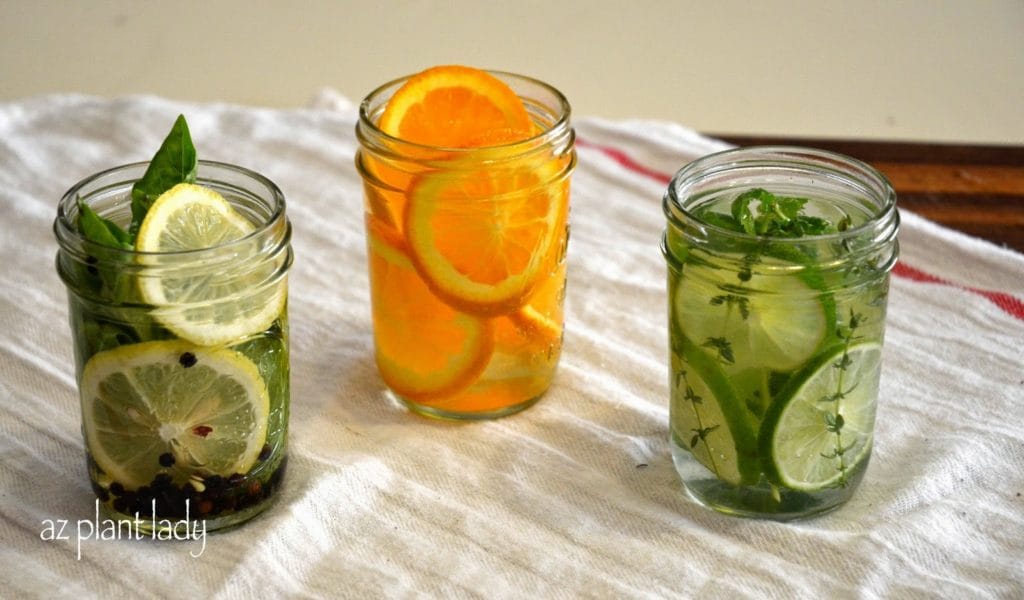
One of my favorite DIY projects was creating natural air-fresheners.
I don’t know about you, but I do not like the heavy, artificial smells of air-freshener sprays – not to mention the idea of chemicals floating through the air. So, the idea of making air-fresheners using plants definitely appealed to me.
Last week, I mentioned on my Facebook page that I was “channeling my inner Martha Stewart”, preparing for a futurediy blog post
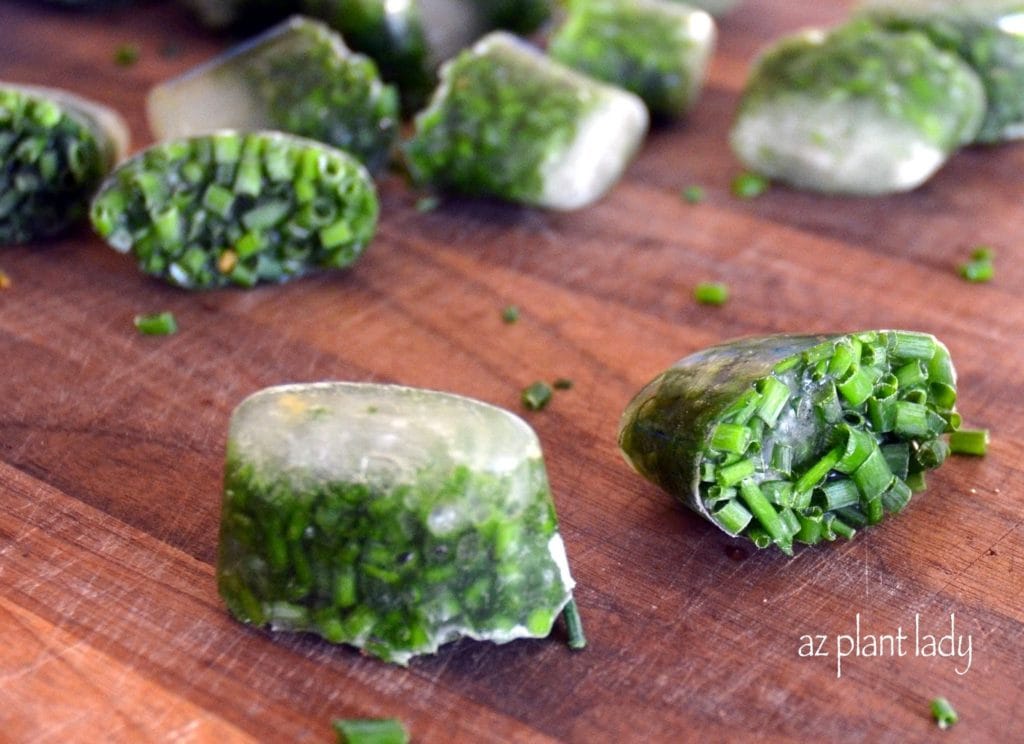
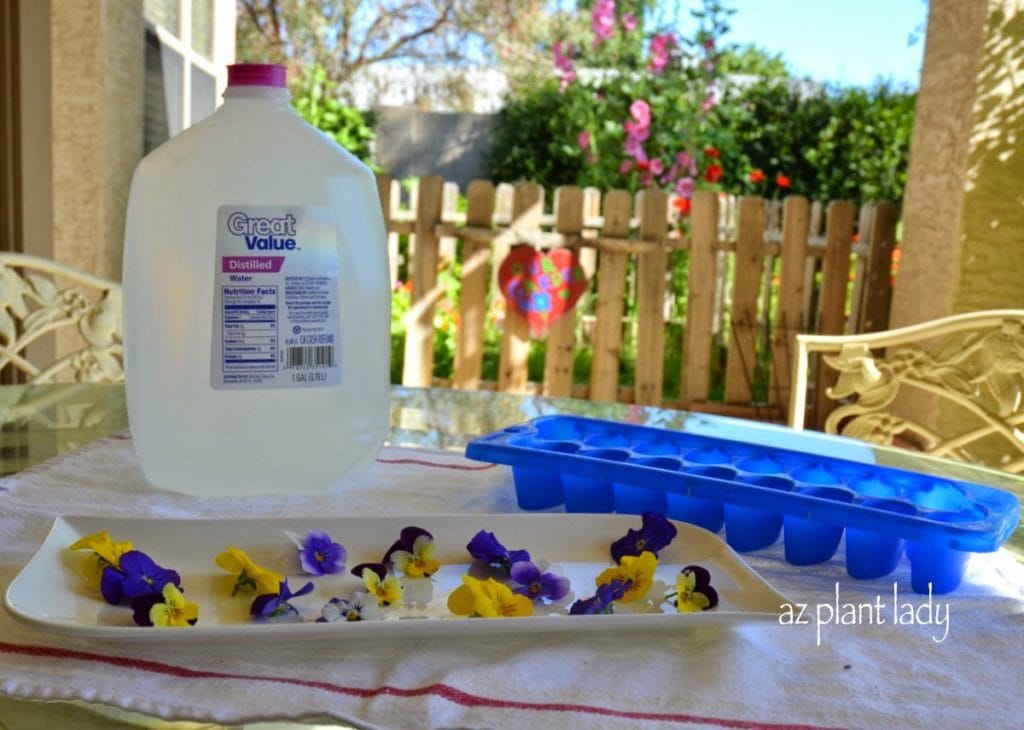
Here are the ingredients I used…
Distilled water, ice-cube trays and edible flowers such as violas.
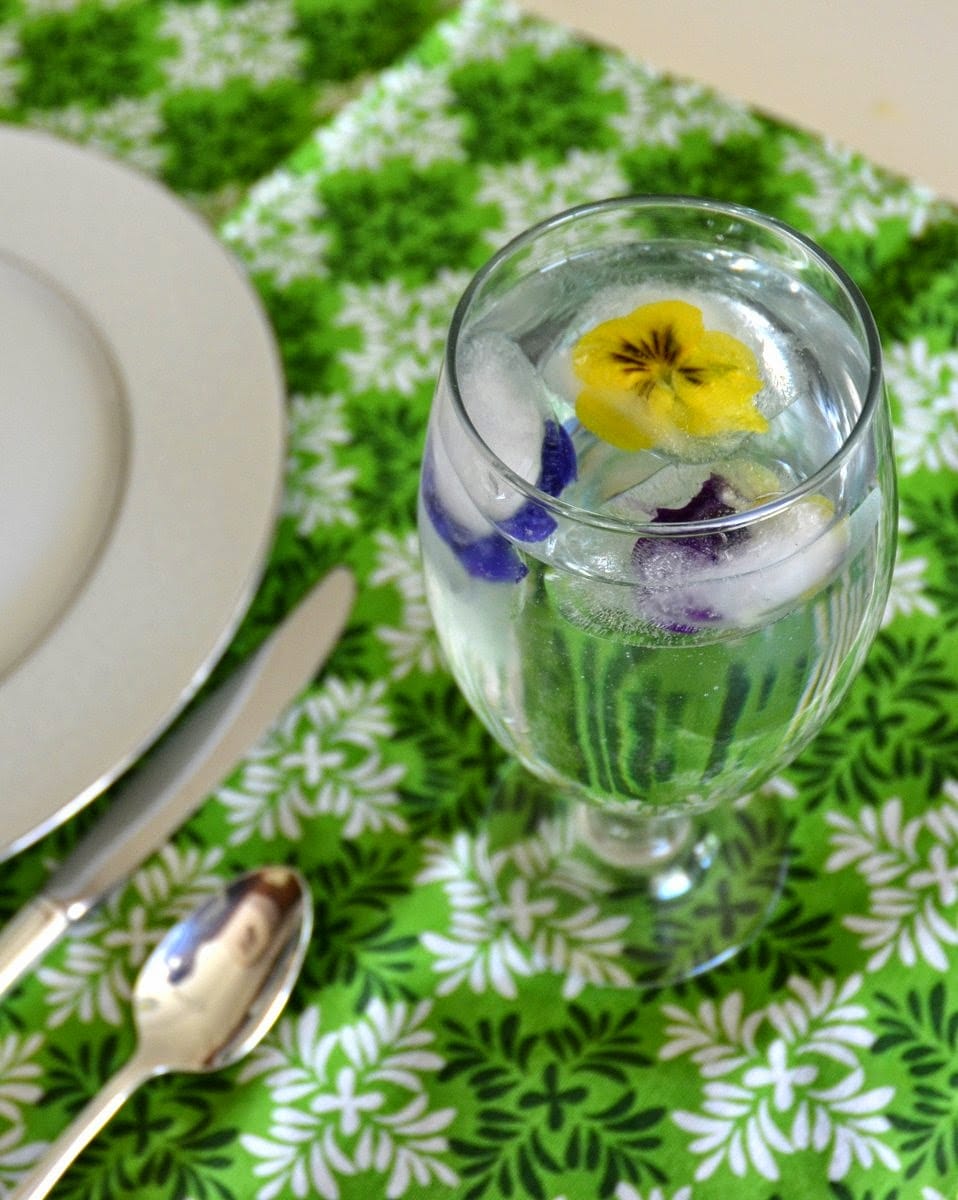
Here is what I ended up with…
Wouldn’t these look great on your Easter table?
It was very easy to do, but there are some tricks to doing it just right.
Not all blooms are safe to consume, and you must be sure to use flowers that have not been treated with chemicals or pesticides.
I wrote about how to make your own floral ice cubes along with a list of flowers safe to eat, in my latest blog post for Birds & Blooms, which you can access here.
https://www.azplantlady.com/wp-content/uploads/2014/04/diy_floral_ice_cubes-002-1.jpg8561200arizonaplantlady@gmail.comhttps://www.azplantlady.com/wp-content/uploads/2025/08/AZ-Plant-Lady-Logo-small.jpgarizonaplantlady@gmail.com2014-04-18 19:39:002025-08-03 05:22:28DIY in the Garden: Floral Ice Cubes
A Tale of New Beginnings: The Mexican Fence Post Cactus and Rachele’s Journey
This is a story about new beginnings – one for a new cactus and another beginning for my second-oldest daughter, Rachele.
Believe me when I say that both stories are connected in a way.
The Connection Between a Mexican Fence Post Cactus and a Daughter’s Departure
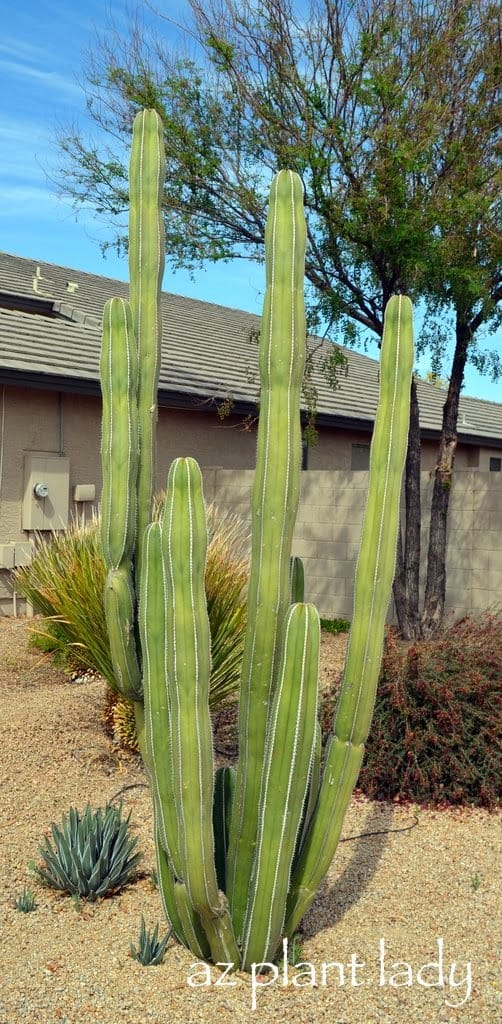
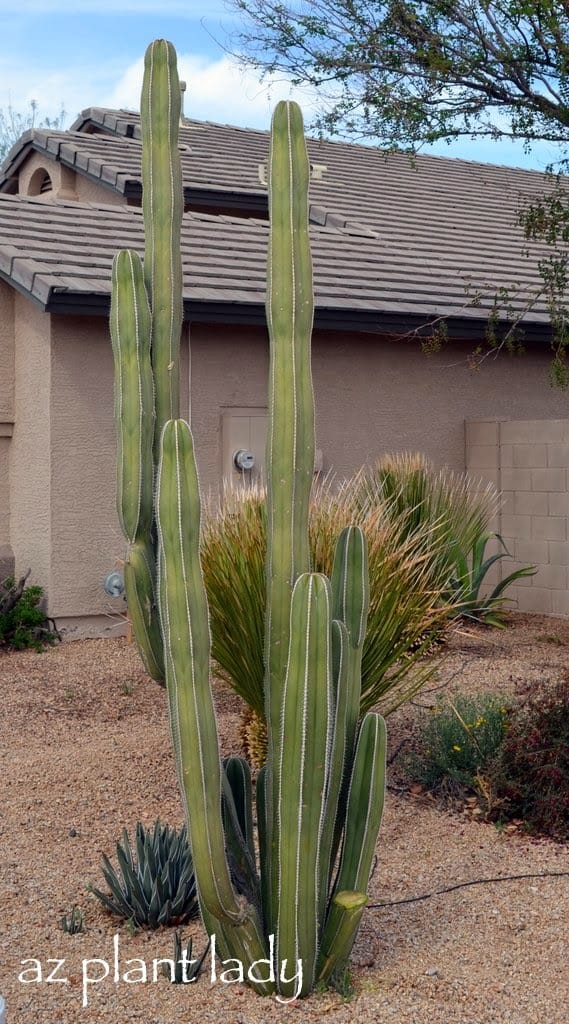
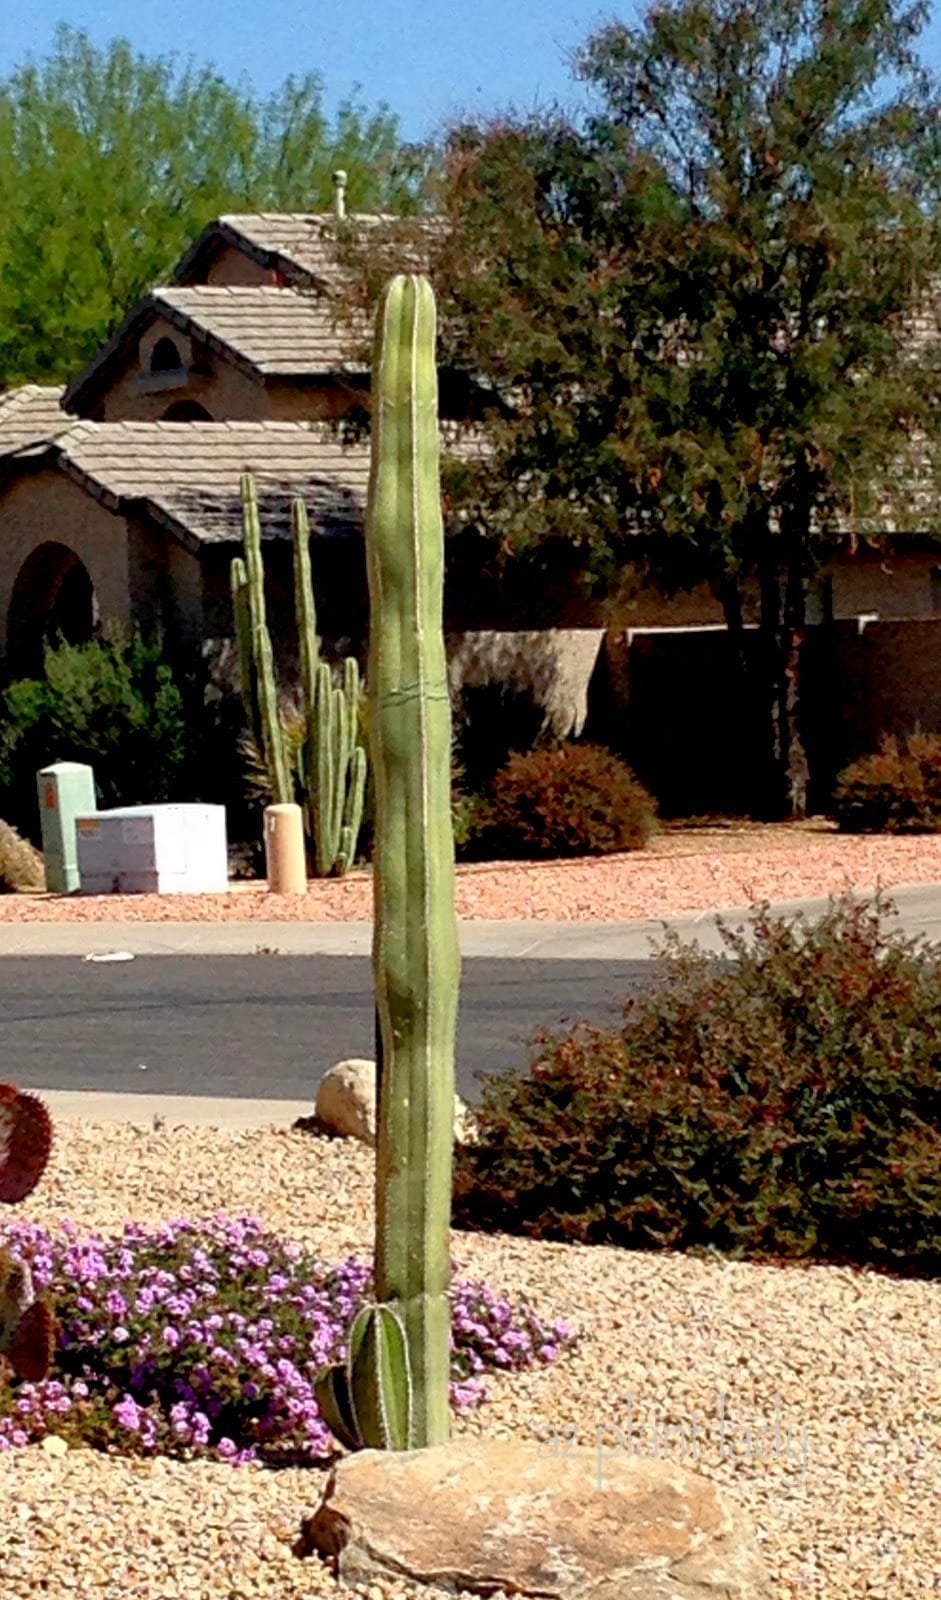
This cactus, above, is a Mexican Fence Post (Pachycereus marinatus), which has been happily growing in my front garden.
What may not be initially obvious is that 11 years ago, I started this cactus from a 2 ft. piece of one (called a ‘cutting’) given to me by a client from their large Mexican Fence Post cactus.
Well, exactly 1 year ago, I repeated the favor for our neighbors.
Sharing the Beauty: Providing a Piece of the Mexican Fence Post Cactus to Neighbors
Look carefully at the photo above and compare it with the first one. Can you see where we cut off a piece of the cactus?
Our neighbors had recently re-landscaped their front yard and wanted a cactus like ours. Of course, they knew that they would have to start out with a much smaller one – but they were unprepared for how expensive it would be to buy one at the nursery.
Our cactus had been growing so well, we decided to offer them a piece (cutting) off of our Mexican Fence Post. So, my husband, daughter and I gathered together to take a cutting from our cactus.
Here is how we did it…
How to Properly Take a Cutting from a Cactus
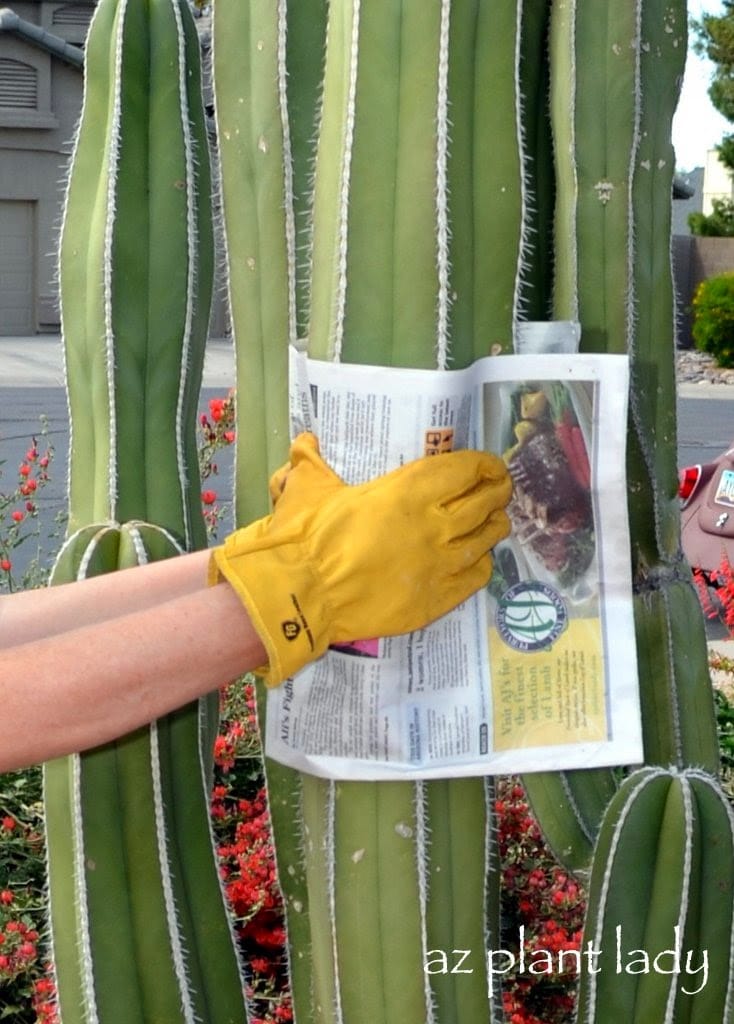
We selected a good-sized length of cactus and while I held onto it, my husband took a pruning saw and started sawing it off at the bottom.
Multiple layers of newspaper and gloves are helpful to use to grab onto cacti with short thorns. For cacti with longer thorns, you can use carpet remnants. When you cut out a piece of cactus, it will be much heavier then you are expecting – so be prepared.
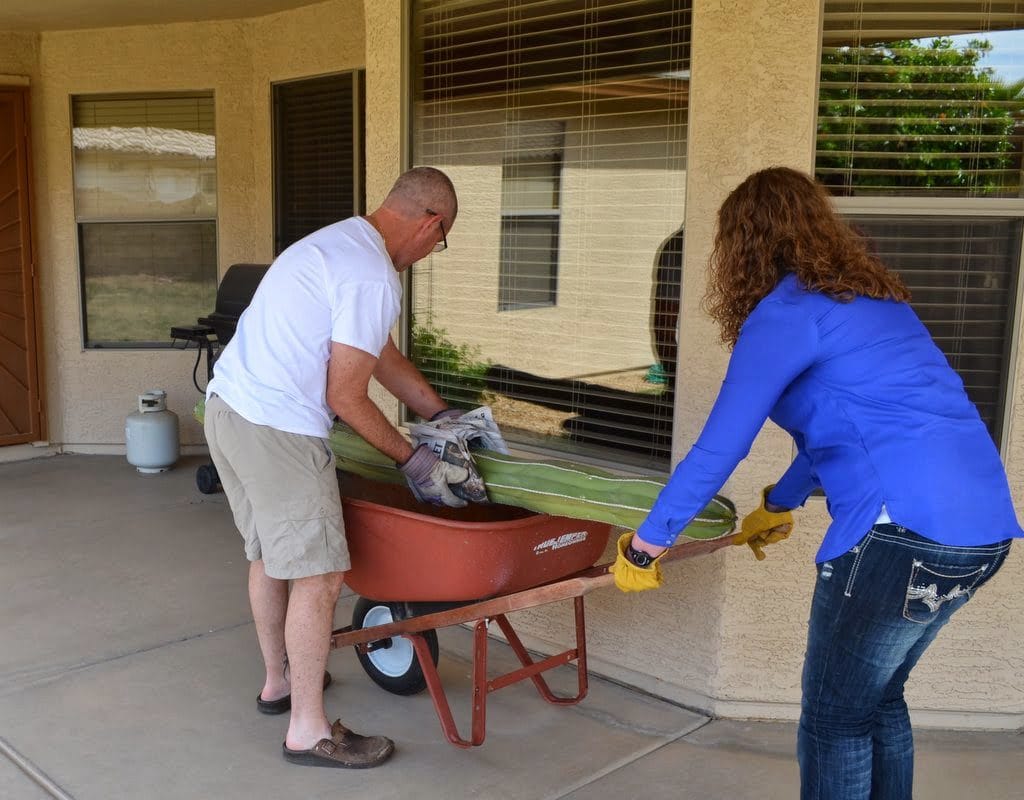
My husband and daughter wheeled the cactus cutting over to our neighbor’s house using our wheelbarrow.
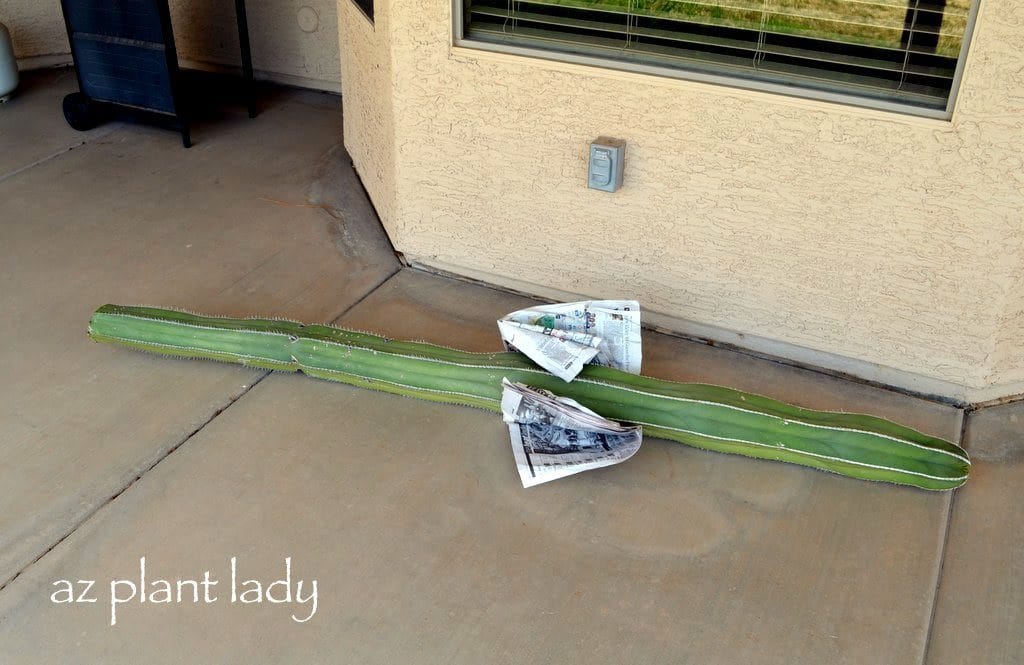
Preparing the Cactus Cutting for Planting
We then placed the cutting in a dry, shady spot for 2 weeks in order to allow the cut site to ‘callus’ over, which would protect the cacti from rotting when it is replanted.
*Exactly 3 days after helping us with the cactus cutting, my daughter, Rachele, left for the Navy and basic training. It was a sad goodbye for us, but a new beginning for her.
After 2 weeks had passed, the new cactus was planted in its new location with a wooden stake for support.
No water was applied for the first month after planting, in order to make sure that the entire cut end had callused over.
One month after planting, the cactus was watered deeply, monthly, until November.
*Whenever I looked at the newly-planted cactus, thoughts of my daughter and how she was doing in her new Navy life always crossed my mind.
One year later, the new cutting is doing so well and has even grown two new sections.
You can see the parent cactus in the background.
Now, I may not be located as closely to my daughter as these two cacti, but like the new cactus, she is growing and doing so well in her new career with the Navy. We are so proud of her!
You can read more about Rachele’s adventures, here.
How to Propagate Cactus Via Cuttings
Propagating cactus via cuttings can be done with many species of cacti. Here are a few guidelines to follow for success:
1. Propagate cactus during the warm season, when the threat of frost is over.
2. Make the cut at the joint where the segment attaches to the parent plant. For prickly pear cacti, you can cut a segment that consists of 1 – 3 pads.
3. Place the new cutting in a dry, shady spot for 2 weeks to allow the cut site to ‘callus’, which protects the cacti from rot when it is replanted.
4. Plant your new cactus in full sun with well-drained soil.
5. Don’t water for a month after planting. Then water deeply, monthly until fall.
6. Provide temporary shade for the first summer. You can do this by placing a plastic patio chair over the top or using shade cloth.
Soon, you will begin to see new growth on your cactus.
https://www.azplantlady.com/wp-content/uploads/2014/03/5454.jpg1024502arizonaplantlady@gmail.comhttps://www.azplantlady.com/wp-content/uploads/2025/08/AZ-Plant-Lady-Logo-small.jpgarizonaplantlady@gmail.com2014-03-31 13:30:002023-09-04 10:56:56New Beginnings For a Cactus and a Daughter
If you had asked me a year ago, I would have said “no”. I had done some filming for “how-to” gardening videos for SheKnows.com – but they weren’t live and took place in my back garden. Somehow, live TV is quite different.
Last time, I told you about my upcoming appearance on our local ABC station to talk about creative container gardening tips.
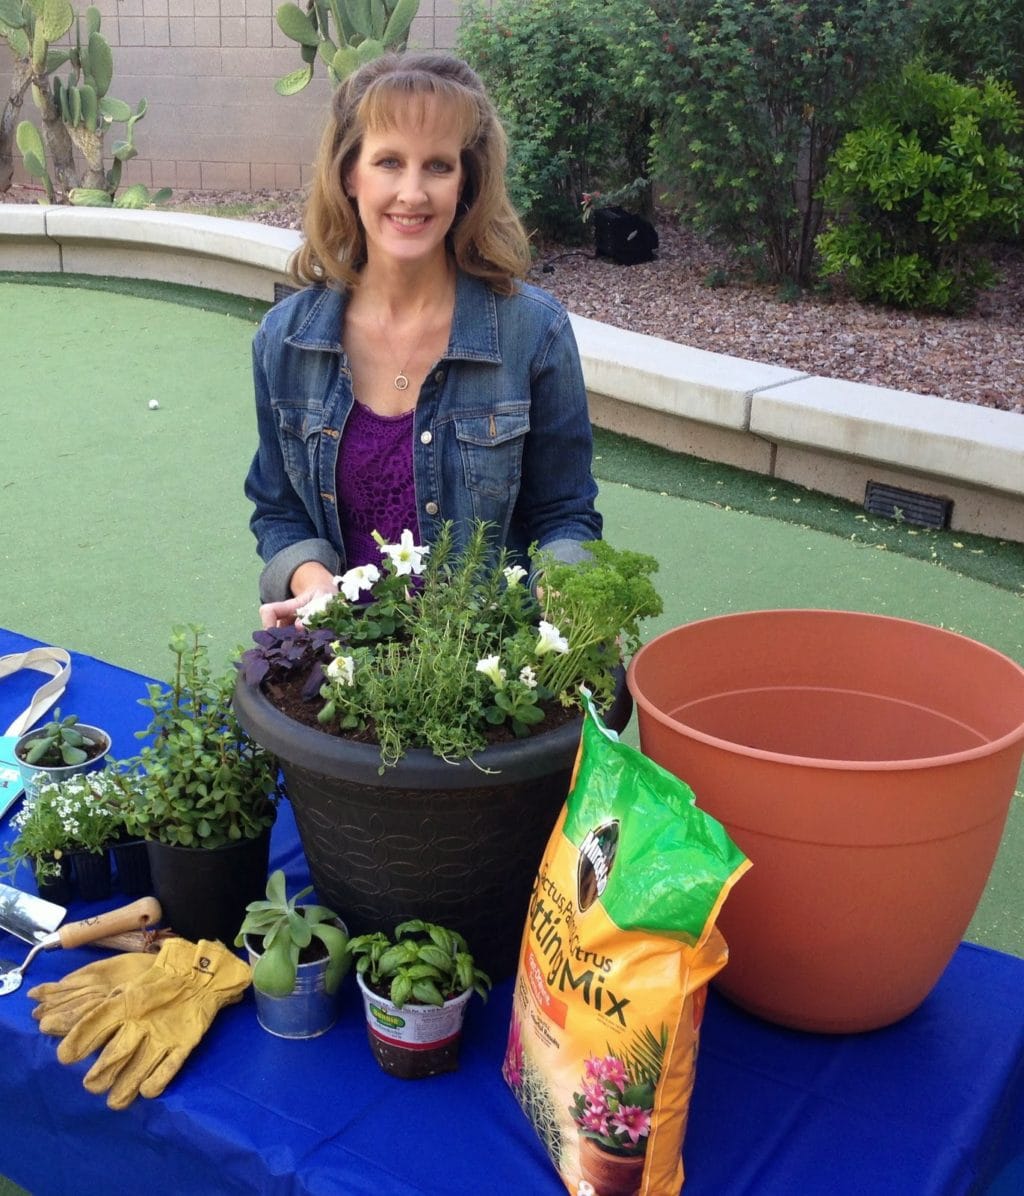
Posing next to my newly-planted container filled with purple basil, thyme, rosemary and parsley. White petunias add beauty to the pot.
This was the second time that I had been asked to appear on Sonoran Living, which is a local morning program.
Last time I was on the show, I spoke about ‘Fuss Free’ Plants. This time, I would be talking about creative tips for container gardening.
So, I went shopping for my ‘props’. I decided to plant an herb container as well as a pot filled with vegetables and flowers. I bought several medium-sized pots, a variety of potting mixes and of course, plants.
My sister came along with me to help with the props and setting up. I had planted the pots ahead of time, so setting up wasn’t too difficult.
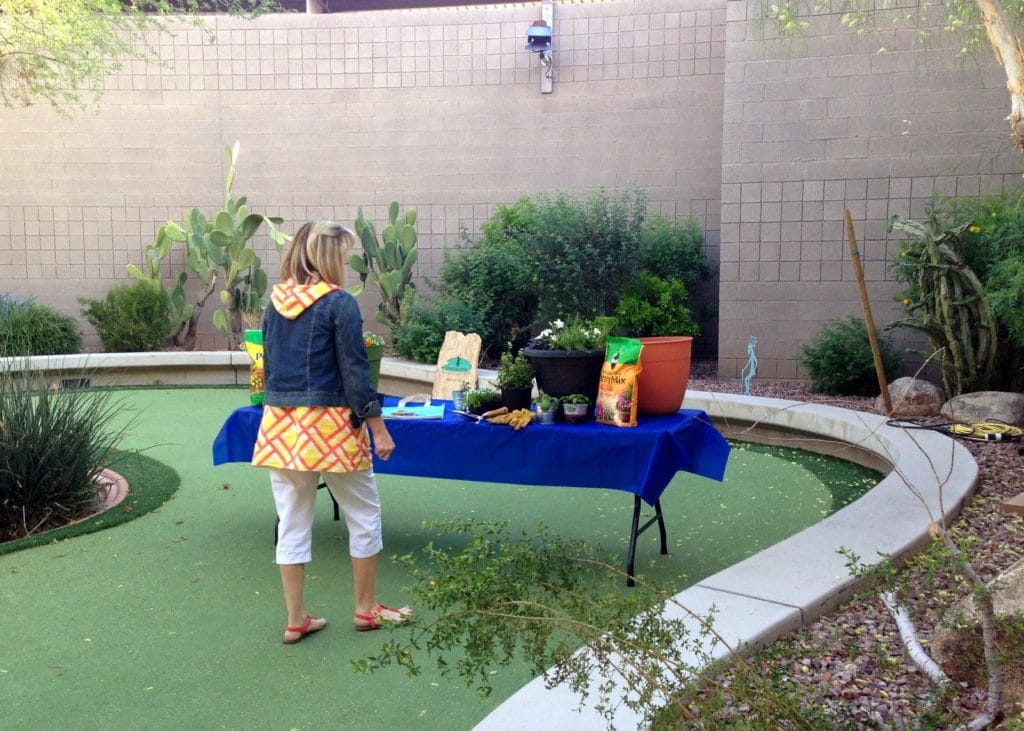
The main focus of the demonstration would be the three pots, the potting mixes and the recyclable grocery bag.
They tell you to bring a lot of props, which look good on television. So, I brought gardening gloves, some hand tools and extra plants to help ‘set the stage’. My microphone was there for me to put on and I was almost ready.
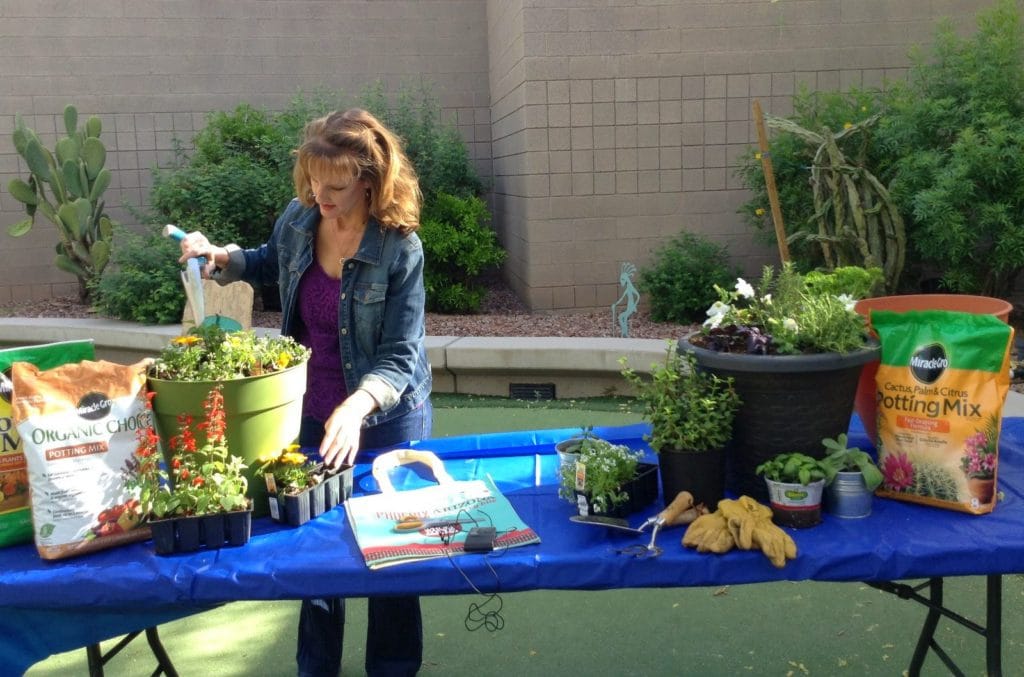
Finishing up planting my vegetable/flower container.
Last time I was on the show, mine was the first segment. It went very fast and we were back on the road before the show was over.
This time, I was to go last. So after everything was set up, my sister and I were invited to wait in the staff break room.
To say that I wasn’t nervous would be an exaggeration. But, I was not as nervous as my first time. It’s actually not as hard as doing a “how-to” video where you have to talk to the camera. On the show, I am talking to a person who asks me questions so I don’t speak directly to the camera at all. If you lose your train of thought, they are there to get you back on track.
Of the tips I shared on air – using recycled, plastic containers to fill the bottom of large pots as well as using a recycled grocery bag as a container were the most popular with the hosts.
I had a great time and hope to be invited back again.
Below, is the link for my container gardening segment and at the end you see where I accidentally got involved in a conversation at the end about “Dancing With the Stars”.
We use cookies on our website to give you the most relevant experience by remembering your preferences and repeat visits. By clicking “Accept All”, you consent to the use of ALL the cookies. However, you may visit "Cookie Settings" to provide a controlled consent.
This website uses cookies to improve your experience while you navigate through the website. Out of these, the cookies that are categorized as necessary are stored on your browser as they are essential for the working of basic functionalities of the website. We also use third-party cookies that help us analyze and understand how you use this website. These cookies will be stored in your browser only with your consent. You also have the option to opt-out of these cookies. But opting out of some of these cookies may affect your browsing experience.
Necessary cookies are absolutely essential for the website to function properly. These cookies ensure basic functionalities and security features of the website, anonymously.
Cookie
Duration
Description
cookielawinfo-checkbox-analytics
11 months
This cookie is set by GDPR Cookie Consent plugin. The cookie is used to store the user consent for the cookies in the category "Analytics".
cookielawinfo-checkbox-functional
11 months
The cookie is set by GDPR cookie consent to record the user consent for the cookies in the category "Functional".
cookielawinfo-checkbox-necessary
11 months
This cookie is set by GDPR Cookie Consent plugin. The cookies is used to store the user consent for the cookies in the category "Necessary".
cookielawinfo-checkbox-others
11 months
This cookie is set by GDPR Cookie Consent plugin. The cookie is used to store the user consent for the cookies in the category "Other.
cookielawinfo-checkbox-performance
11 months
This cookie is set by GDPR Cookie Consent plugin. The cookie is used to store the user consent for the cookies in the category "Performance".
viewed_cookie_policy
11 months
The cookie is set by the GDPR Cookie Consent plugin and is used to store whether or not user has consented to the use of cookies. It does not store any personal data.
Functional cookies help to perform certain functionalities like sharing the content of the website on social media platforms, collect feedbacks, and other third-party features.
Performance cookies are used to understand and analyze the key performance indexes of the website which helps in delivering a better user experience for the visitors.
Analytical cookies are used to understand how visitors interact with the website. These cookies help provide information on metrics the number of visitors, bounce rate, traffic source, etc.
Advertisement cookies are used to provide visitors with relevant ads and marketing campaigns. These cookies track visitors across websites and collect information to provide customized ads.