Tag Archive for: how to

Make Your Own DIY Citrus Salt

Do you have a lemon or other type of citrus tree growing in your backyard?

Chances are, if you live in California, the Southwest or Southeastern United States, you do or your neighbor does.

While many people throughout the rest of the nation are waiting for snow to disappear, we get to enjoy the sight of colorful citrus fruit hanging from our trees, just ready to be picked and enjoyed.

During this time of year, neighbors give bags of excess fruit to neighbors or local food banks.

I have a young lemon tree, that isn’t old enough to produce fruit for me, but that hasn’t stopped me from having lemons to use.

Make Your Own DIY Citrus Salt

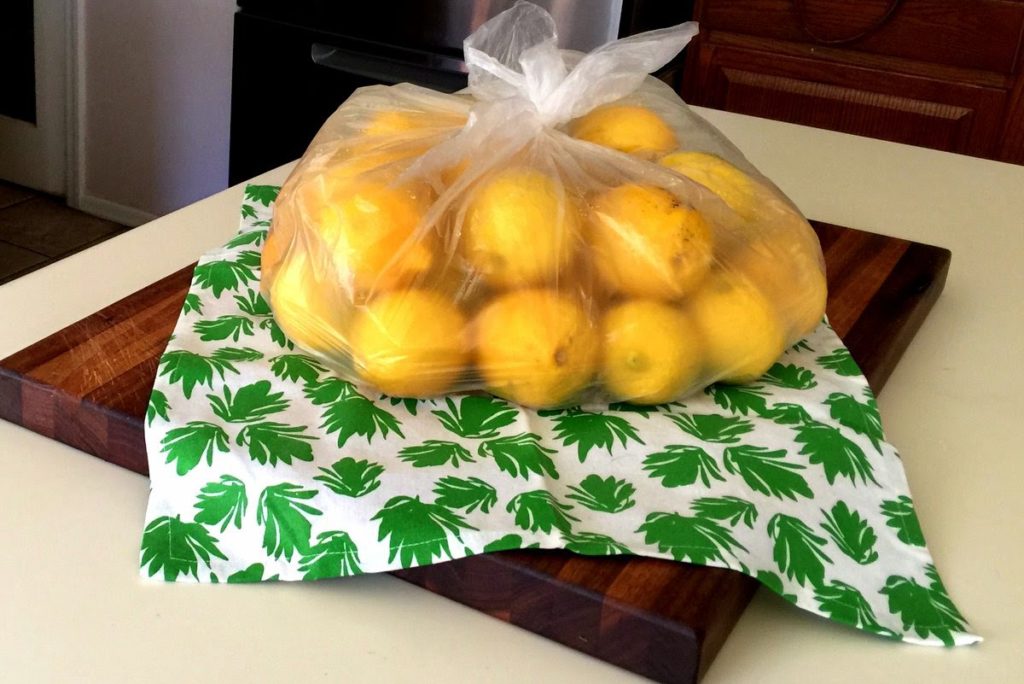
Between my mother’s prolific lemon tree on the family farm to those from my vet (who happens to be our neighbor), I have plenty to use.

I’ve used lemons in a variety of ways from freezing the zest, the juice, making citrus cleaner, natural air fresheners and was looking for another way to use them.

Make Your Own DIY Citrus Salt

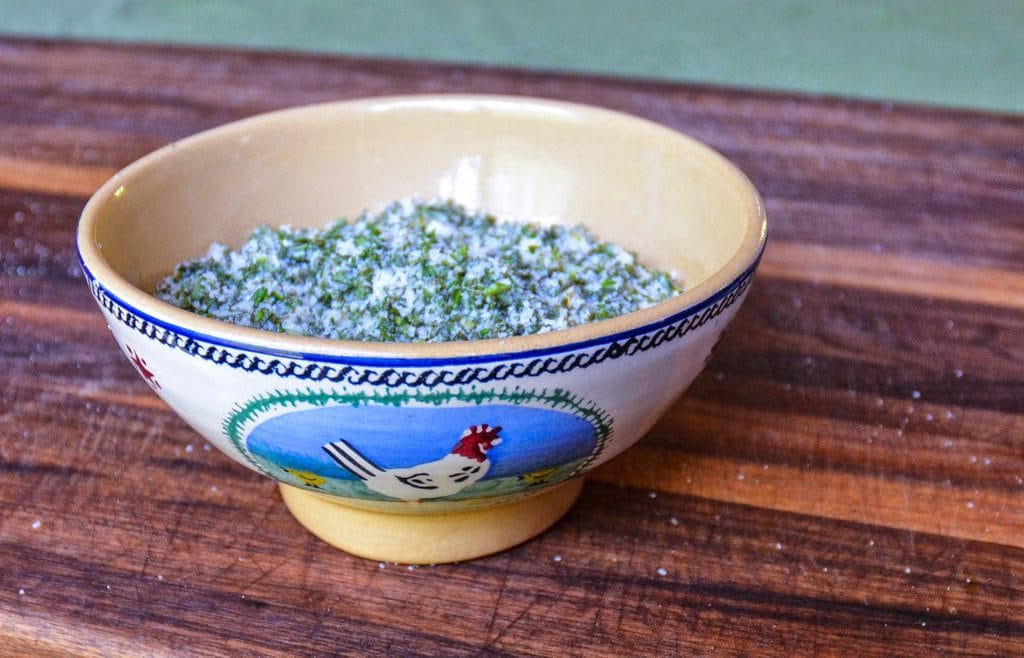
I recently learned about lemon salt and how great it tastes on my favorite dishes – chicken, fish, homemade salad dressings, salsa and much more – basically anything that you want to add a hint of citrus and salt too.

Making lemon salt is very easy to do and can be done using grapefruit, limes, or oranges instead.

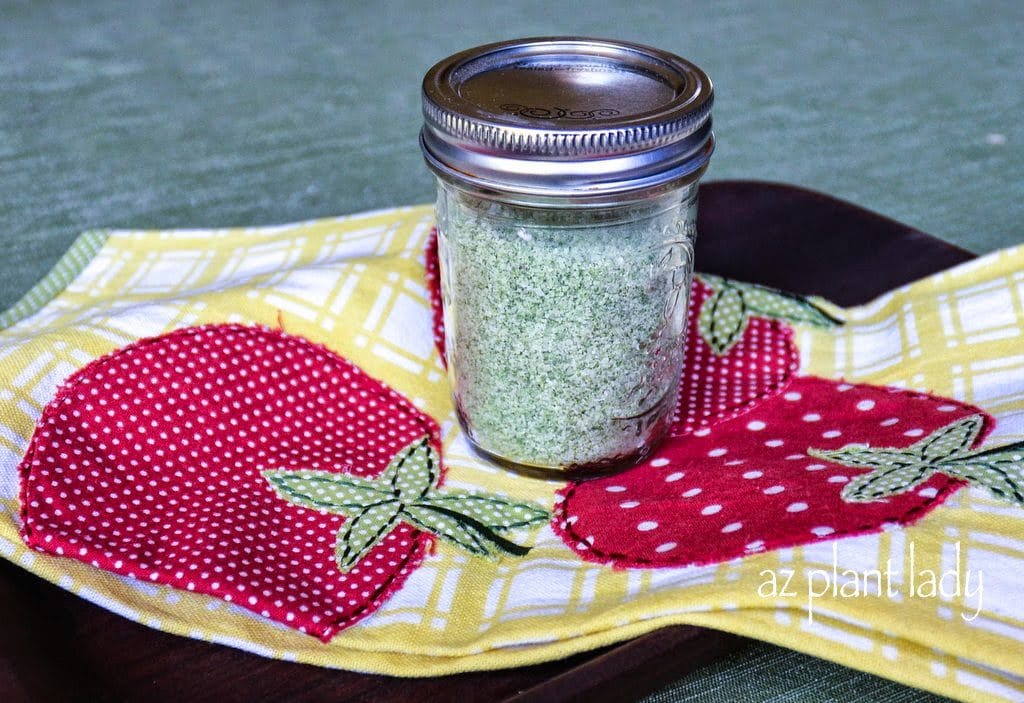
Citrus salts make a great homemade gift and are also a great way to preserve the taste of your favorite citrus when they are no longer in season.

Whether you grow your own lemons or buy them from the store, lemon salt is easy to make.

Make Your Own DIY Citrus Salt

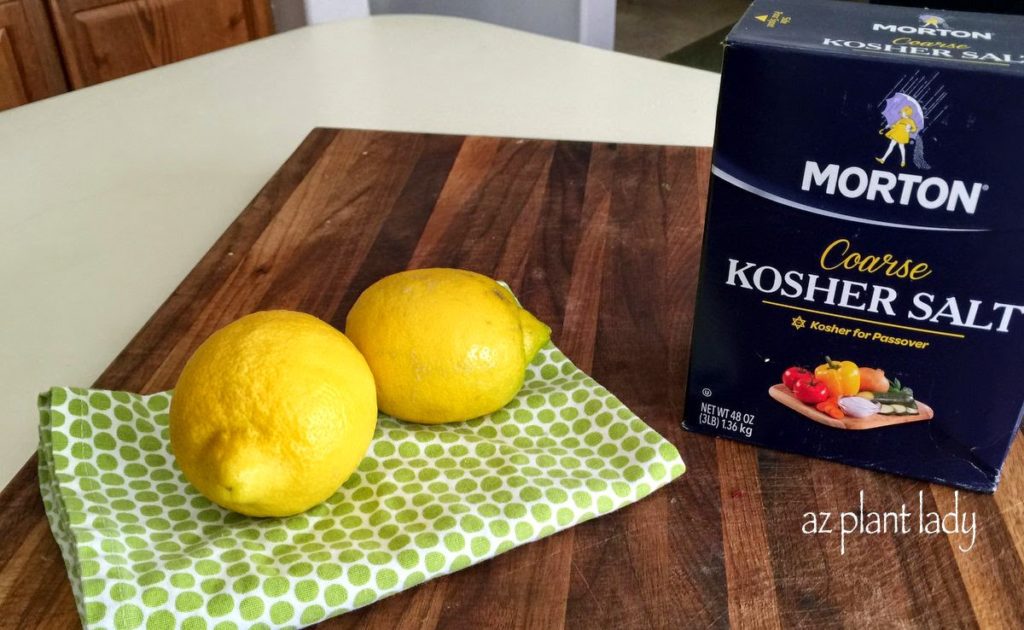
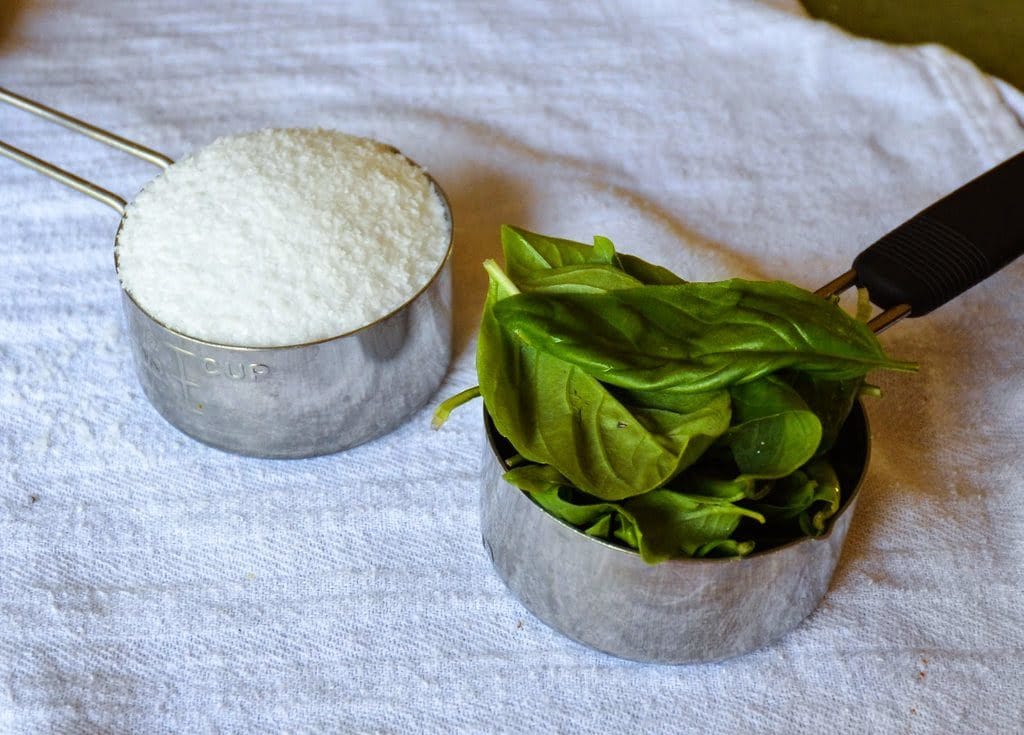
1. You’ll need 3 lemons and 1 cup of kosher salt.

Make Your Own DIY Citrus Salt

2. Zest 3 lemons.

Make Your Own DIY Citrus Salt

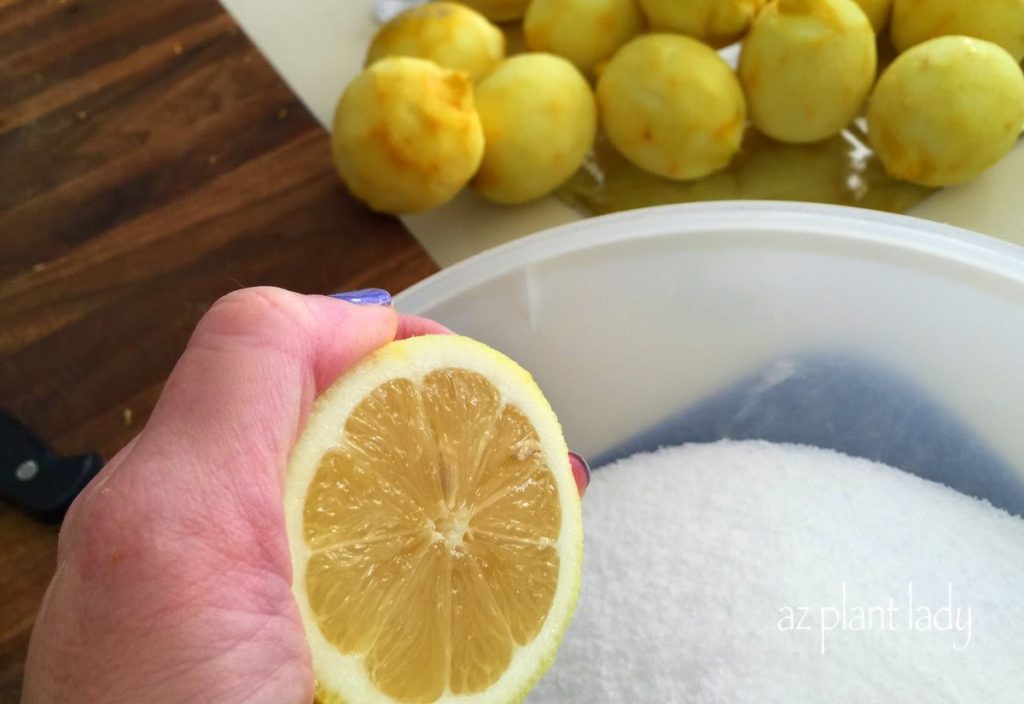
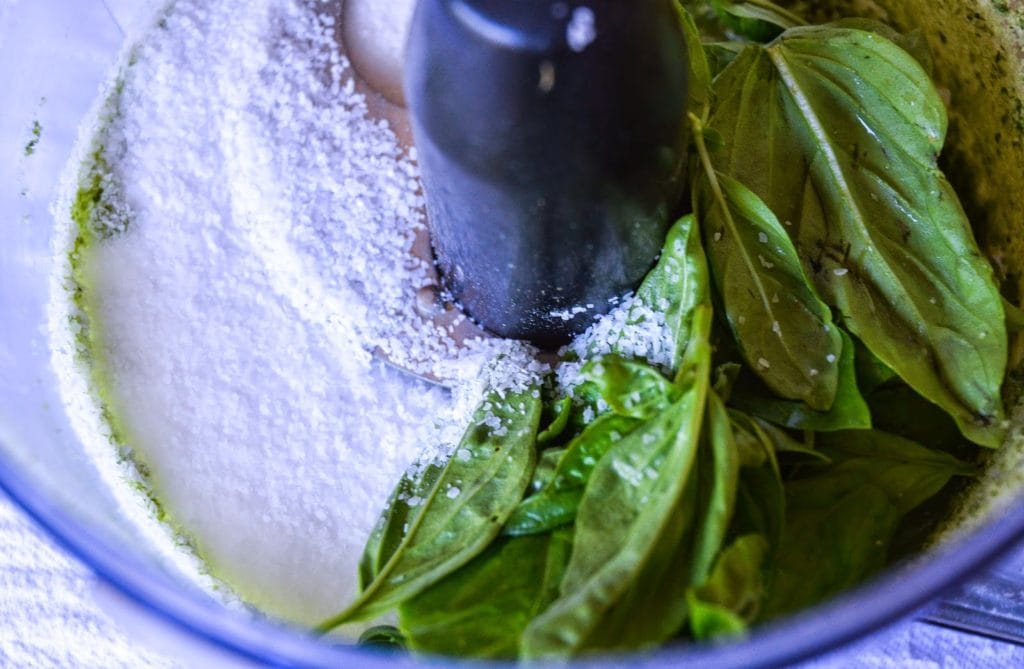
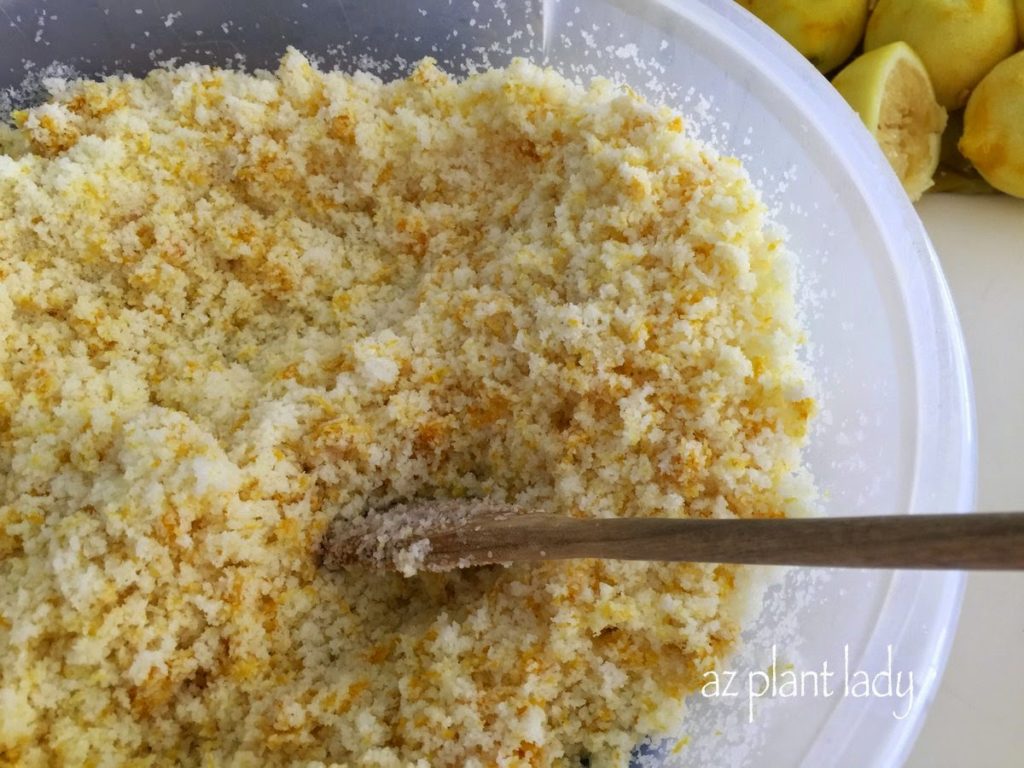
3. Add together 1 cup kosher salt, the lemon zest and the juice from 1 lemon.

(Of course, you can make a lot more, like I did – I had a lot of lemons and wanted to make some as gifts.)

Make Your Own DIY Citrus Salt

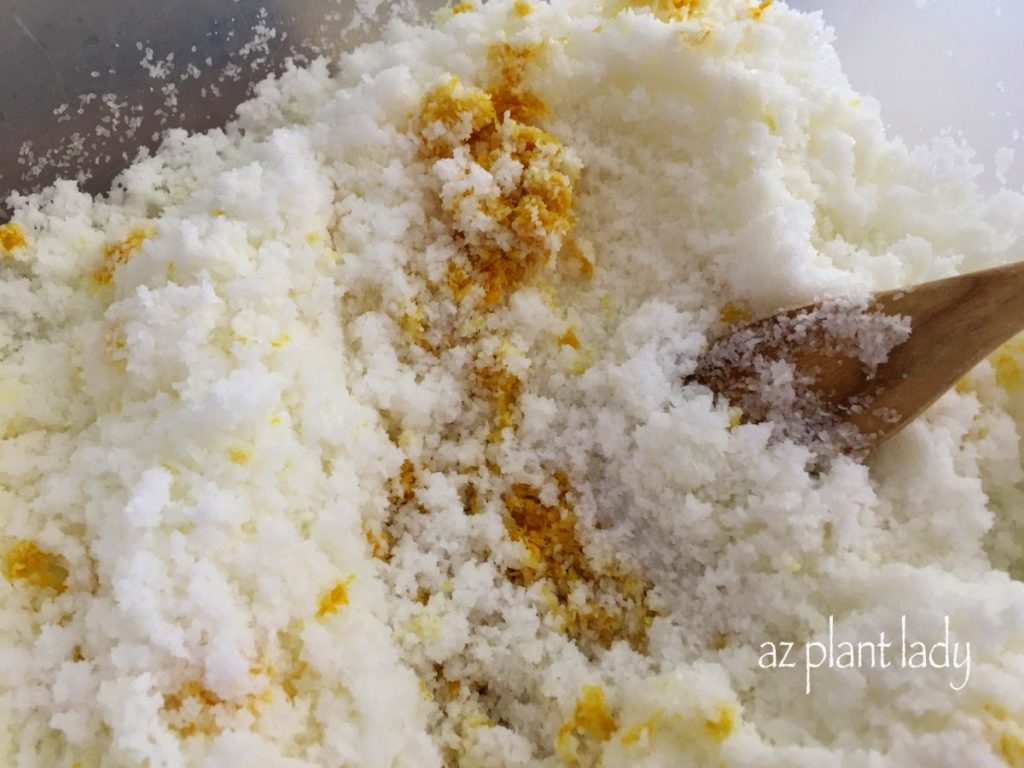
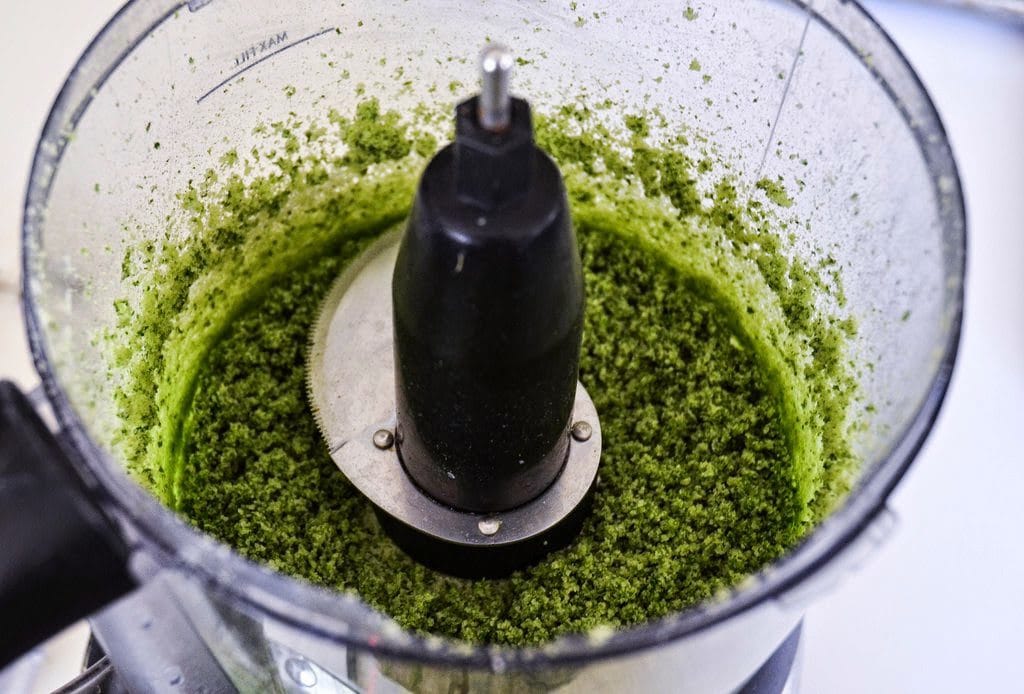
4. Mix together the lemon juice, salt and zest.

Make Your Own DIY Citrus Salt
Got Lemons? Make Your Own DIY Citrus Salt

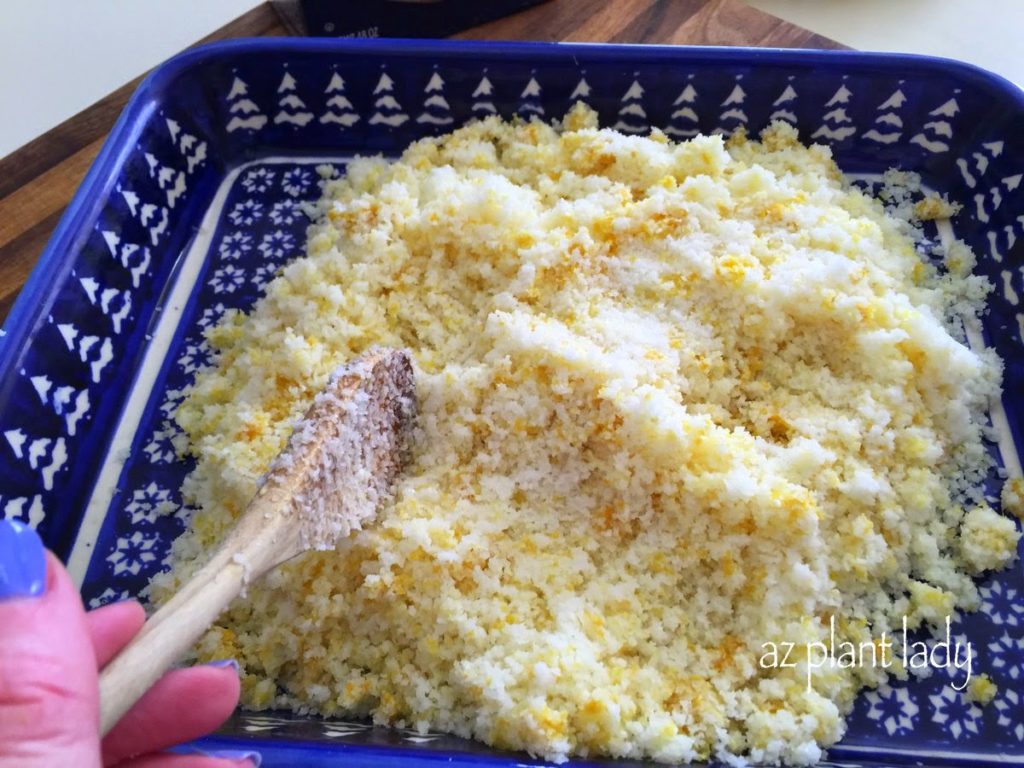
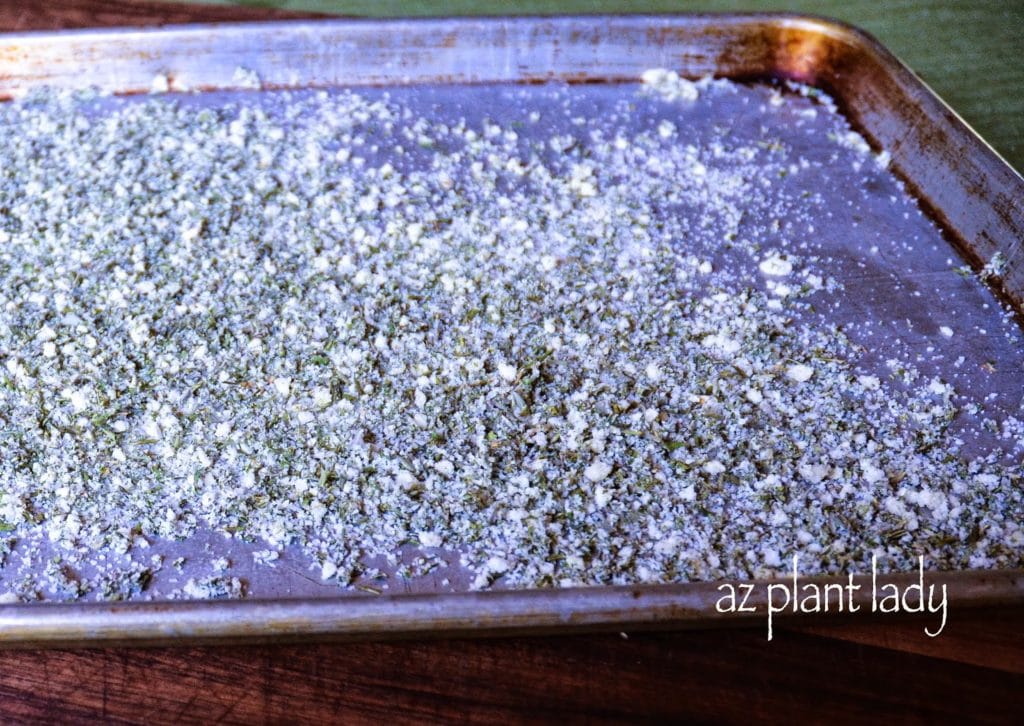
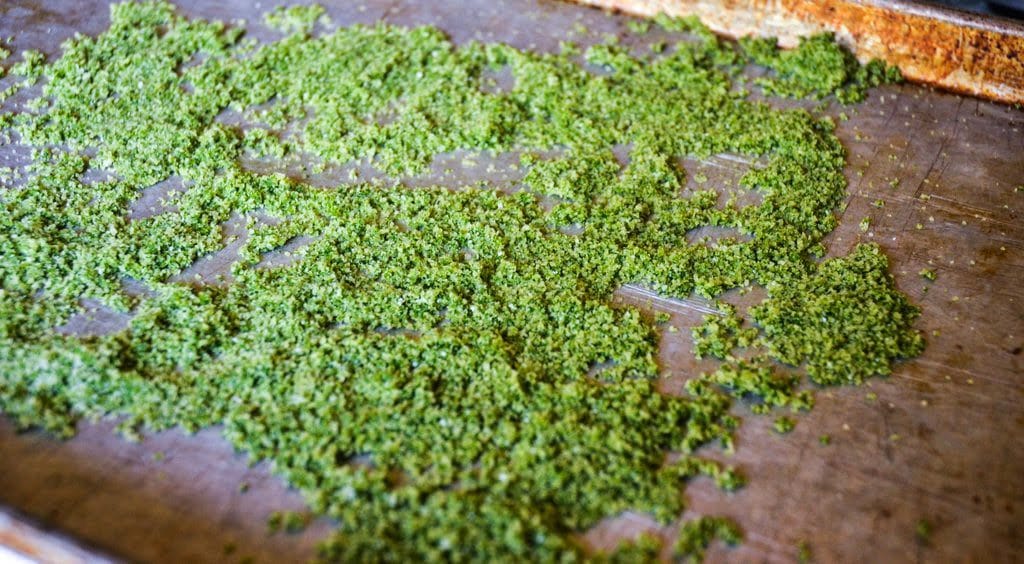
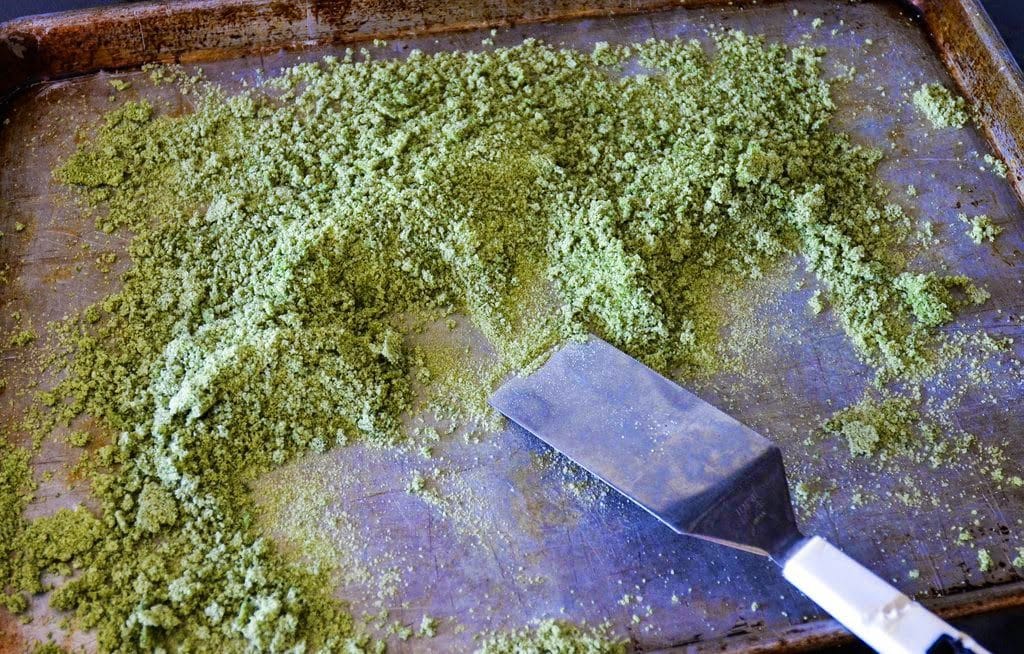
5. Pour the lemon salt mixture into a shallow baking dish or cookie sheet.

6. Place in a 200 degree F. oven for a half hour. Then lightly mix it up and bake for another 20 minutes.

(If it hasn’t dried all the way, cover it with a clean dish towel and let sit overnight.)  

Make Your Own DIY Citrus Salt

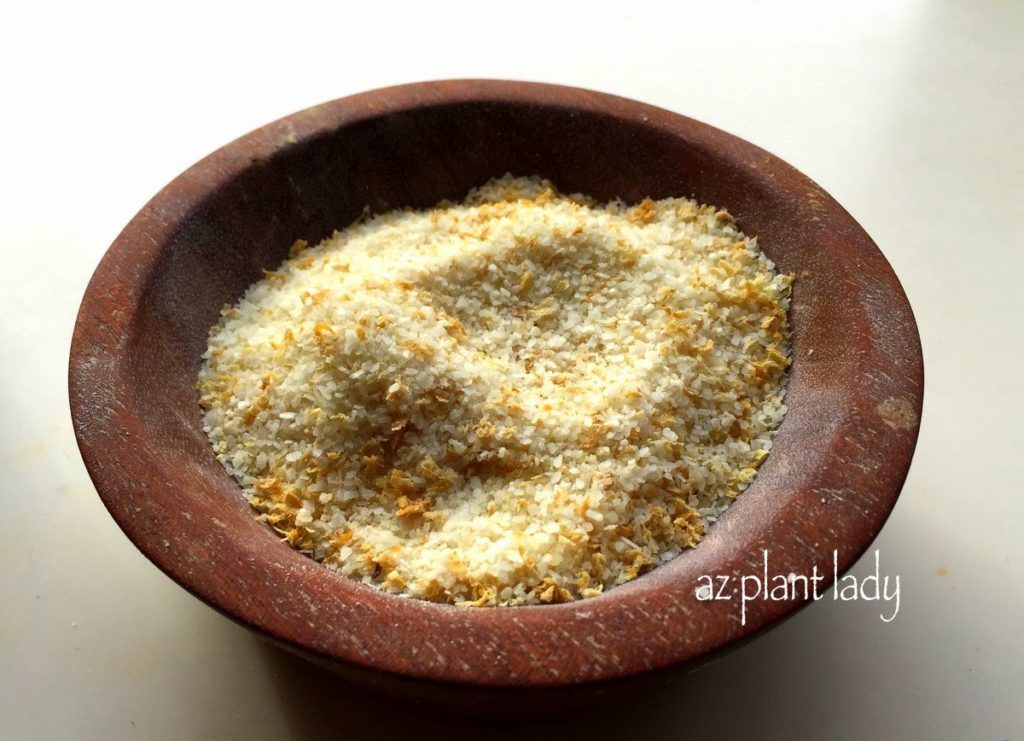
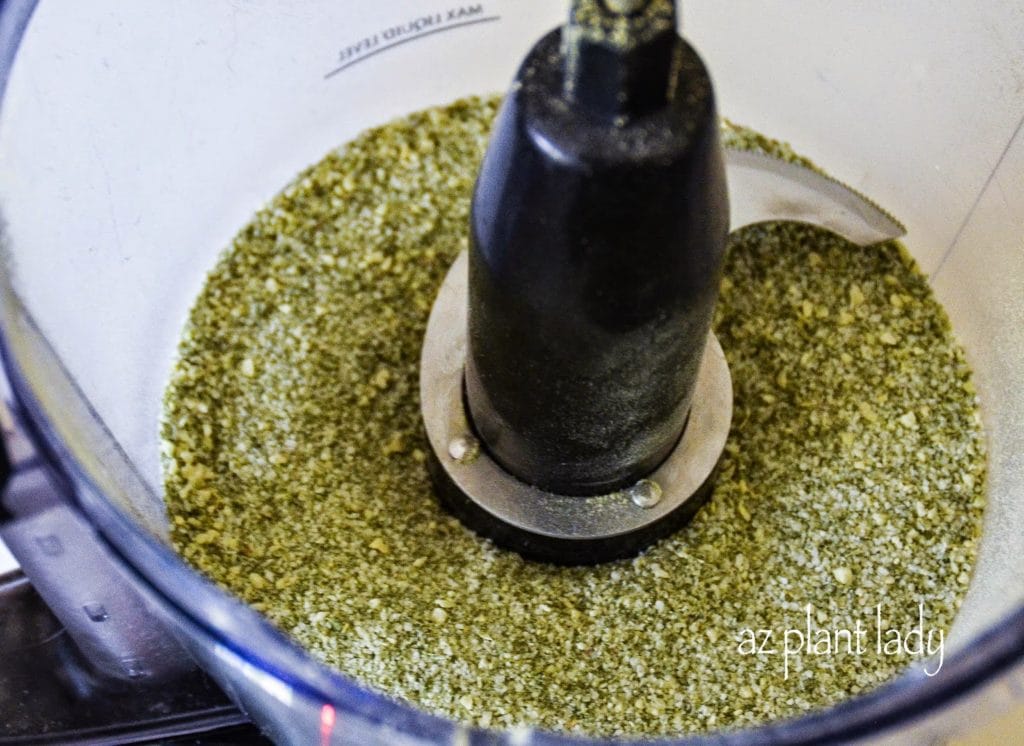
7. Use your fingers to break up any large clumps or you can put it in your food processor and pulse it 2 – 3 times.

Make Your Own DIY Citrus Salt

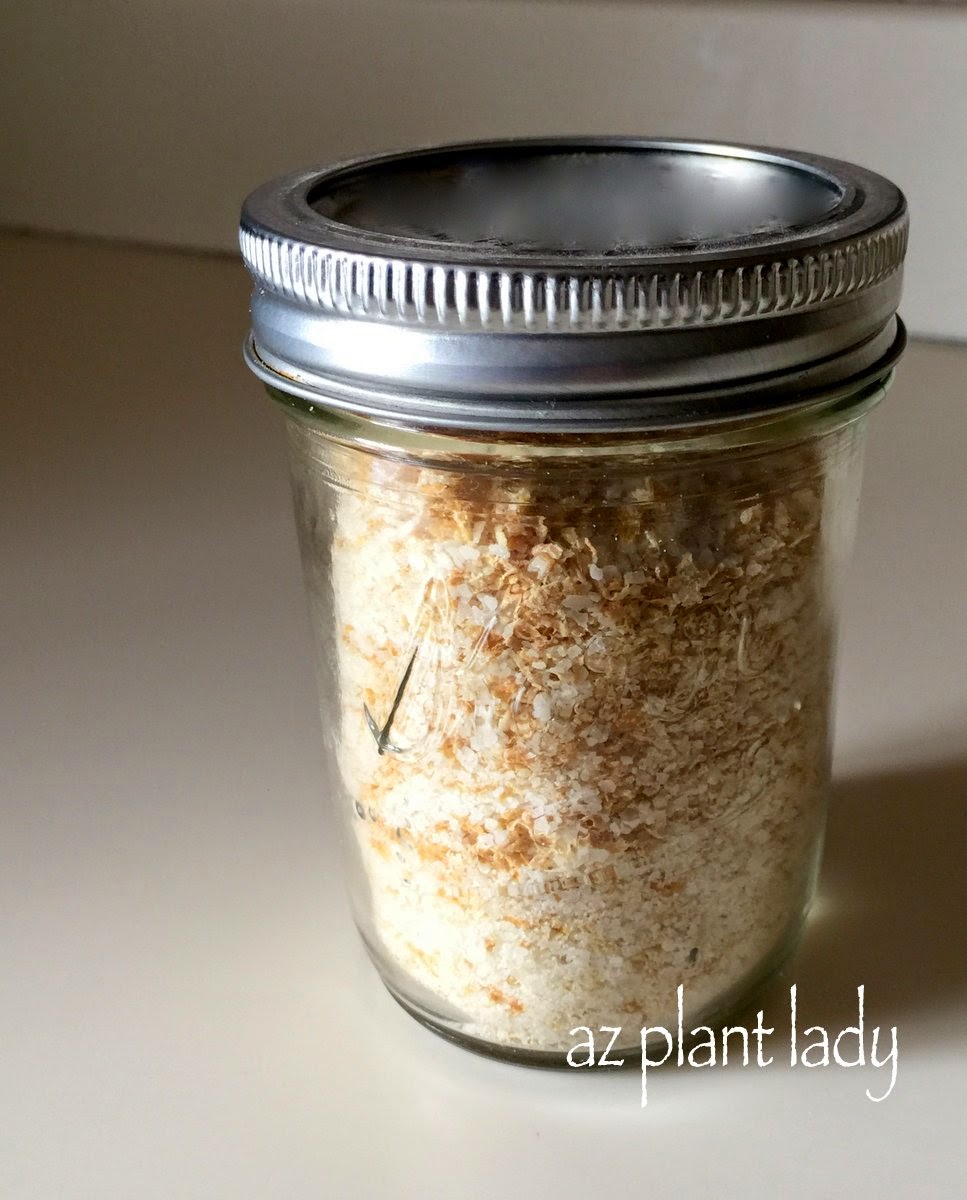
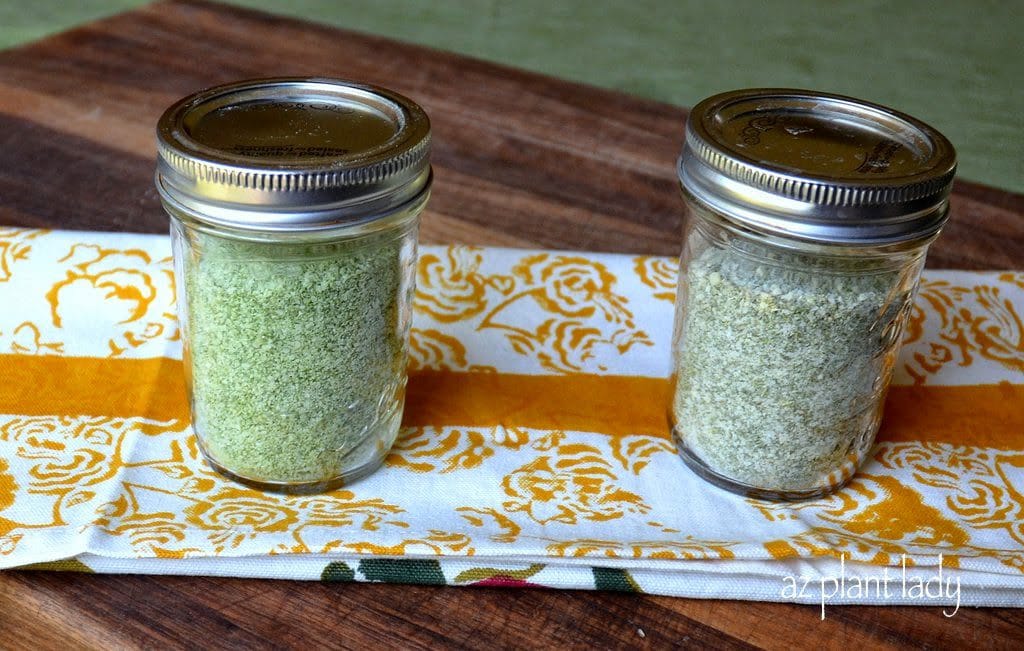
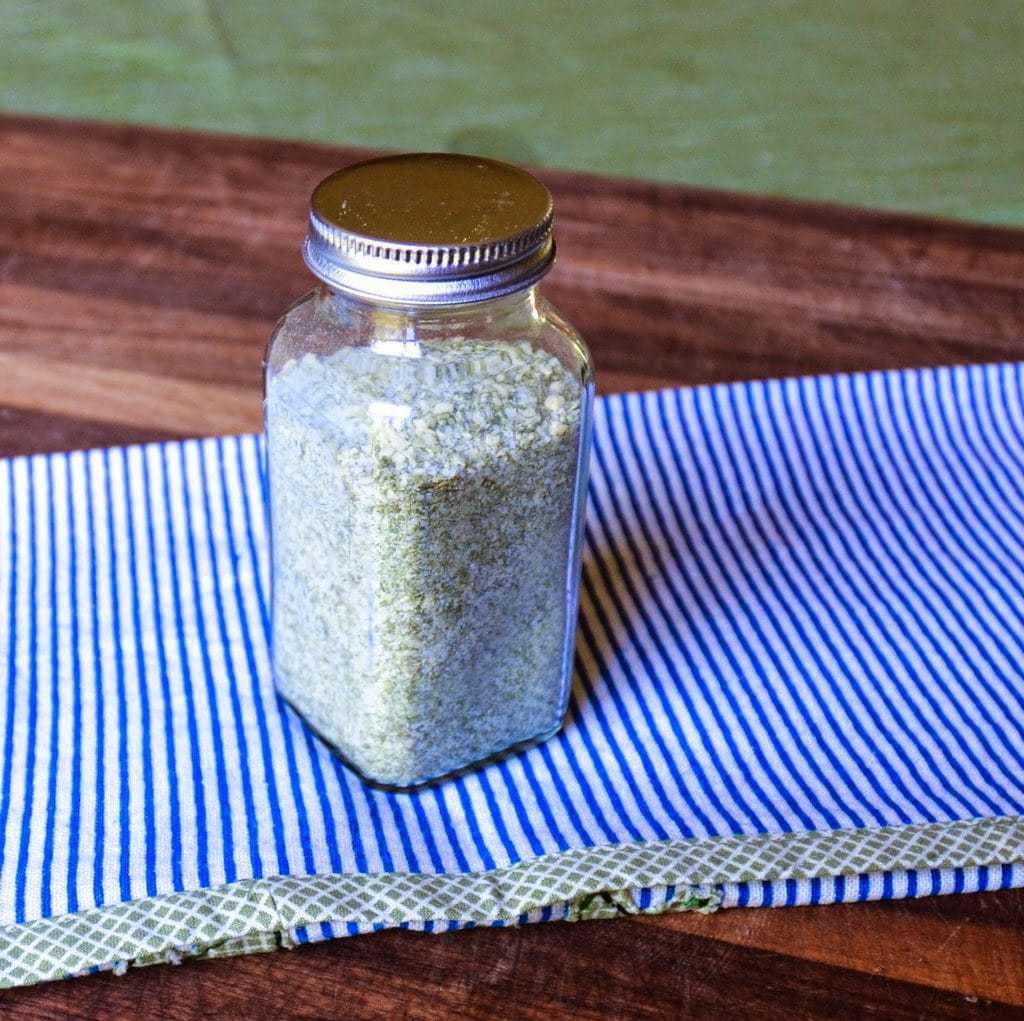
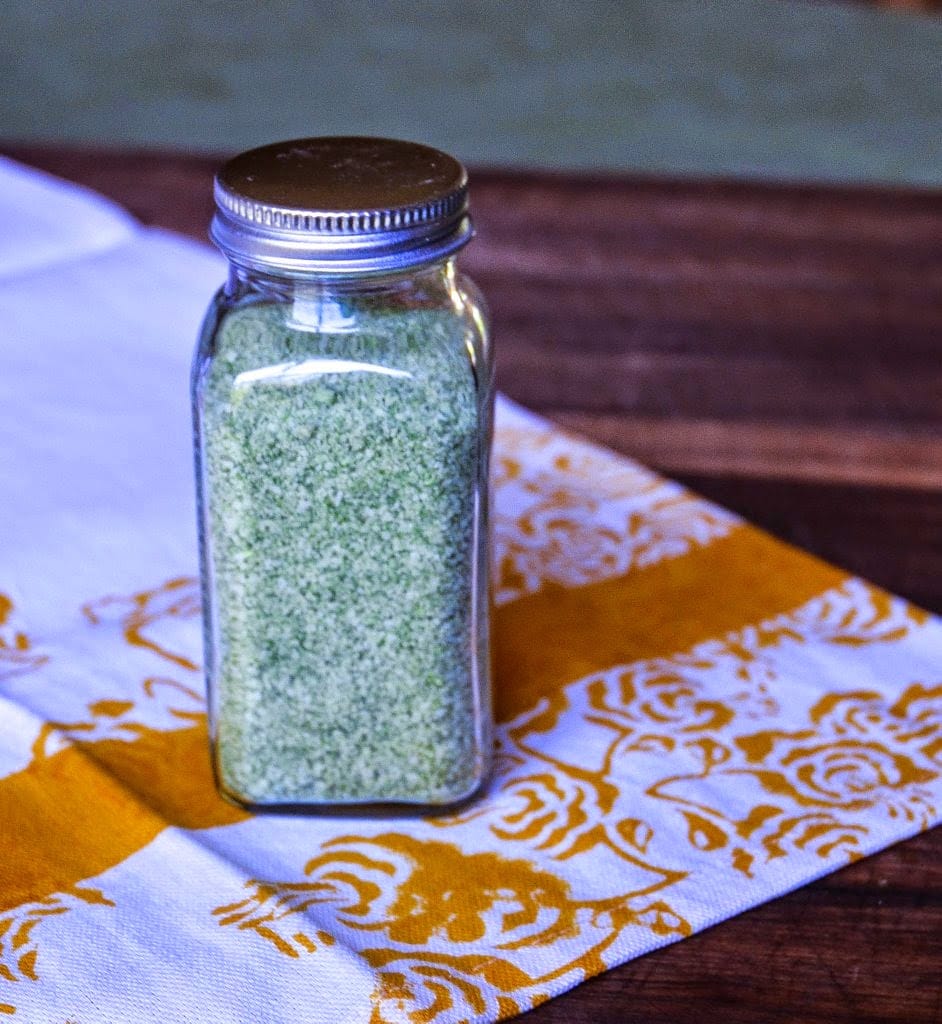
That’s it!  I told you it was easy.  You can use it right away or store it in a sealed jar to keep it for longer.

Lemon or salts made from other citrus fruit last a long time – at least a year if put in a sealed container.

If you love lemon pepper, you can simply add pepper to the mixture for a delicious addition to your steak!

basil and herb salts

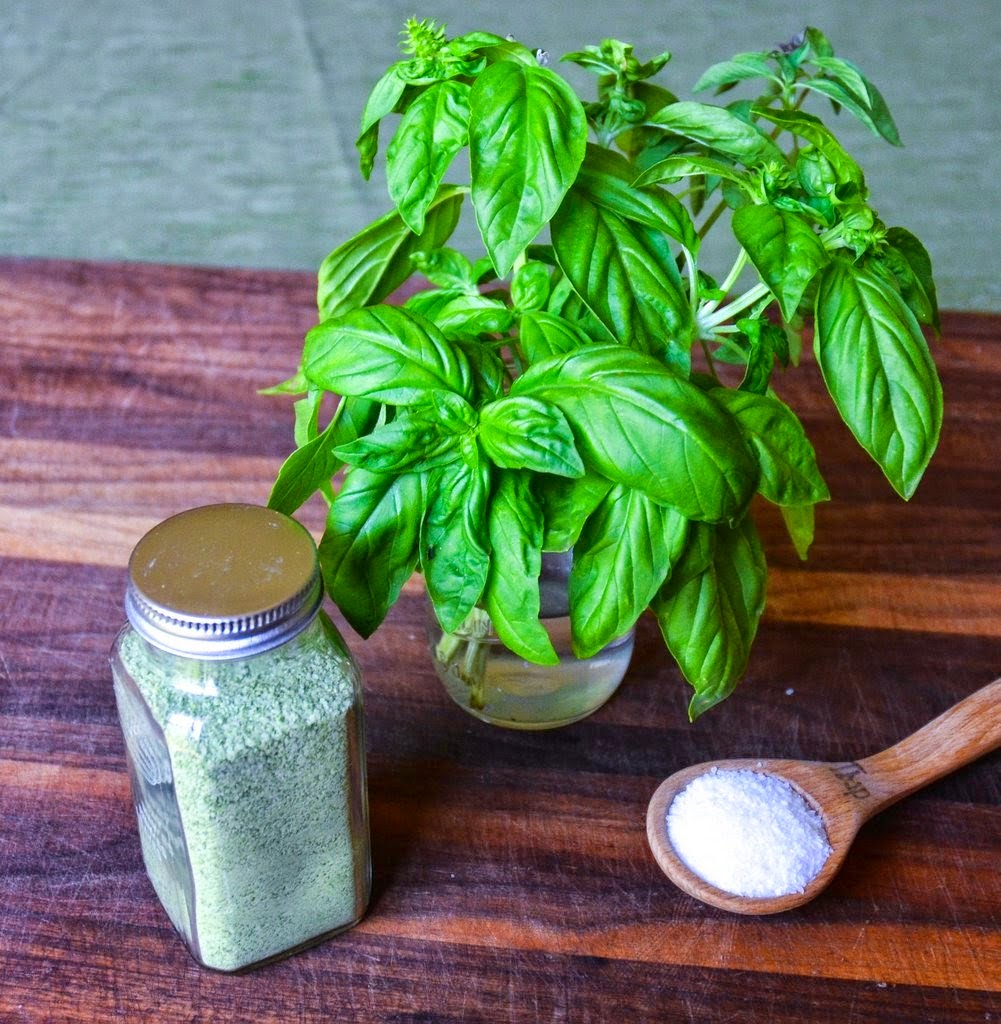
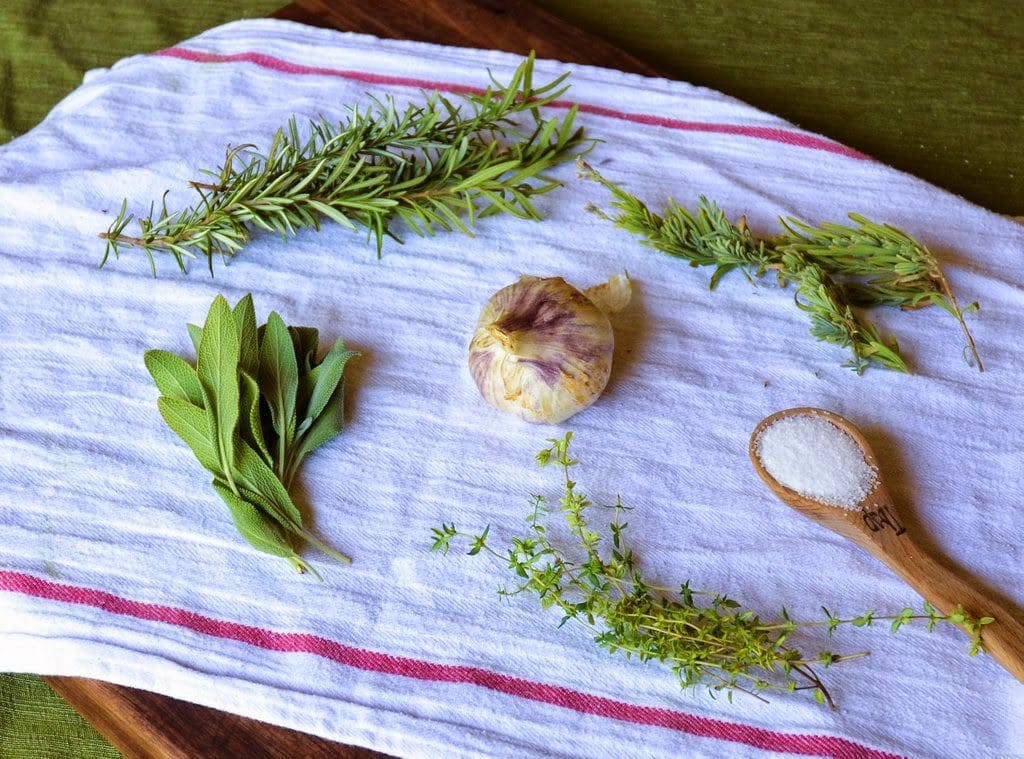
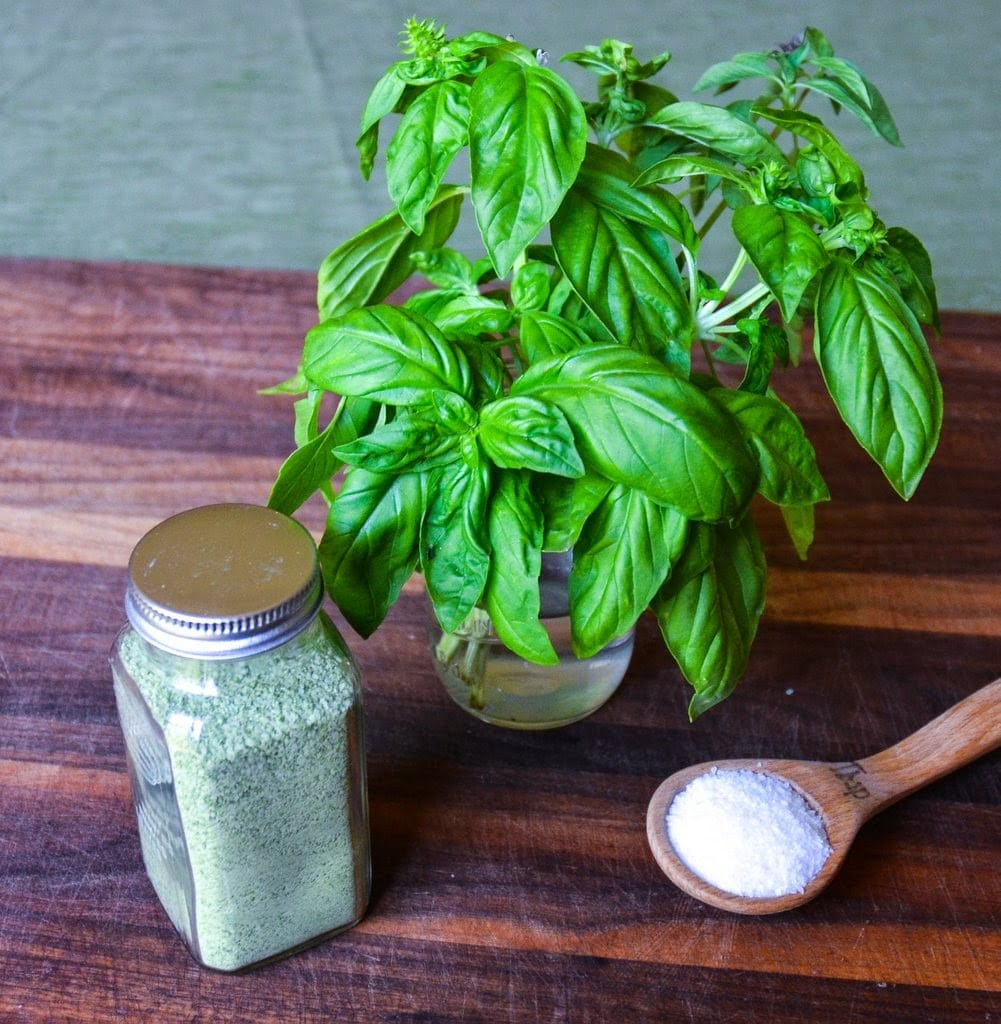
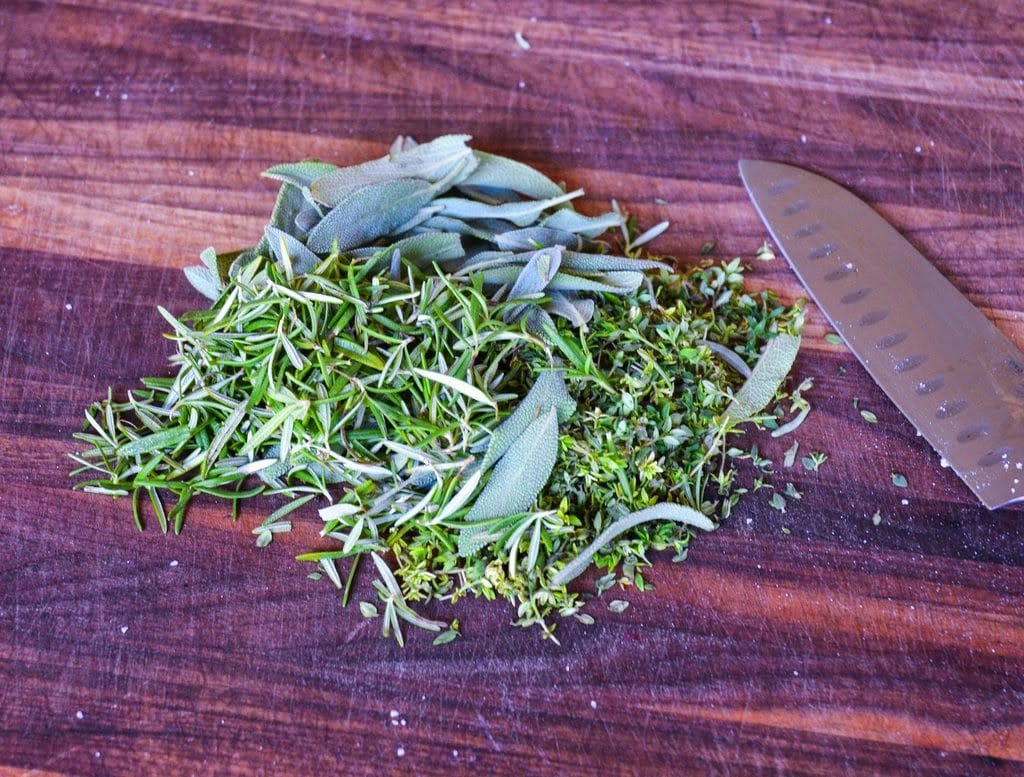
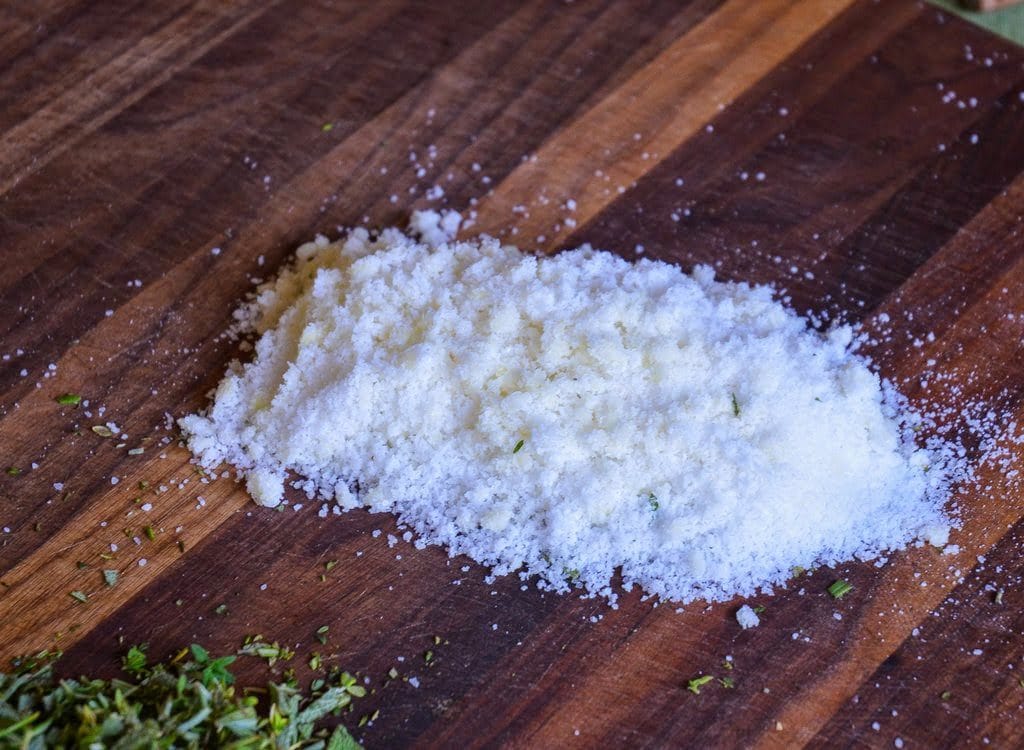
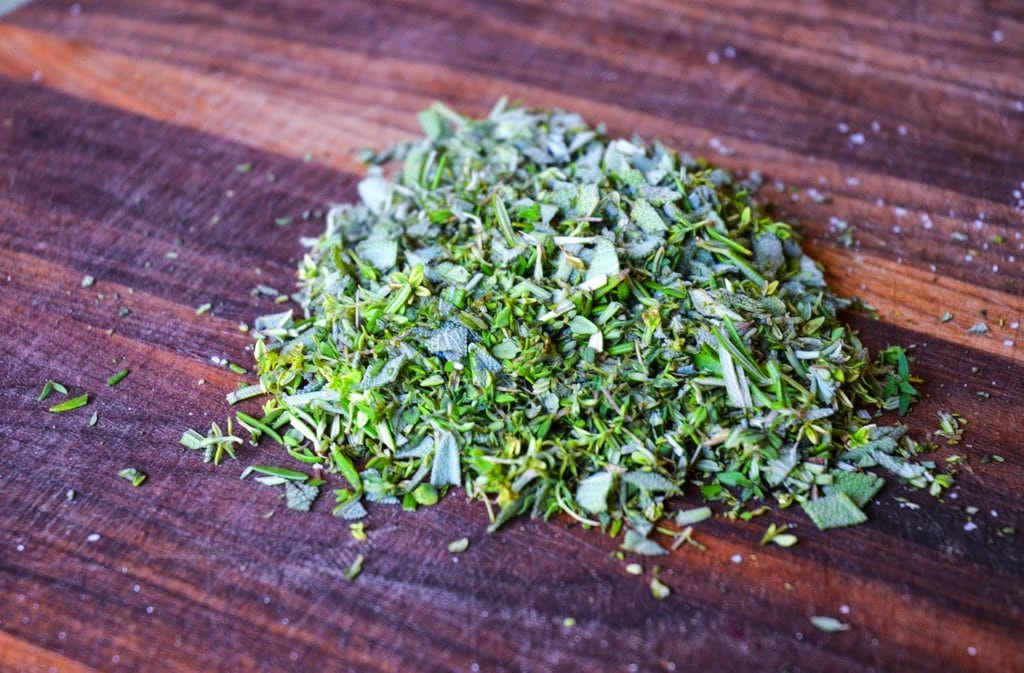
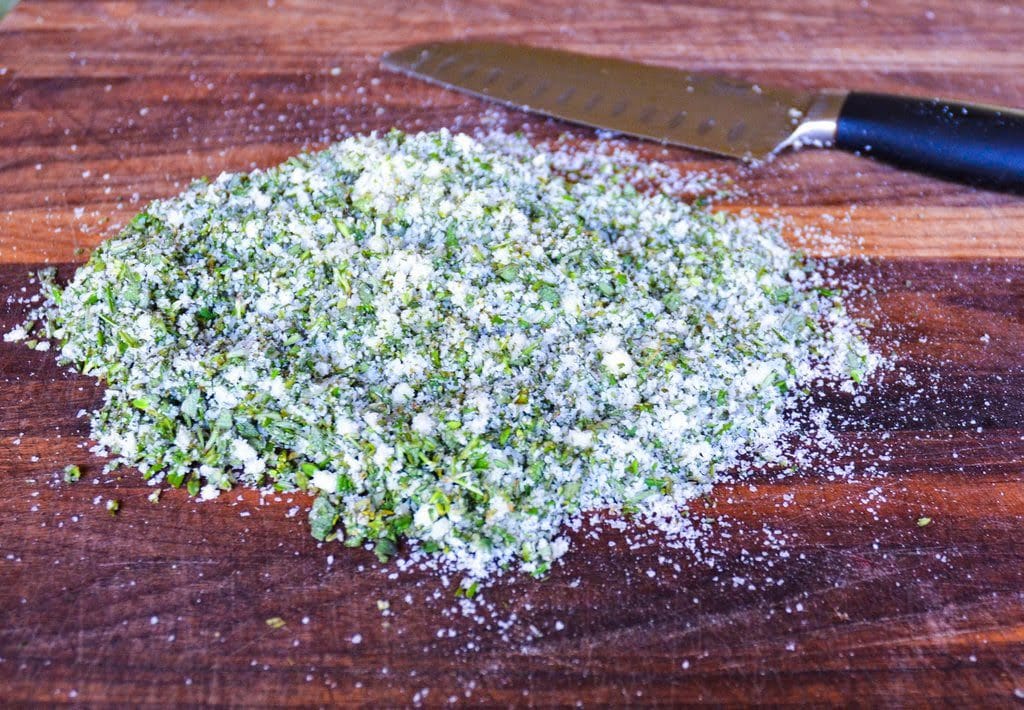
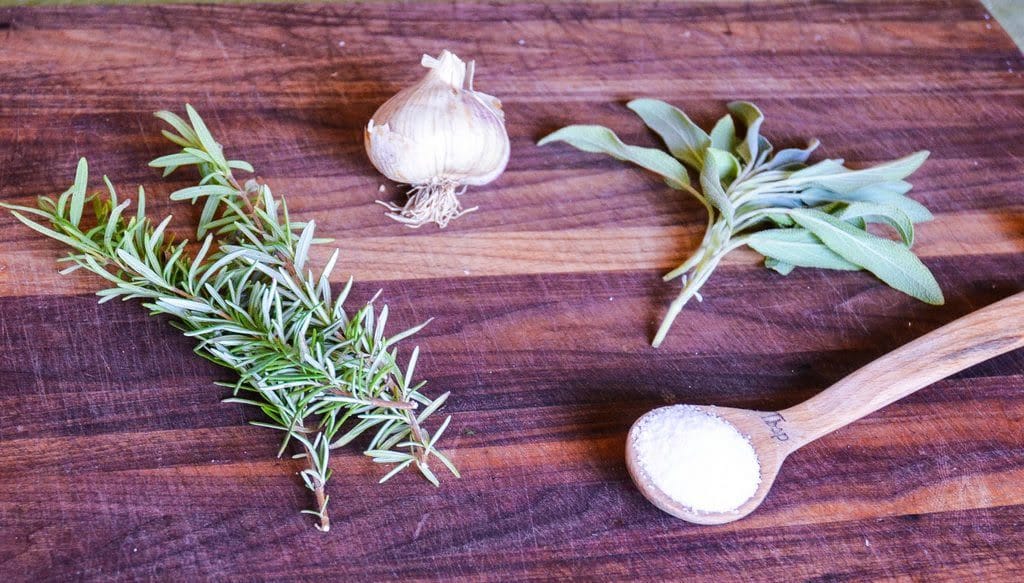
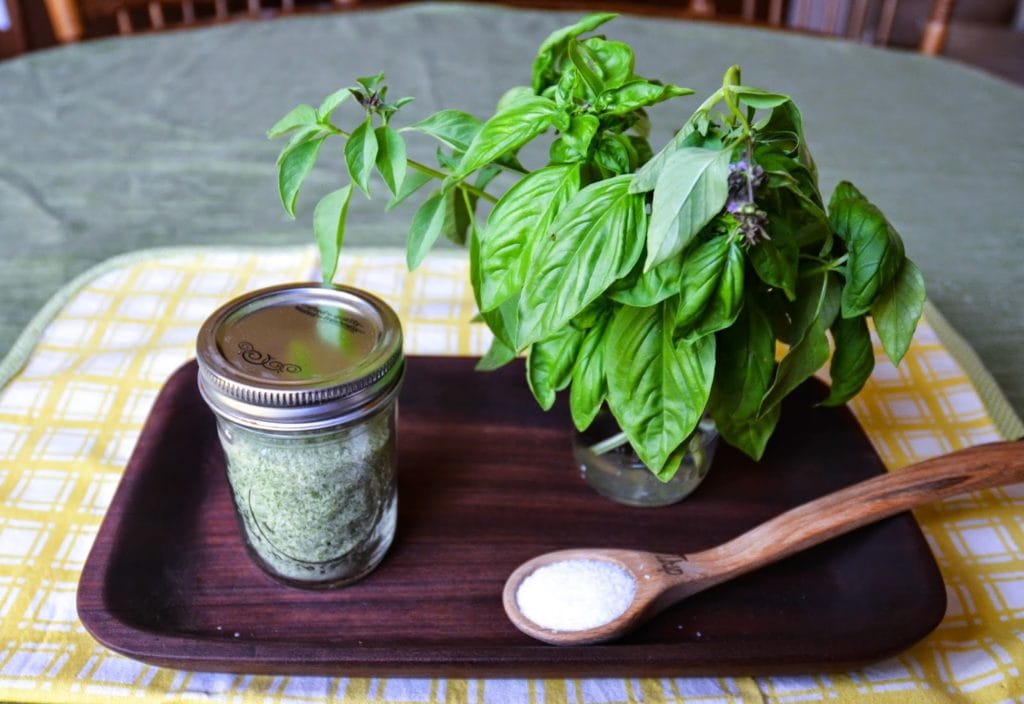
I’ve been enjoying making flavored salts for cooking with.  Last year, I made basil and herb salts, which were delicious too!

I love living in the desert Southwest.


I really do, except in August.  That’s when I start to tire of the long, hot summer and yearn for fall. By September, the days begin to shorten and the weather begins to cool and I plant my cool-season vegetable garden.


One of the things that I love most about gardening in the desert Southwest is that you can grow fruit and vegetables all year long – even in the midst of winter when most of the country can only dream of growing things outdoors.

delicious vegetables

 Where else can you look outside and see delicious vegetables coming up and picking them fresh for your table in January?

desert Southwest winter garden

desert Southwest winter garden

Oh, and how about the citrus fruit that not only provides us with sweet, tart fruit – but also adds bright color to our desert gardens?

Over the next few days, I thought that I’d share with you what I have harvested from my winter garden in hopes that you will be inspired to grow your own desert Southwest winter garden.

Even if you don’t live in a mild winter area, growing vegetables is not all that different in other regions, except for the calendar.  So, you can always pick up some helpful tips from vegetable gardeners who live in other places.

Tomorrow, I’ll share my first-ever success in growing a vegetable that has given me problems in the past.

***********************

Baby Watch Update:

Our second-oldest daughter, Rachele, is expecting her first child soon! She is in the Navy and currently stationed in California – about 7 hours away from us.

She is being monitored closely because of the baby’s low birth weight and now the latest ultrasound shows a lower level of amniotic fluid.

Rachele has been seeing having weekly ultrasounds, stress tests and seeing the doctor.  On her last visit, she was told that they may have to induce her maybe a week early.

So, what does that mean for me and my husband? Well, I had to reschedule a speaking engagement on “Updating Your Landscape”.

Our plan is to hit the road as soon as we get the call from her that she is being induced and/or in labor. Hopefully, we will get there before the baby does!

Meanwhile, I’m off to pack my bags!

Vegetable Garden Before The First Frost

Most of us are familiar with teak wood and its beauty.  Often, you can find it in a garden setting being in the form of benches, which weather the sun and rain with no problem.

Teak wood is extremely durable and unlike many types of wood, can handle water with no problem. 

A couple of weeks ago, I was asked by Teak Closeouts if I would try out some of their teak bowls, which would be suitable as planters.

I am always on the lookout for unique and unusual items for the garden that can be both functional and beautiful, so of course, I said said yes!  

One of the reasons I was excited to try out the teak bowl planters was that over the summer is that I saw a rustic wooden planter on a visit to the Green Bay Botanical Gardens.

Teak Bowls Make Unique and Beautiful Planters

I loved it’s rustic look and how the annual flowers fit into the interior of this piece of tree trunk.

So, when the FedEx deliveryman dropped of a large box, I couldn’t wait to open it.

Inside were several pieces, but it was the two teak bowls that got my attention right away.  

Teak Bowls Make Unique and Beautiful Planters

The first bowl, was a piece of art.  Its sides were very smooth, which showed off the beauty of the teak wood.

You may notice the hole at the bottom, which is essential for a planter.

The next teak bowl that I unwrapped was a bit more rustic in nature, much like the tree trunk planter I had seen over the summer.

Teak Bowls Make Unique and Beautiful Planters

I always like pieces of wood that allows you to see the grain, which you could see on different parts of the bowl.

Teak Bowls Make Unique and Beautiful Planters

This bowl also had holes for drainage and I couldn’t wait to plant them both.

planted my favorite cool season annuals - violas

To keep the potting mix from falling out the holes, I put a coffee filter over them, which is a cheap and effective way to keep the dirt in and allow the water to drain.

I planted my favorite cool season annuals – violas.

white alyssum for fragrance

I added a variety of colors in this large teak bowl and a touch of white alyssum for fragrance.

'Johnny Jump-Ups'

For my rustic teak bowl, I decided to add ‘Johnny Jump-Ups’, which were the first flowers I planted as a child.  I have always loved their sunny faces.

Teak Bowls Make Unique and Beautiful Planters

As you might expect, the amount of soil is rather shallow, but it is enough to grow cool-season annuals.  However, there wouldn’t be enough soil to grow warm season flowers through the summer – the soil would get too hot.

Teak Bowls Make Unique and Beautiful Planters

You could however, plant small succulents in them and keep them in light shade – maybe located on a patio?

Teak Bowls Make Unique and Beautiful Planters

Although I used this teak bowl as a planter, however it is so beautiful, you could certainly use it to grace a patio or large dining room table.

I often have clients, like those above, who want decorative, yet functional items for their patio.  Either of these teak bowls would work beautifully in this type of setting.

When exposed to the sun, teak will fade to a light gray color, which will provide great color contrast for plants.

As you can imagine, no two bowls are the same – each one retains the unique character from the part of the teak wood it was carved from, which lends to the uniqueness of these bowls.

lovely teak vase

In addition to the bowls, I also received a lovely teak vase – wouldn’t that look beautiful filled with flowers or perhaps a dried arrangement?

Teak Closeouts has a large variety of teak items including outdoor furniture and garden art at closeout prices.  I encourage you to visit their online store where you will find great gift ideas for the gardener in your life or for yourself!

*I was provided these items from Teak Closeouts free of charge to review, but my opinions are my own 🙂

Newly Planted Vegetables

*This blog post contains affiliate link for a product that helps get rid of caterpillars. If you click through and make a purchase, I may receive a commission (at no additional cost to you). Thanks for your support in this way.*

Fall is a busy time for me in the garden.  However, you will usually find me in other people’s gardens helping them achieve their goal of a beautiful, low-maintenance garden. I did manage to get my cool-season vegetable gardens planted.  I planted my favorites, which include carrots, cauliflower, garlic, a variety of leaf lettuces and radishes.

my mother's garden)

I included broccoli in my list of vegetables this year, despite the fact that I have yet to grow a healthy head of broccoli (the broccoli in the photo above is from my mother’s garden).

Every year, I grow beautiful cauliflower while my broccoli decides to produce very few flowering stalks.  At the end of the season when I look at my less than stellar broccoli harvest – I promise myself that I won’t try again.

But, after 6 months pass, I am always tempted to try again hoping that this year will be different.

With the exception of carrots and radishes, I planted all of my other vegetables from transplants.  Normally, I almost always use seed, (with the exception of broccoli and cauliflower, which do better when grown from transplants) but I knew that I wouldn’t have time to come out and thin excess plants later.

Newly Planted Vegetables

This smaller vegetable garden is closer to my kitchen and so I put in vegetables that I would harvest more frequently throughout the season in this area. Leafy greens such as lettuce, Swiss chard, spinach and kale all went in here.

The larger garden is a bit further away and so it was planted with broccoli, cauliflower, carrots, garlic and radishes, which are harvested once.

My artichoke plant from next year died back to the ground in the summer, (which is normal by the way) and is now growing again.

bell pepper plant , Newly Planted Vegetable

In addition to my artichoke, my bell pepper plant is also a holdover from last year’s garden.  Actually, it is 2 years old.  Although pepper plants can die from freezing temperatures, I protect mine when the temps dip below freezing, so they are qutie large and produce a lot of peppers much to the delight of my husband and children who like to eat the bell peppers raw.

bell pepper plant

I also dice them and freeze them for using in my favorite Mexican rice recipe.

I’ve already had to spray my leafy greens with BT (Bacillus thuringiensis) to deal with the caterpillars that had started to eat holes in the leaves.  It worked great, but I will need to reapply every once in a while. I use Safer Brand 5163 Caterpillar Killer II Concentrate, 16 oz.

Nasturtiums ,

Nasturtiums are coming up again from seed in the gardens.  I just let them go to seed each year and they always come back.  I use nasturtiums in my vegetable gardens because they repel bad bugs.  Besides, they look pretty, don’t you think?

Nasturtiums

Nasturtiums aren’t the only flowers in my vegetable gardens – marigolds are also great at keeping damaging insects at bay.  This year, I planted a marigold at the end of each row of vegetables.

I love how their orange flowers brighten up the garden in the middle of winter.   Marigolds and nasturtiums are just a few of the flowers who actually help vegetables.  For more information on other plants to include in your vegetable garden you can visit my previous post, “Even Vegetables Need Friends”.

weed

I am having a problem in one of my vegetable gardens that began this past summer – spurge!  I have come to truly hate this creeping weed and it has decided to move from the nearby landscape areas into my vegetable garden.

It got pretty bad last summer and we ripped it all out.  To help combat it, we added 4 inches of compost/manure, which did help to smother some of the weeds.  But, some are still coming up.  So, I go out every week and spray them with my homemade weed killer, taking care not to spray my vegetables by accident.

You may see homemade weed killers that list salt as one of the ingredients.  DON’T add salt to weed killers – especially if you live in the desert Southwest. Our soil and water already has a lot of salts in them and adding more is not good for your plants – in fact, too much salt can kill them.

Homemade weed killer made from vinegar and soap works just fine on most weeds, except for the really tough ones.

Have you planted a vegetable garden this year?  What are you growing?

Did you enjoy your Halloween?  While you may be spending your morning cleaning up small candy wrappers and trying to get your kids out of bed after they crashed after their sugar high – I’d like to ask you a question:

“What are you going to do with your pumpkin?”

Before tossing it in the trash can (or compost pile) – how about getting a little more use out of it and creating a pumpkin bird feeder?

pumpkin bird feeder

Last year, I took my heirloom pumpkin and transformed it into a bird feeder.

Needless to say, the birds were thrilled and my kids and I had fun seeing how many different birds visited our pumpkin feeder.

**You can make your own pumpkin feeder and I recently wrote a “how-to” post for Birds & Blooms Magazine.  You can find my blog post, “Backyard Project: DIY Pumpkin Bird Feeder”.

So how about you? What do you do with your pumpkins after Halloween?

Planting in fall

Planting in fall

Are you anxious for fall to arrive?  

I certainly am!    

Fall is my favorite season because of the holidays, cooler weather, and best of all – it is the best time of year to add new plants to the landscape.

Planting in fall

Now you may have thought that spring was the best time of year to start planting and while you certainly can plant then, I’ll tell you why fall is better…

Planting in fall allows enough time for plants to grow a good root system before the heat of the next summer arrives.  

Think about it – plants must have a good root system so that they can soak up enough water to handle the stress from intense heat and the dry conditions of summer.    

If a plant is planted just before or during the summer months, they are focused on just hanging on until temperatures cool off.  In many cases, they don’t make it.

fall planting

The only exception to fall planting is with frost-tender plants such as bougainvillea, lantana, and yellow bells.    

Because young plants are particularly susceptible to frost damage, or even death, it is best to wait until the danger of frost has passed to add these plants to your landscape.

Getting Ready for Fall Planting in the Southwest Garden

Over the next couple of posts, I’ll share with you some other helpful tips to help you with selecting plants, how to tell if they are healthy, the best way to dig a hole, and finally – I’ll reveal my favorite plant nursery!  

****************************  

On a personal note, I am going to be a grandma again 🙂  

My second-oldest daughter, Rachele, is having her first baby, and my husband and I are flying to California to be there when she gets her ultrasound and finds out if she is having a boy or girl!  

I can hardly wait…

New Perennial Discovery and a Baby

Do you have vines in your garden? 

What type of trellis do you use for them?  Is it your basic (somewhat boring) wooden trellis?

What if you could make your own trellis that not only looks better but costs next to nothing?

*I have been sharing some of my favorite garden blog posts that I have written recently for Birds & Blooms magazine where I serve as the garden blogger – including this one about how to make your own ‘natural’ trellis.

Wooden trellis

Wooden trellis

I have seen quite a few trellises made from branches, but I thought this one that I saw while visiting the Green Bay Botanical Gardens in Wisconsin, was especially nice because you could see how it was made because the vine had not yet grown up on it.  

With all of the stormy weather, I’m sure you have your share of branches that have blown down from your tree that you can use.  I shared how to create your own trellis using branches in a recent post for Birds & Blooms…  

DIY Yard Project: How to Make a Trellis From Tree Branches    

You’ll not only save money by making your own, but I think that it looks nicer and is a more sustainable option.

DIY in the Garden: Floral Ice Cubes

Is your garden looking a bit lackluster and in need of more color than green?  While colorful flowering plants can help, it is hard to find a plant that will flower all year long.  

*Some of you may know that I am the garden blogger for Birds & Blooms magazine.  I have been going through some recent blog posts that I have written for them and thought that I would share some of my favorites with you.

Garden Without Plants

As part of a two-part series, I shared some creative ways to add color to the landscape without relying on plants alone.  This is especially helpful during the winter months when not many plants are in flower.  

Most of the photographs in these posts were taken during a recent trip to Southeastern Arizona including Bisbee, Tombstone, and Tucson.  

Backyard Garden Decor: Adding Color – Part 1

Backyard Garden Decor: Adding Color – Part 2  

I hope that you are inspired to use a few of these colorful ideas in your own landscape!

I am always on the lookout for new things to make from the garden.

Recently I learned how to make specially flavored salts using herbs from my garden.  ‘Herb salts’ have become a popular flavoring tool in the culinary community and they are very easy to make.

The process of making herb salts starts out looking like this…

making herb salts

And ends up transformed into this…

making herb salts

Are you interested in making your own herb salts?   

Summertime means that many of my herbs are actively growing and I sometimes run of ways to use all of the fragrant leaves of them.  

Herb or ‘gourmet’ salts are a great way to preserve herbs while adding a new twist to flavoring my favorite foods.

Basil Salt

Photo: Basil Salt

In my last post, I shared how to make basil salt using two ingredients – fresh basil leaves and kosher salt.  

Today, I’d love to show you how to make your own unique herb salt blend.

DIY Herb Salt Blends From the Garden

For my herb salt blend, I went out into the garden and looked for a variety of herbs that I love to cook with.  I found rosemary, sageand thyme. I then grabbed a head of garlic and kosher salt. I must admit that I was thrilled that I had all these herbs growing in my garden.  I grew the garlic too! 

For equipment, you should have a cutting board, a sharp knife for chopping, a baking sheet and a glass jar with a lid.  

You can make this recipe using a food processor, but it is optional.

DIY Herb Salt Blends From the Garden

1. You will need 2/3 cup rosemary, 2/3 cup sage and 2/3 cup thyme leaves.  These are the amounts I used to get the flavor I liked, but you can play around with the ratio of each herb or choose different herbs to get the flavor you want.  

DIY Herb Salt Blends From the Garden

2. Place 1/2 cup kosher salt on your cutting board and add 5 peeled garlic cloves and chop them together.  The garlic should be finely minced at this point.

DIY Herb Salt Blends From the Garden

3. Chop all of the herbs together.

DIY Herb Salt Blends From the Garden

4. Combine the salt/garlic and the herbs together and continue chopping until finely chopped.

**You can use a food processor for steps 3 & 4 instead of chopping.  Simply put all ingredients in at once and pulse for 30 seconds. 

 herb salt

At this point you can use your herb salt to flavor a roast of beef, chicken or pork before cooking or to flavor roasted vegetables.  But, if you aren’t using the herb salt right away, continue on…  

DIY Herb Salt Blends From the Garden

5. Put your herb salt mixture onto a baking sheet in a thin layer and bake in a 200 degree oven for 30 minutes.  This step dries out the herb mixture.  You can also allow it to air dry over a couple of days instead of putting it into the oven.

DIY Herb Salt Blends From the Garden

6. Place your dried mixture into a food processor and pulse for 30 seconds to get rid of any lumps.

If you don’t have a food processor, you can put the dried mixture into a Ziploc bag and roll it with a rolling pin until it is finely ground up.

Herb salts

7. Put your herb salt into a glass jar with a tightly-fitted lid.  Store in a dark, dry place with your spices and dried herbs to preserve its flavor.

I will use my herb saltblend to flavor a pork loin, baked chicken or even a beef roast.  It would also taste great when sprinkled on roasted vegetables or put into soups, don’t you think? 

As you can imagine there are a number of different types of herb salts that you can make.  Here are a few different combinations that you might want to try:

Rosemary Sage Garlic Salt

Photo: Rosemary Sage Garlic Salt

All of these herb salt blends can be made following the same steps as I have done for my herb salt blend – except where noted.

Rosemary Lemon Pepper Salt – 1/3 cup rosemary leaves, 2 tablespoons lemon zest, 1 teaspoon freshly ground black pepper and 1/2 cup kosher salt.
*(Increase cooking time to 1 hour)

Rosemary Sage and Garlic Salt – 1/2 cup of rosemary leaves, 1/2 cup sage, 5 peeled garlic cloves and 1/4 cup kosher salt.

Sage Thyme and Garlic Salt – 1/2 cup sage, 1/2 cup thyme, 5 peeled garlic cloves and 1/4 cup kosher salt.

If your garden is filled with herbs, this is a creative way to use them in the kitchen or give them as gifts.  Even if you don’t have a garden filled with herbs, you can find fresh herbs at your local grocery store or farmers market.

So, how about you? What would herb(s) would your ideal herb salt contain?

I enjoy DIY projects – particularly when they involve things that I have grown in my garden.

It seems that a lot of the things that I make from the garden include herbs.  I have dried herbs, frozen them into ice cubes and have done homemade herb butter.

Using herbs from my garden when I cook always gives me a special satisfaction, and my food tastes great too!

Basil herb Salt

Photo: Basil herb Salt

Today, I am excited to share with you how to make basil herb salt.  If you haven’t heard of herb salts before, they are referred to as ‘gourmet salts,’ which are very popular in the foodie community.  

Herb salts are easy to make – especially if you have a food processor.  The salt helps to preserve the fresh flavor of your favorite herbs, and they add fabulous flavor to your favorite dishes.  

Gourmet salts also make great gifts.

Basil herb Salt

It is hard to find anyone who doesn’t love basil and the flavor it adds to so many different dishes.  I enjoy making Italian food and am often using basil.  Usually, I tear or chop some fresh basil leaves and add them as flavoring.  

Basil salt can be used in a variety of ways including sprinkling into your favorite tomato sauce, on top of a fresh-baked pizza, adding to bruschetta or simply sprinkling some on the top of fresh tomatoes.   Are you ready to get started?    

You will need fresh basil (either from your garden or the store) and kosher salt – pretty simple!  

Grab your food processor, a baking sheet and a glass jar with a lid.

kosher salt and basil leaves

1. You will need 1/2 cup each of kosher salt and basil leaves.  

basil and kosher salt

2. Add the basil and kosher salt to your food processor and pulse for 30 seconds.

Got Basil? Create Delicious Herb Salt

The finished mixture should look like this.

Got Basil? Create Delicious Herb Salt

3. Pour the mixture out onto a baking sheet in a thin layer.  The mixture will be somewhat moist.

Got Basil? Create Delicious Herb Salt

4. Bake for 20 minutes in a preheated 225-degree oven.  After the first 10 minutes, lightly mix the basil salt mixture and bake for another 10 minutes – this helps it to dry out completely.

basil salt mixture

5. Put the dried basil salt mixture back into the food processor and blend to remove any remaining lumps.  *Make sure that the food processor is dry beforehand.

basil salt into a glass container

6. Put your basil salt into a glass container with a tight-fitting lid.

That’s it – you are done!

I must admit that this is a pretty easy project and the food processor does most of the work.    

Keep your basil salt in a dark, cool space where you keep your other herbs/spices to help preserve its flavor.  Use it within a few months for the best flavor.  

*******************************  

This is one of the rare times that I didn’t have to spend any extra money on a DIY project – I had the basil growing in my garden, the kosher salt was in the pantry, and I used a mason jar that I had on hand.

Basil Salt

I made three batches of basil salt and will keep one for myself and start using it right away.  The rest I plan on giving away as gifts.    

Gifts from the garden and kitchen are personal and much appreciated by others.  Last year, I gave away homemade jam from my peach tree.  This year it will be basil salt.  

I can’t wait for my basil plant to grow more leaves so I can make more!

Herbes de Provence

Photo: ‘Herbes de Provence’ salt

**Basil salt is just the beginning of different types of herb salts you can make.  In my next post, I will show you how to make a customized herb salt blend as well as some ideas of other herb salts you can make.    

What would you use basil salt to flavor?